Chapter 118 – 22/12/2018

Well it’s that time of the year once more when we all finally get a chance to take a break and do some work on our hobby… Only to find that all the suppliers and shops we want to make emergency purchases of decals and glue from are shut!


And why are they all shut might we ask? All so that the proprietors can claim that they have one of those new fangled “life” things I keep reading about.


That’s right it’s time once more for that morbidly obese North Polian to hang up his gloves on his normal job as a sacrificial animal breeder and don his infamously red pajamas and jack boots so that he may, once again, haul his increasingly girthsome posterior into a sleigh. If only to be led around this mildly noteworthy planet of ours by 8 out of breath escapees from the venison farm.


In other words, it’s Christmas time once again. And we all know what that means… It means that the wondrous and only mildly egotistical leader of the Wuiske Models work house can take a breather from yelling and screaming at the urchins in the Wuiske Models work house and relax, take stock and yell and scream at his layout for a week or so.


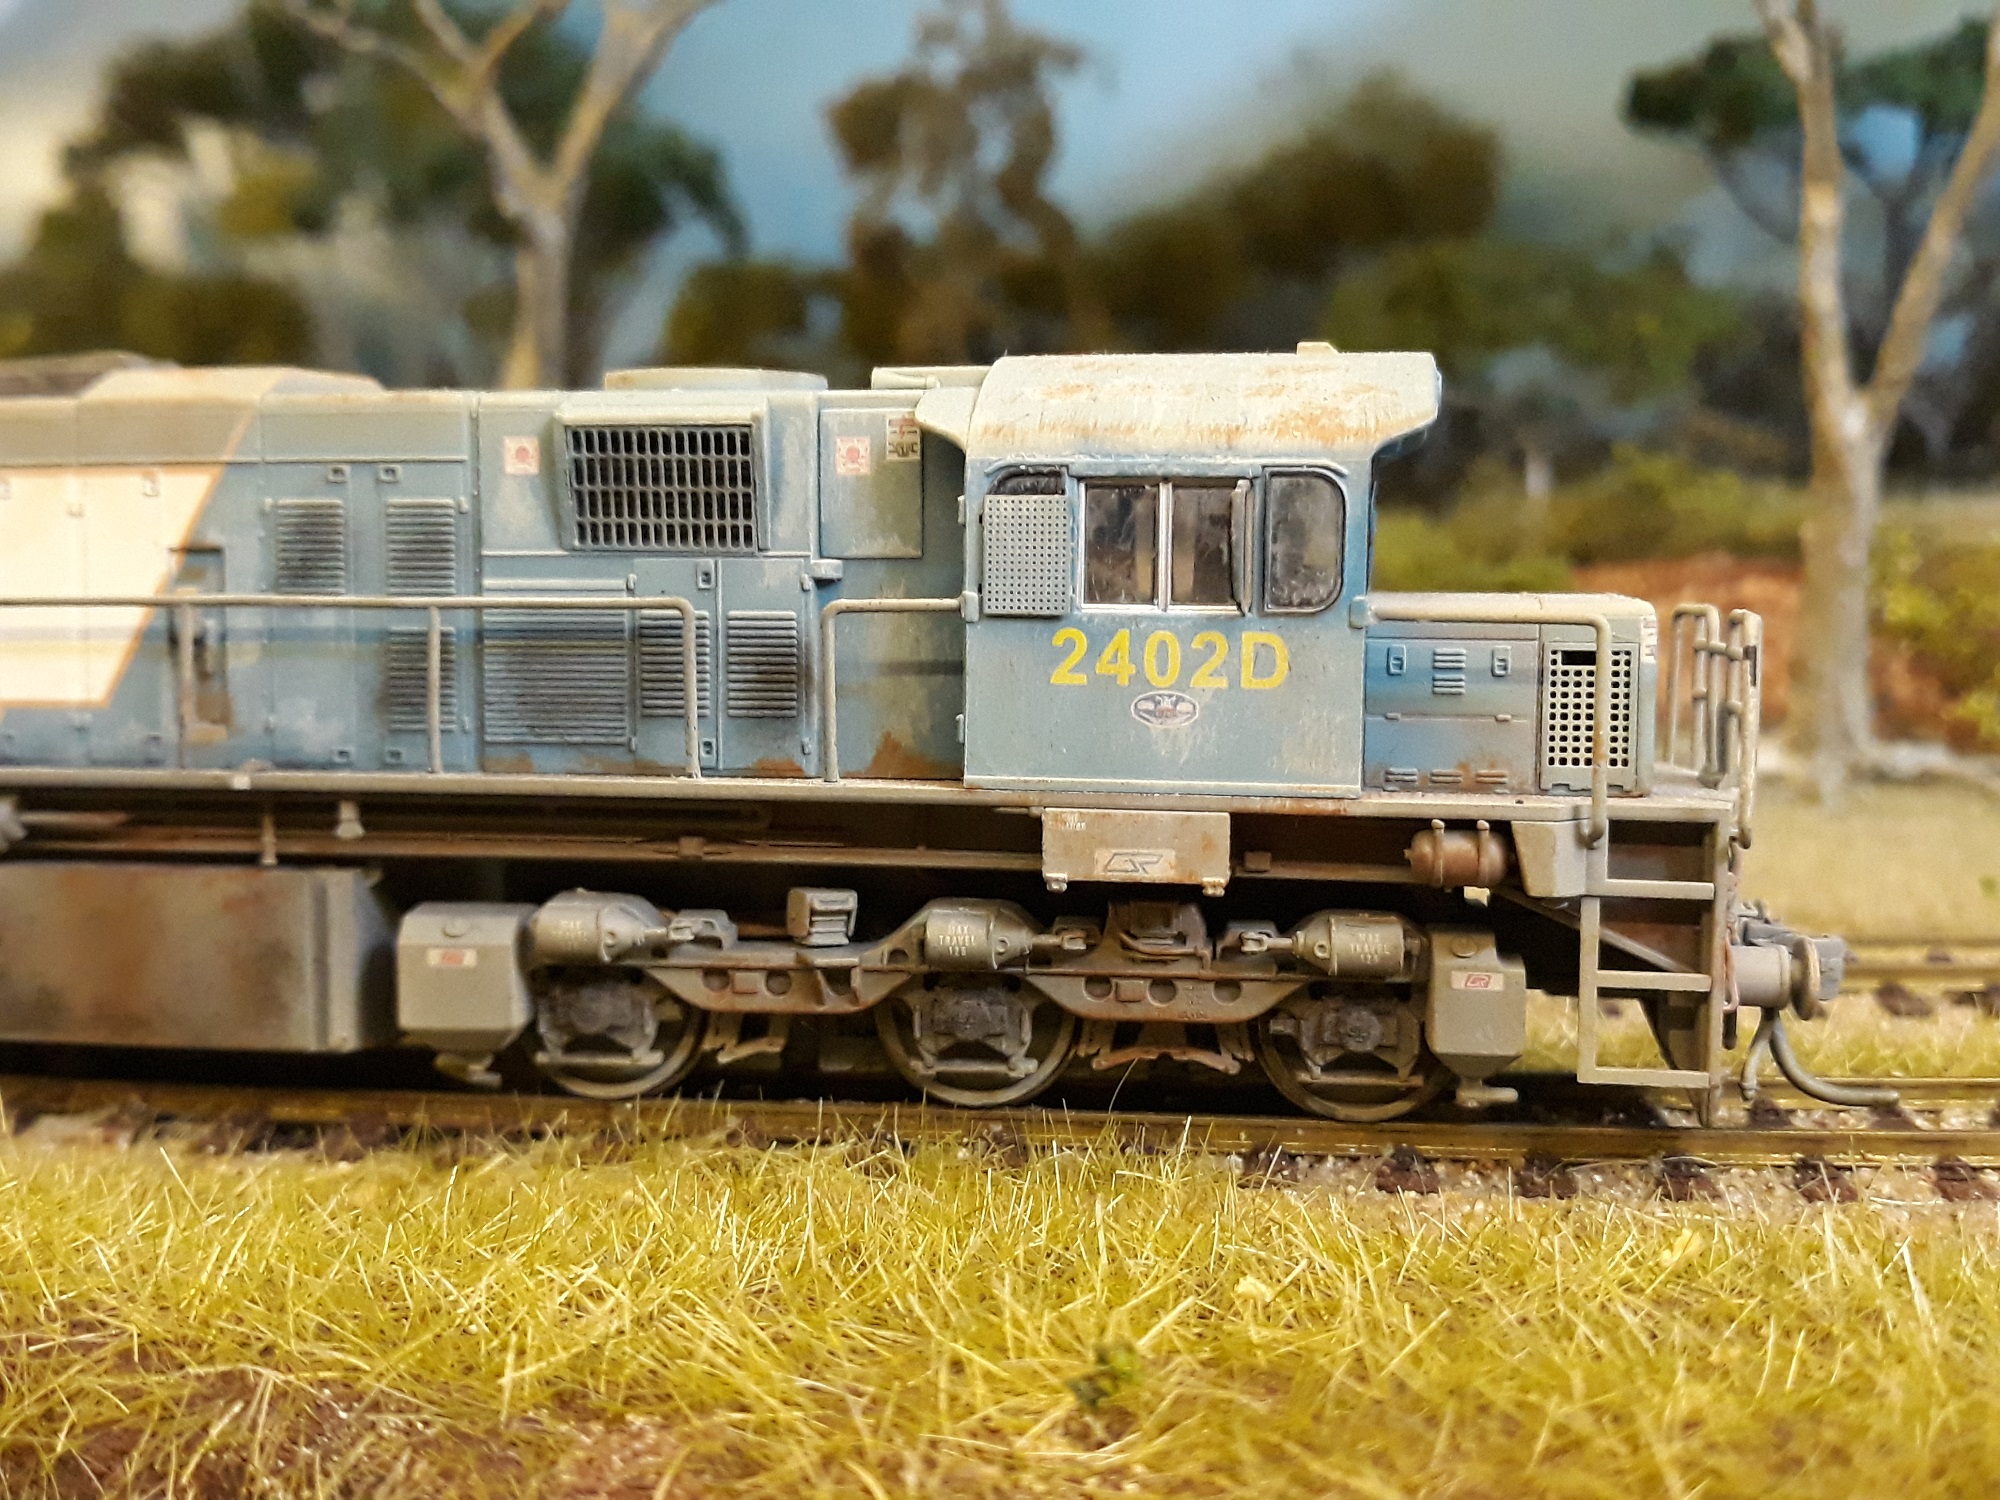
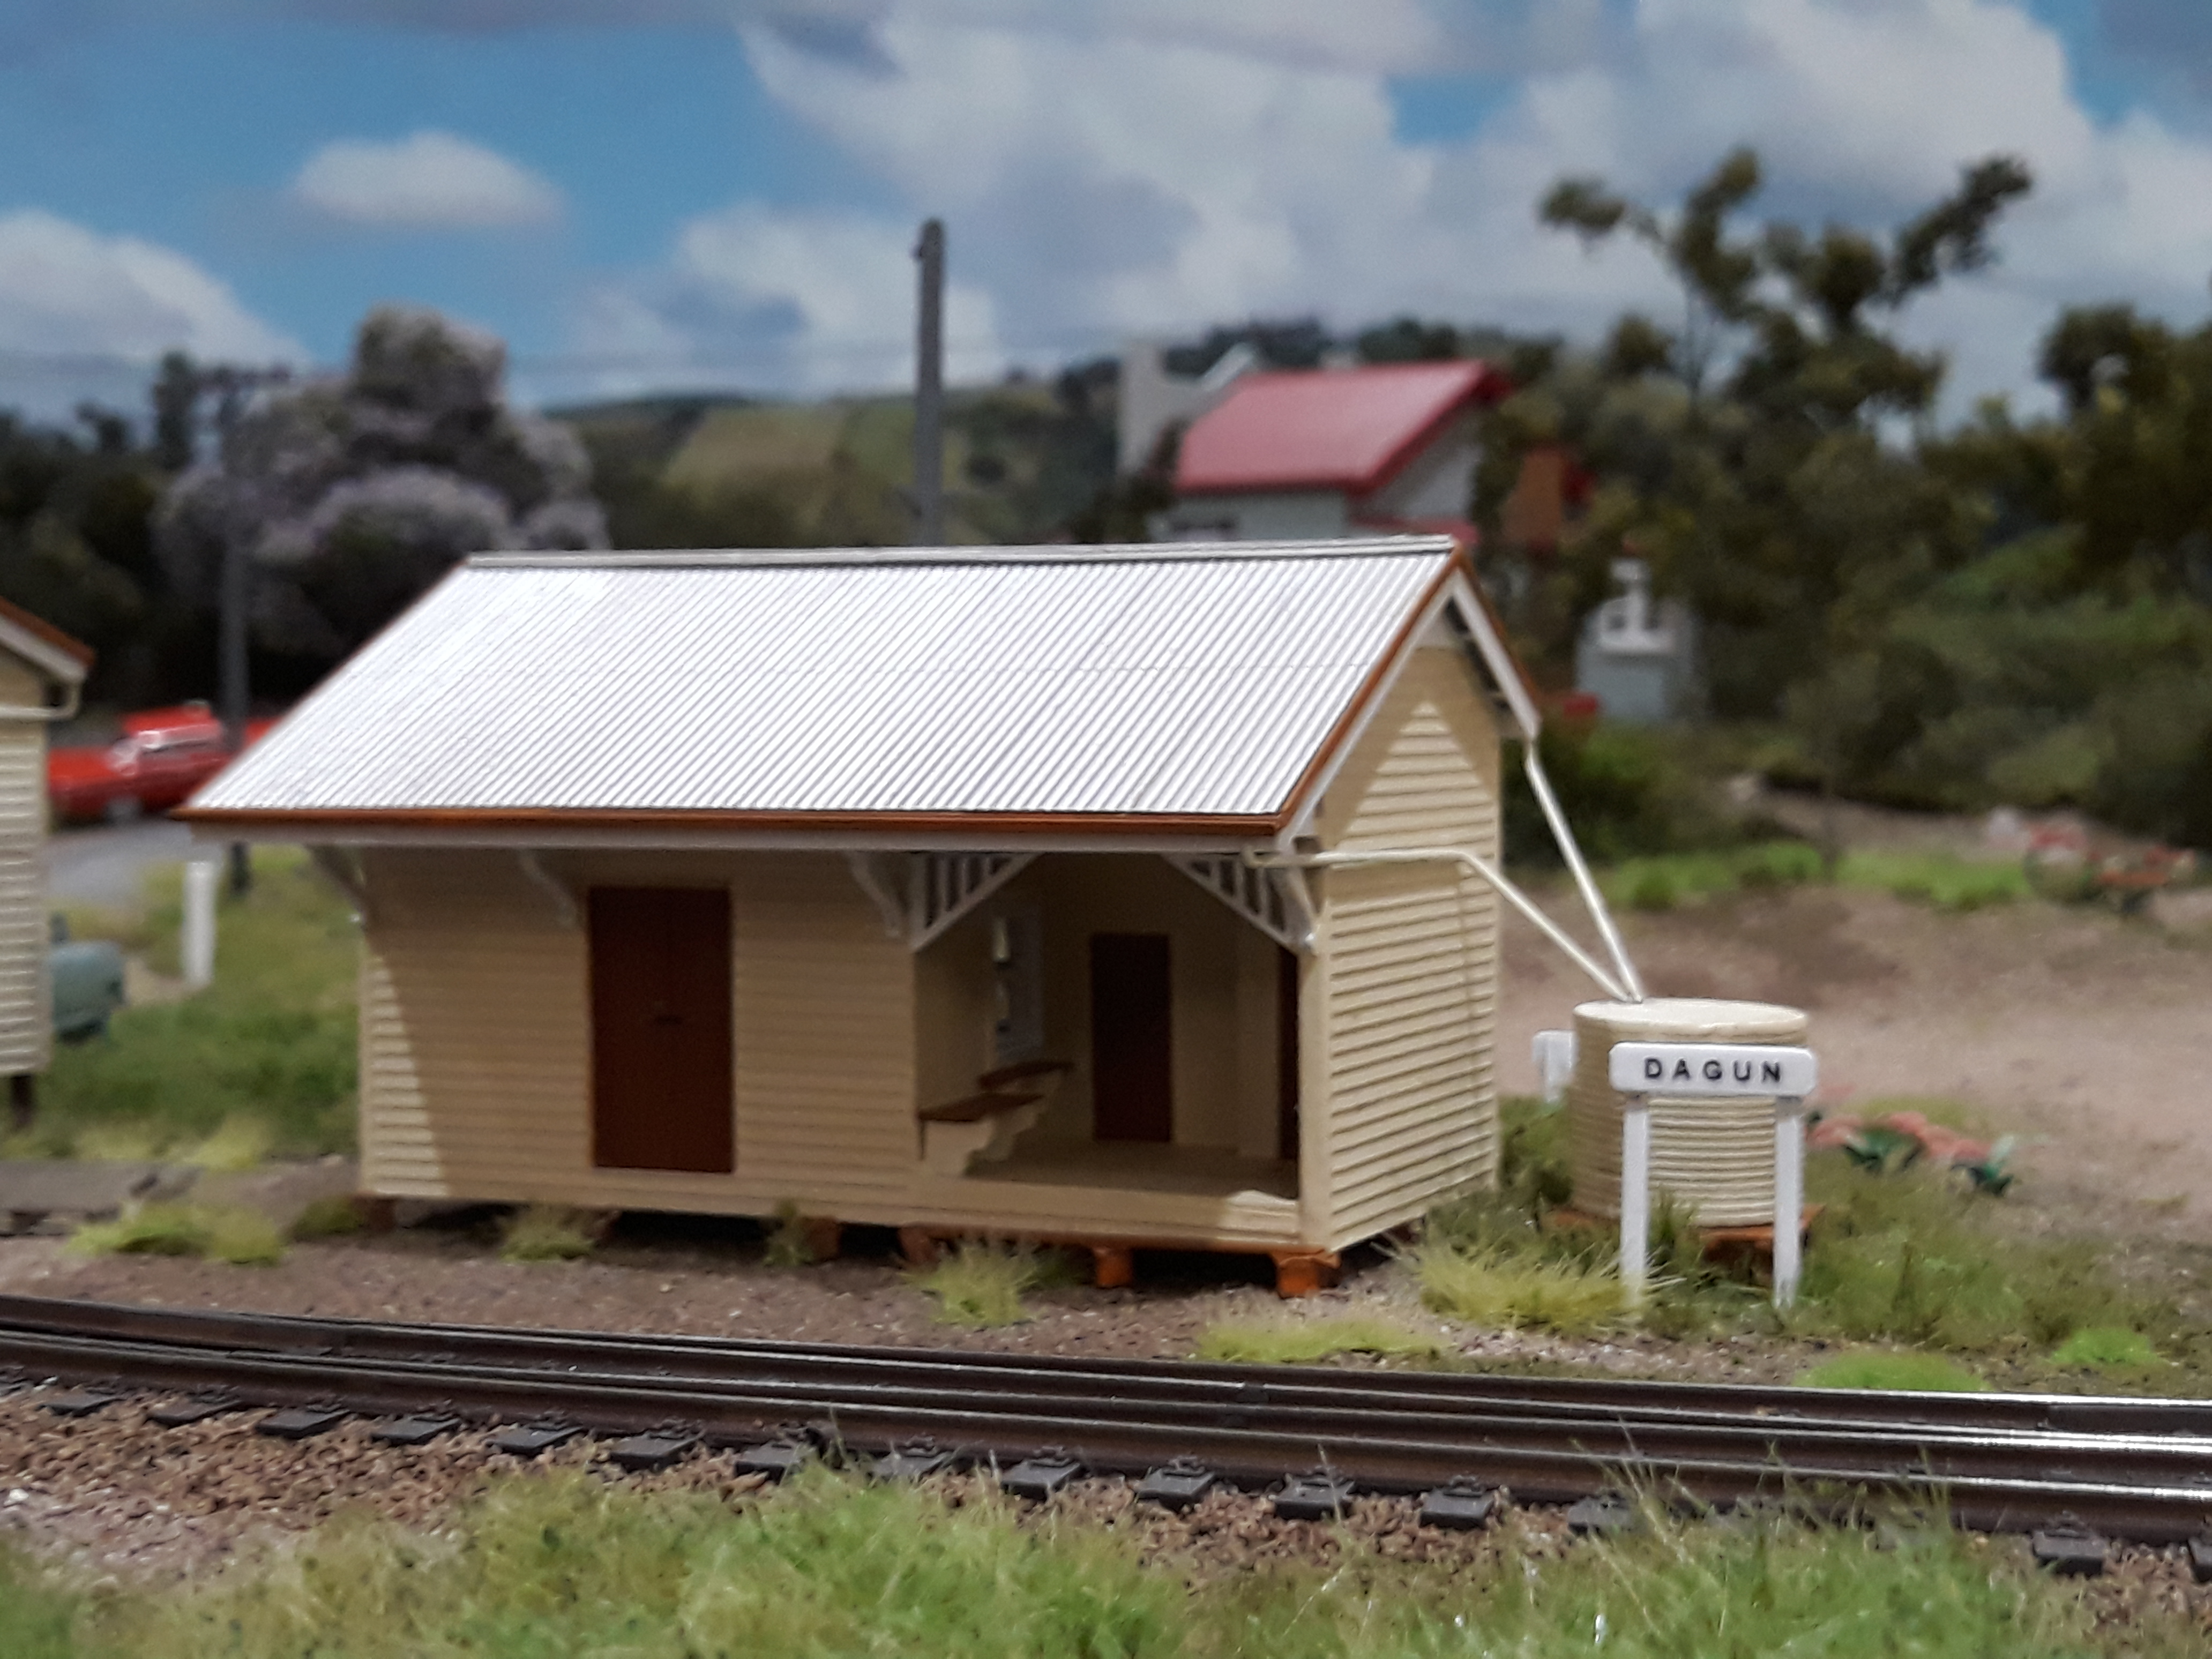
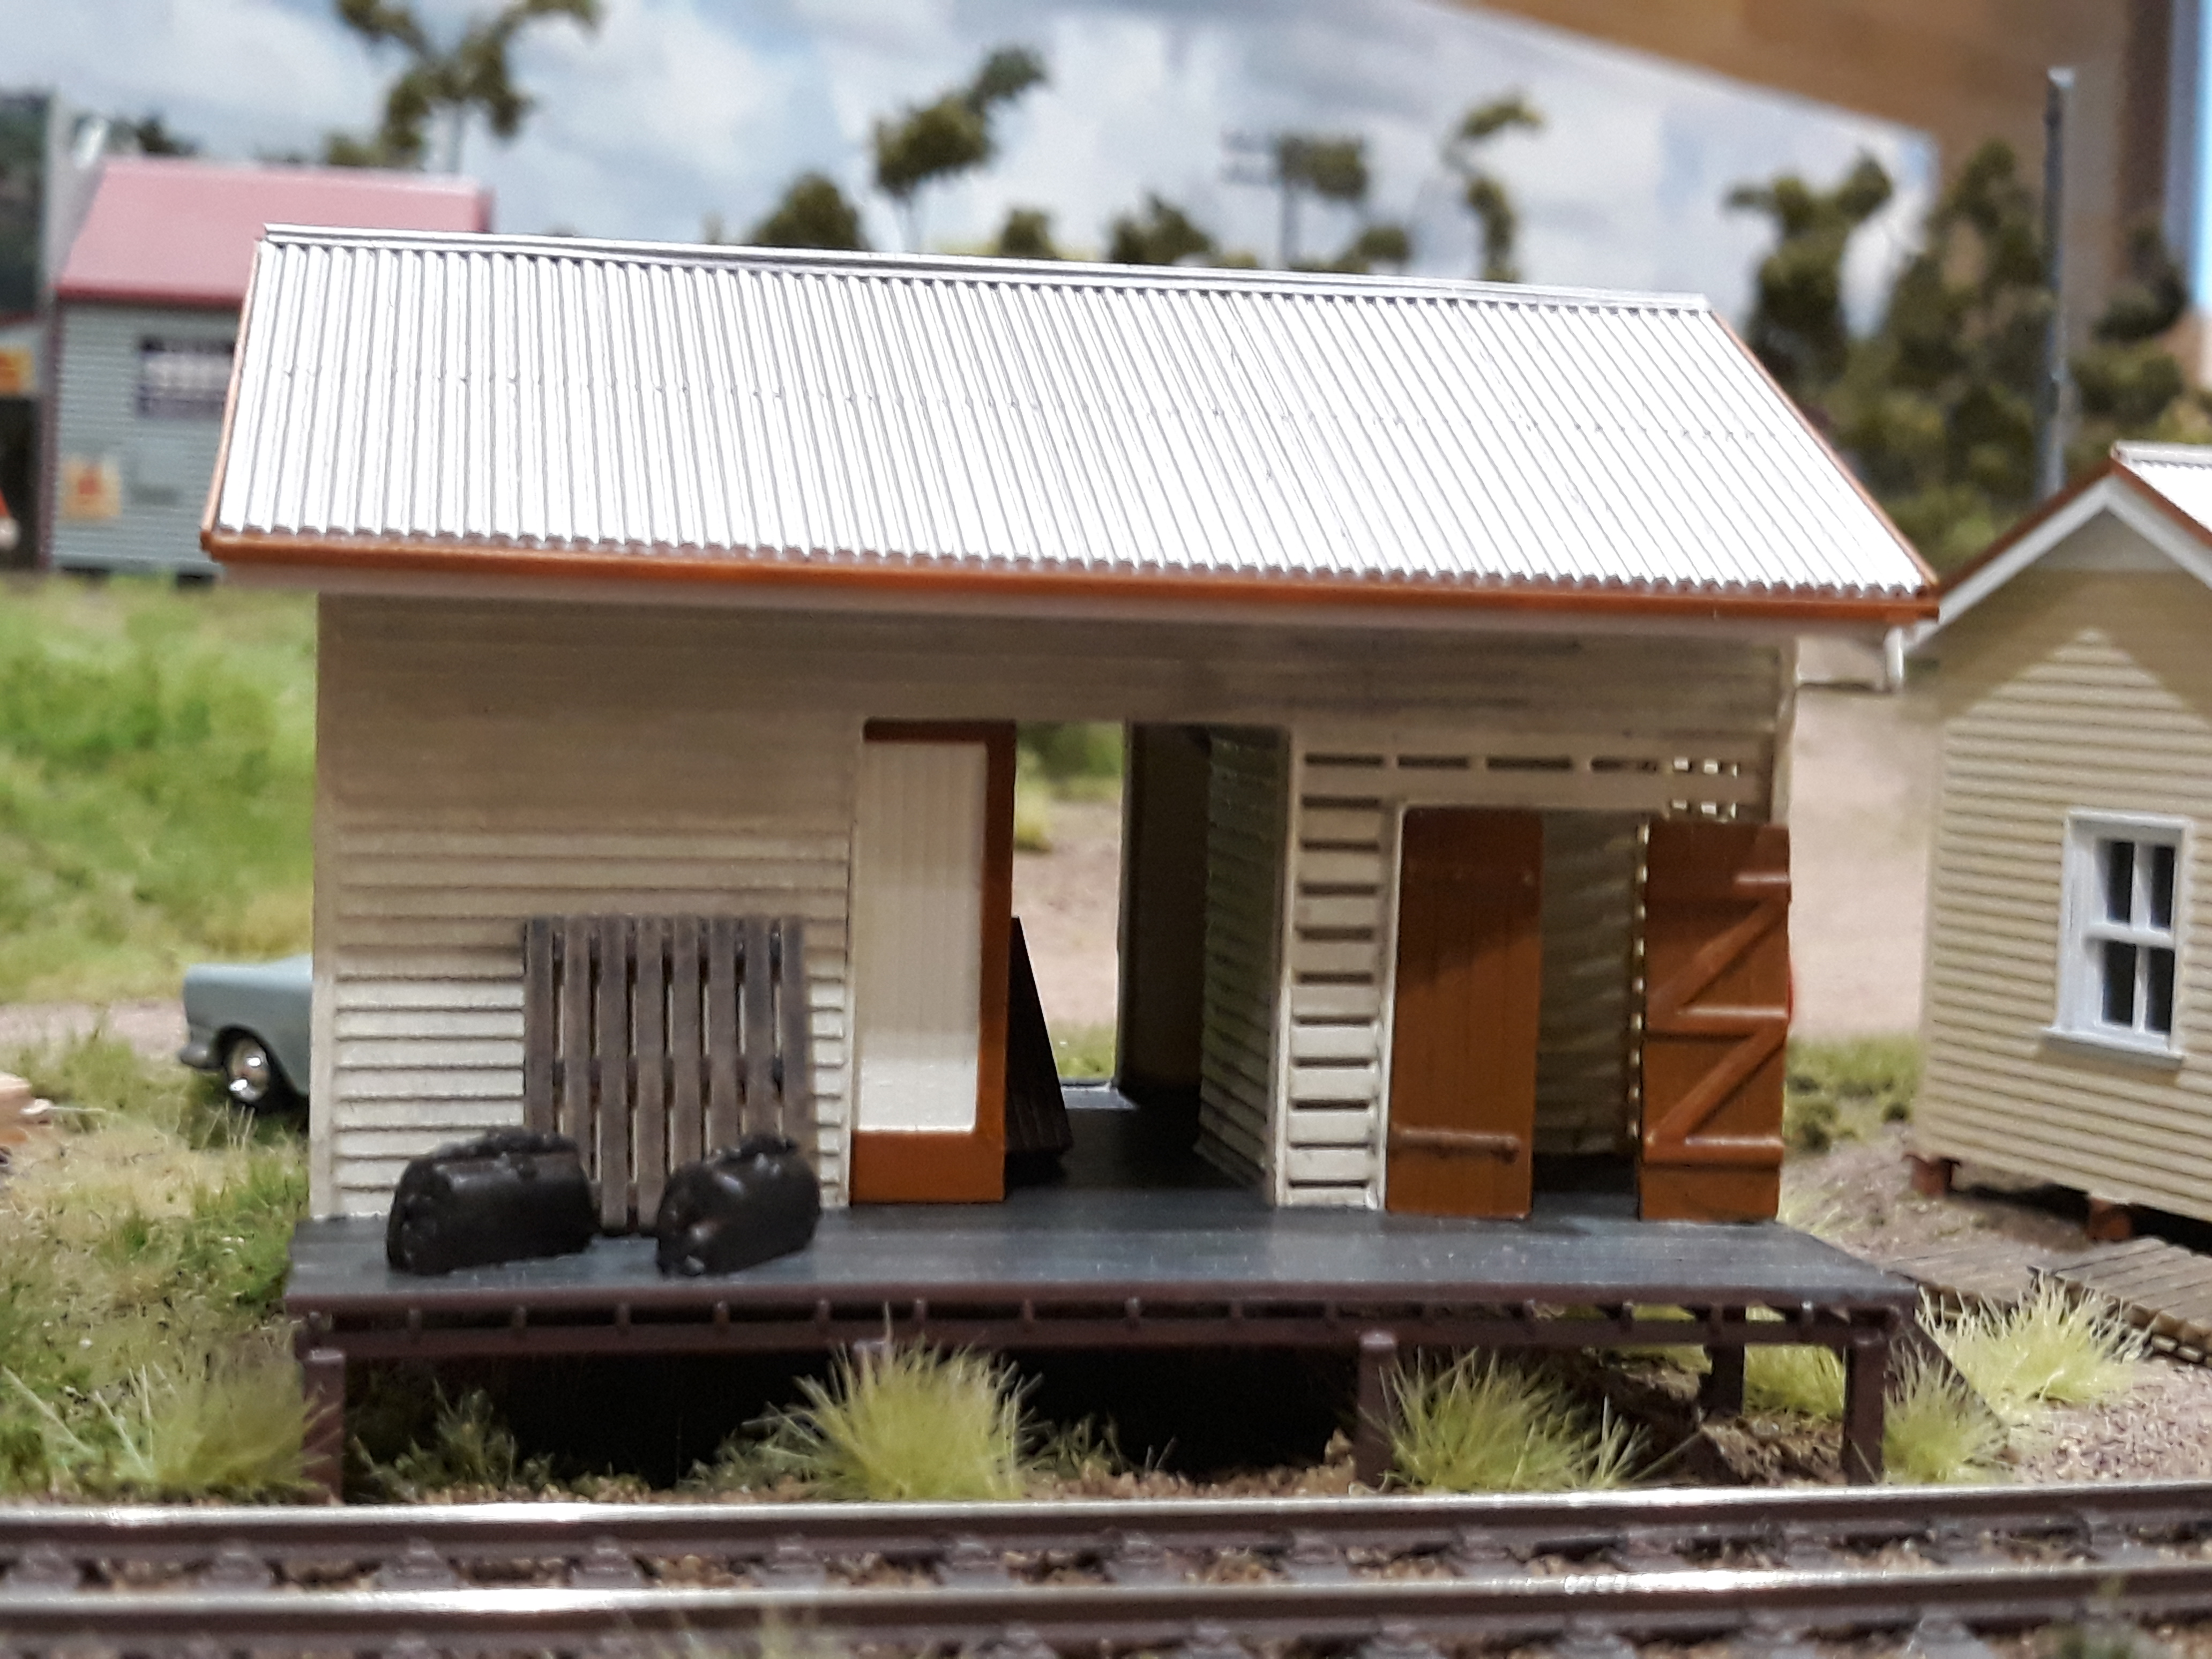
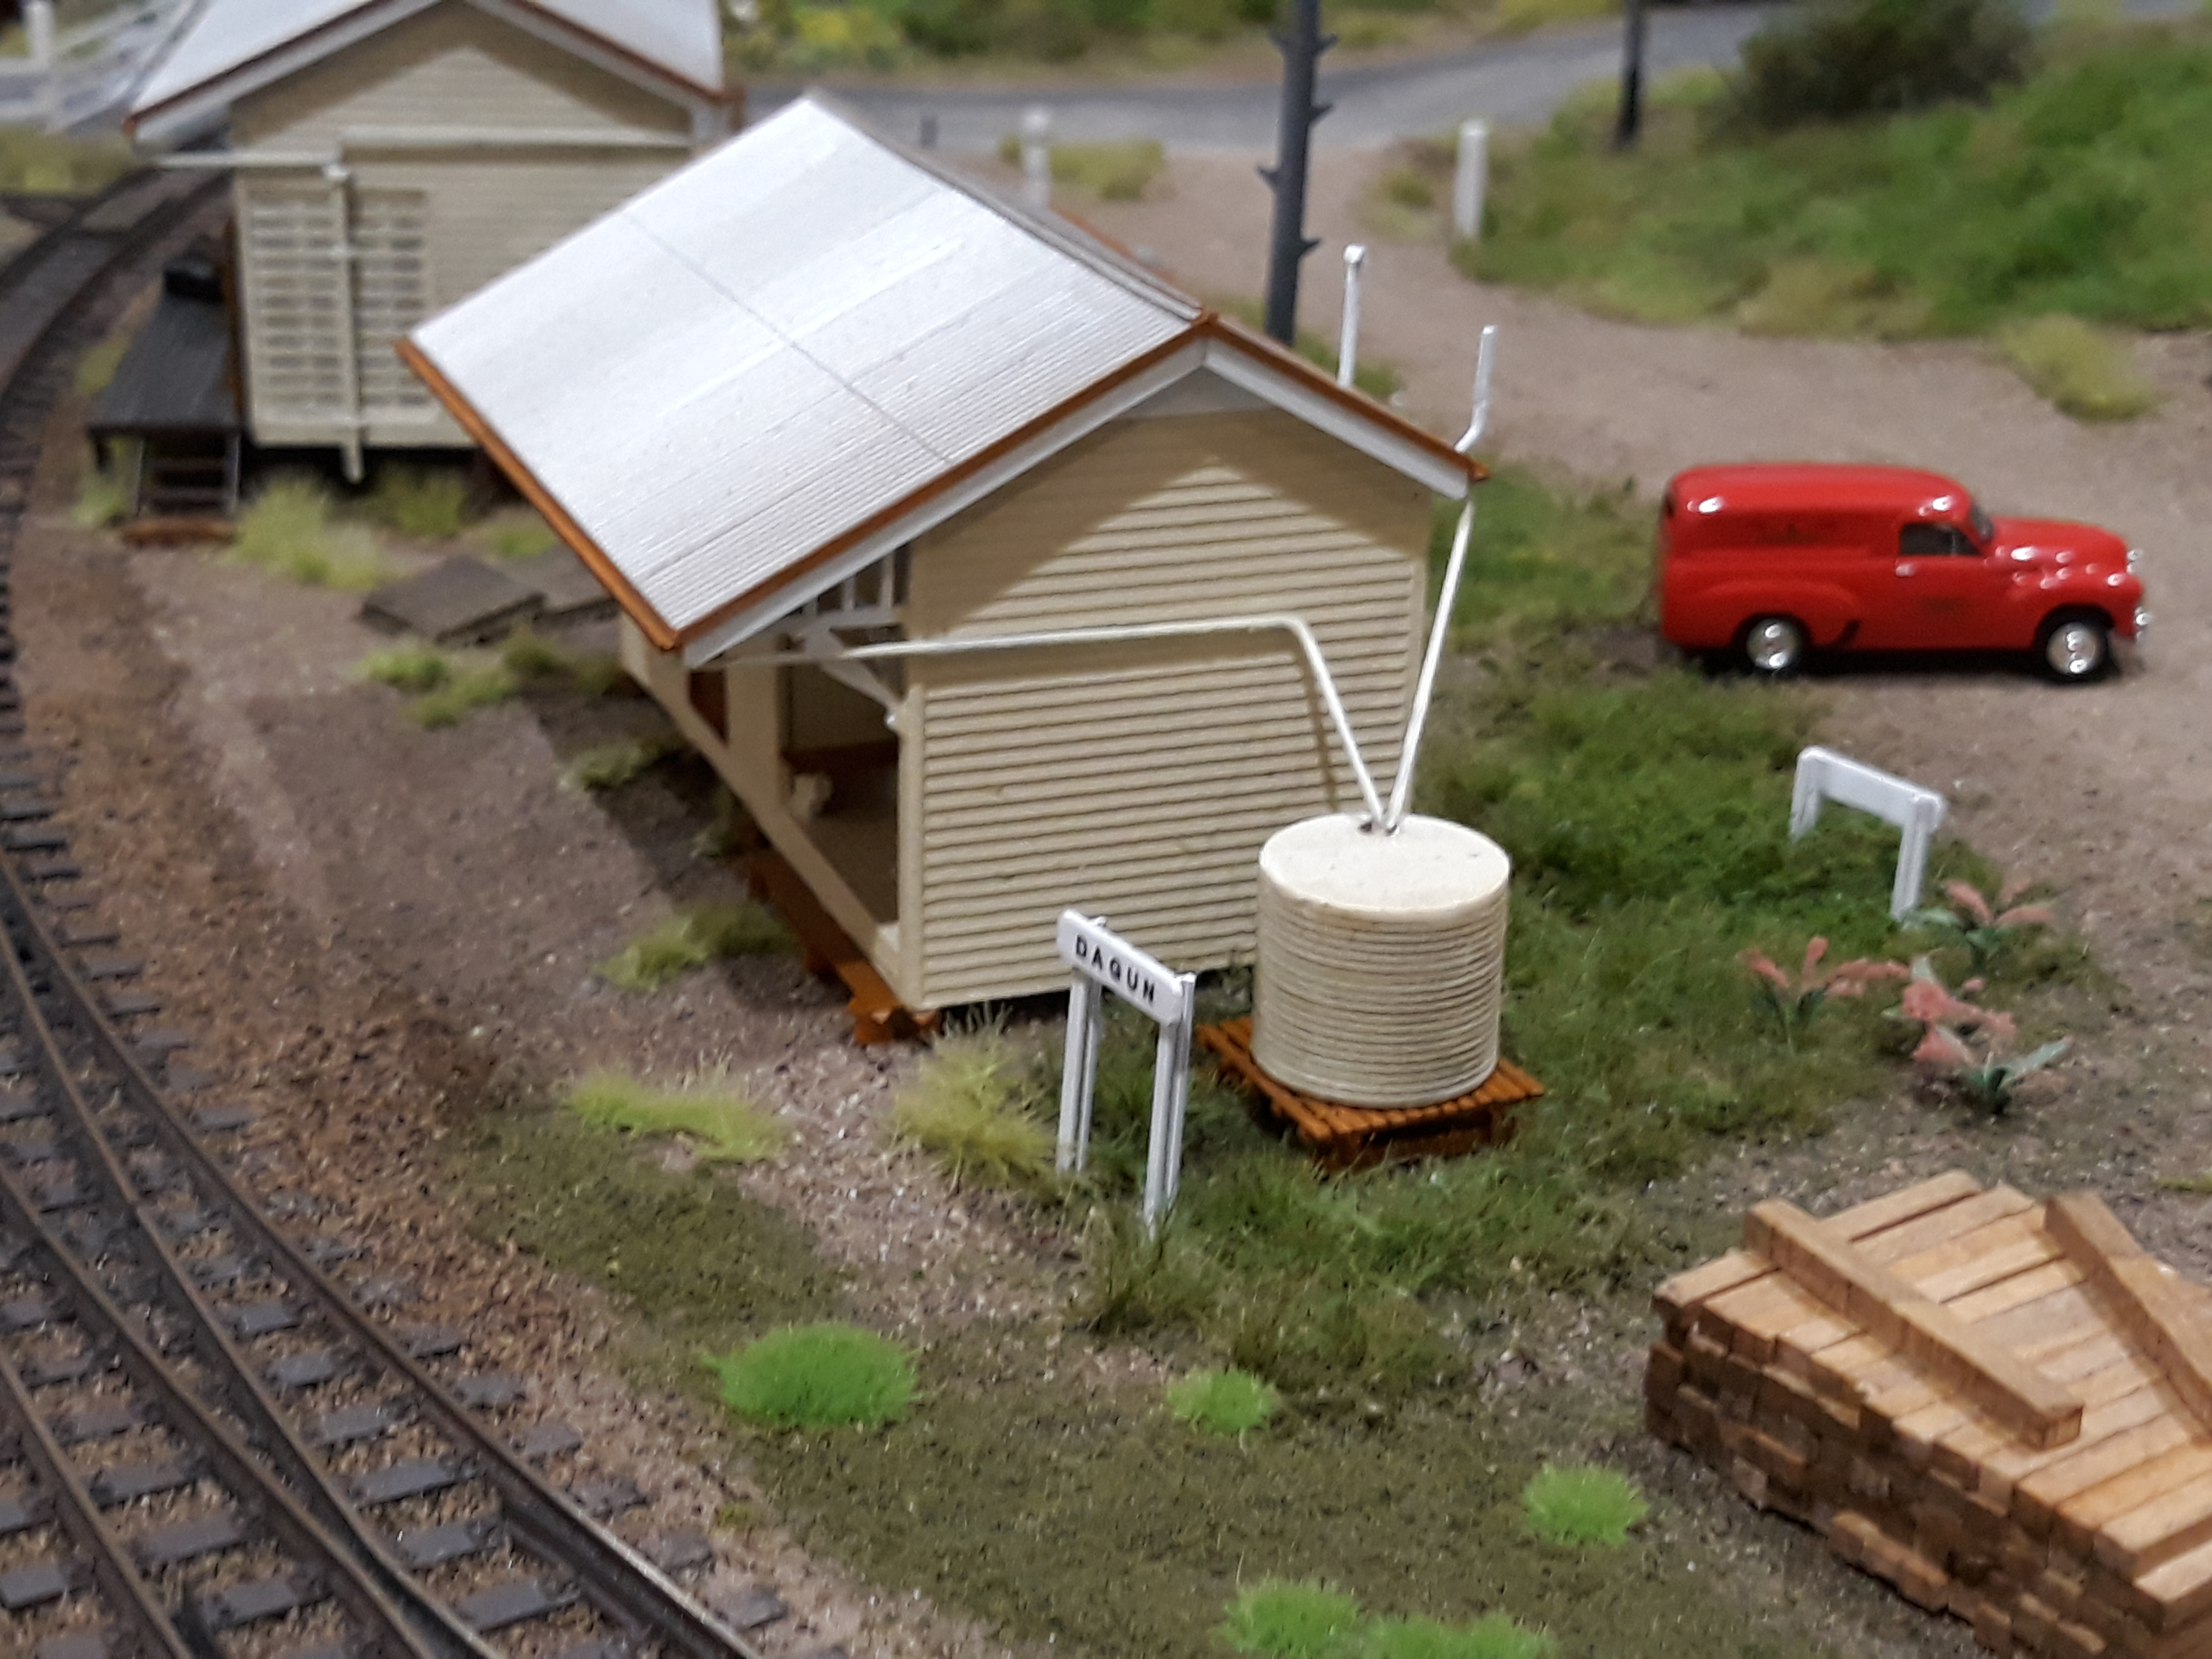
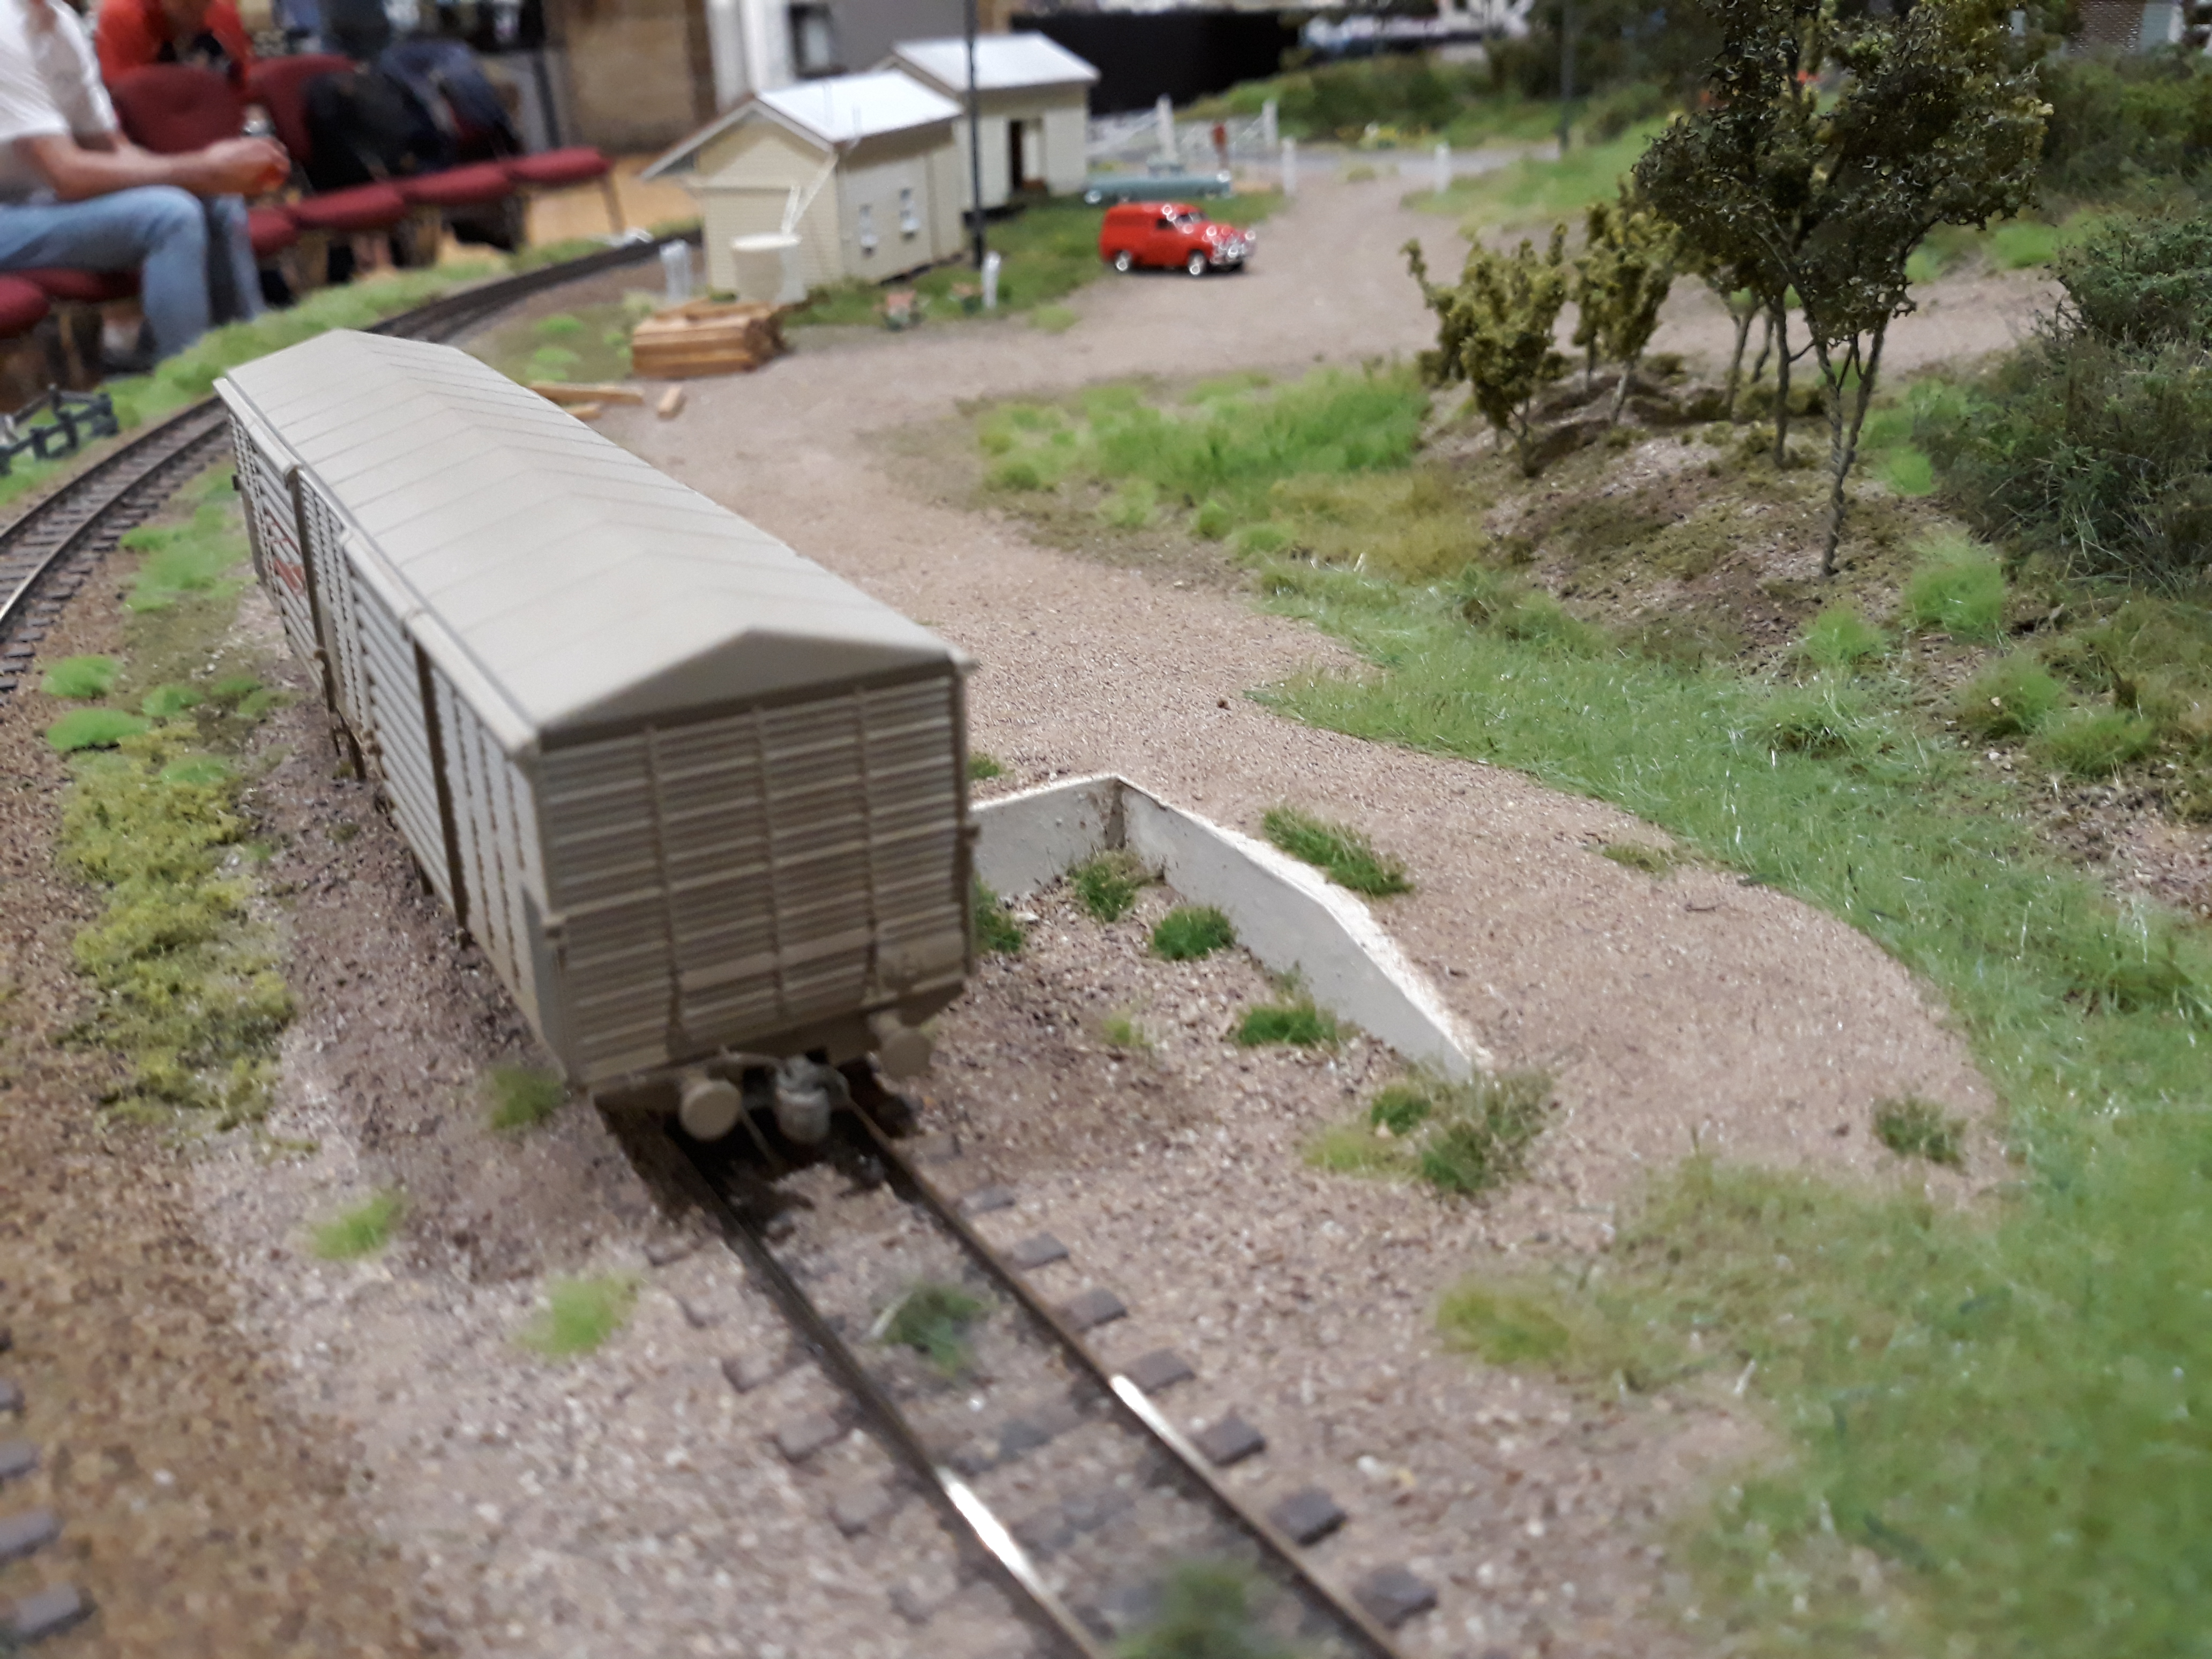
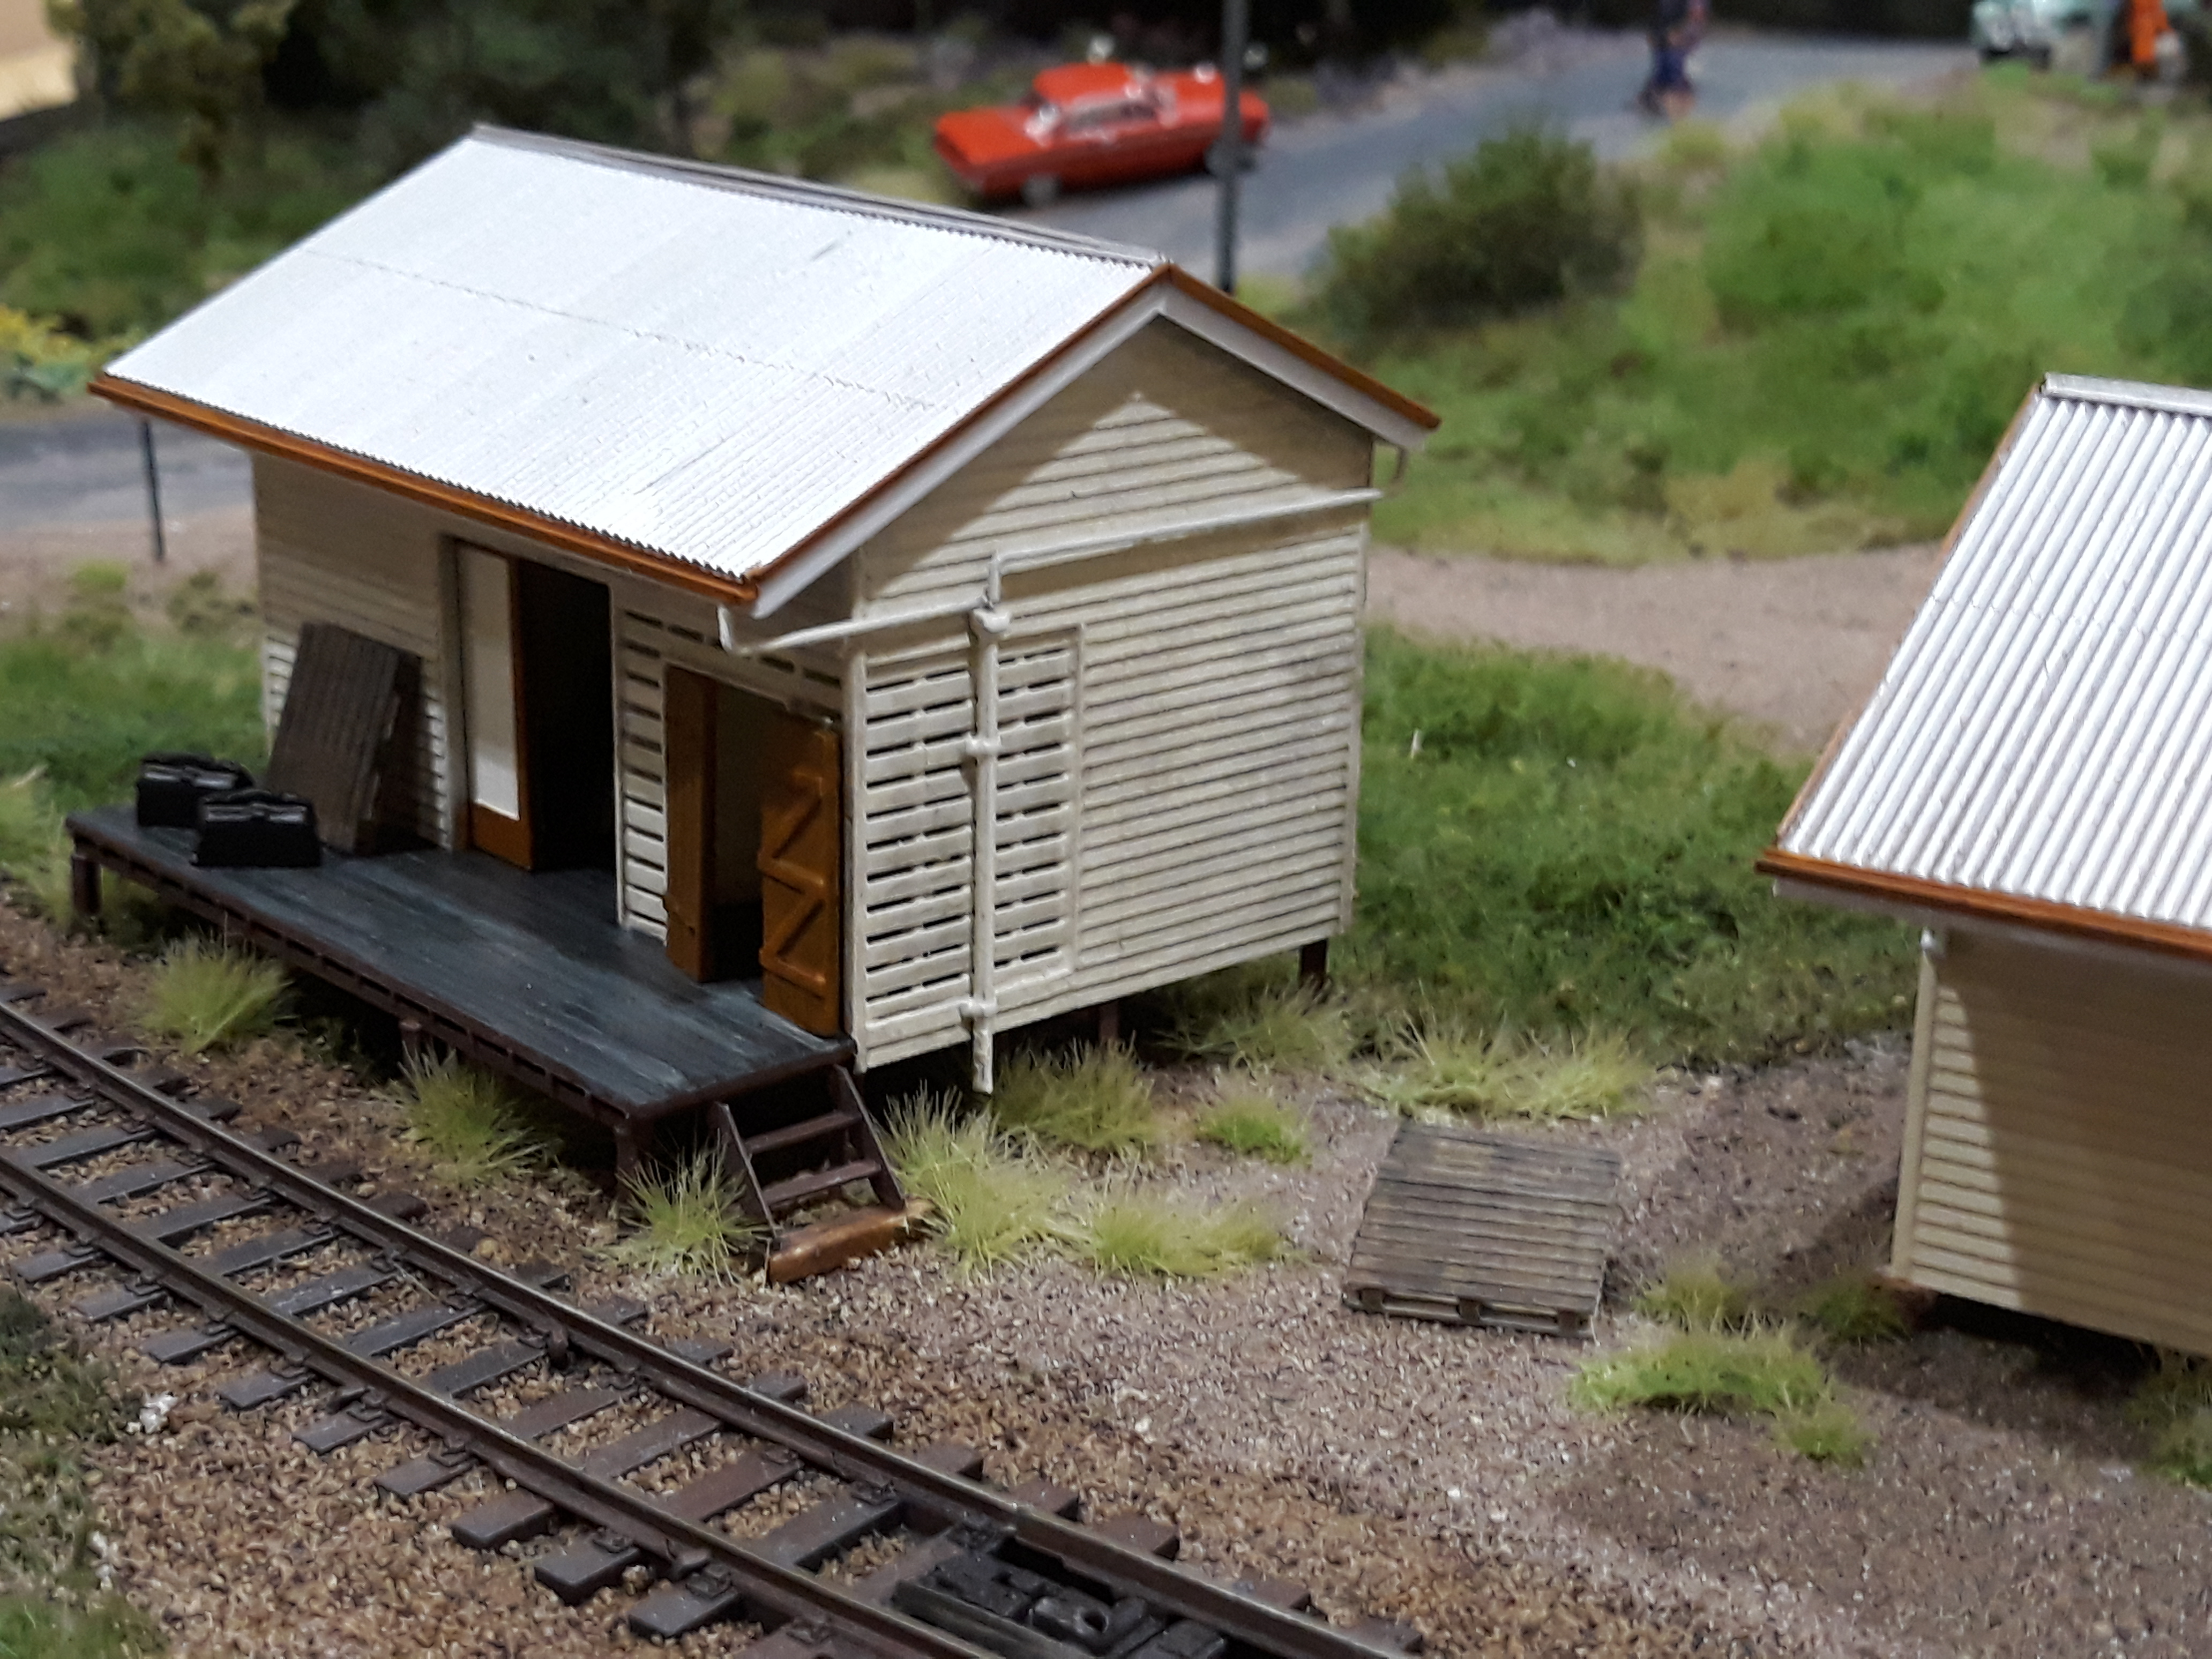
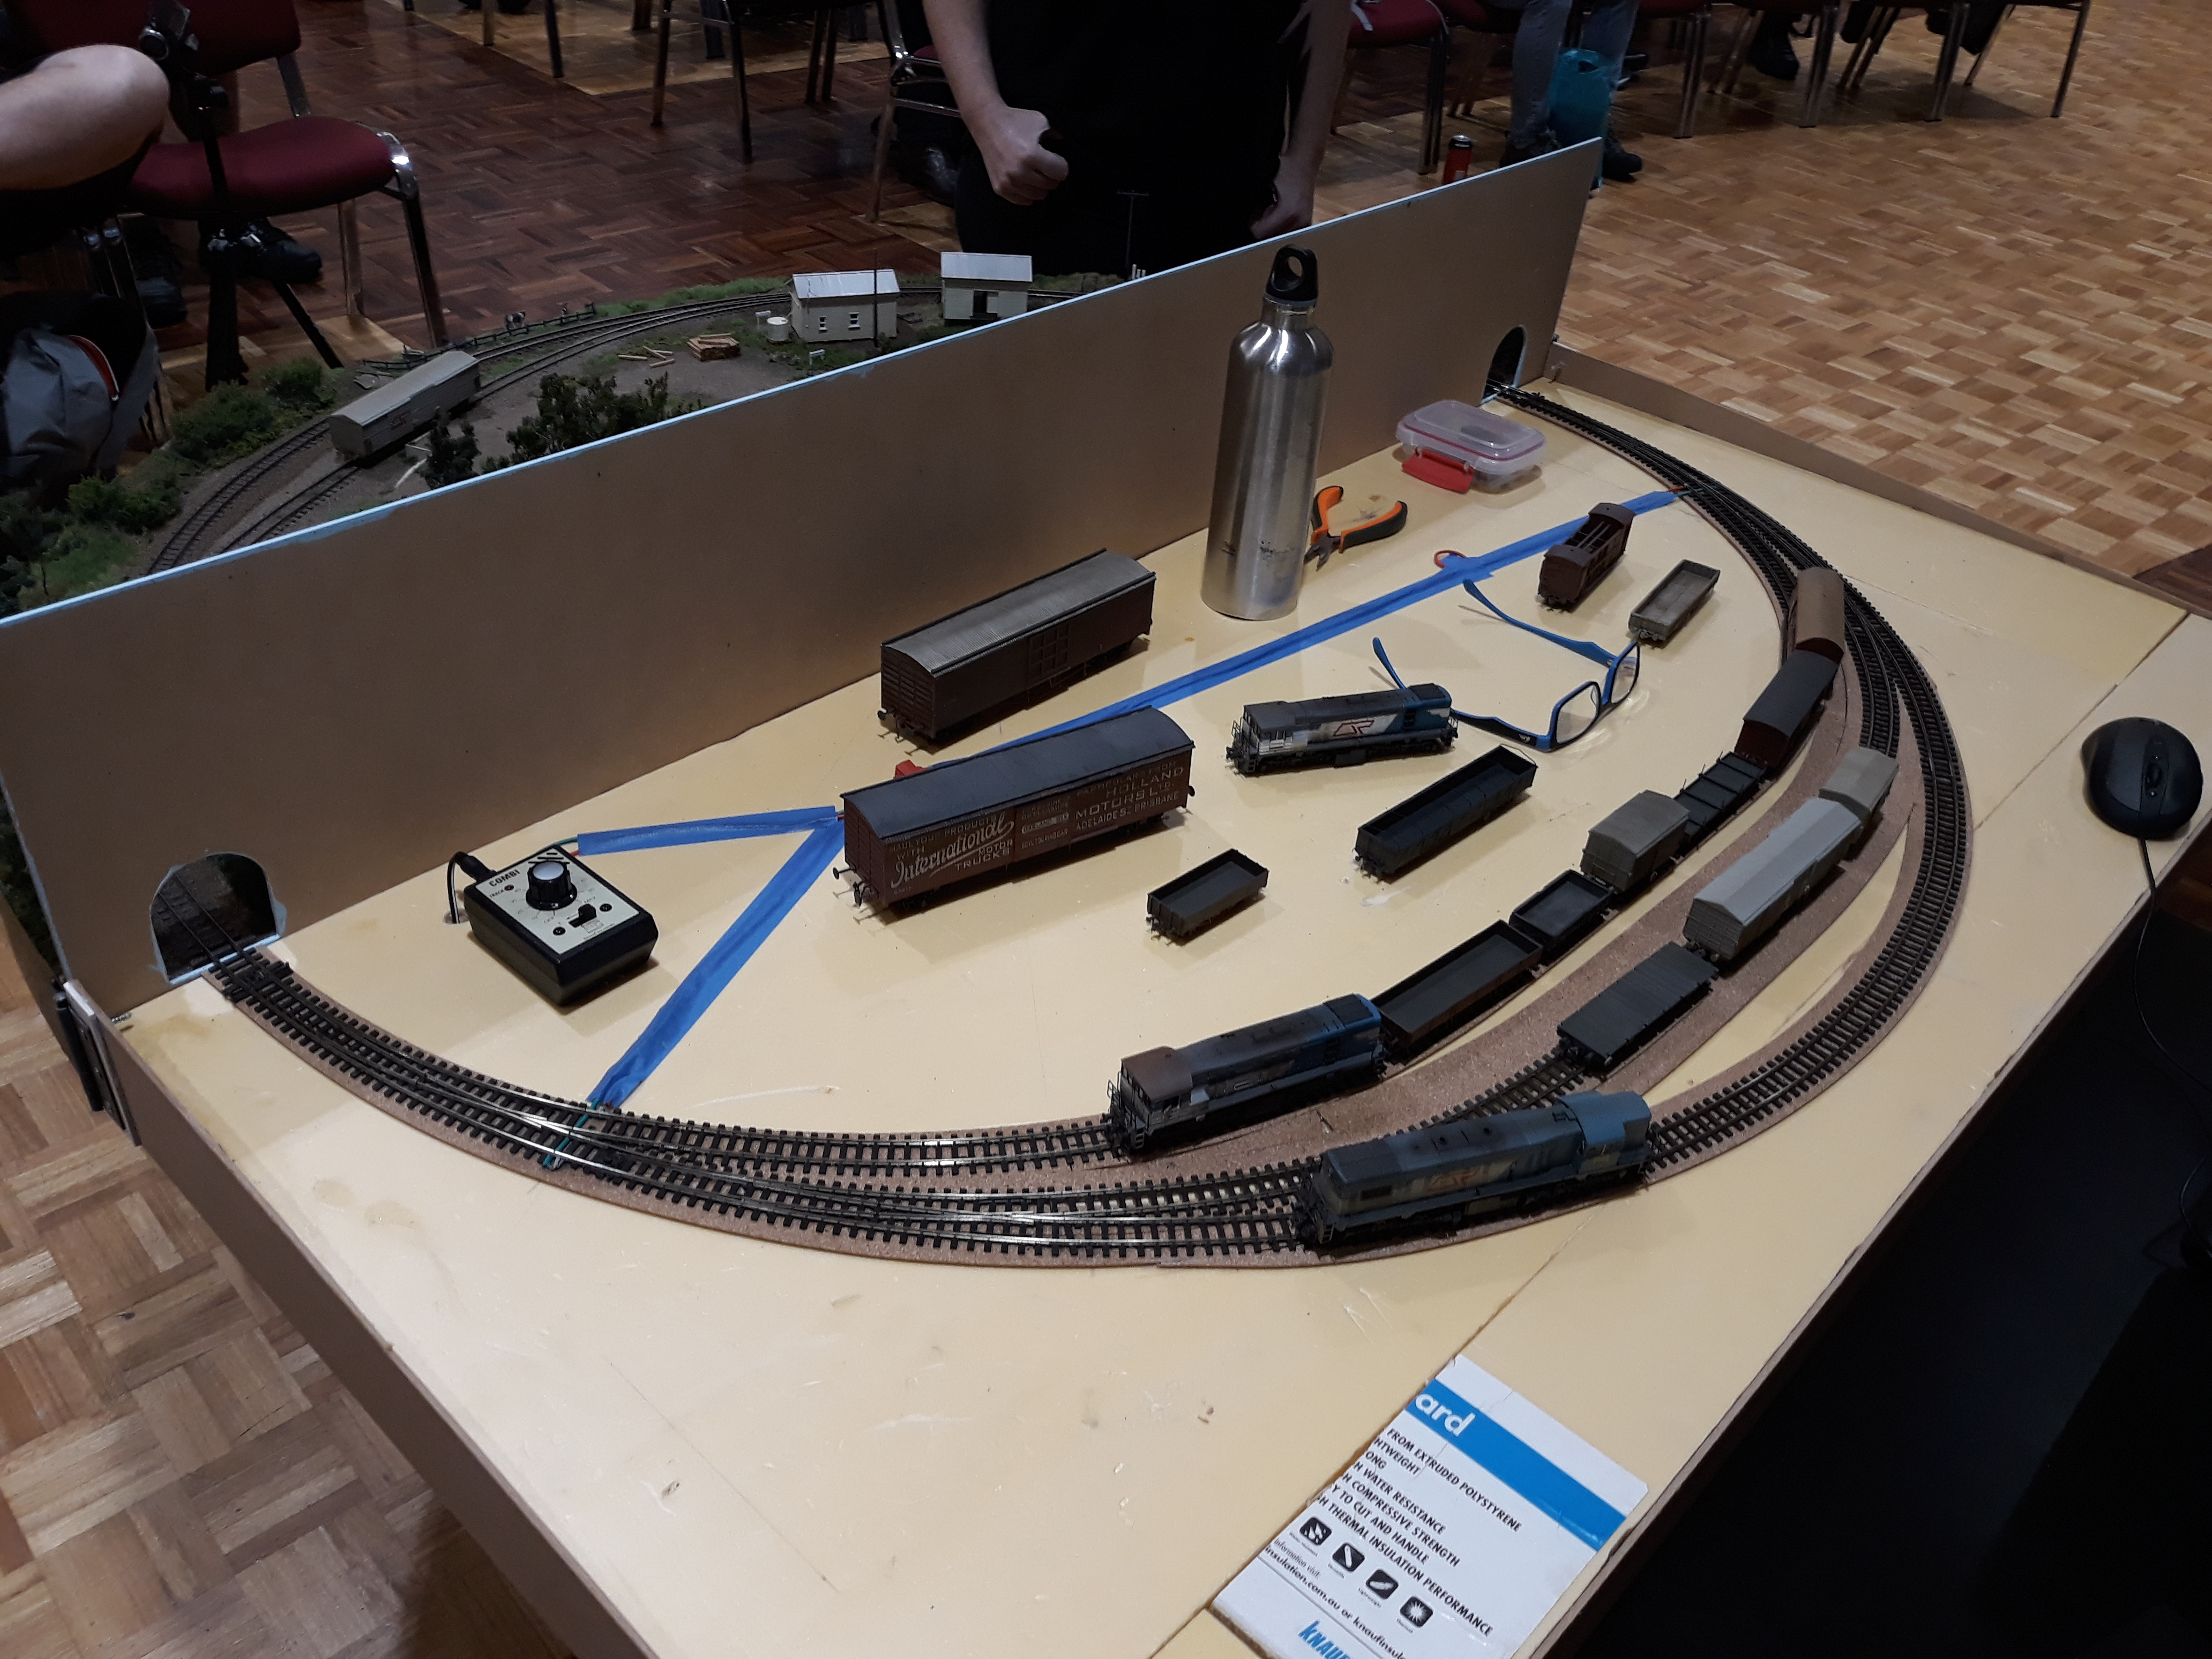
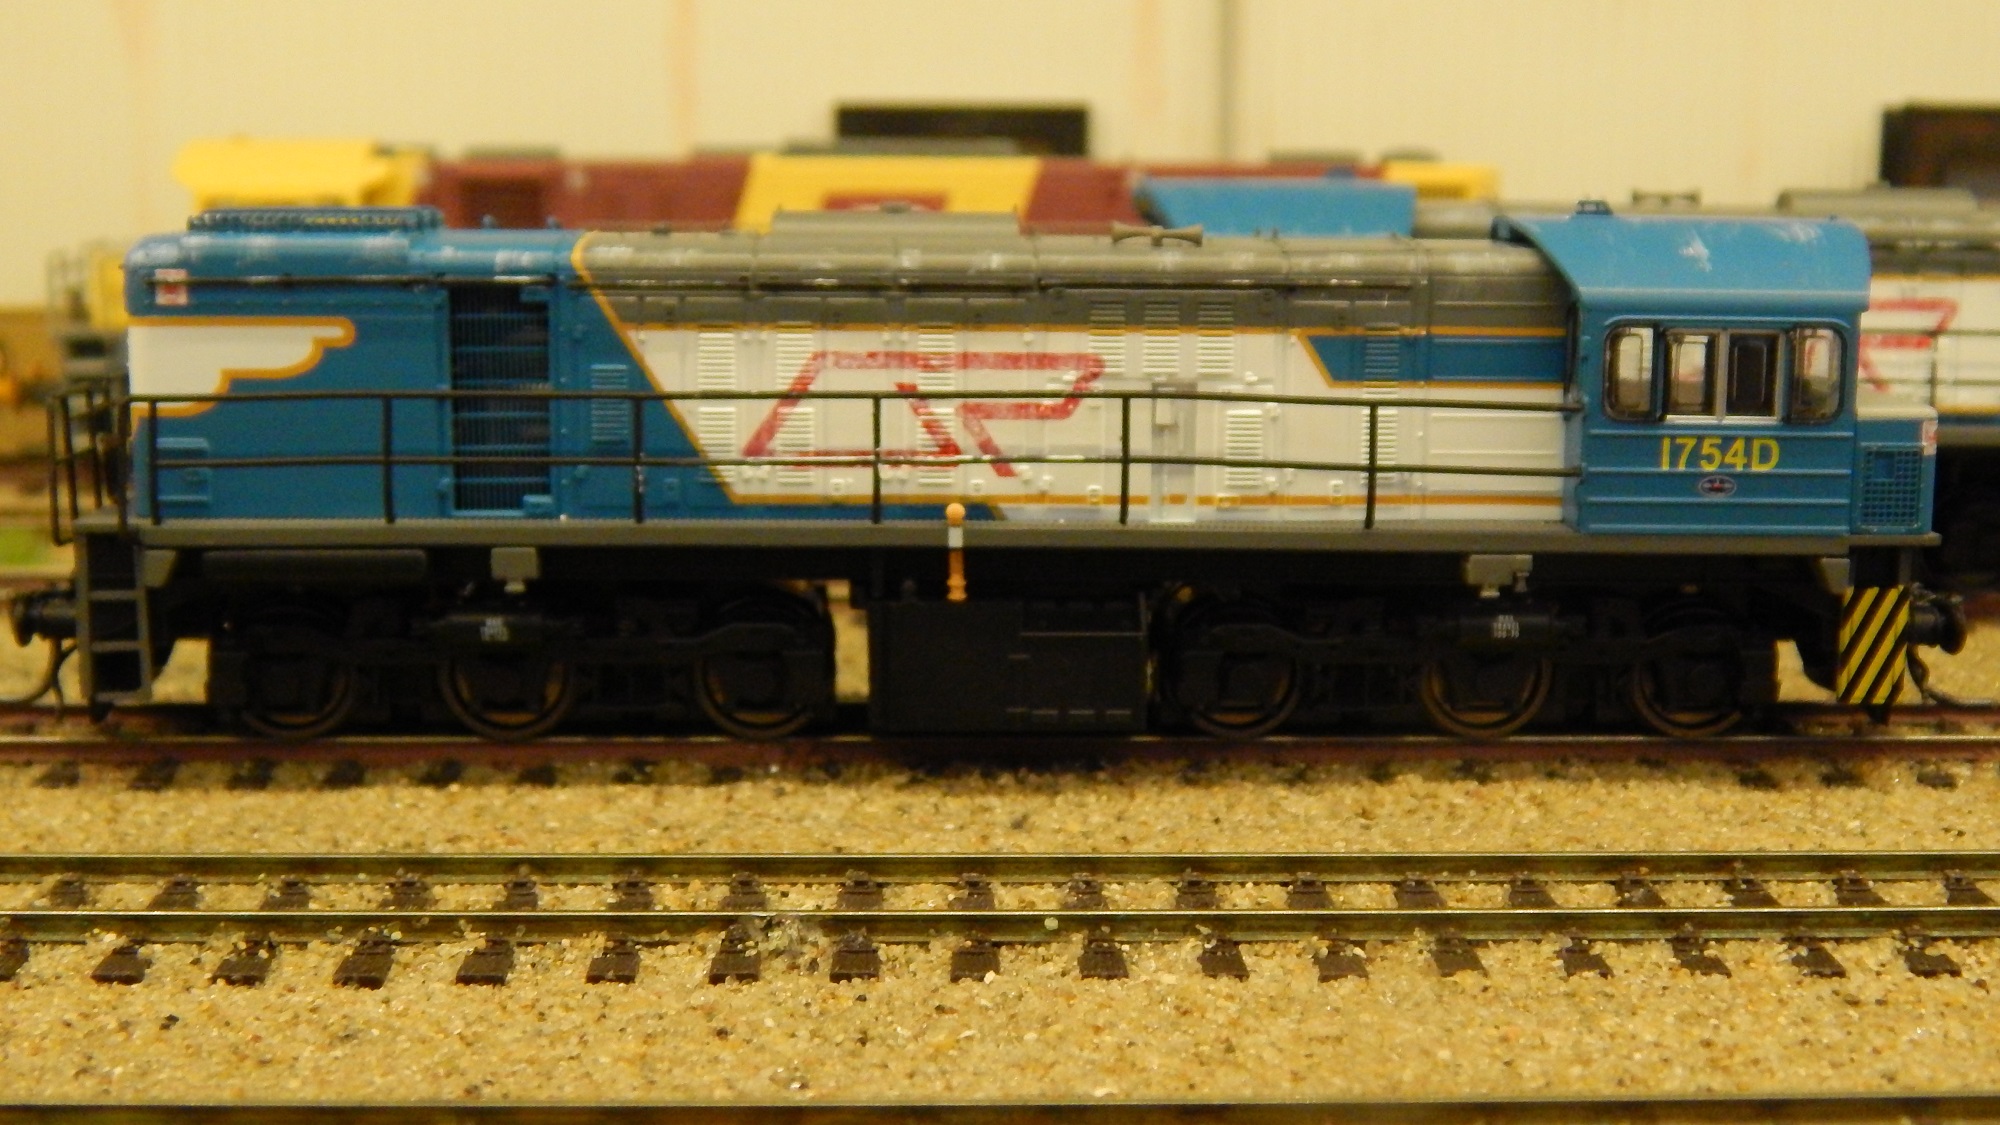
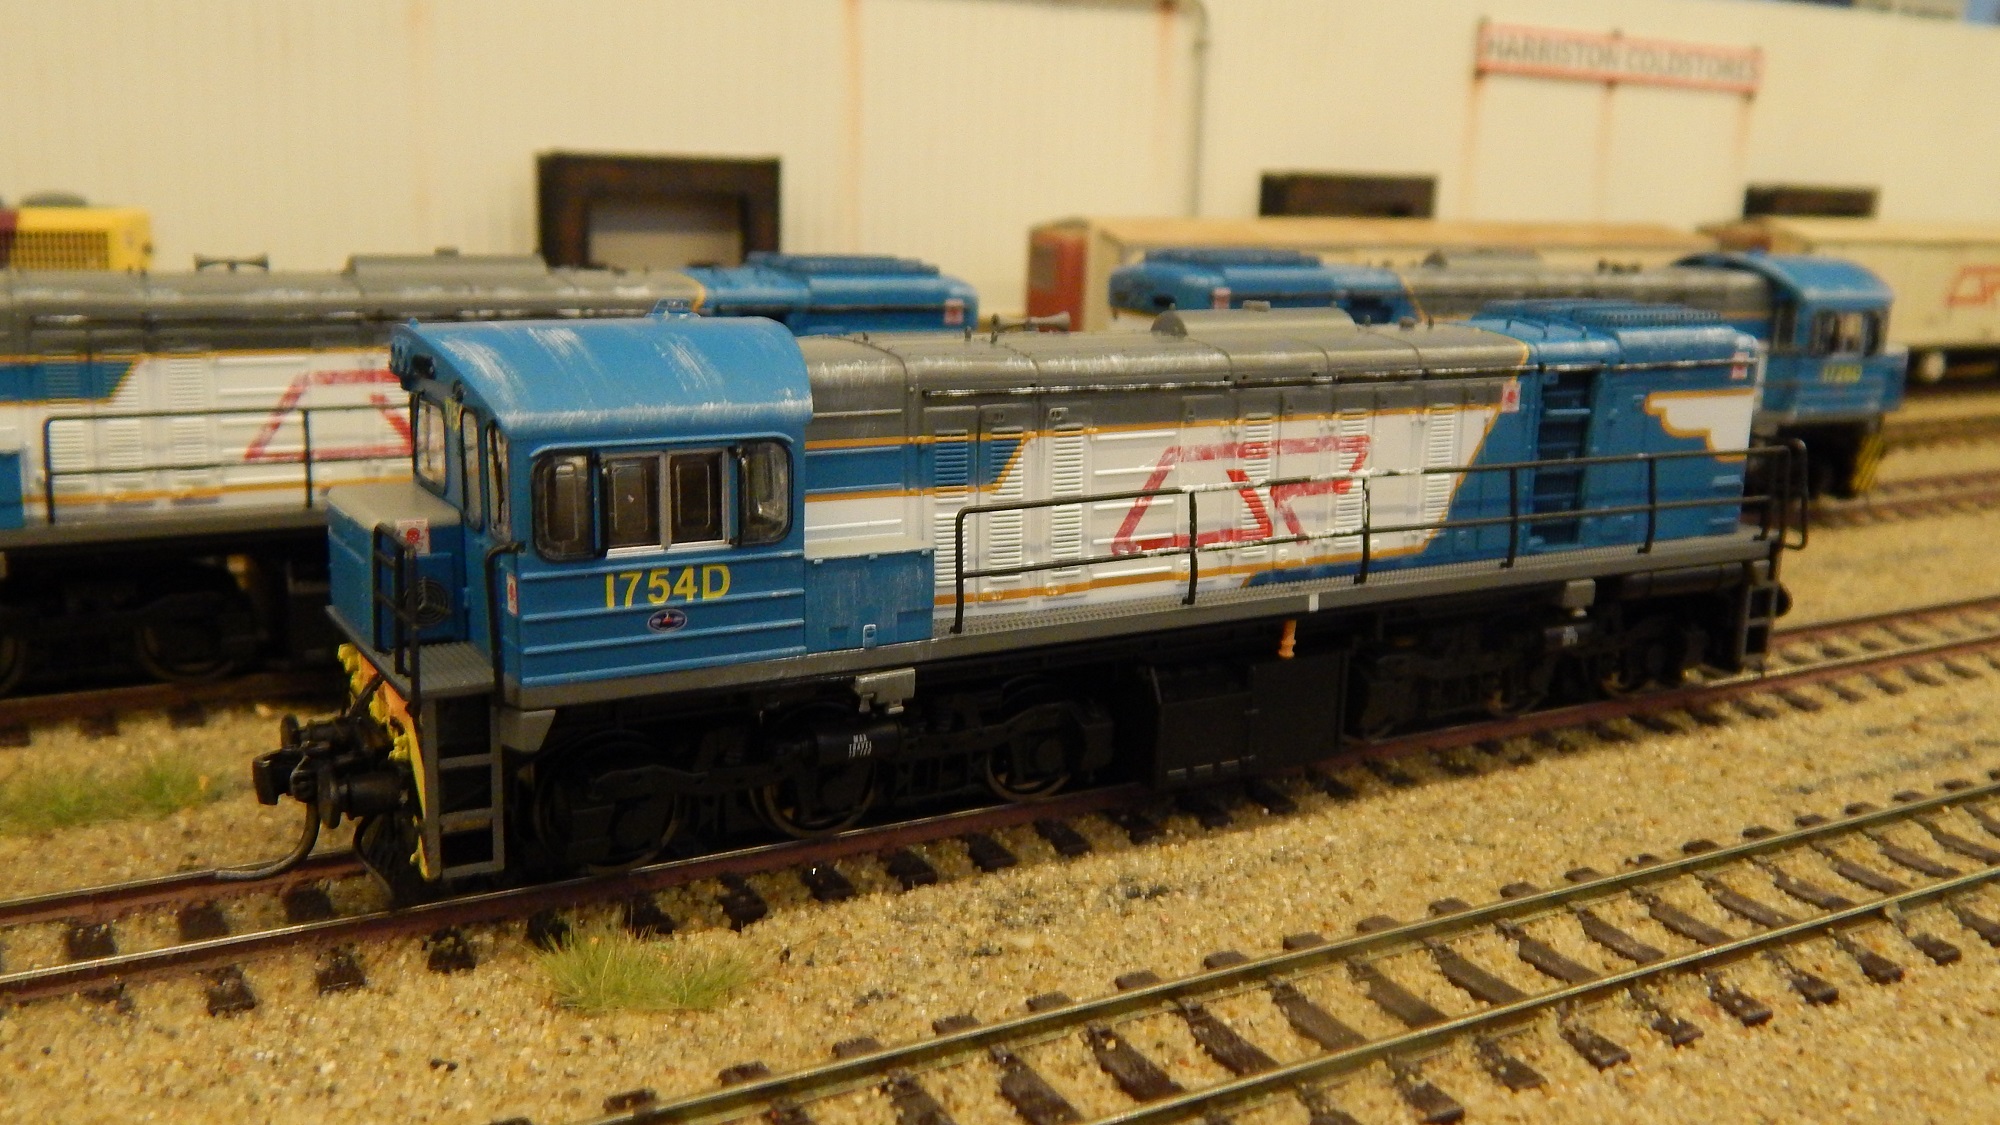
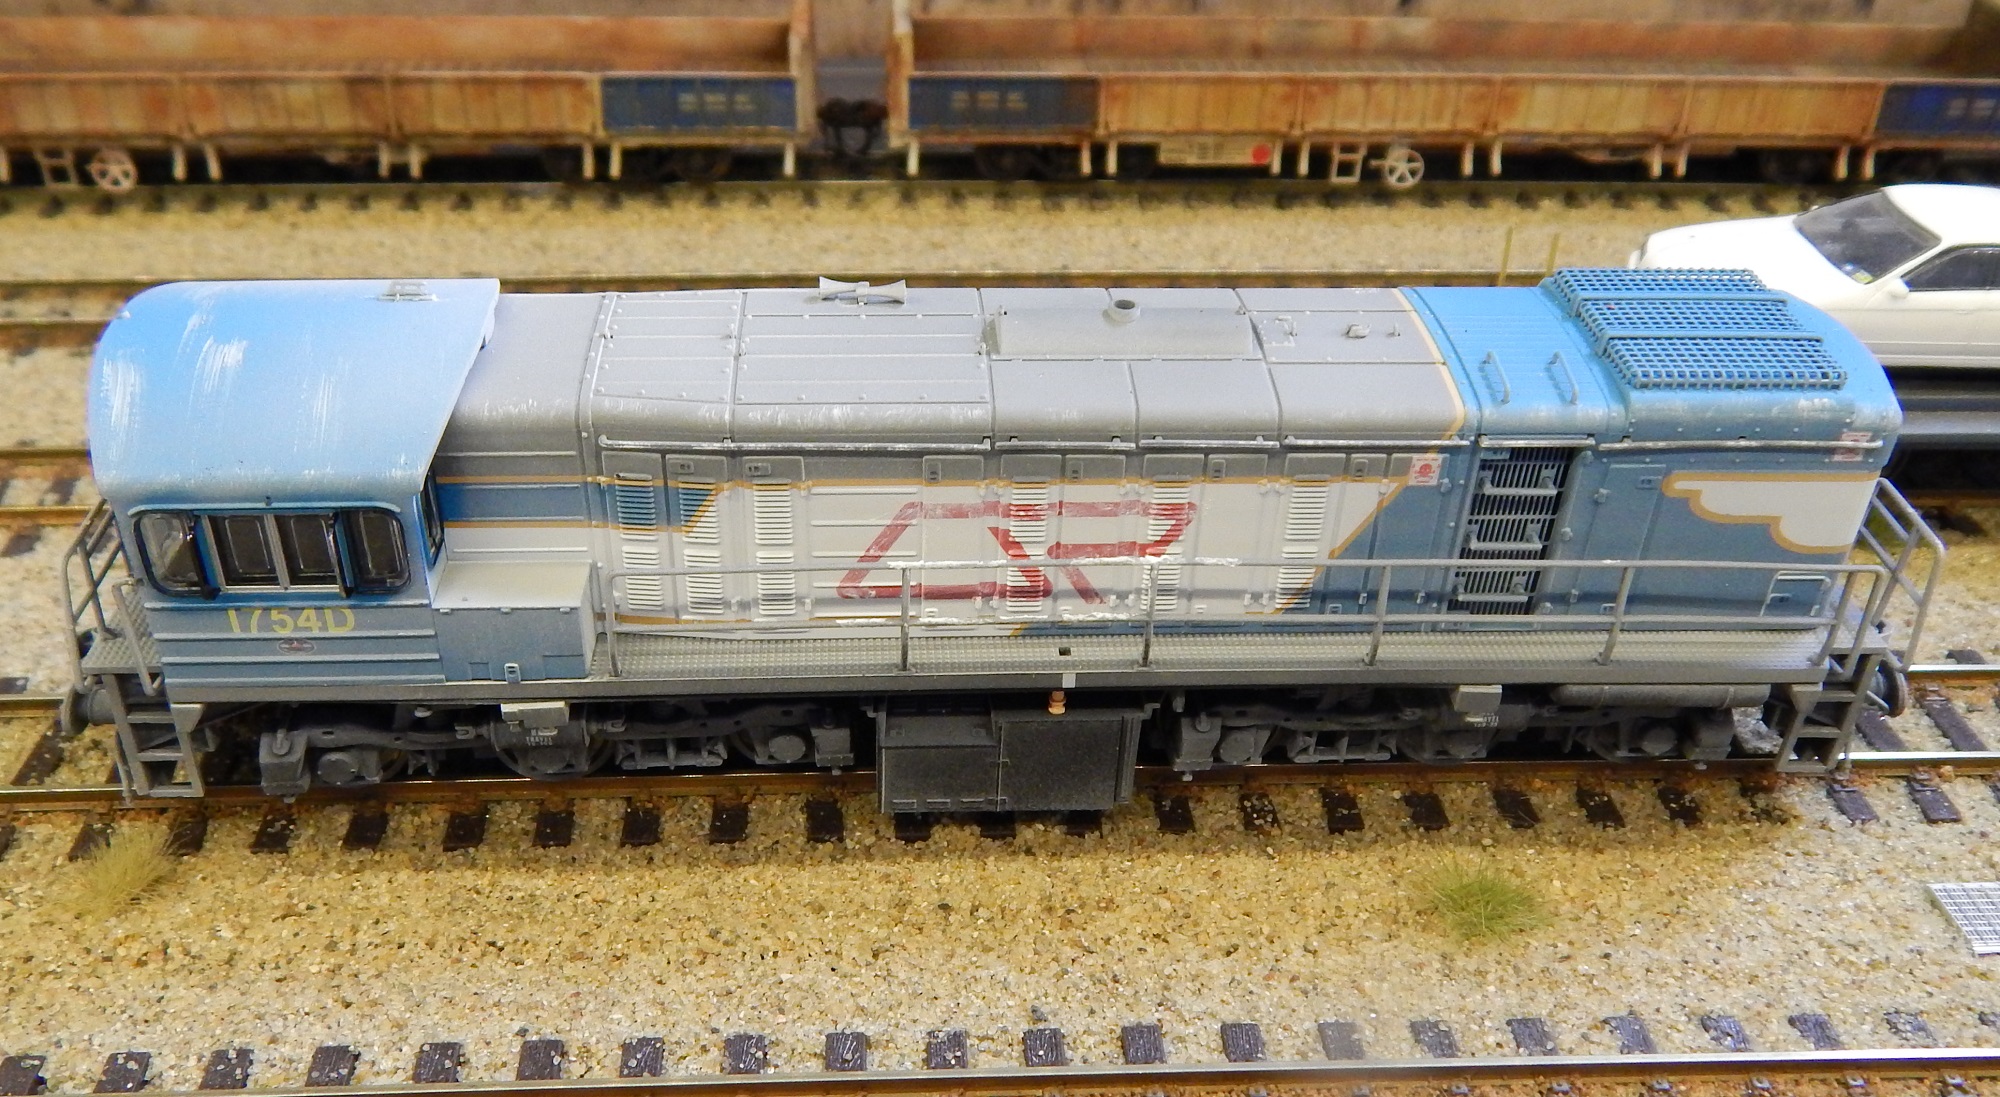
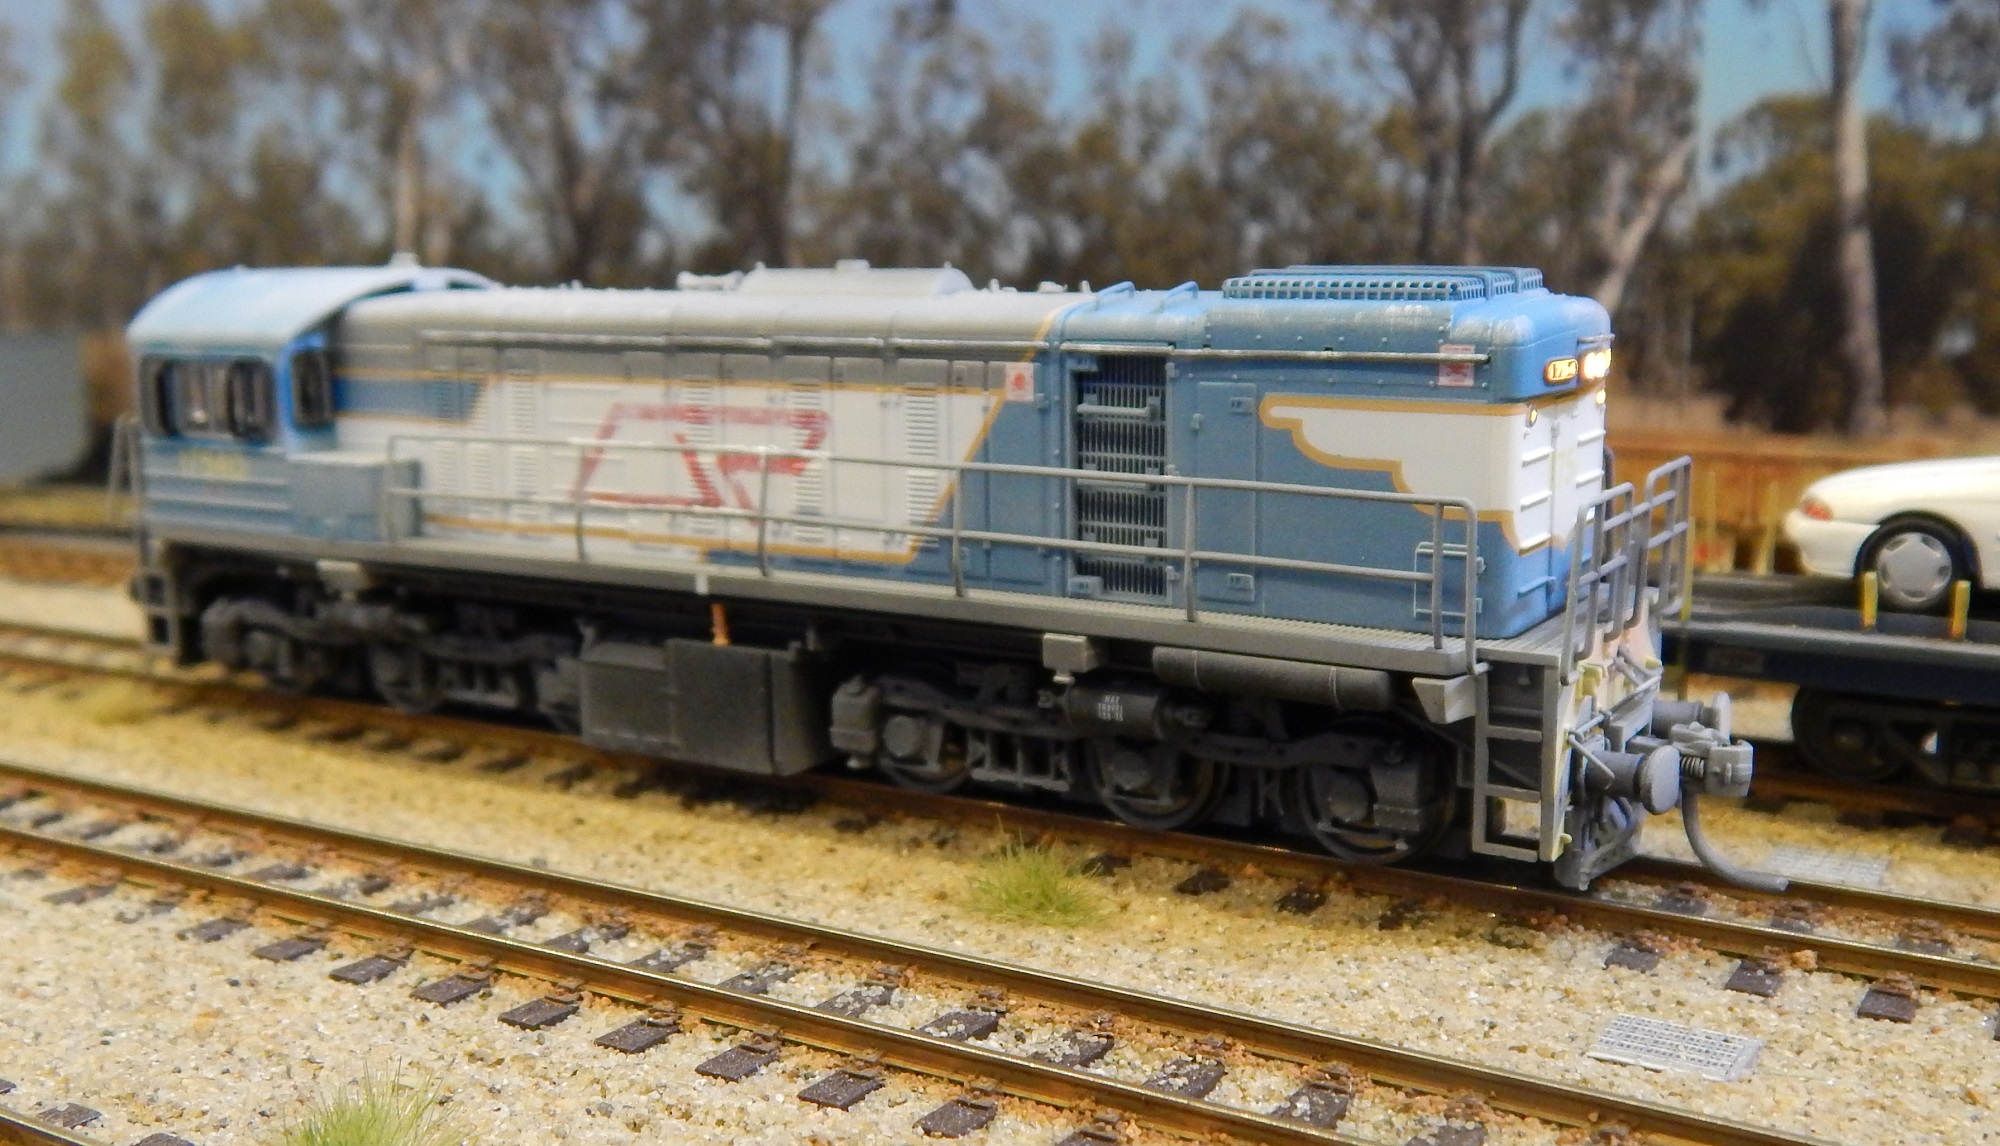
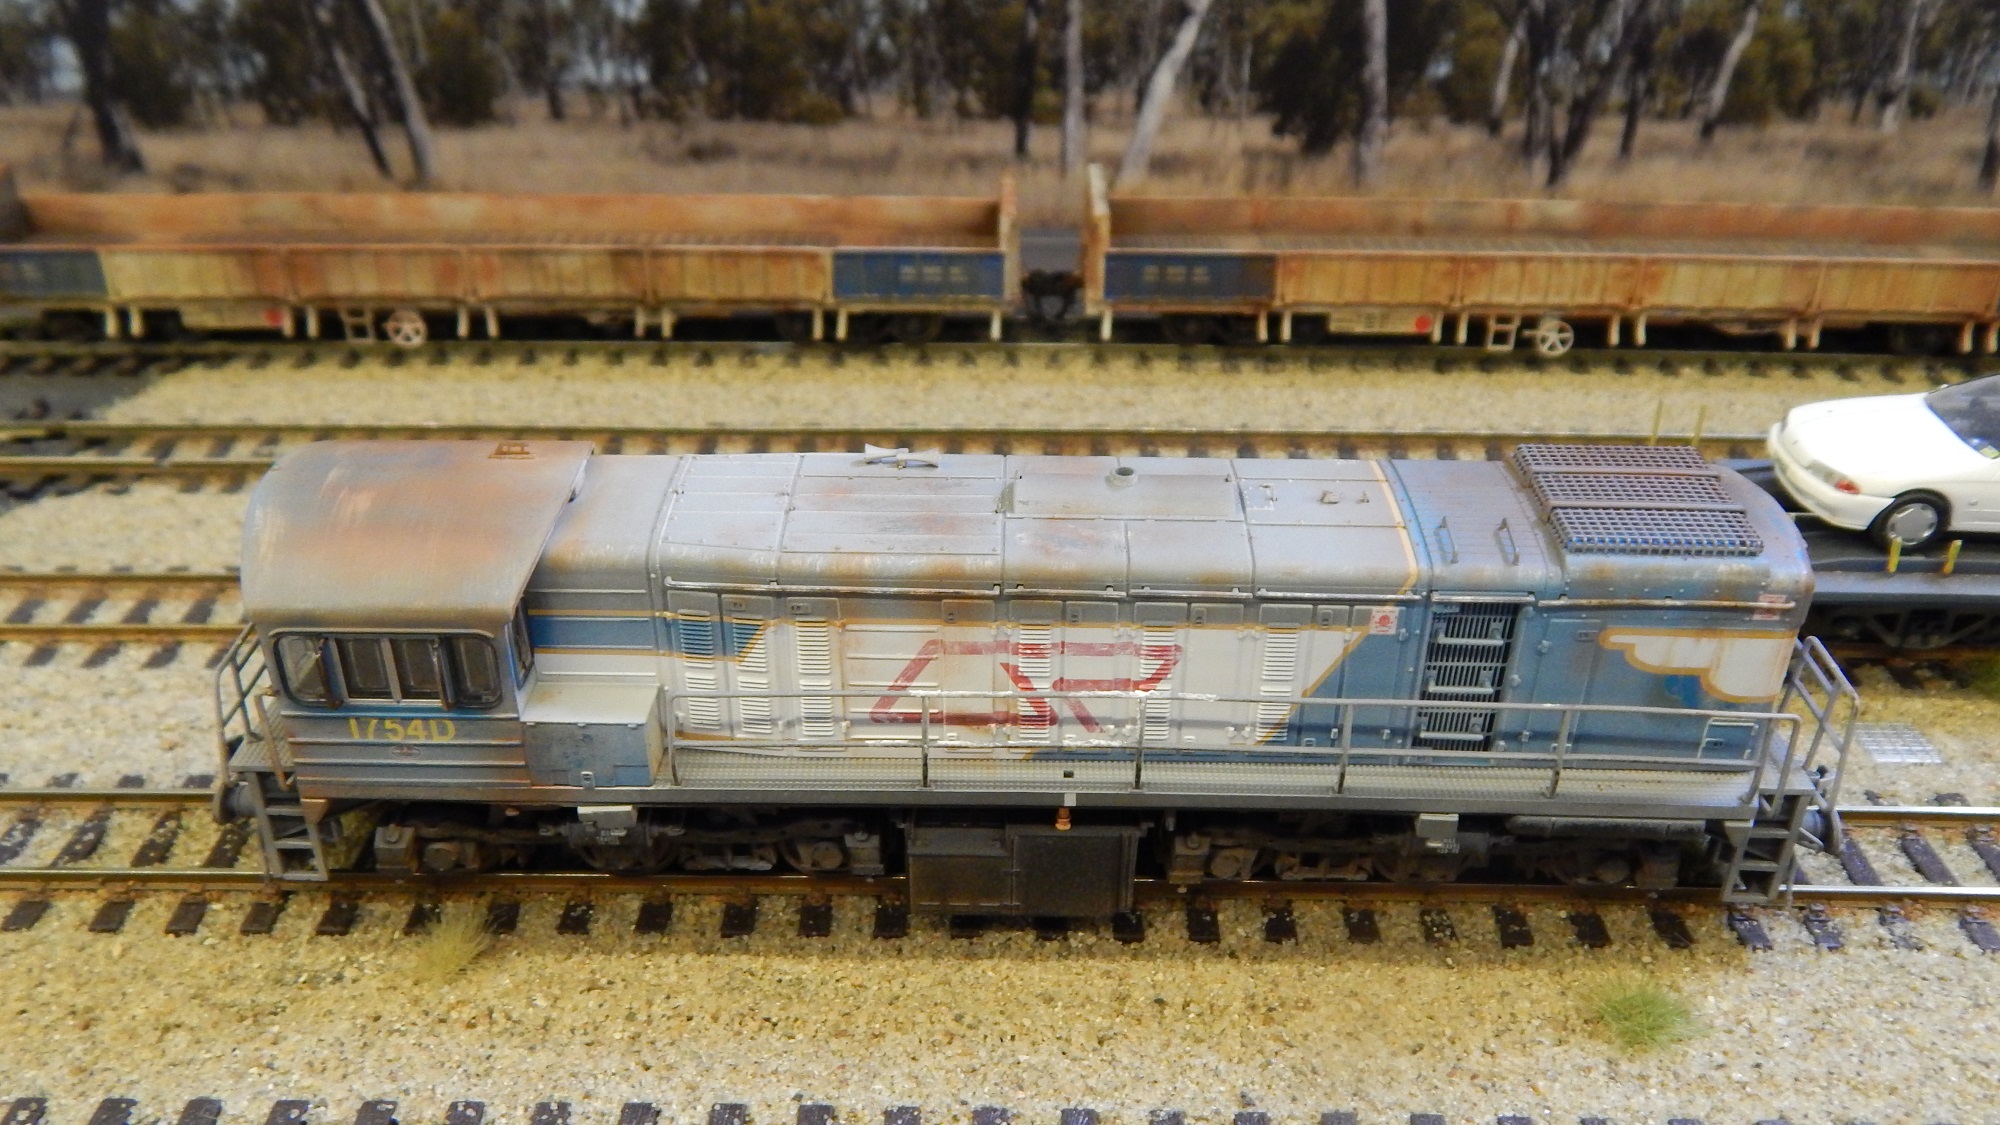
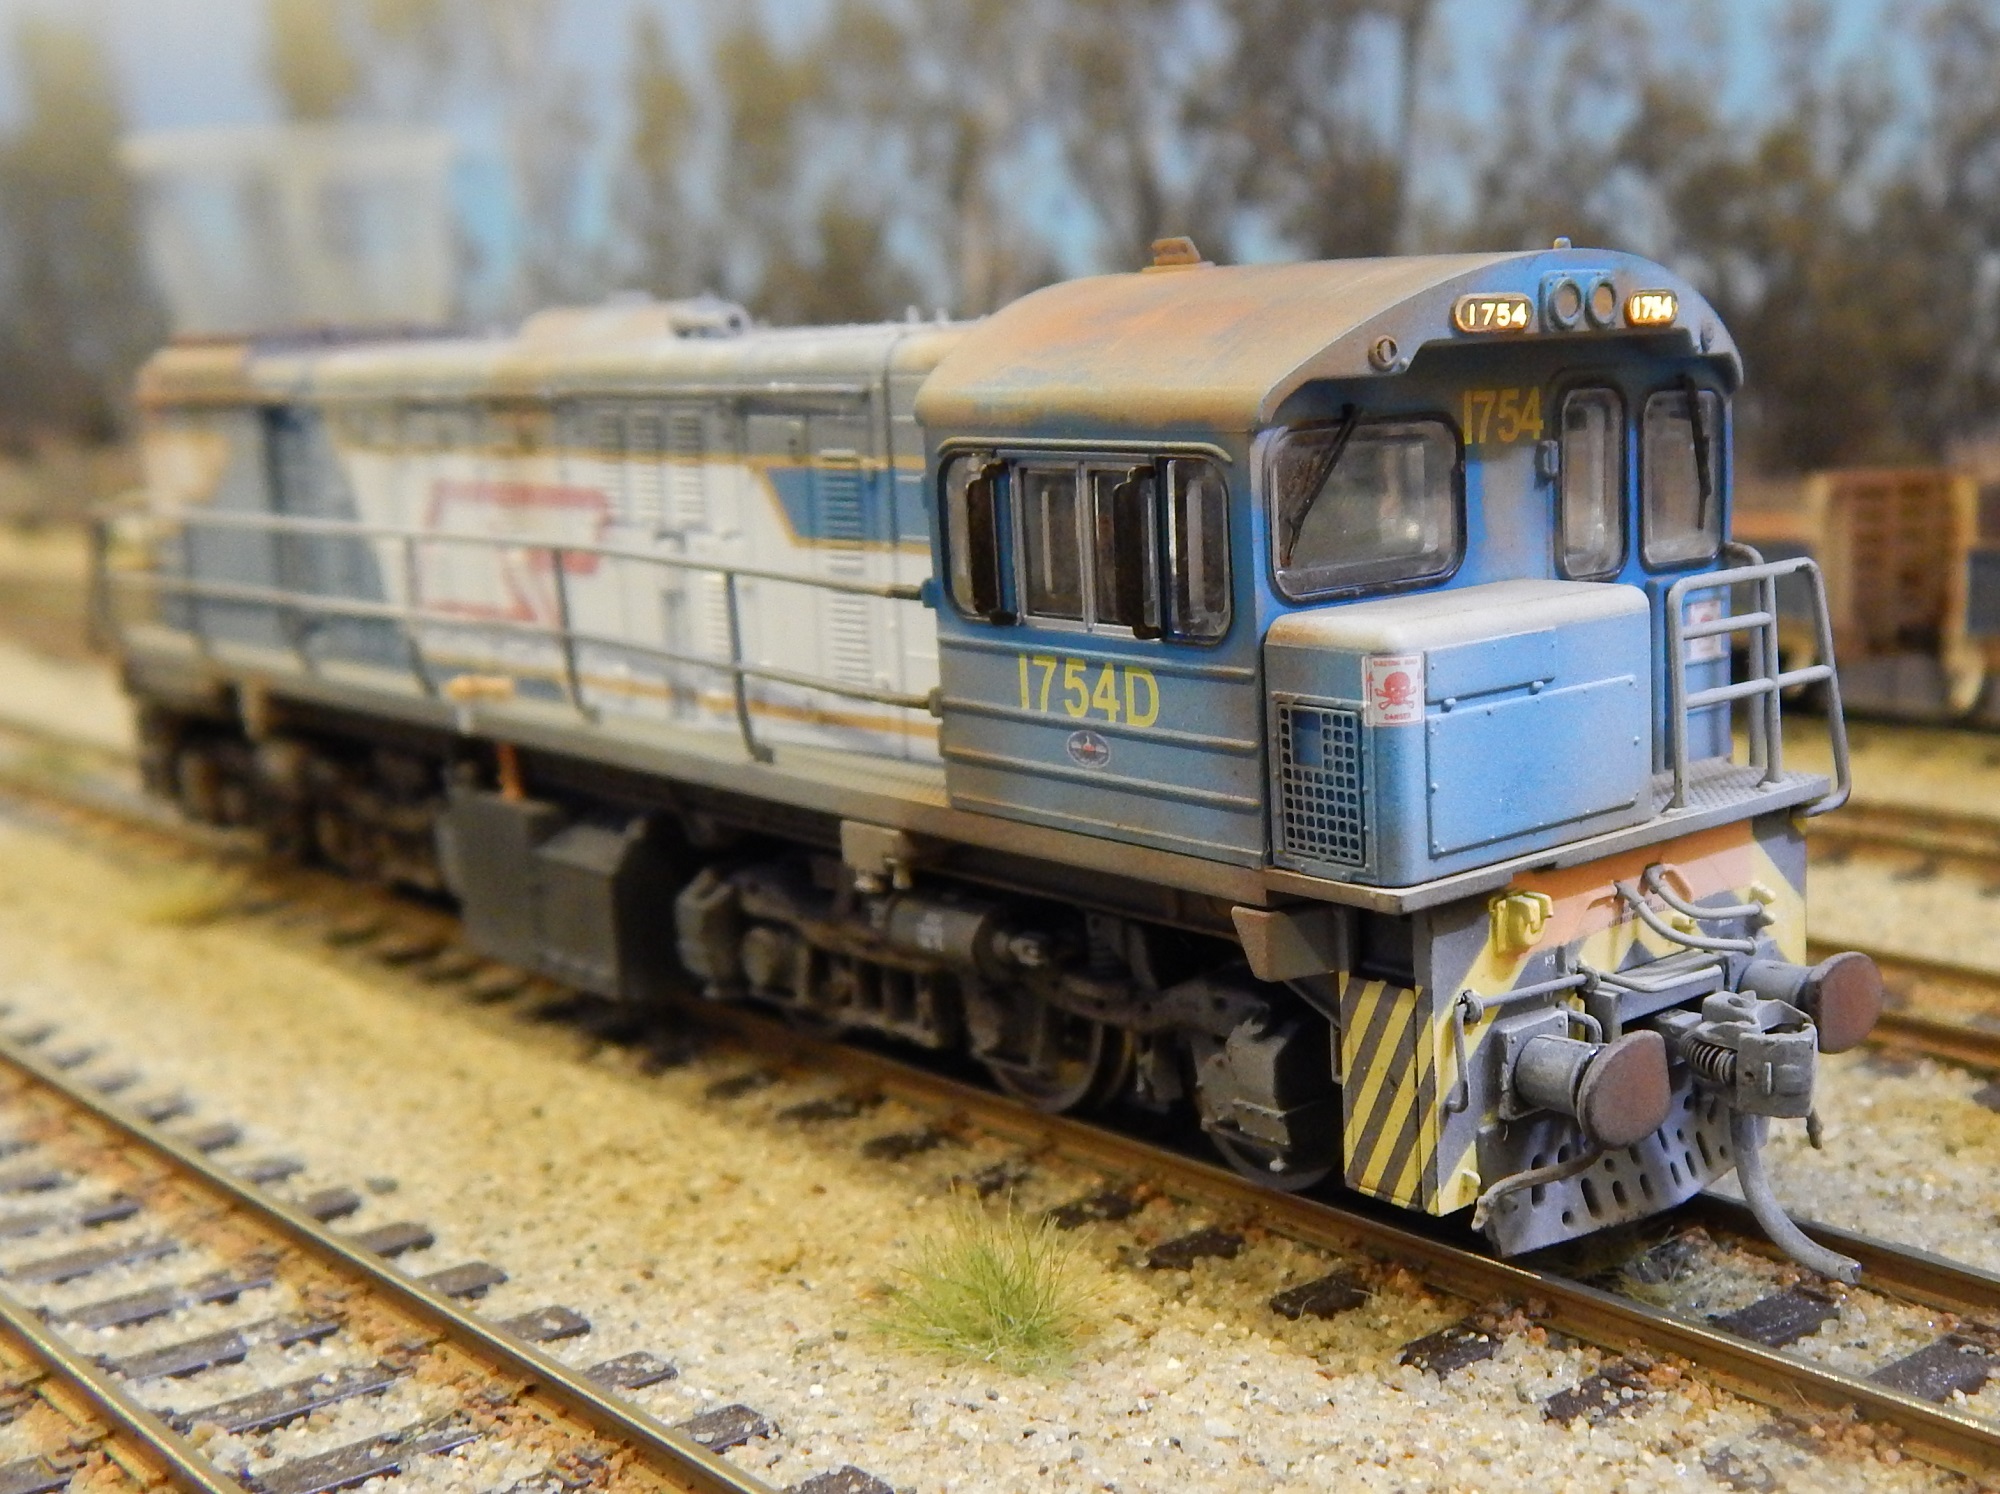
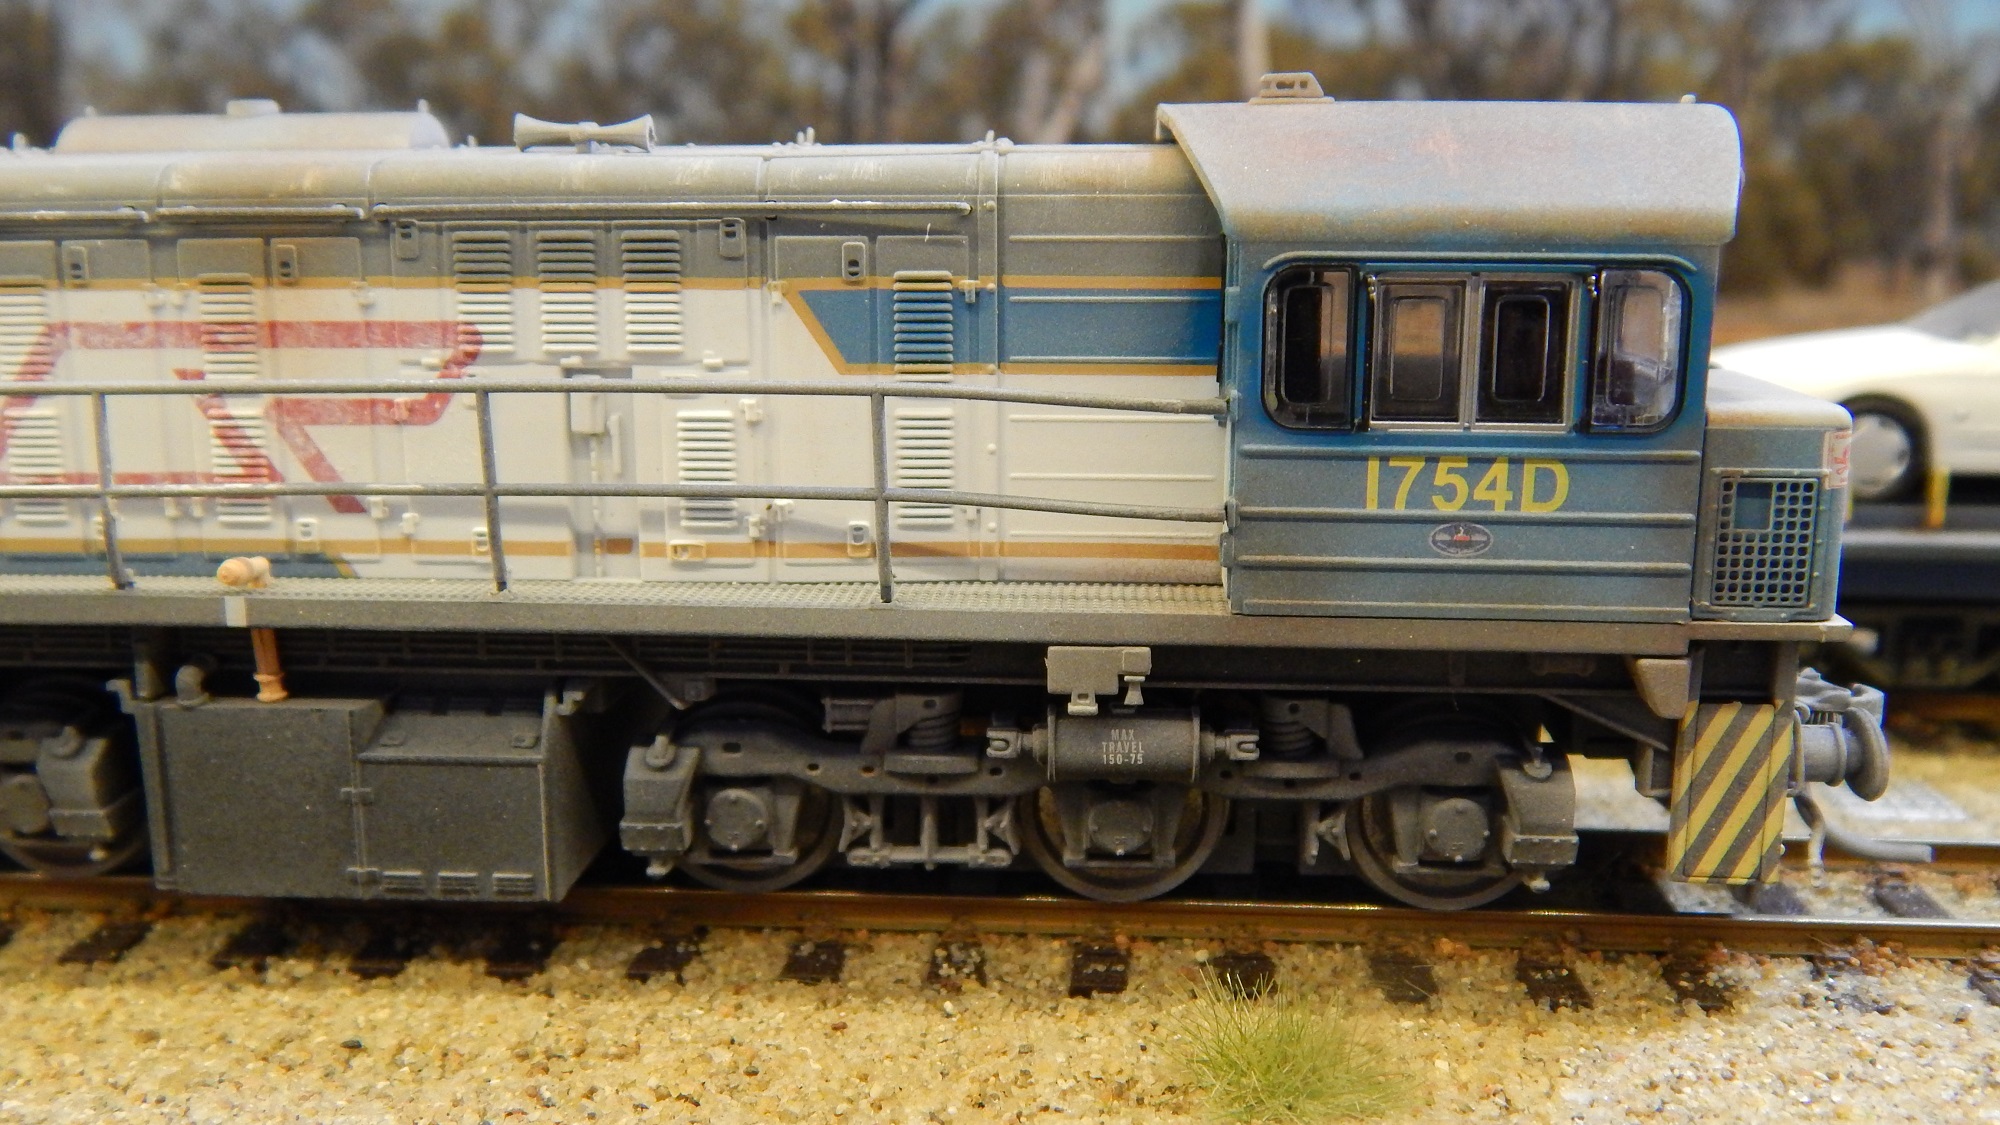
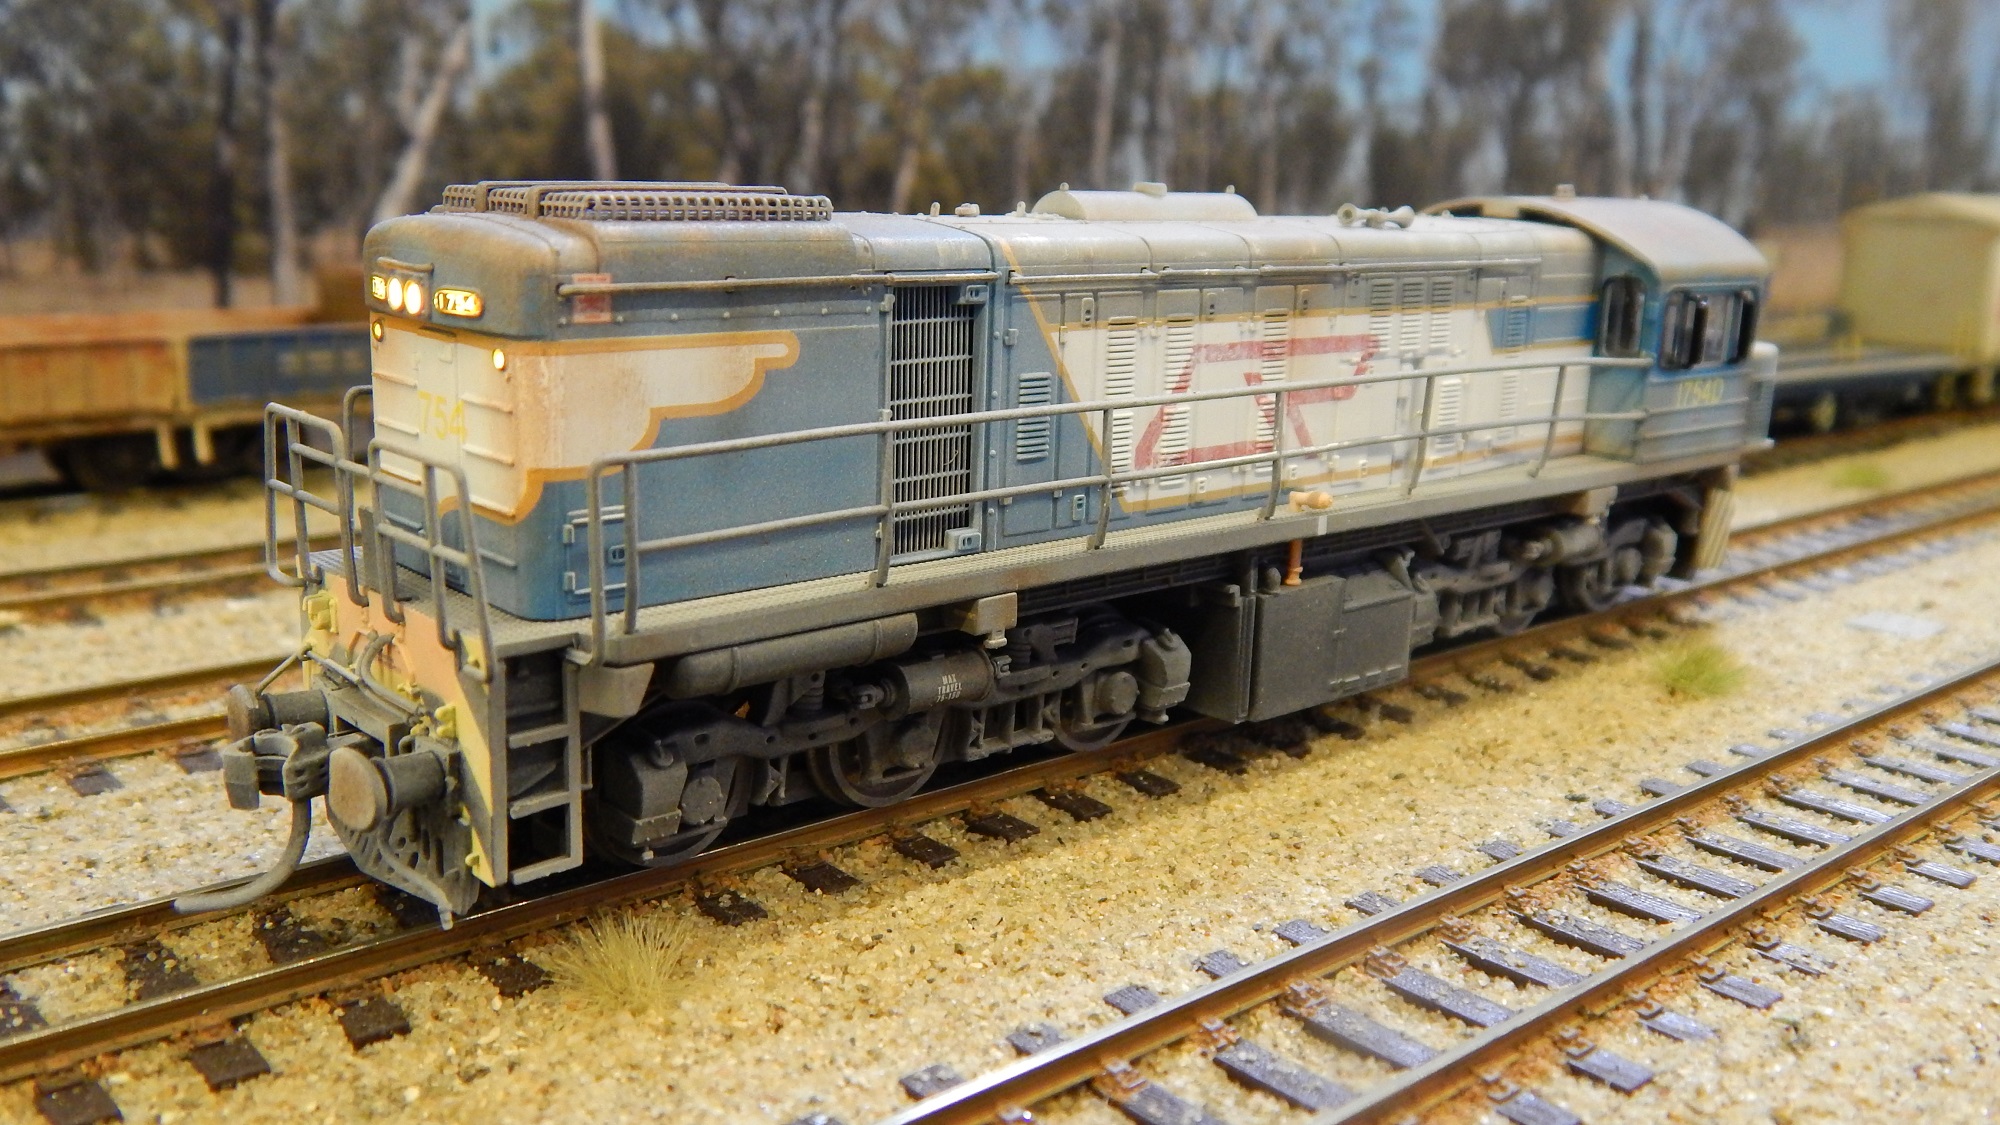
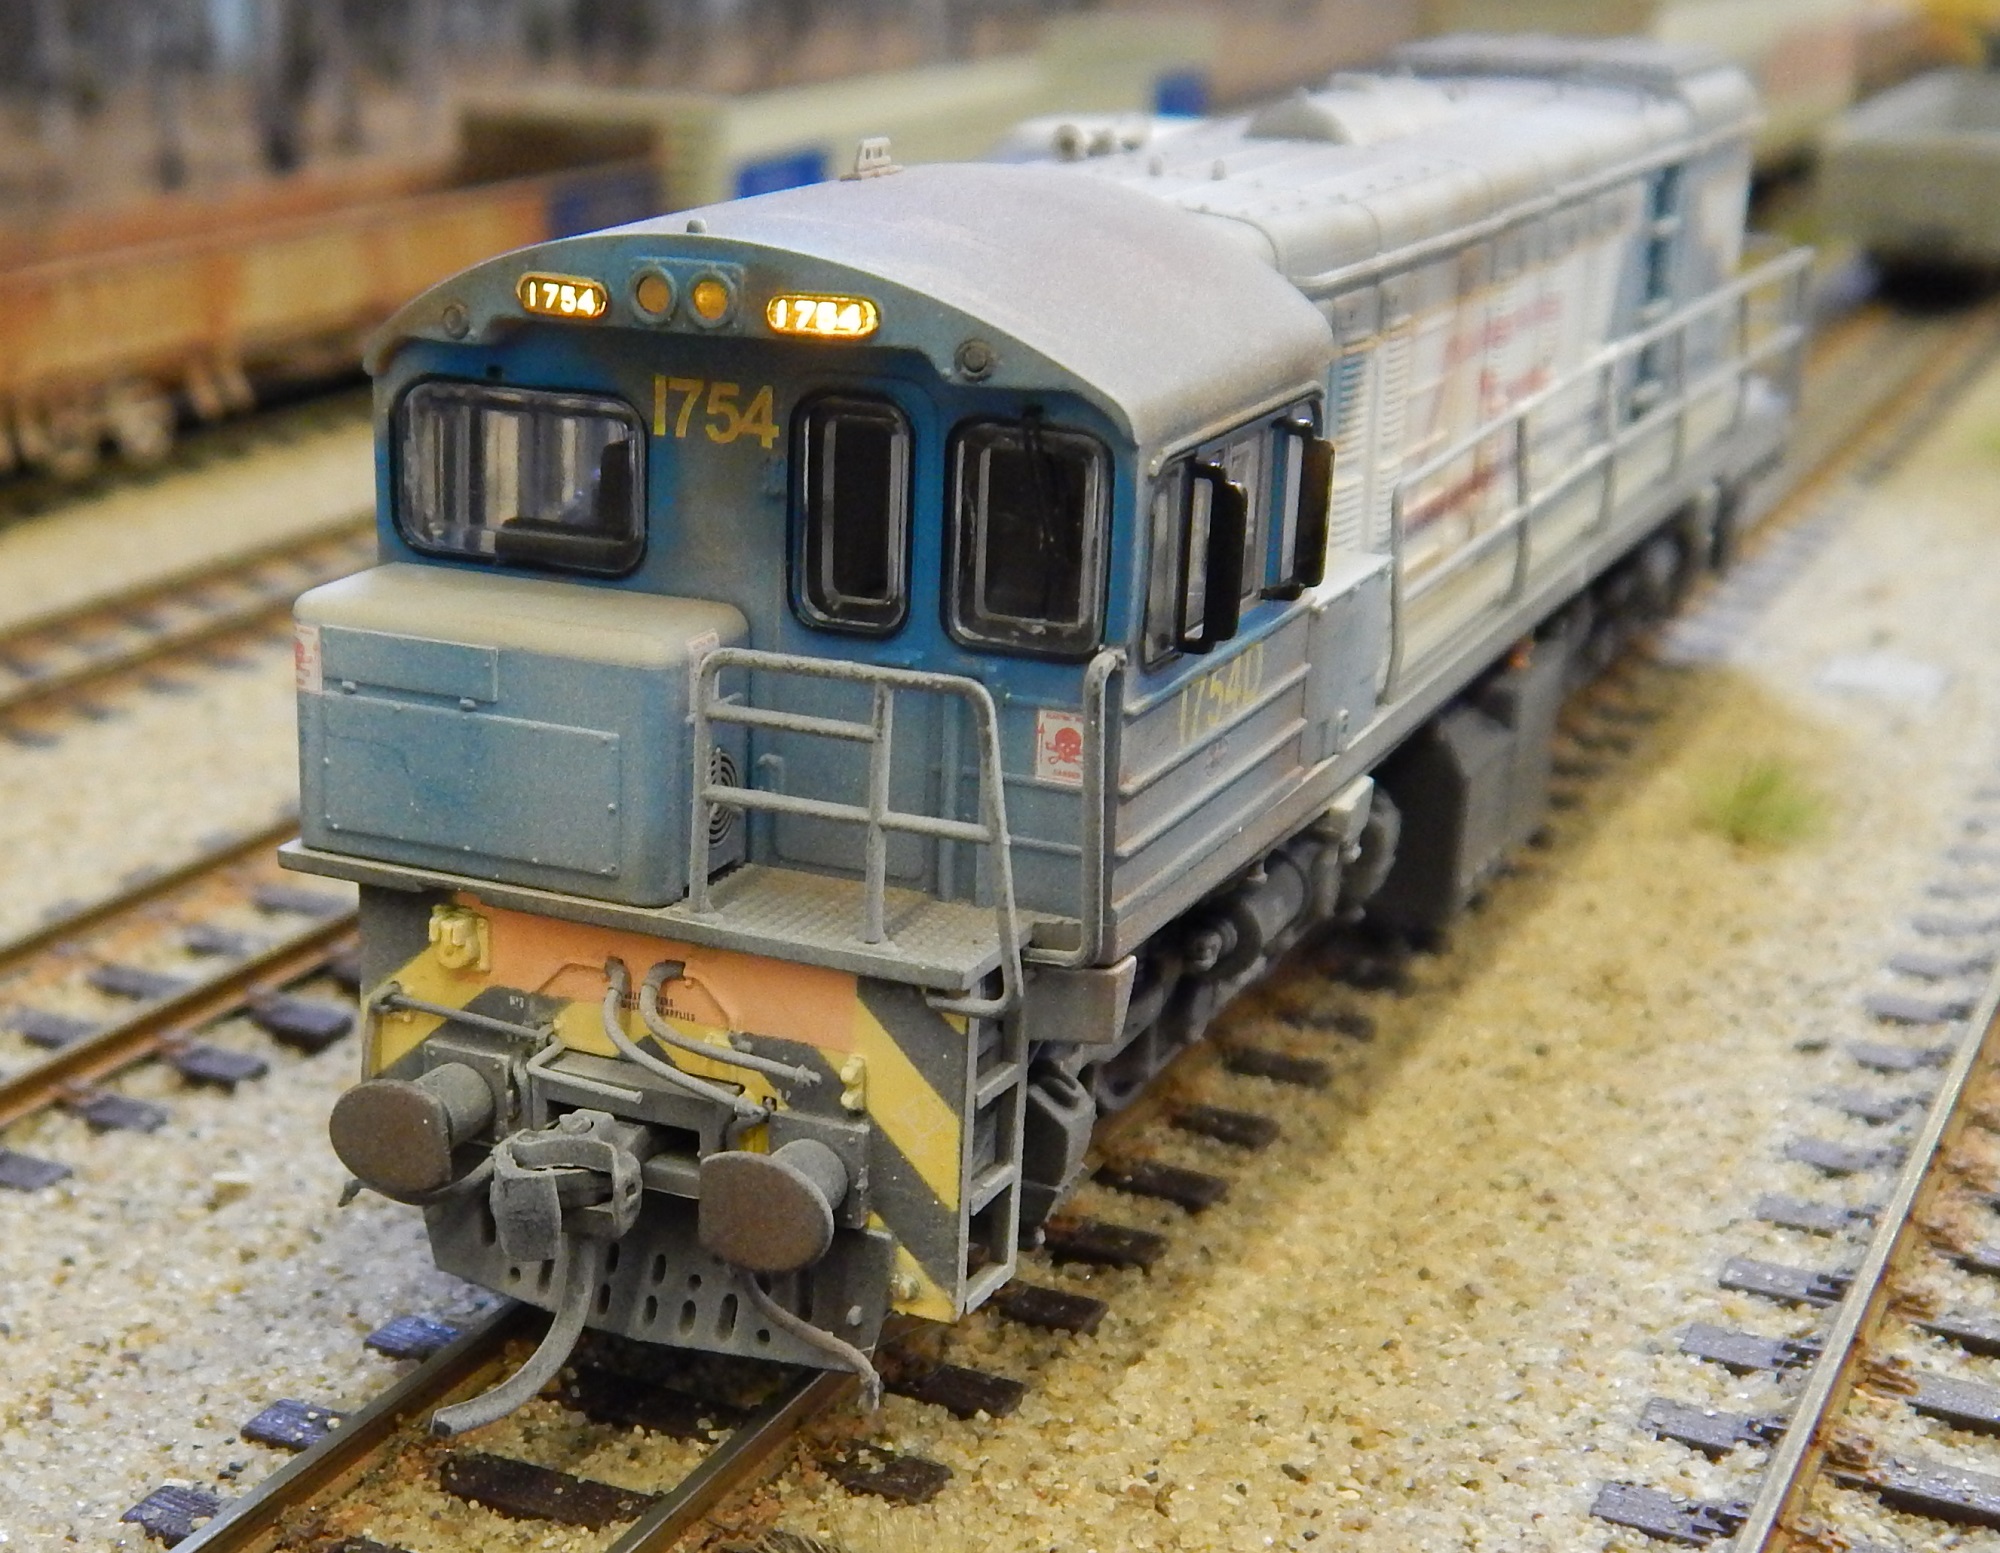
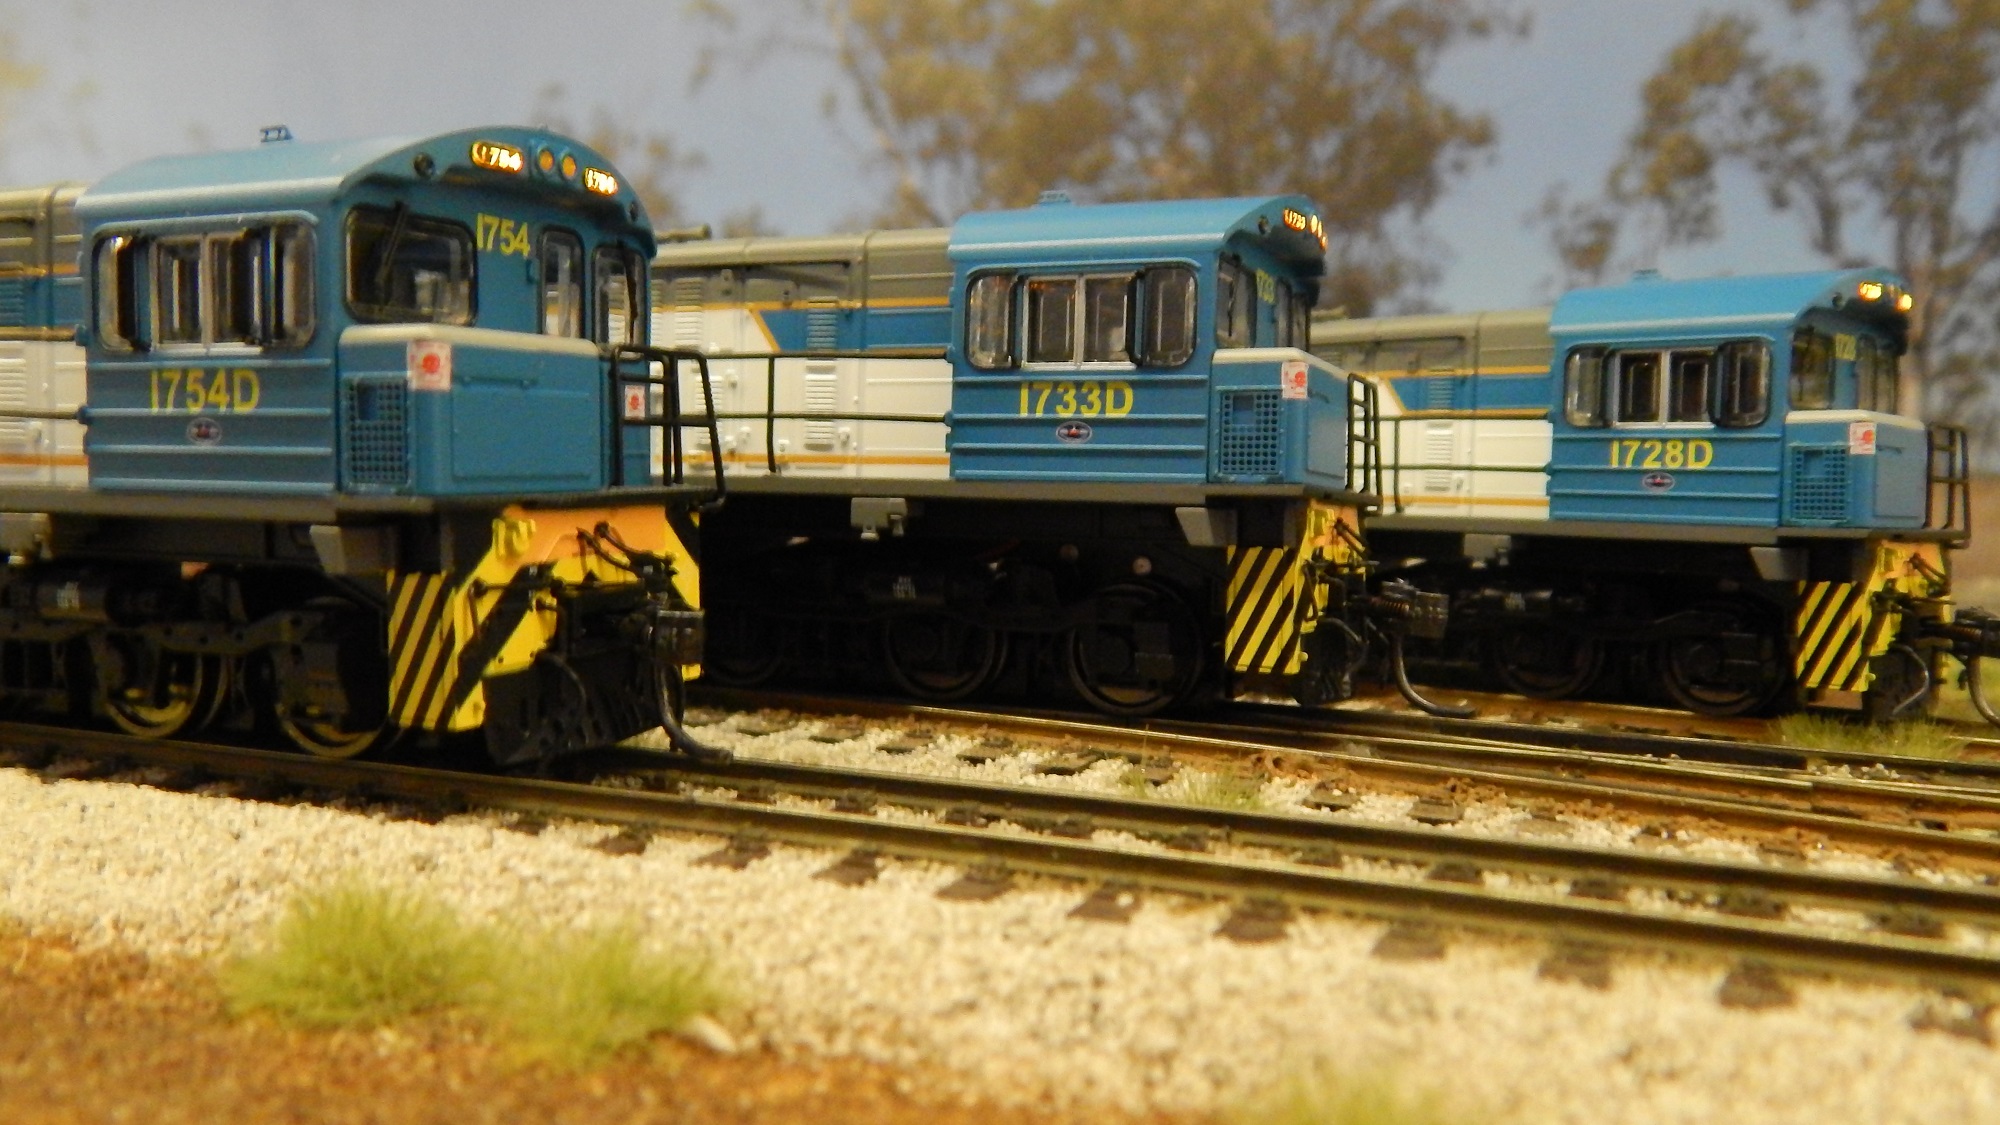
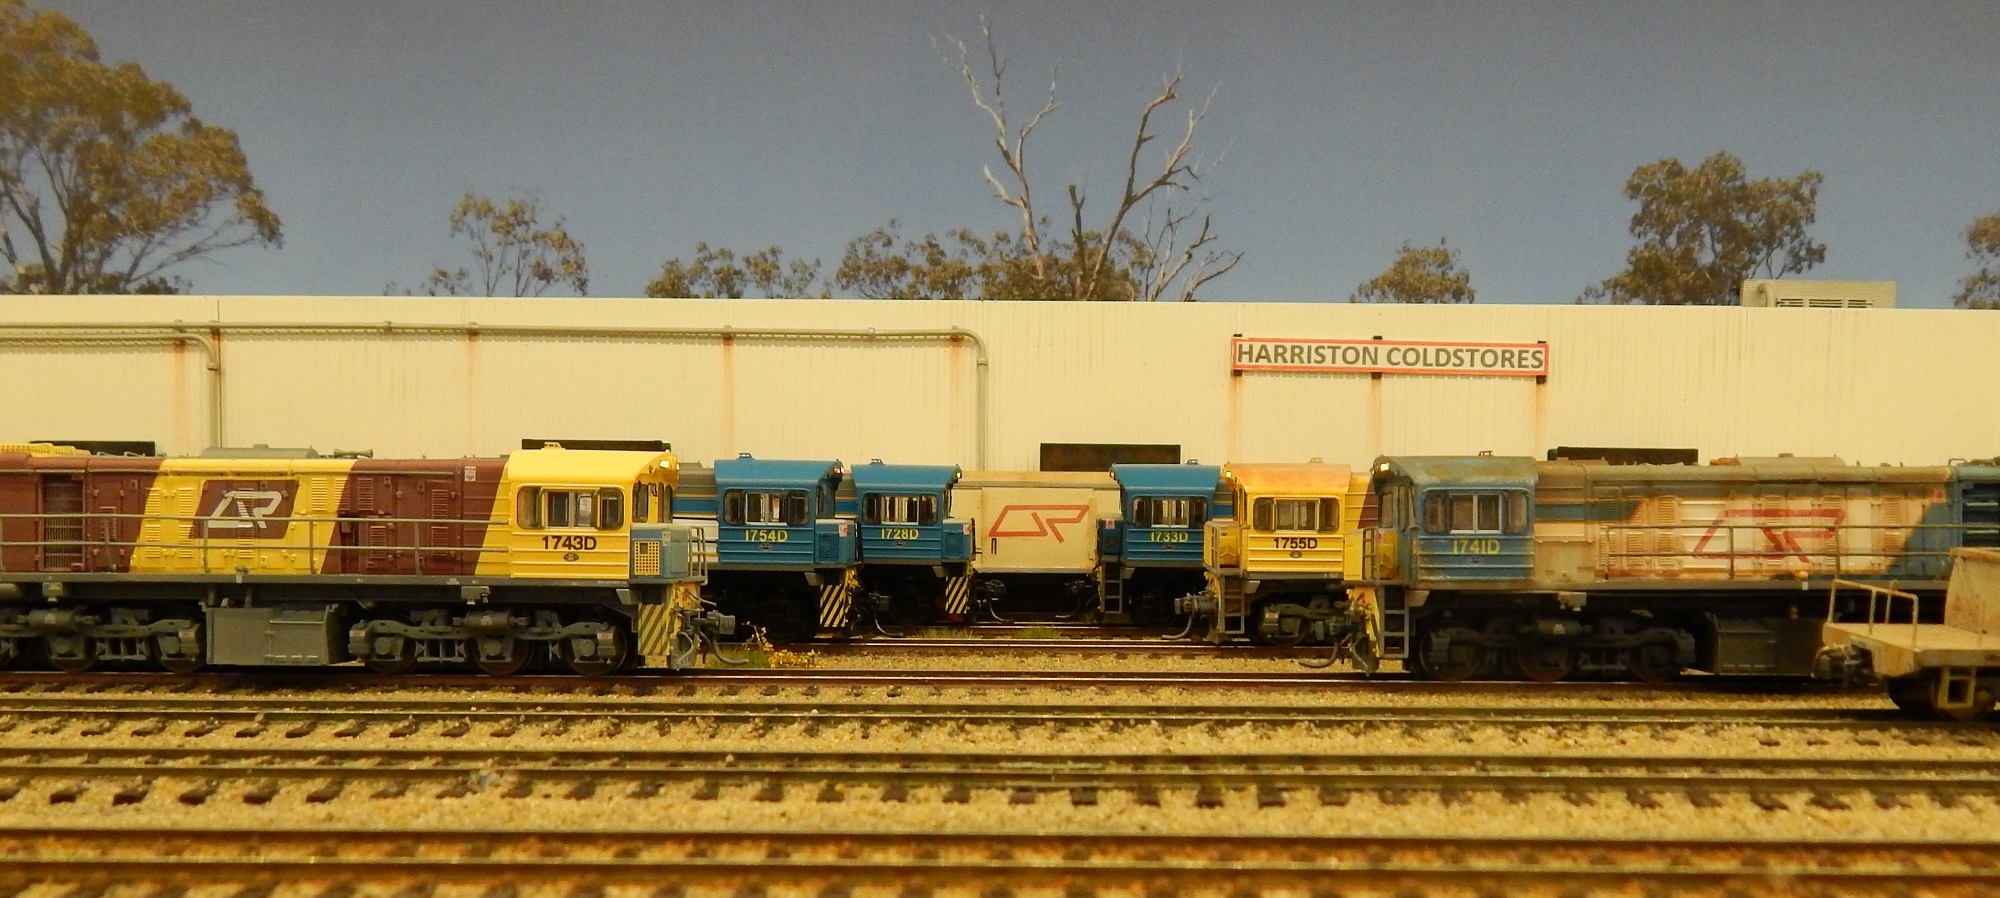
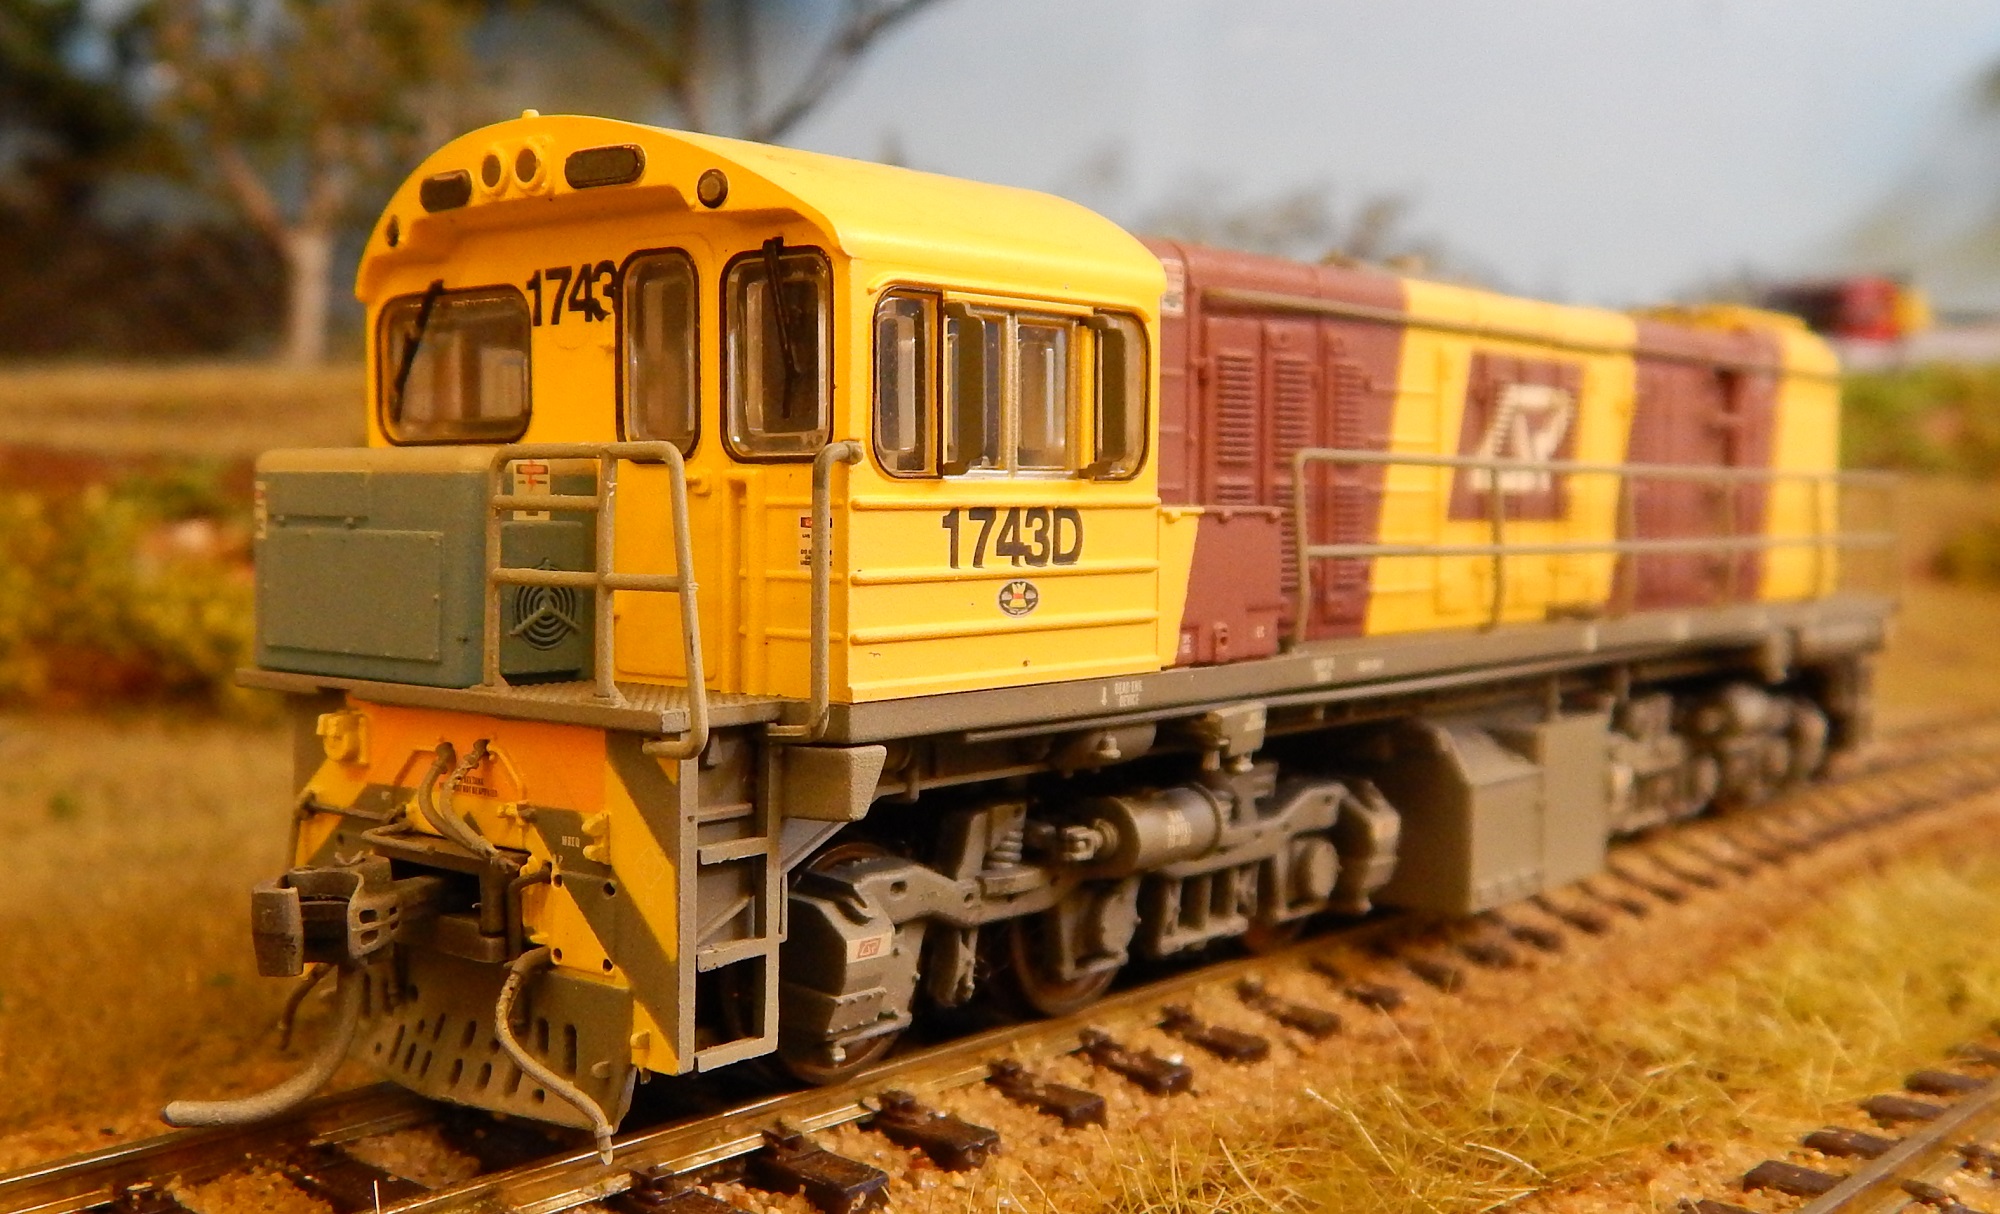
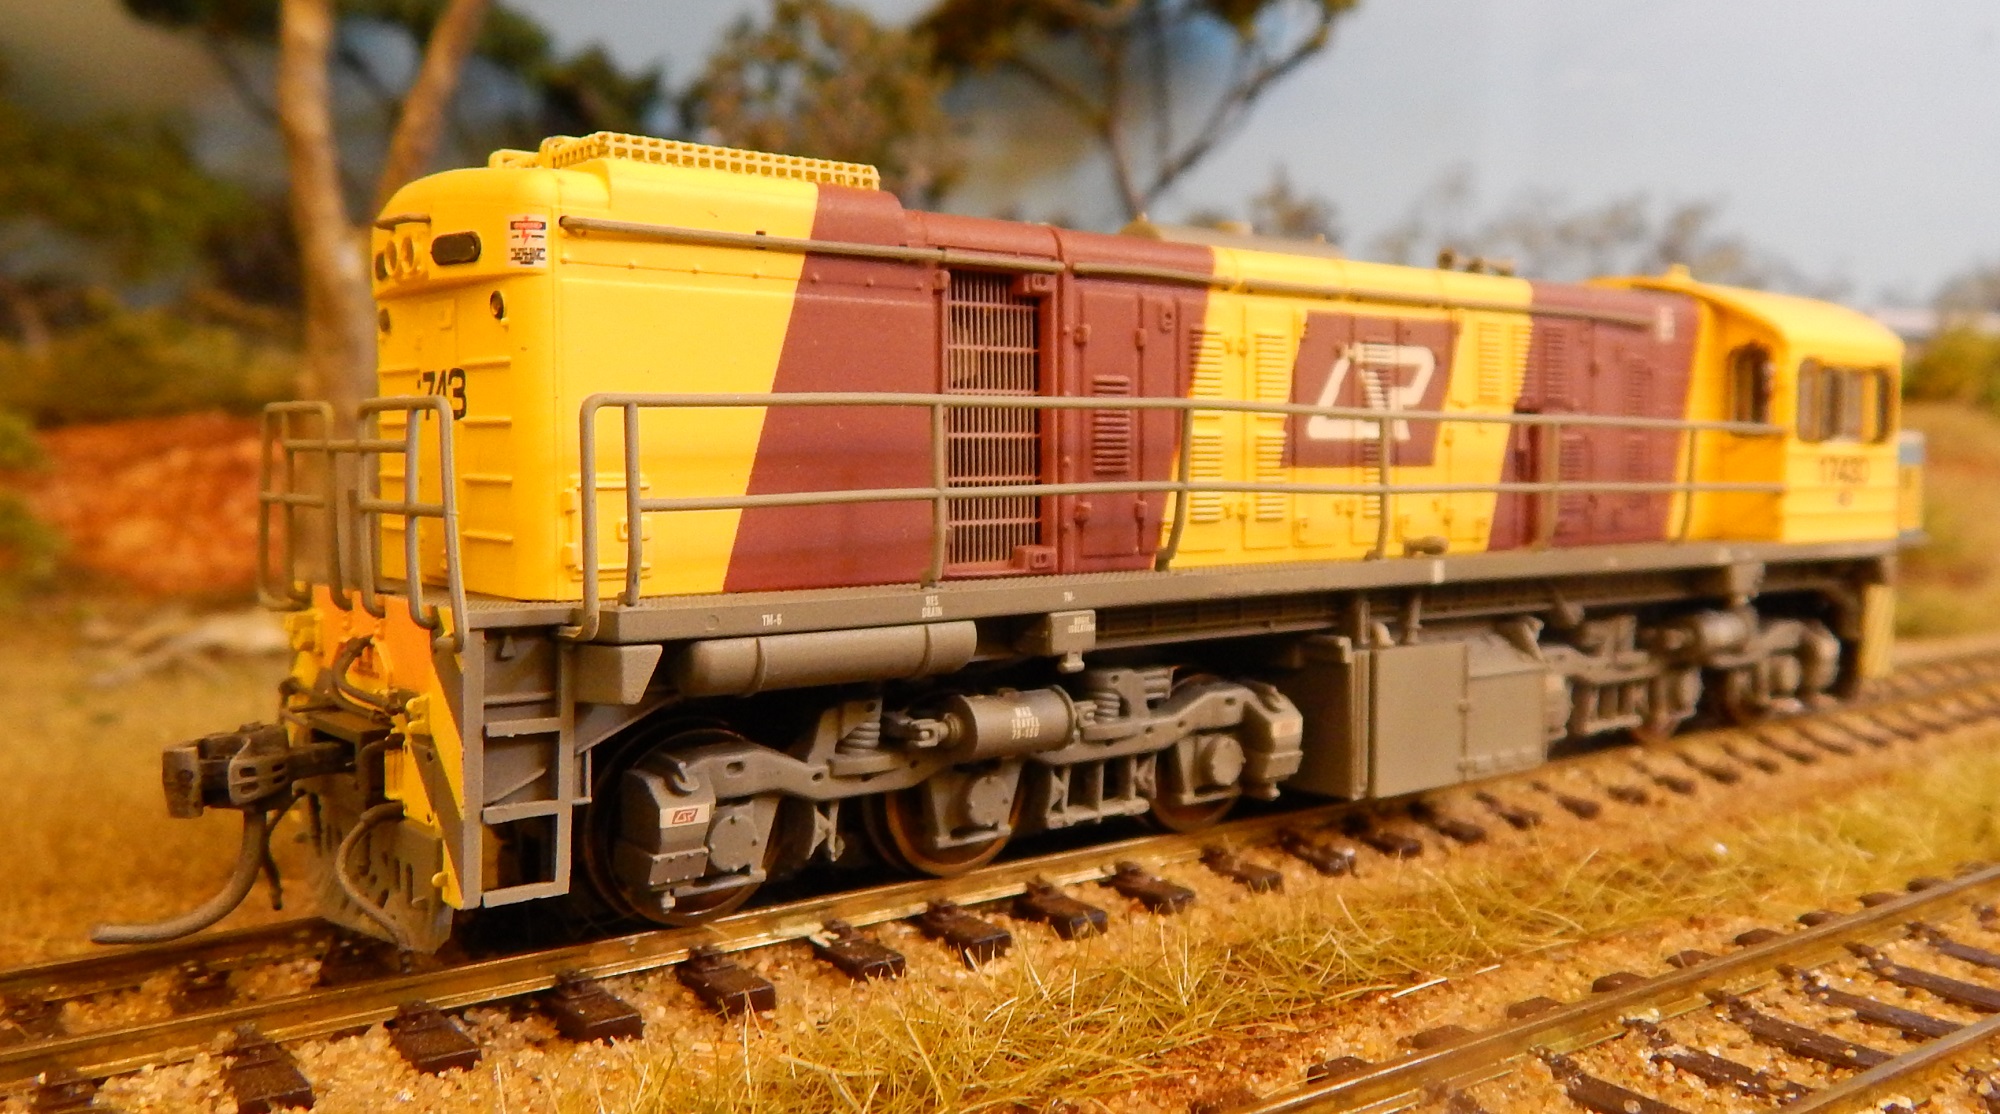
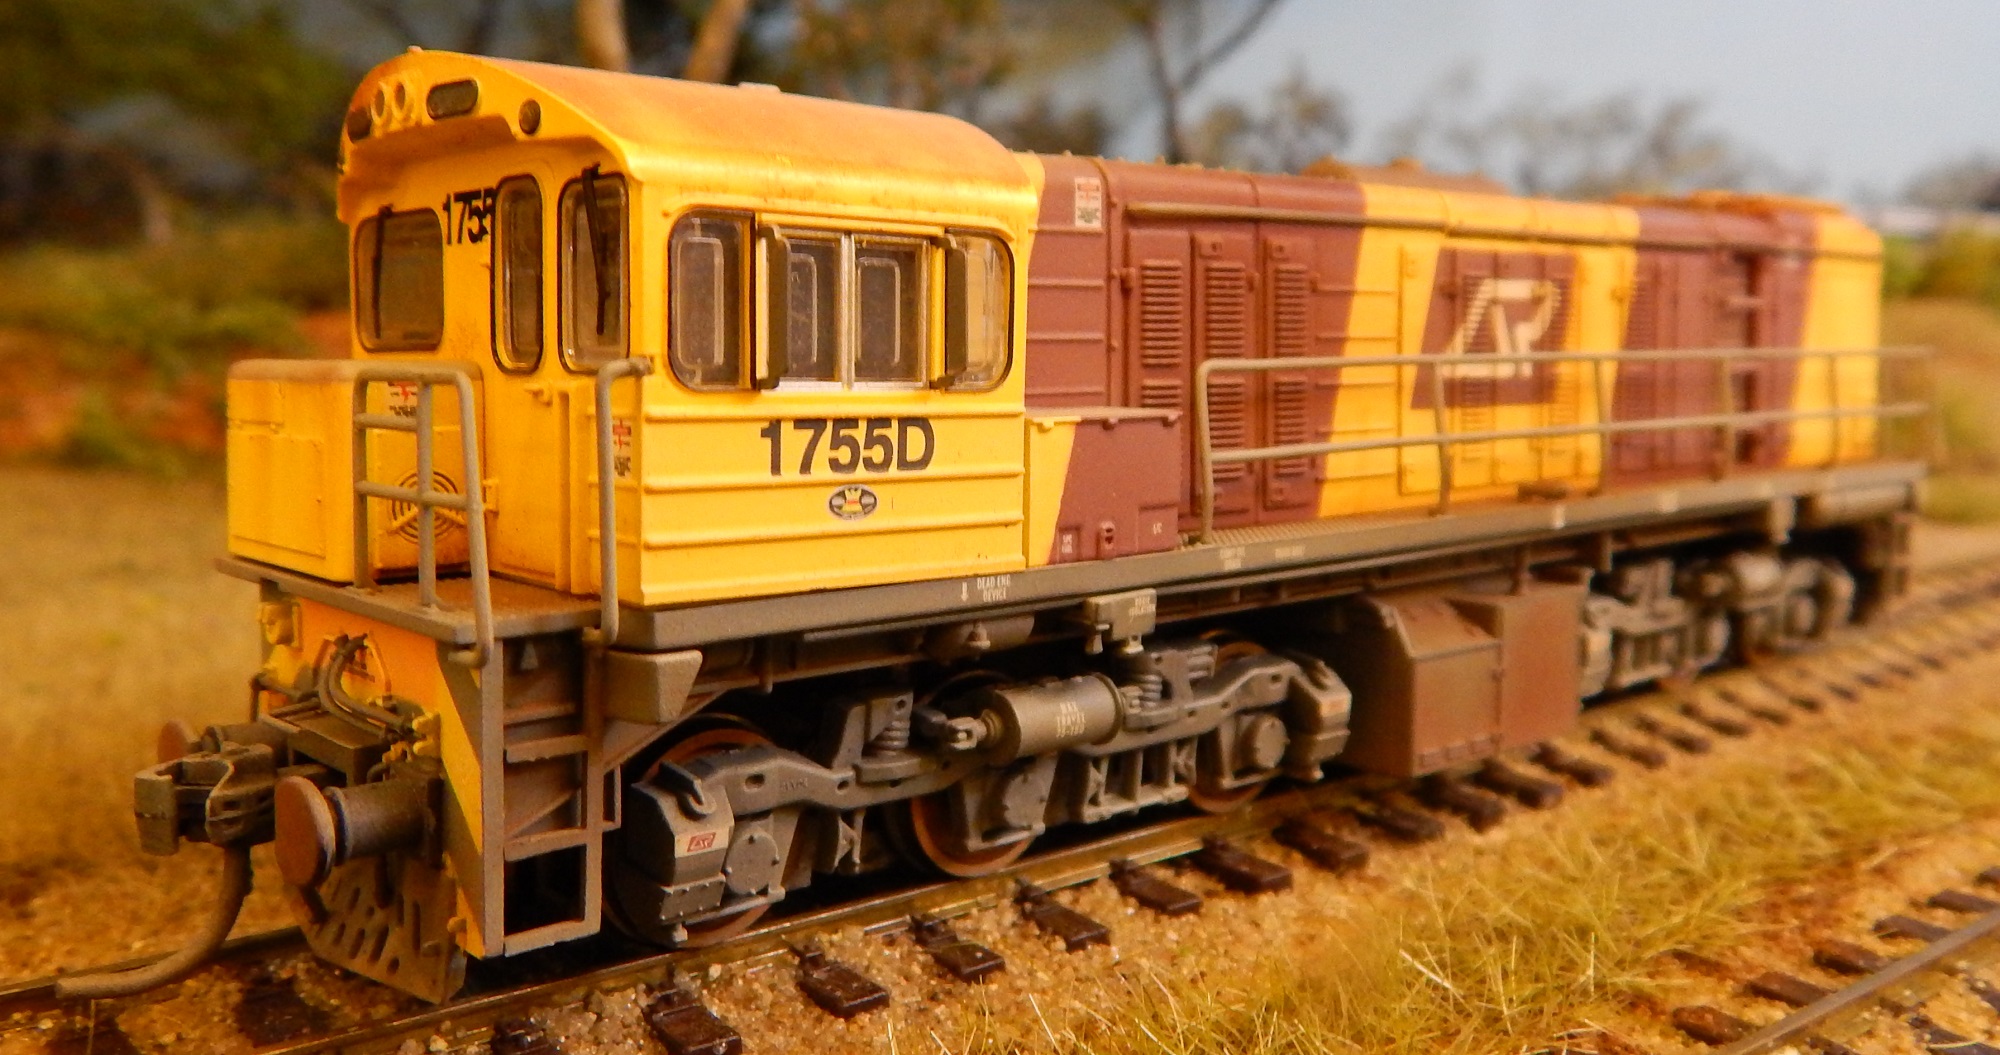
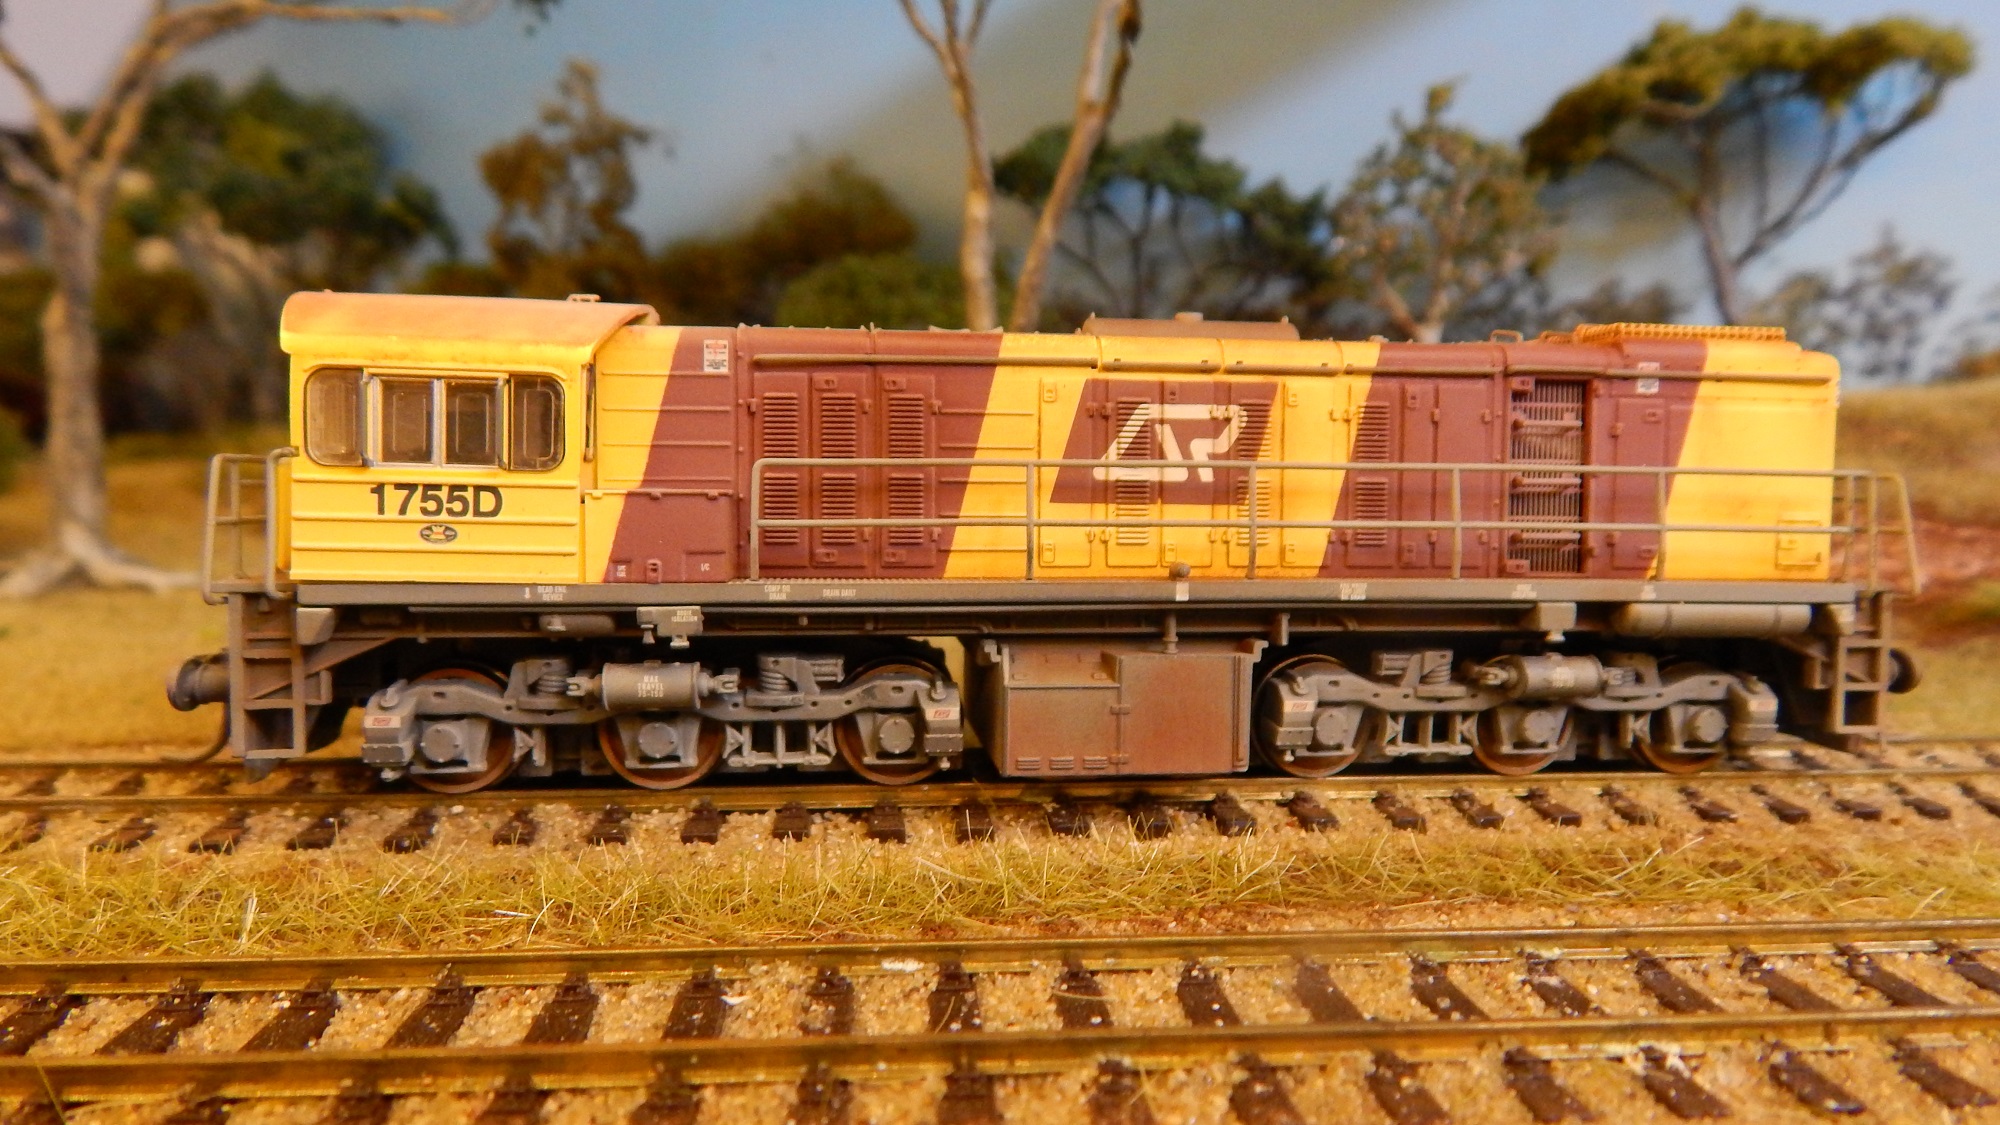
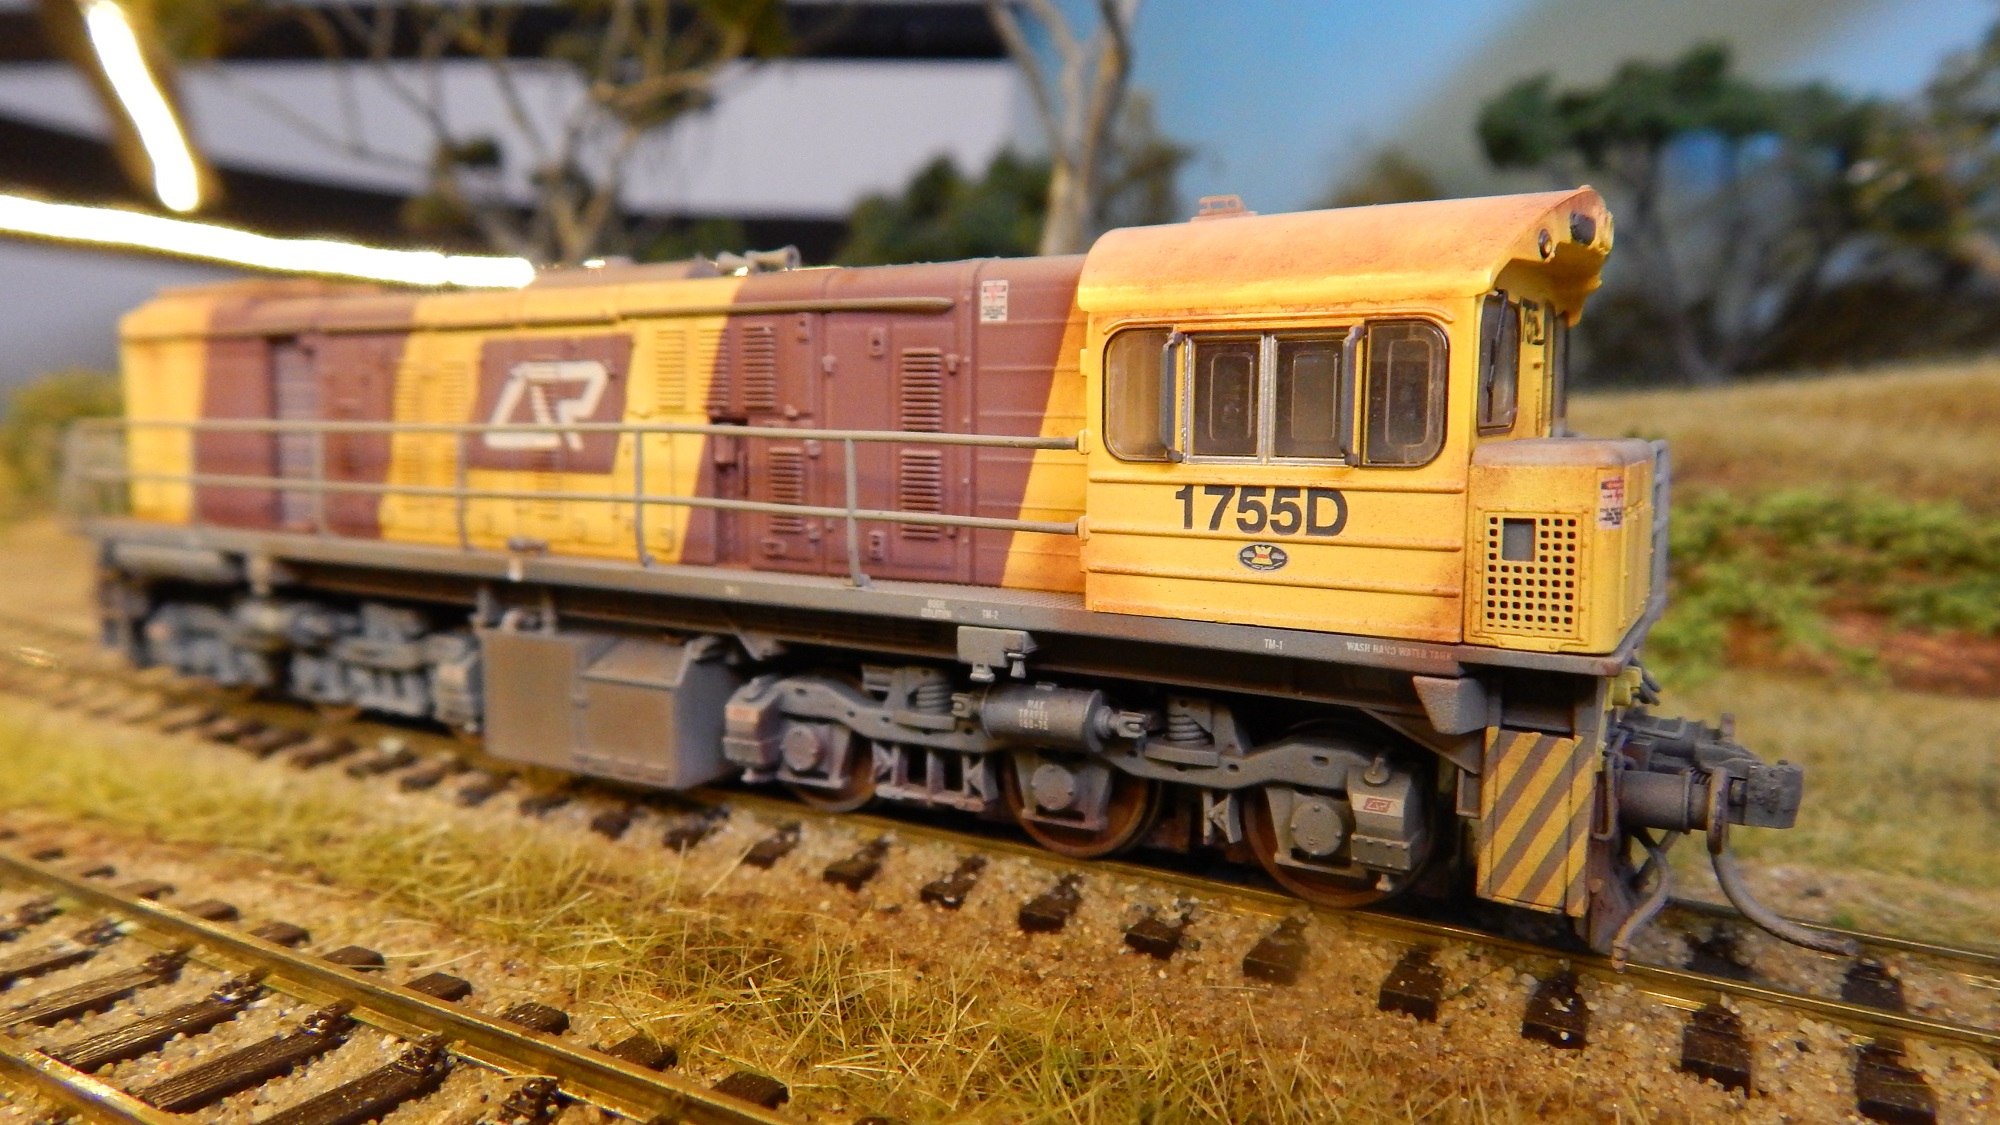
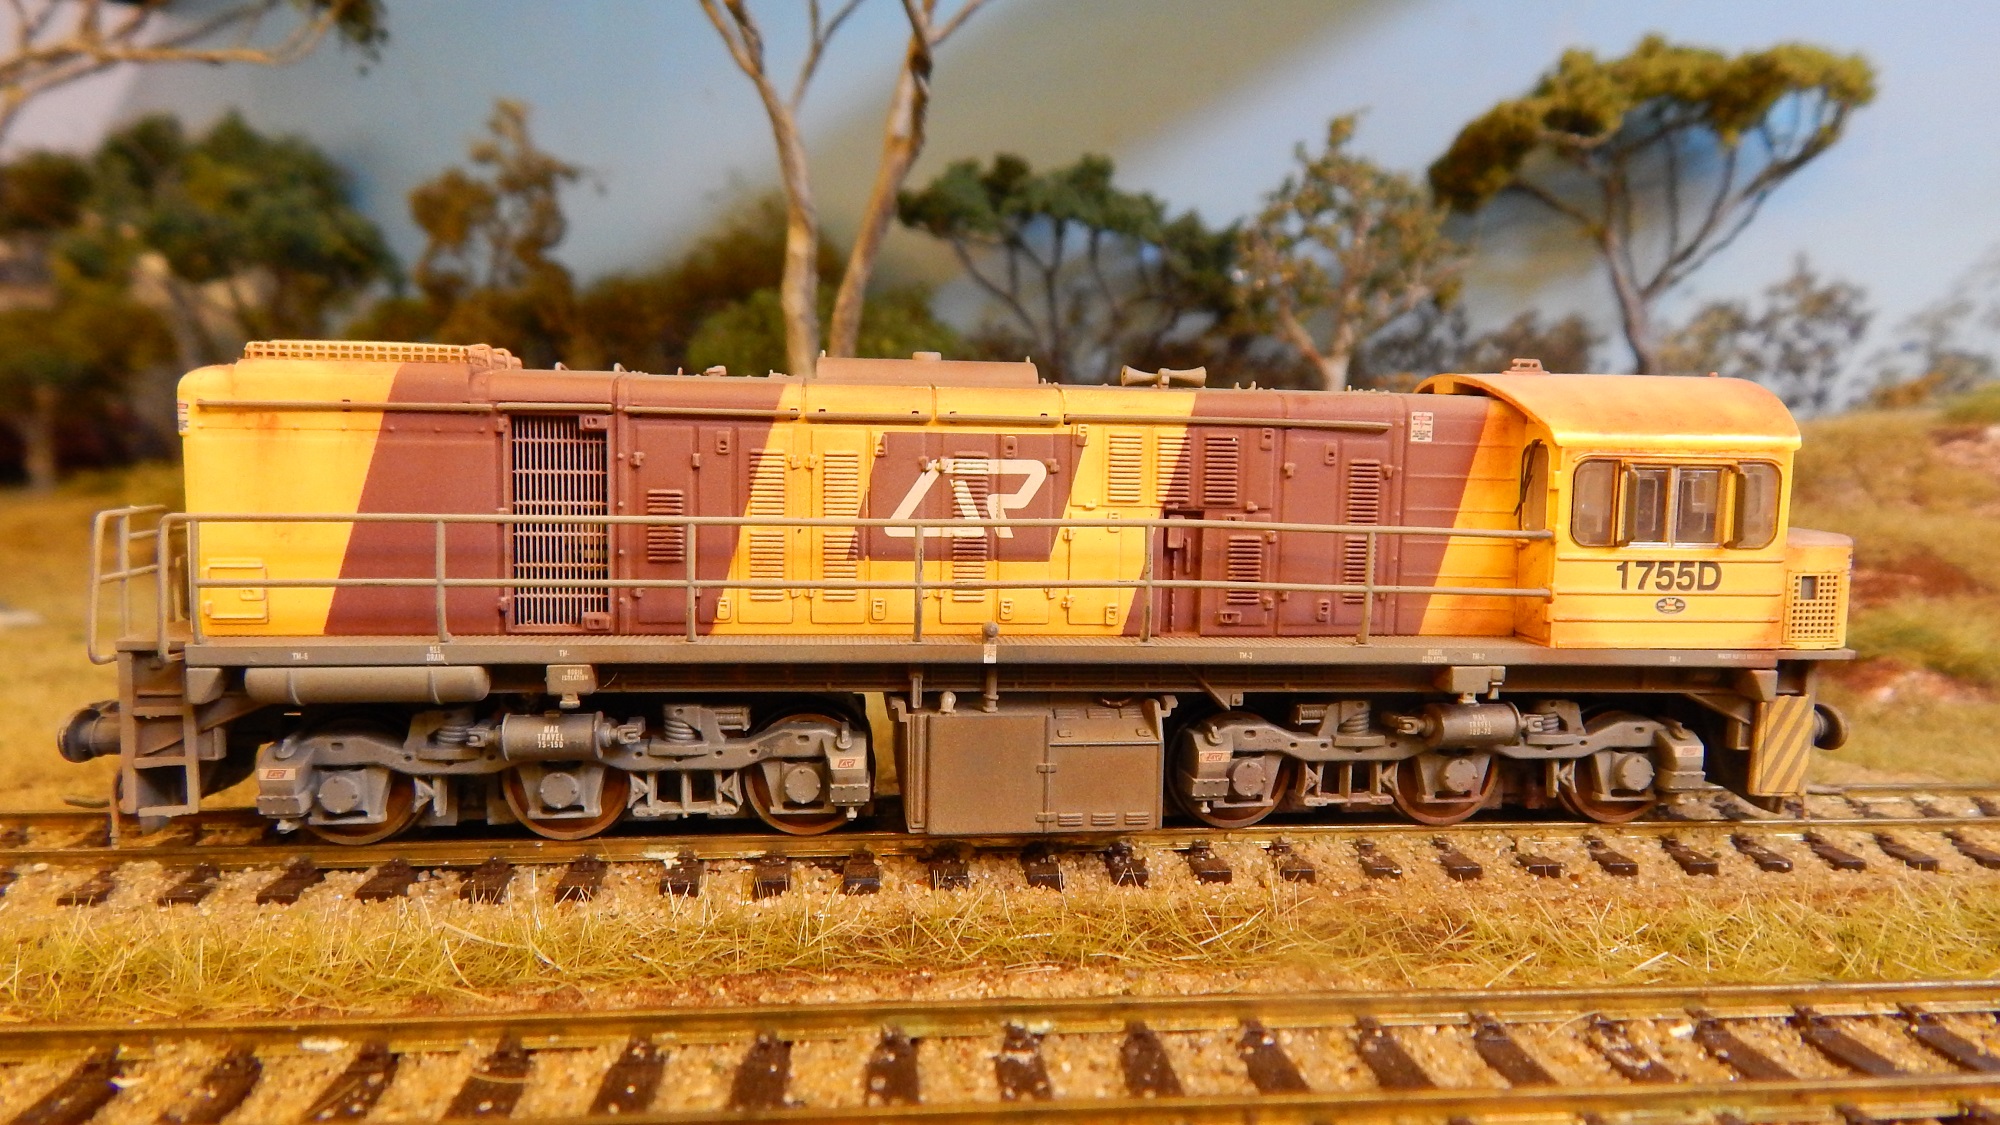
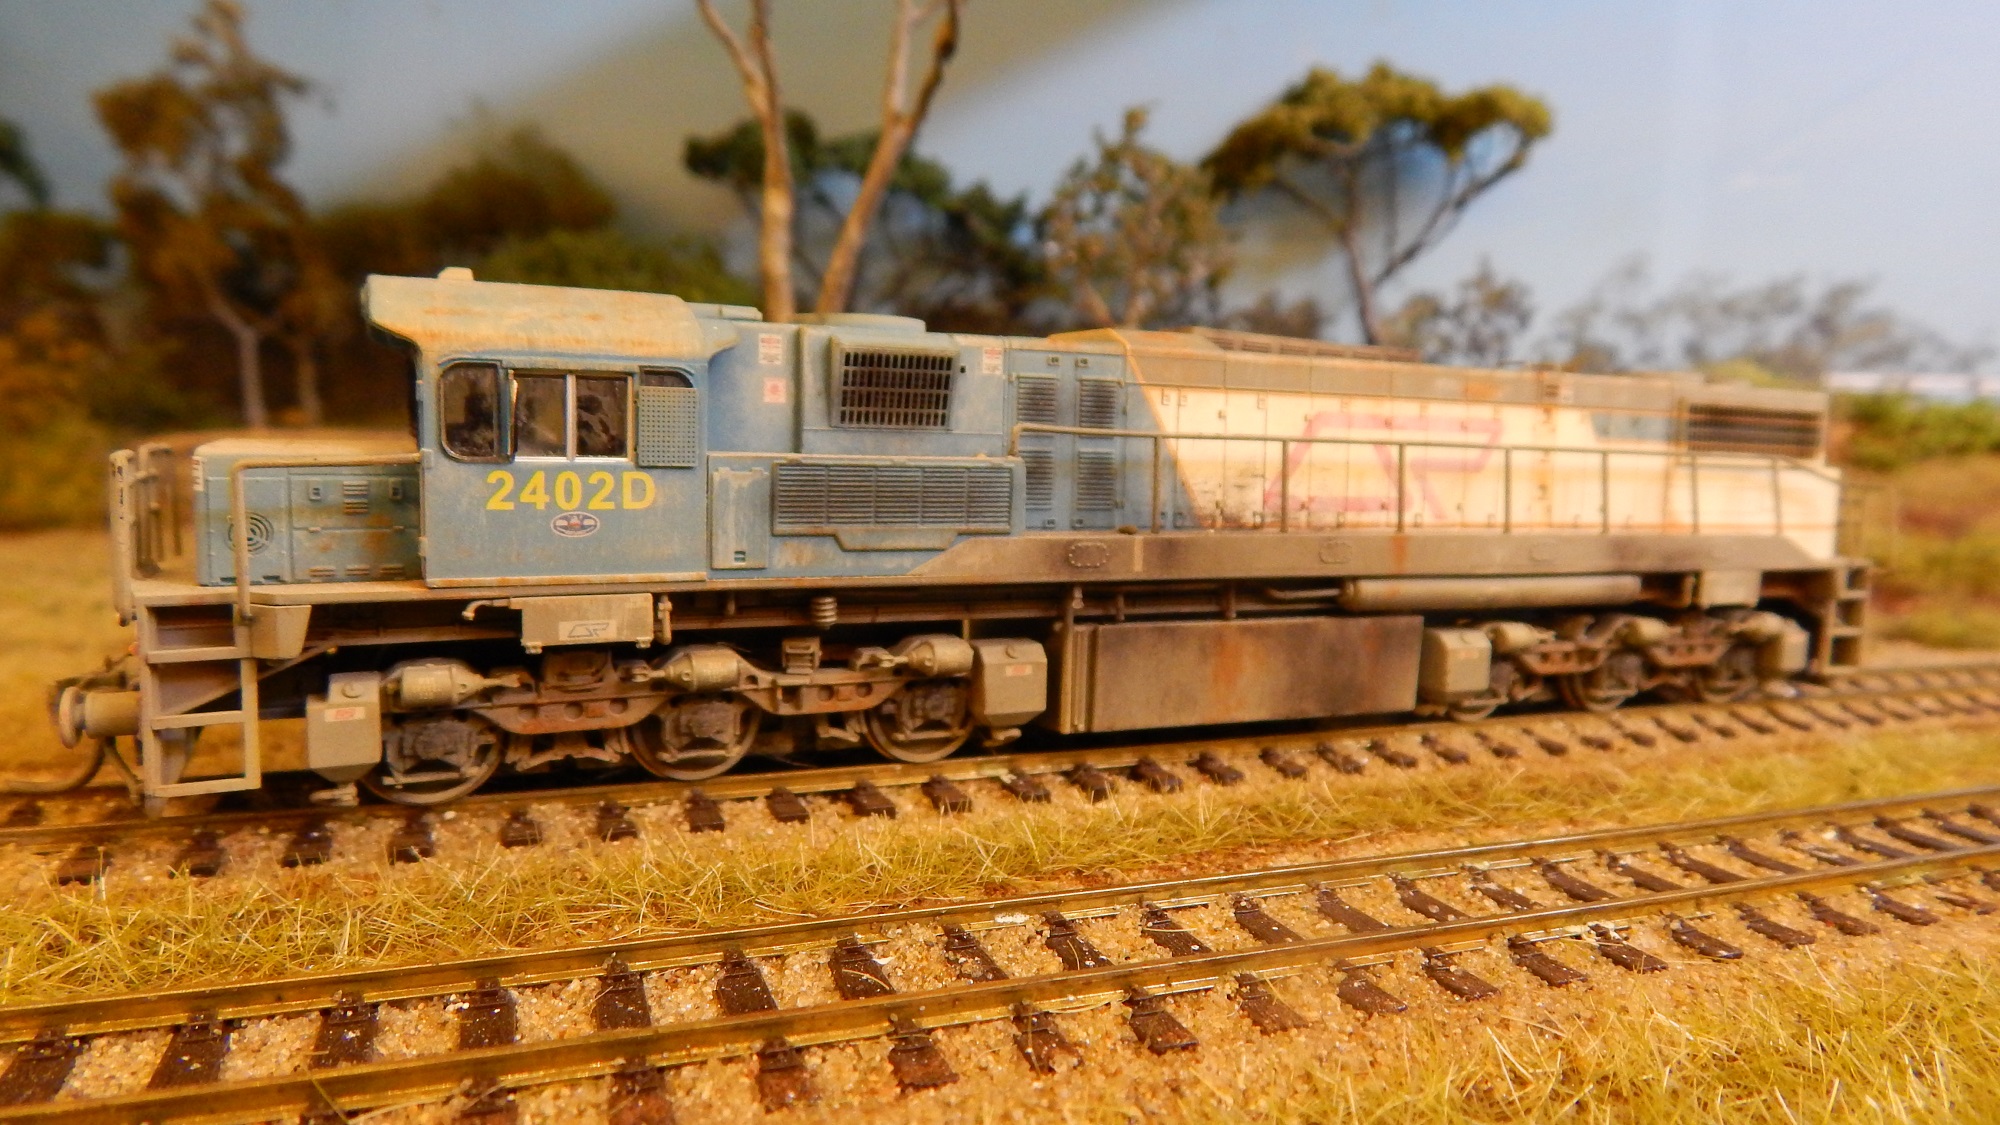
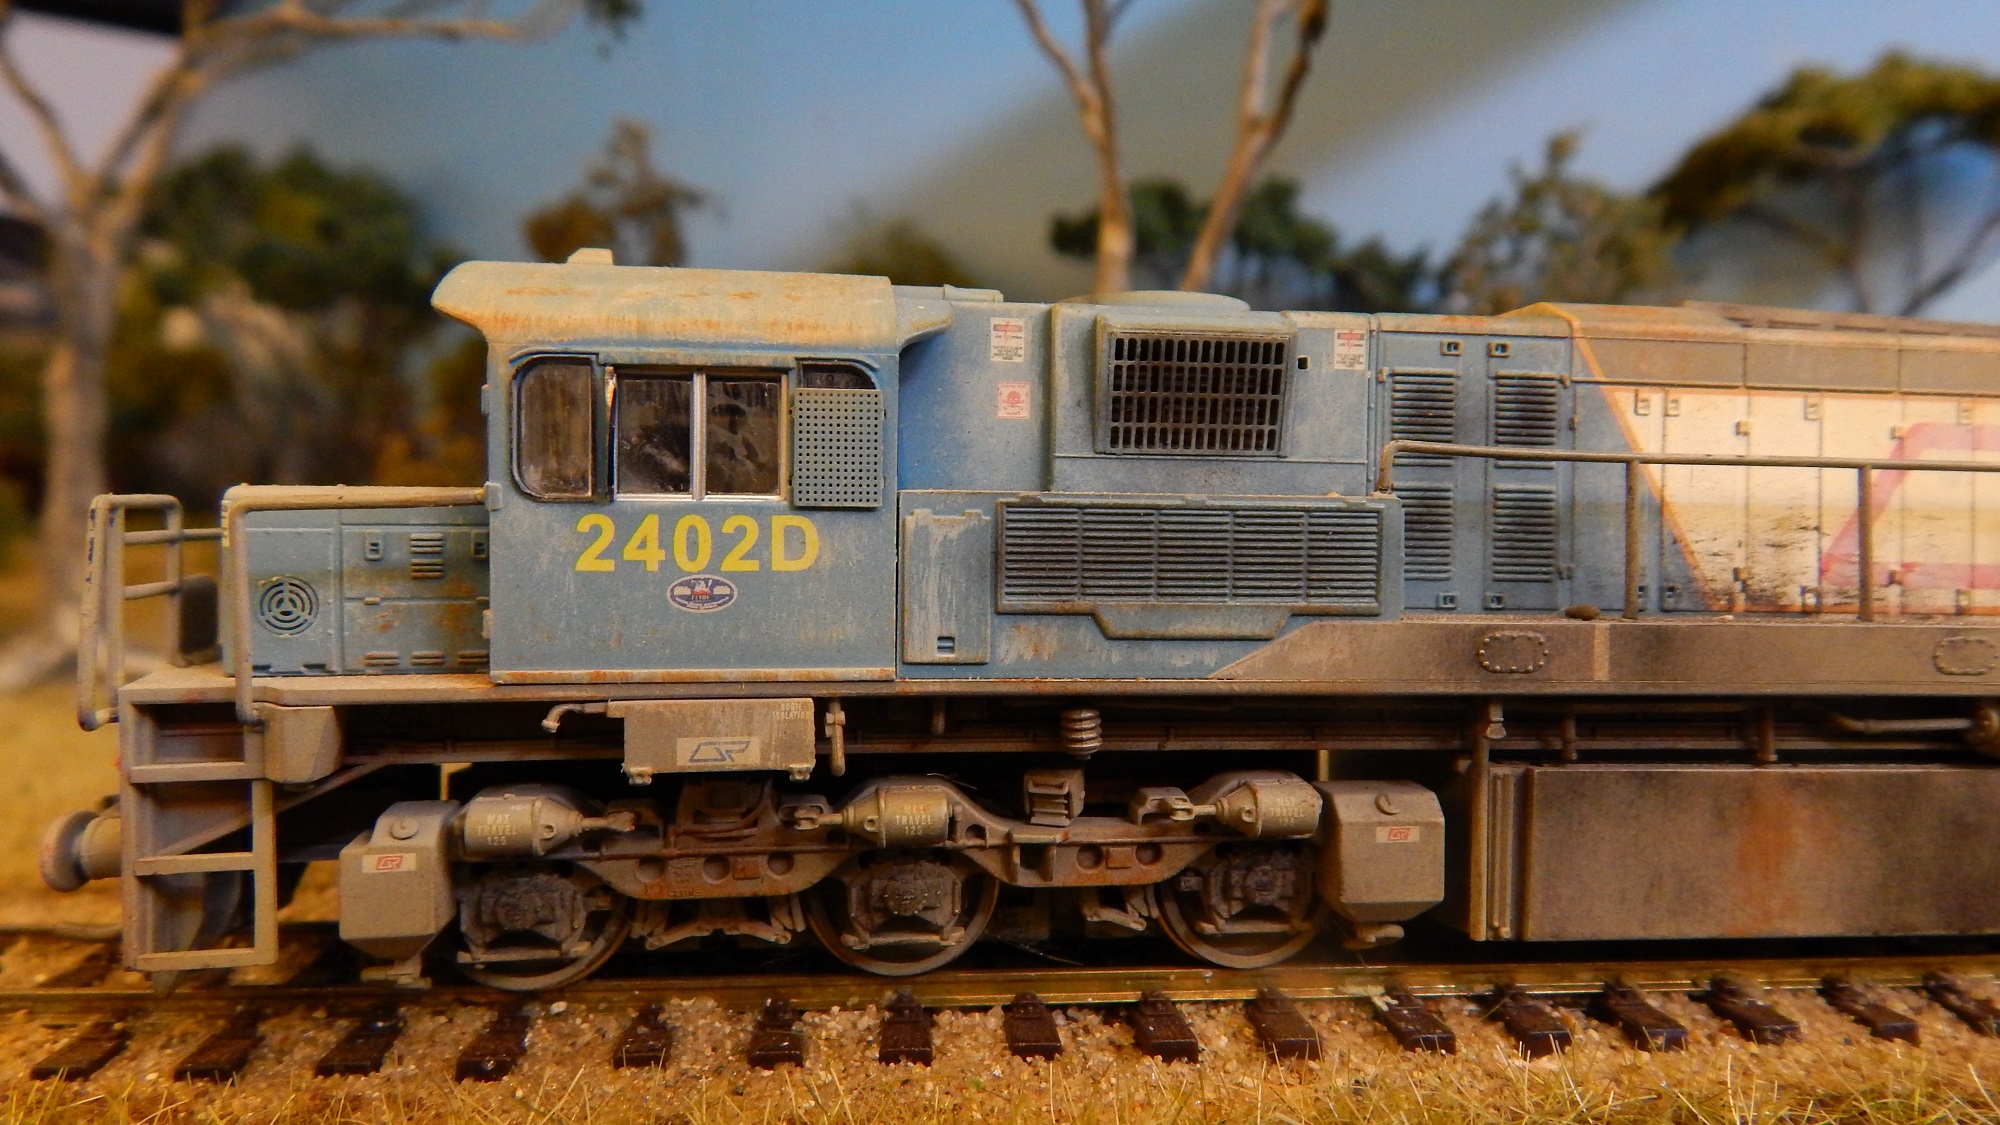
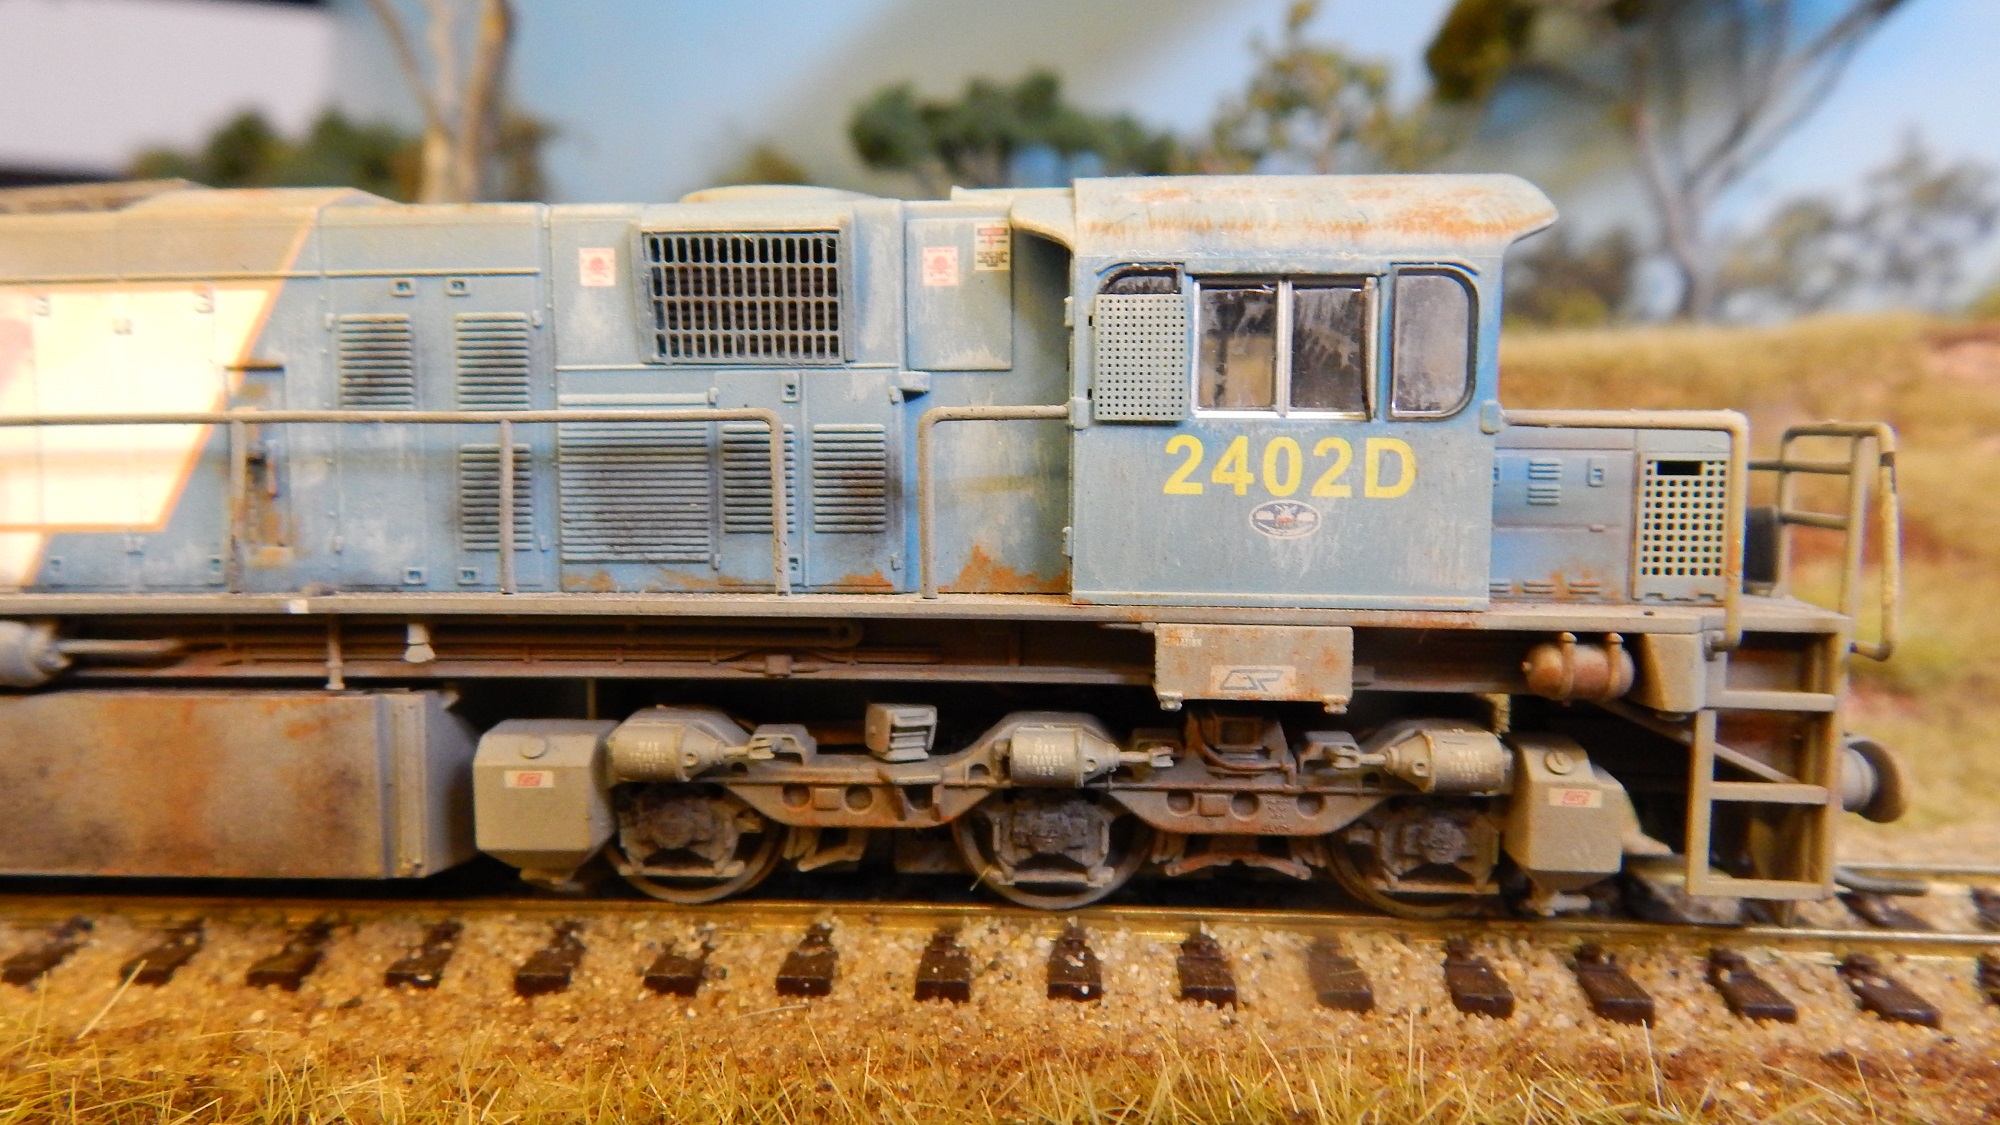
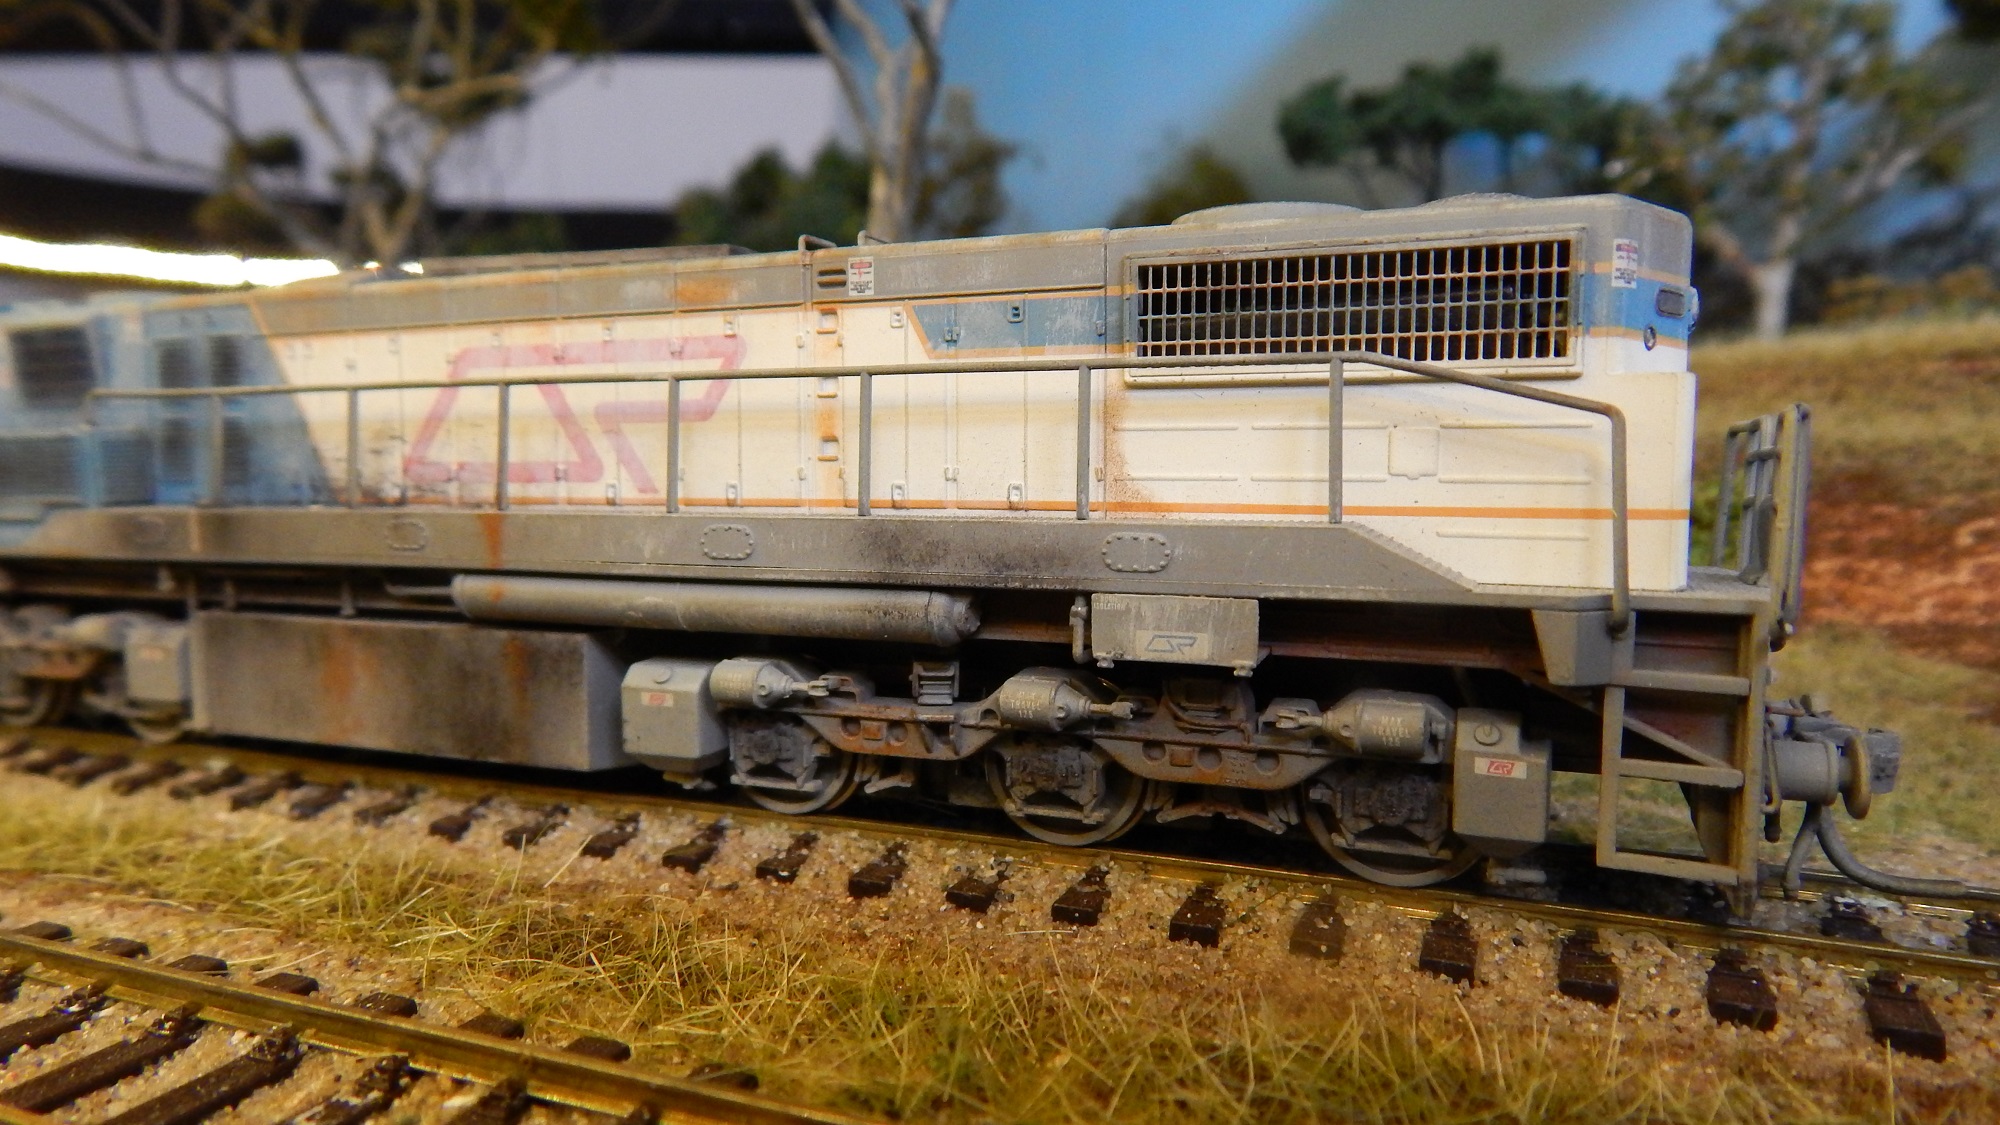
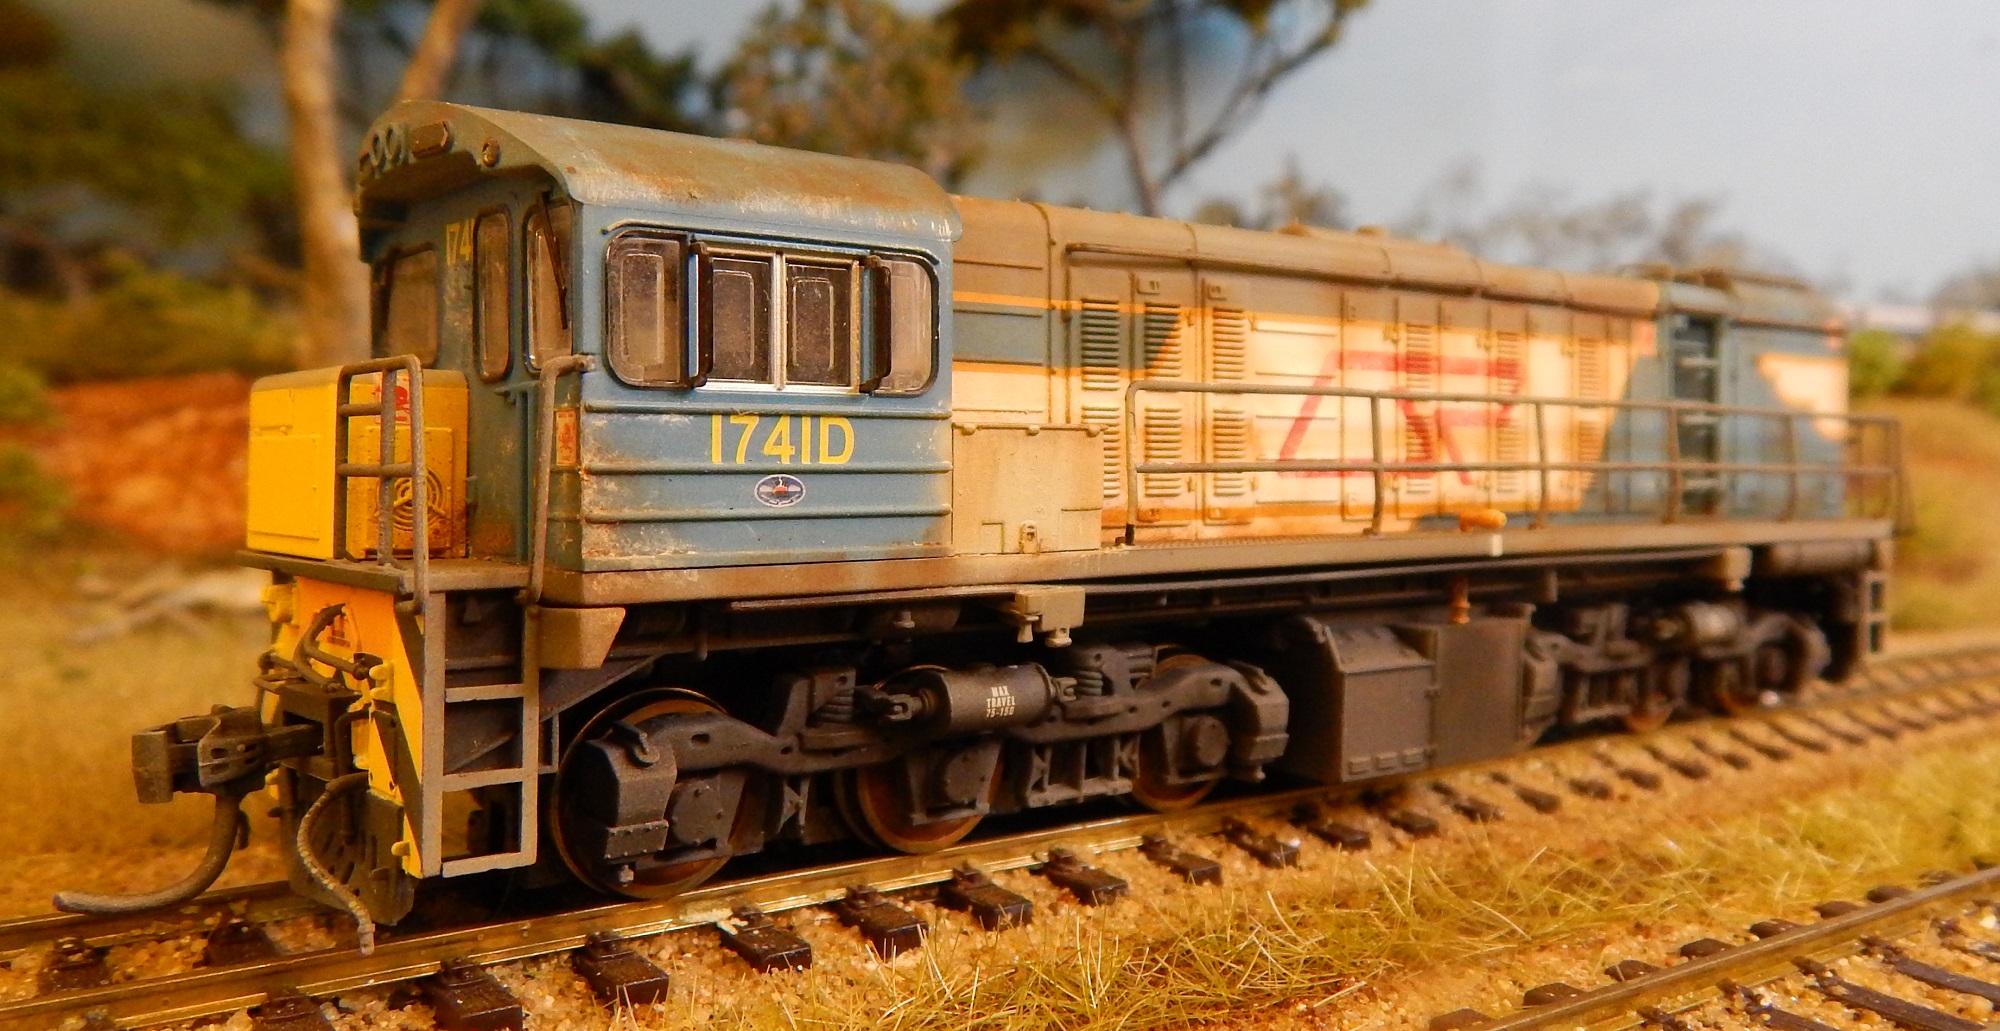
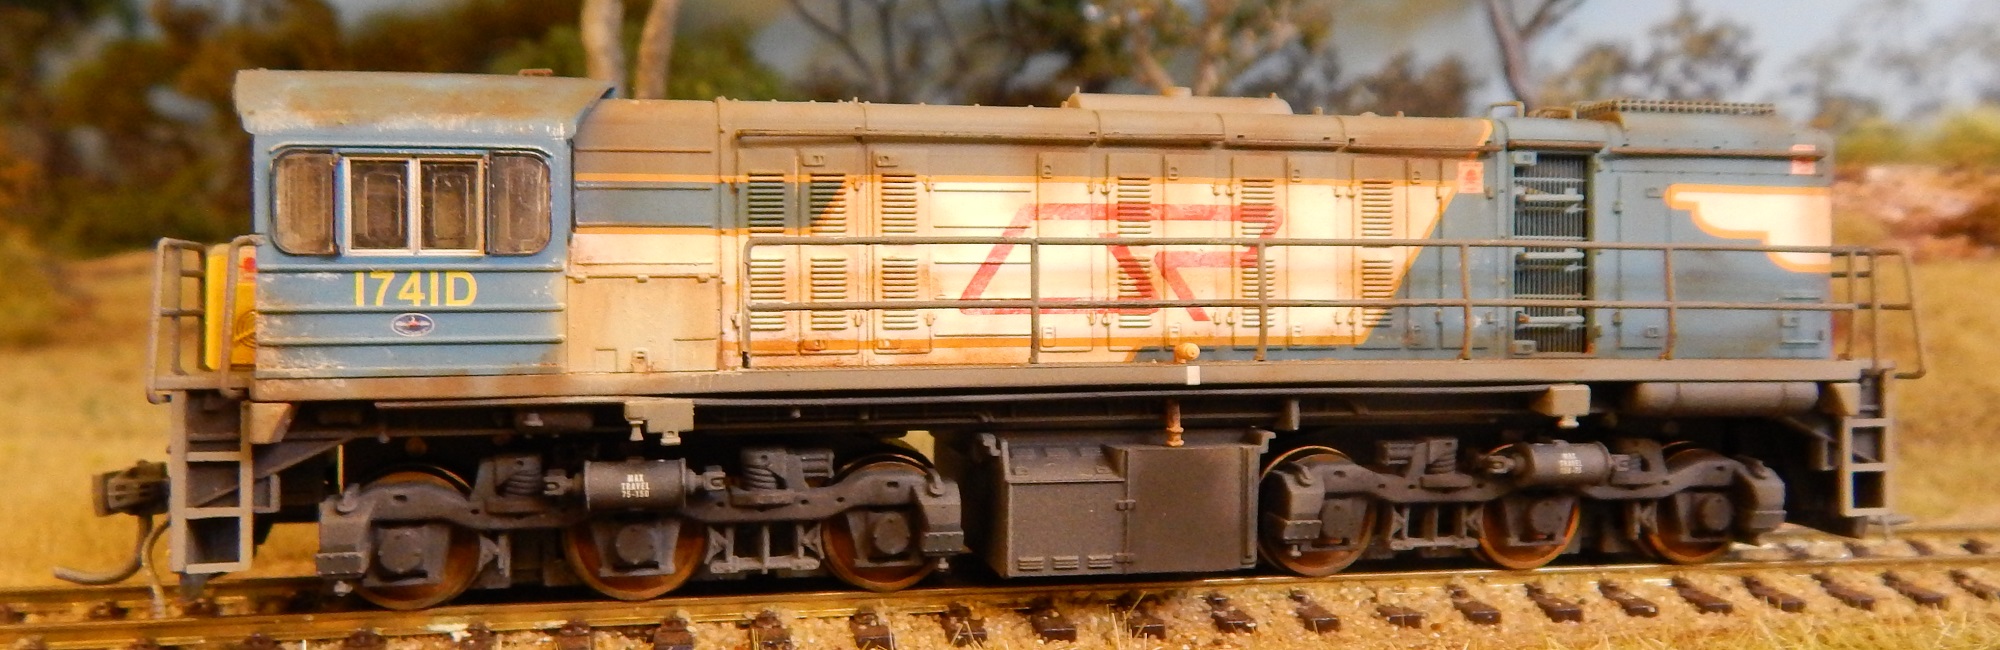
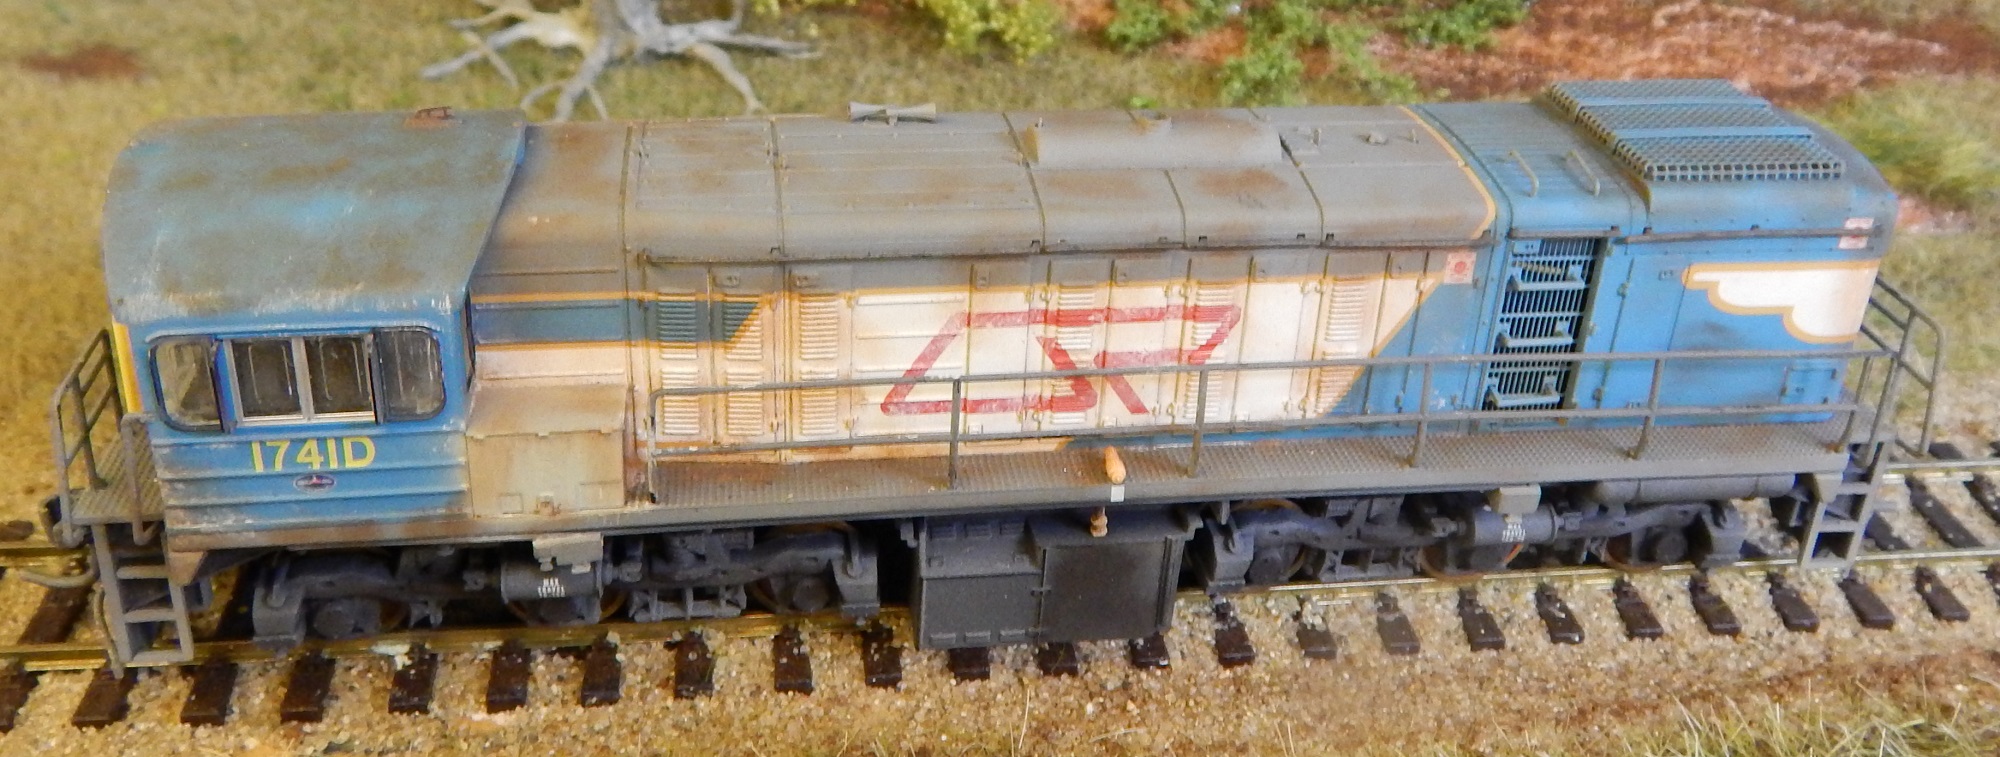
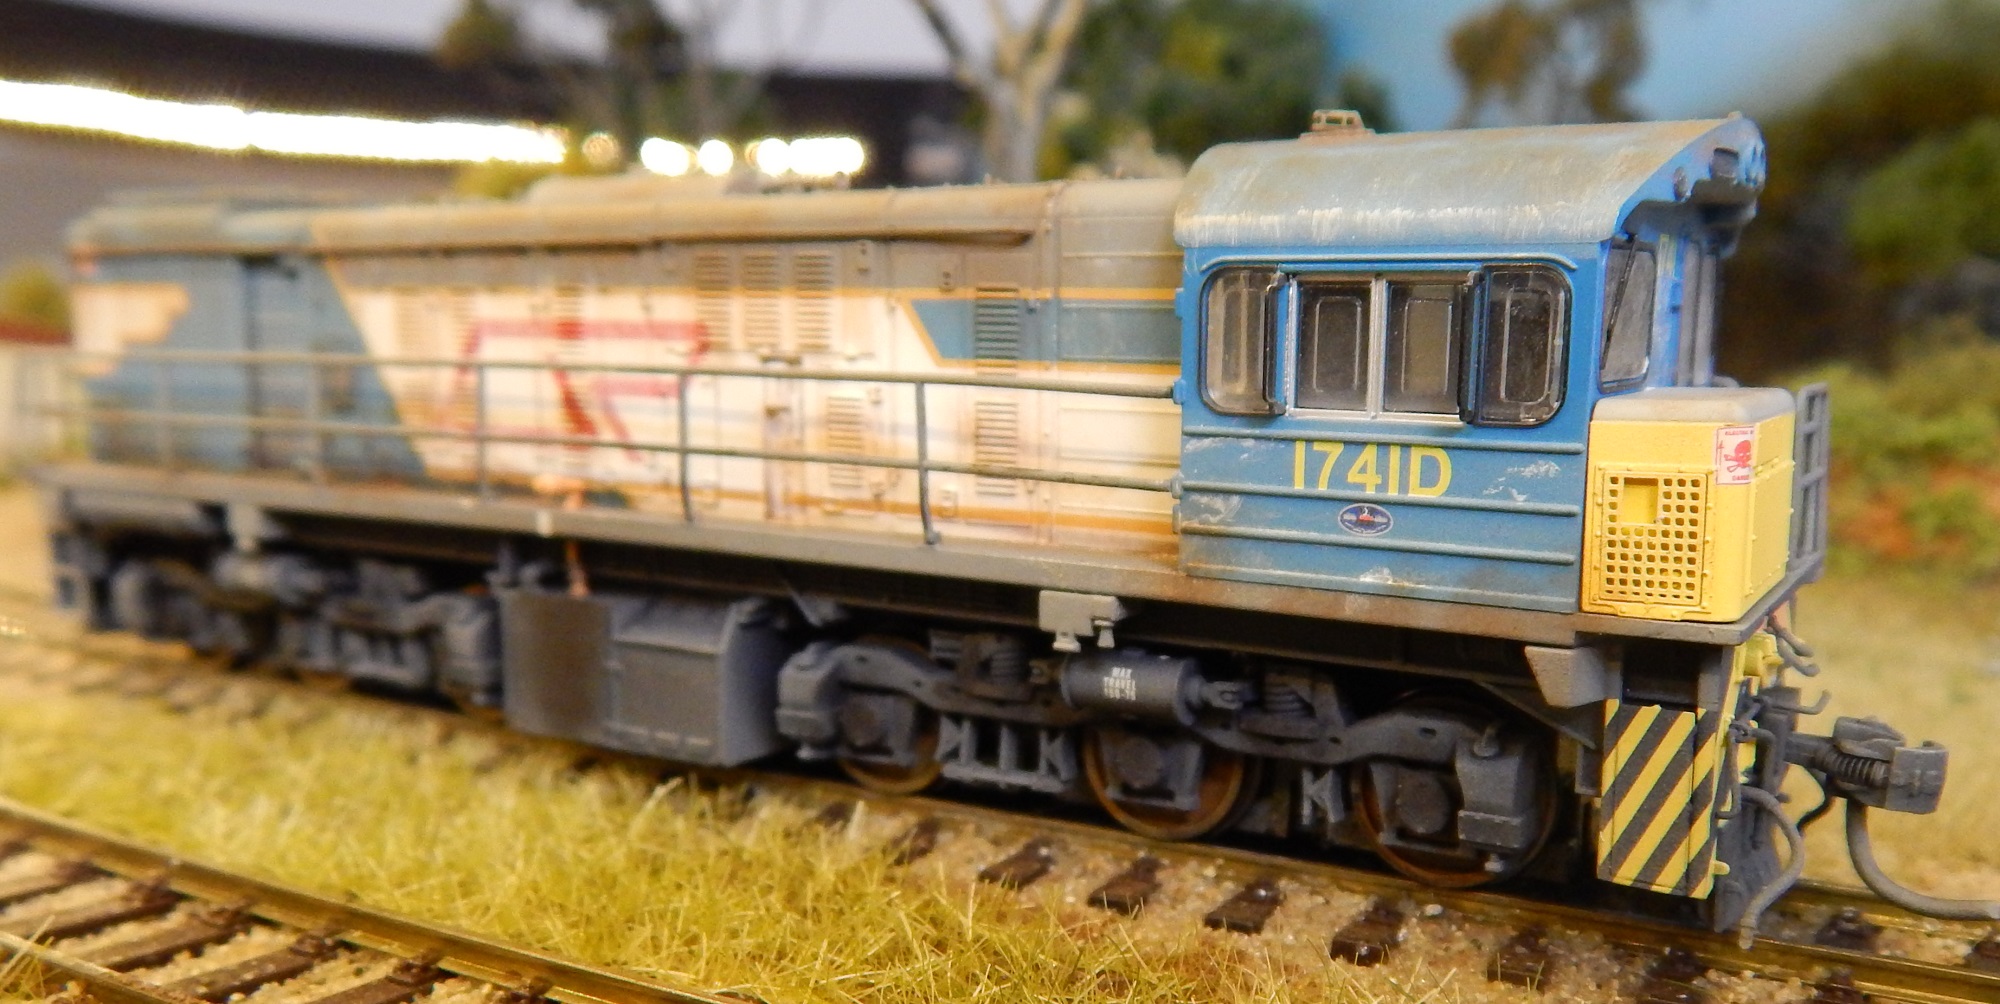
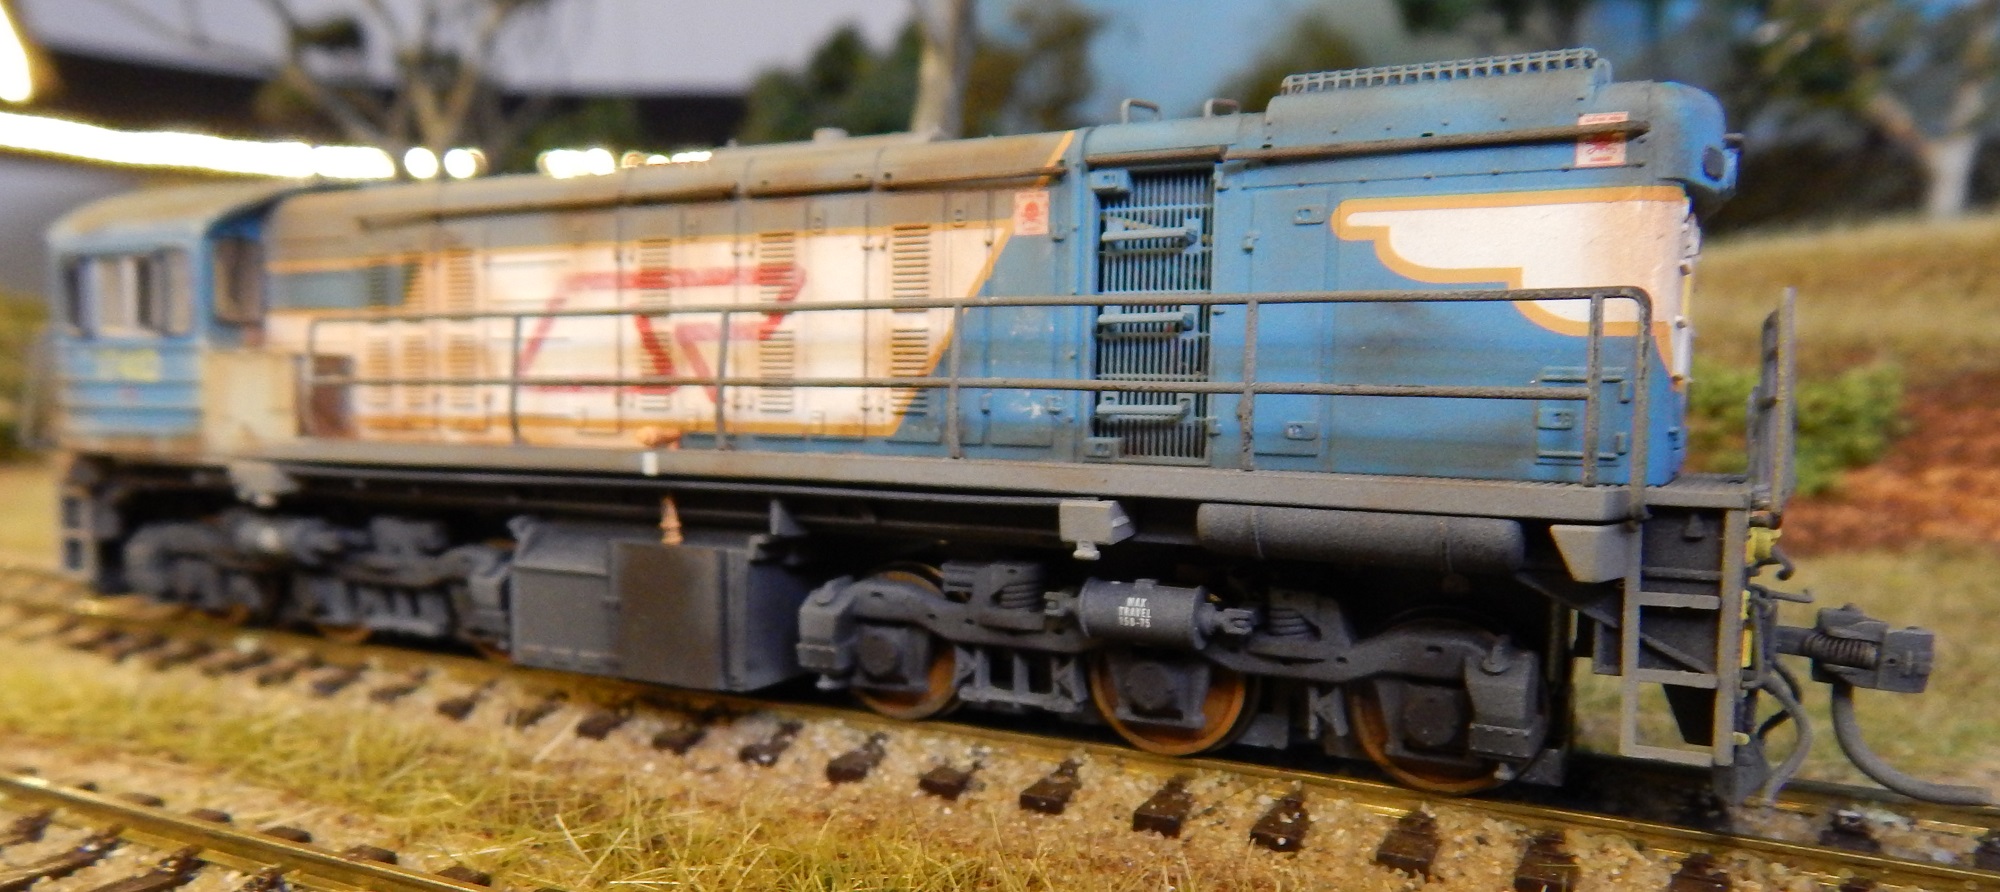
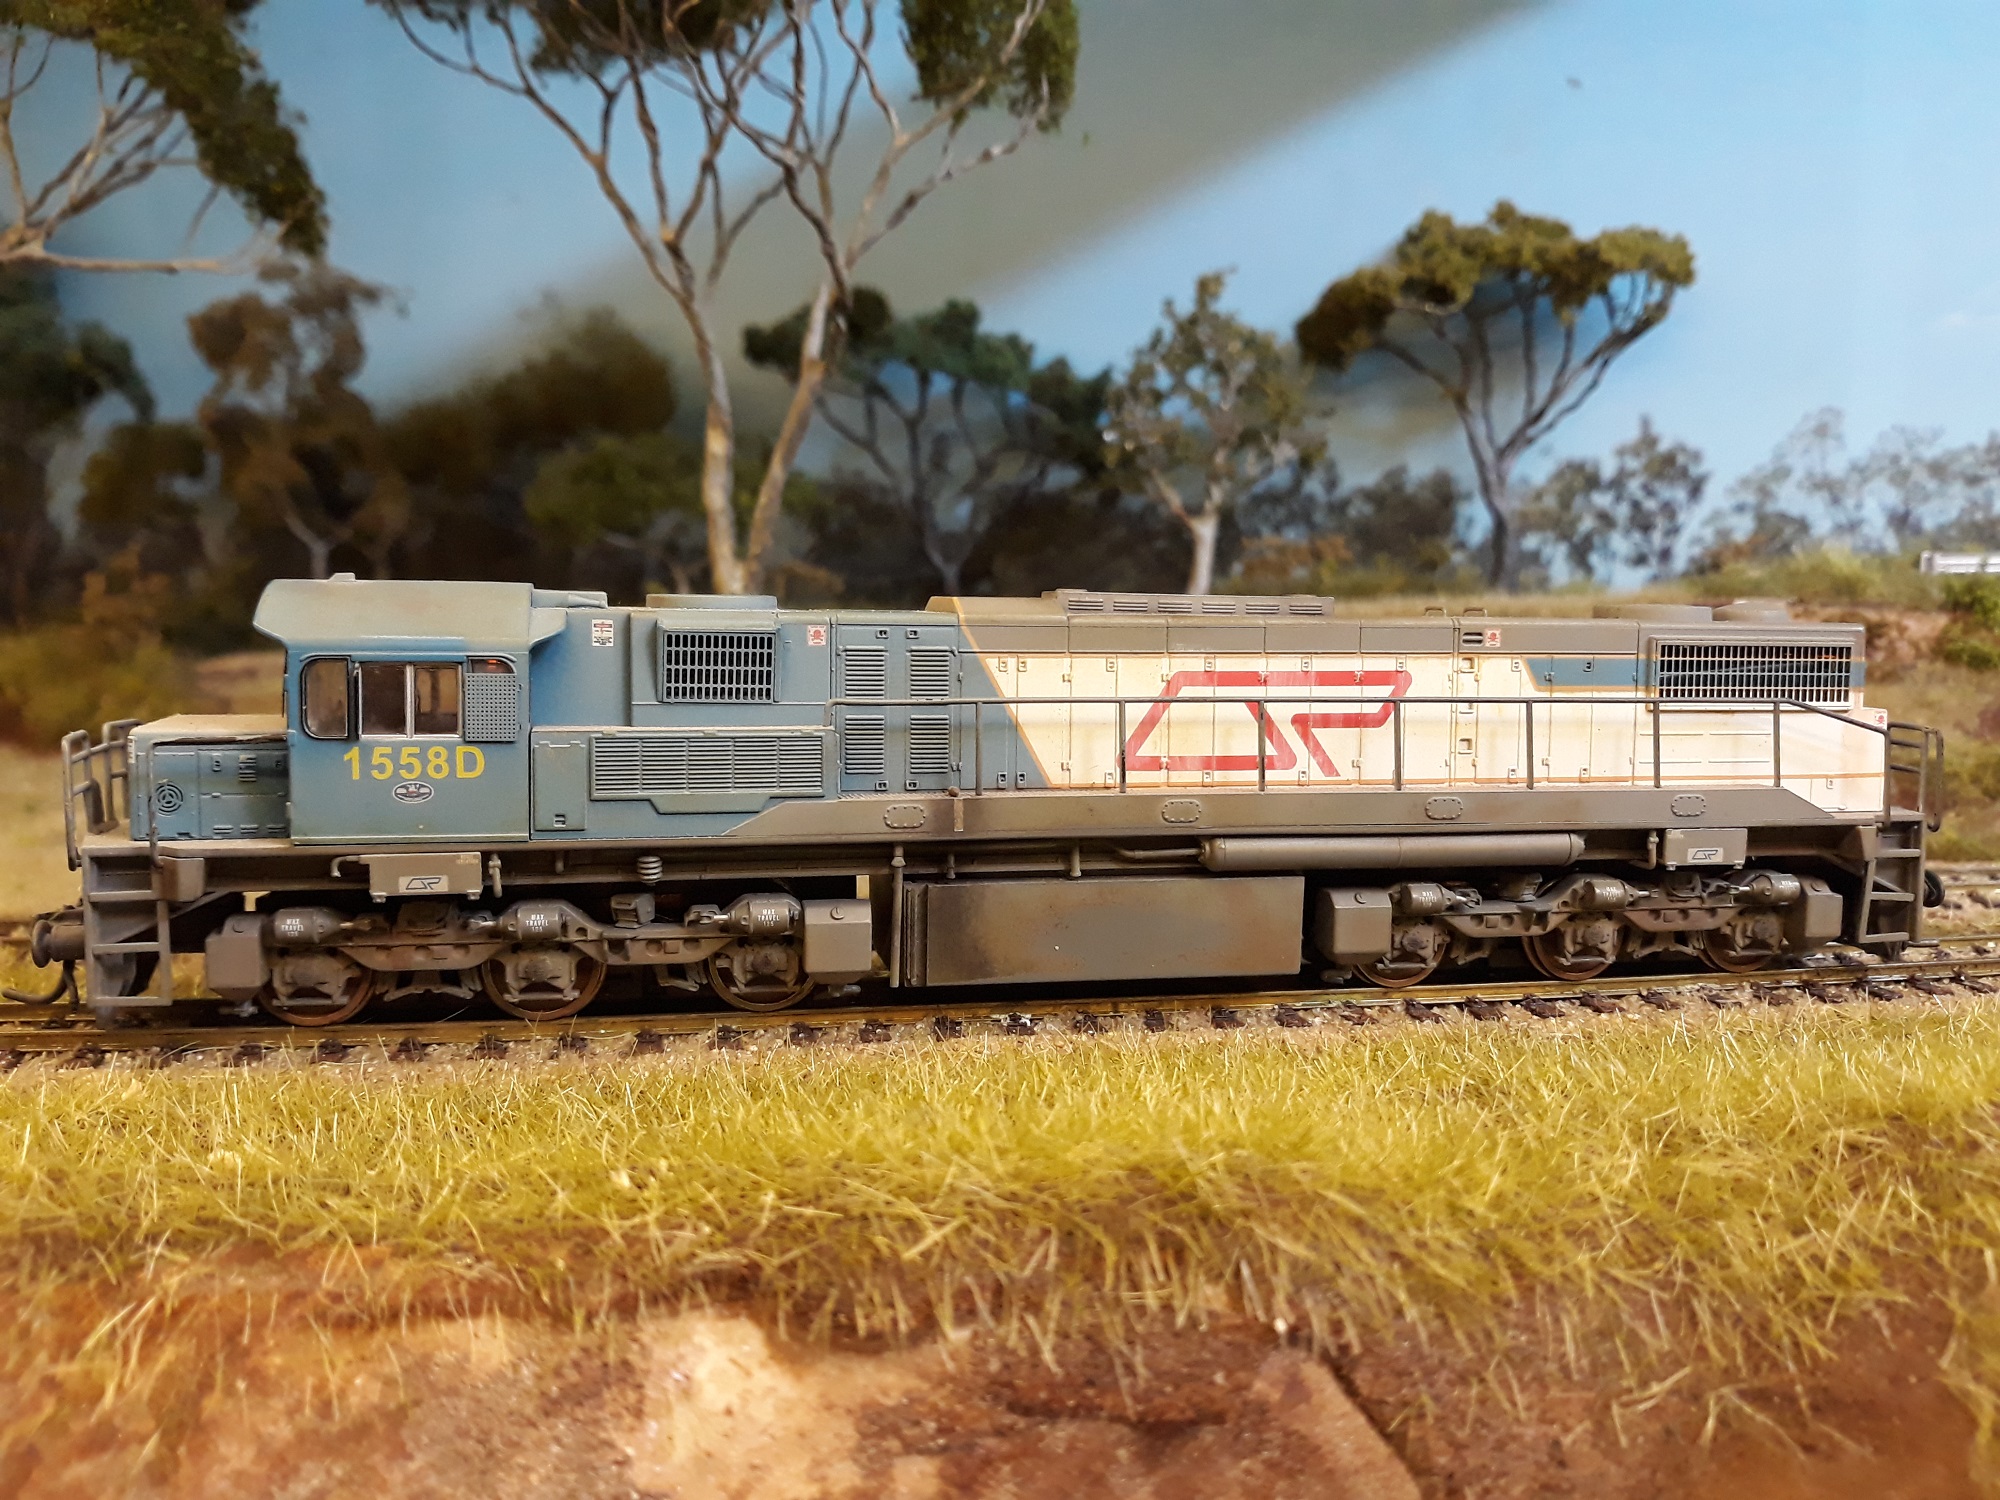
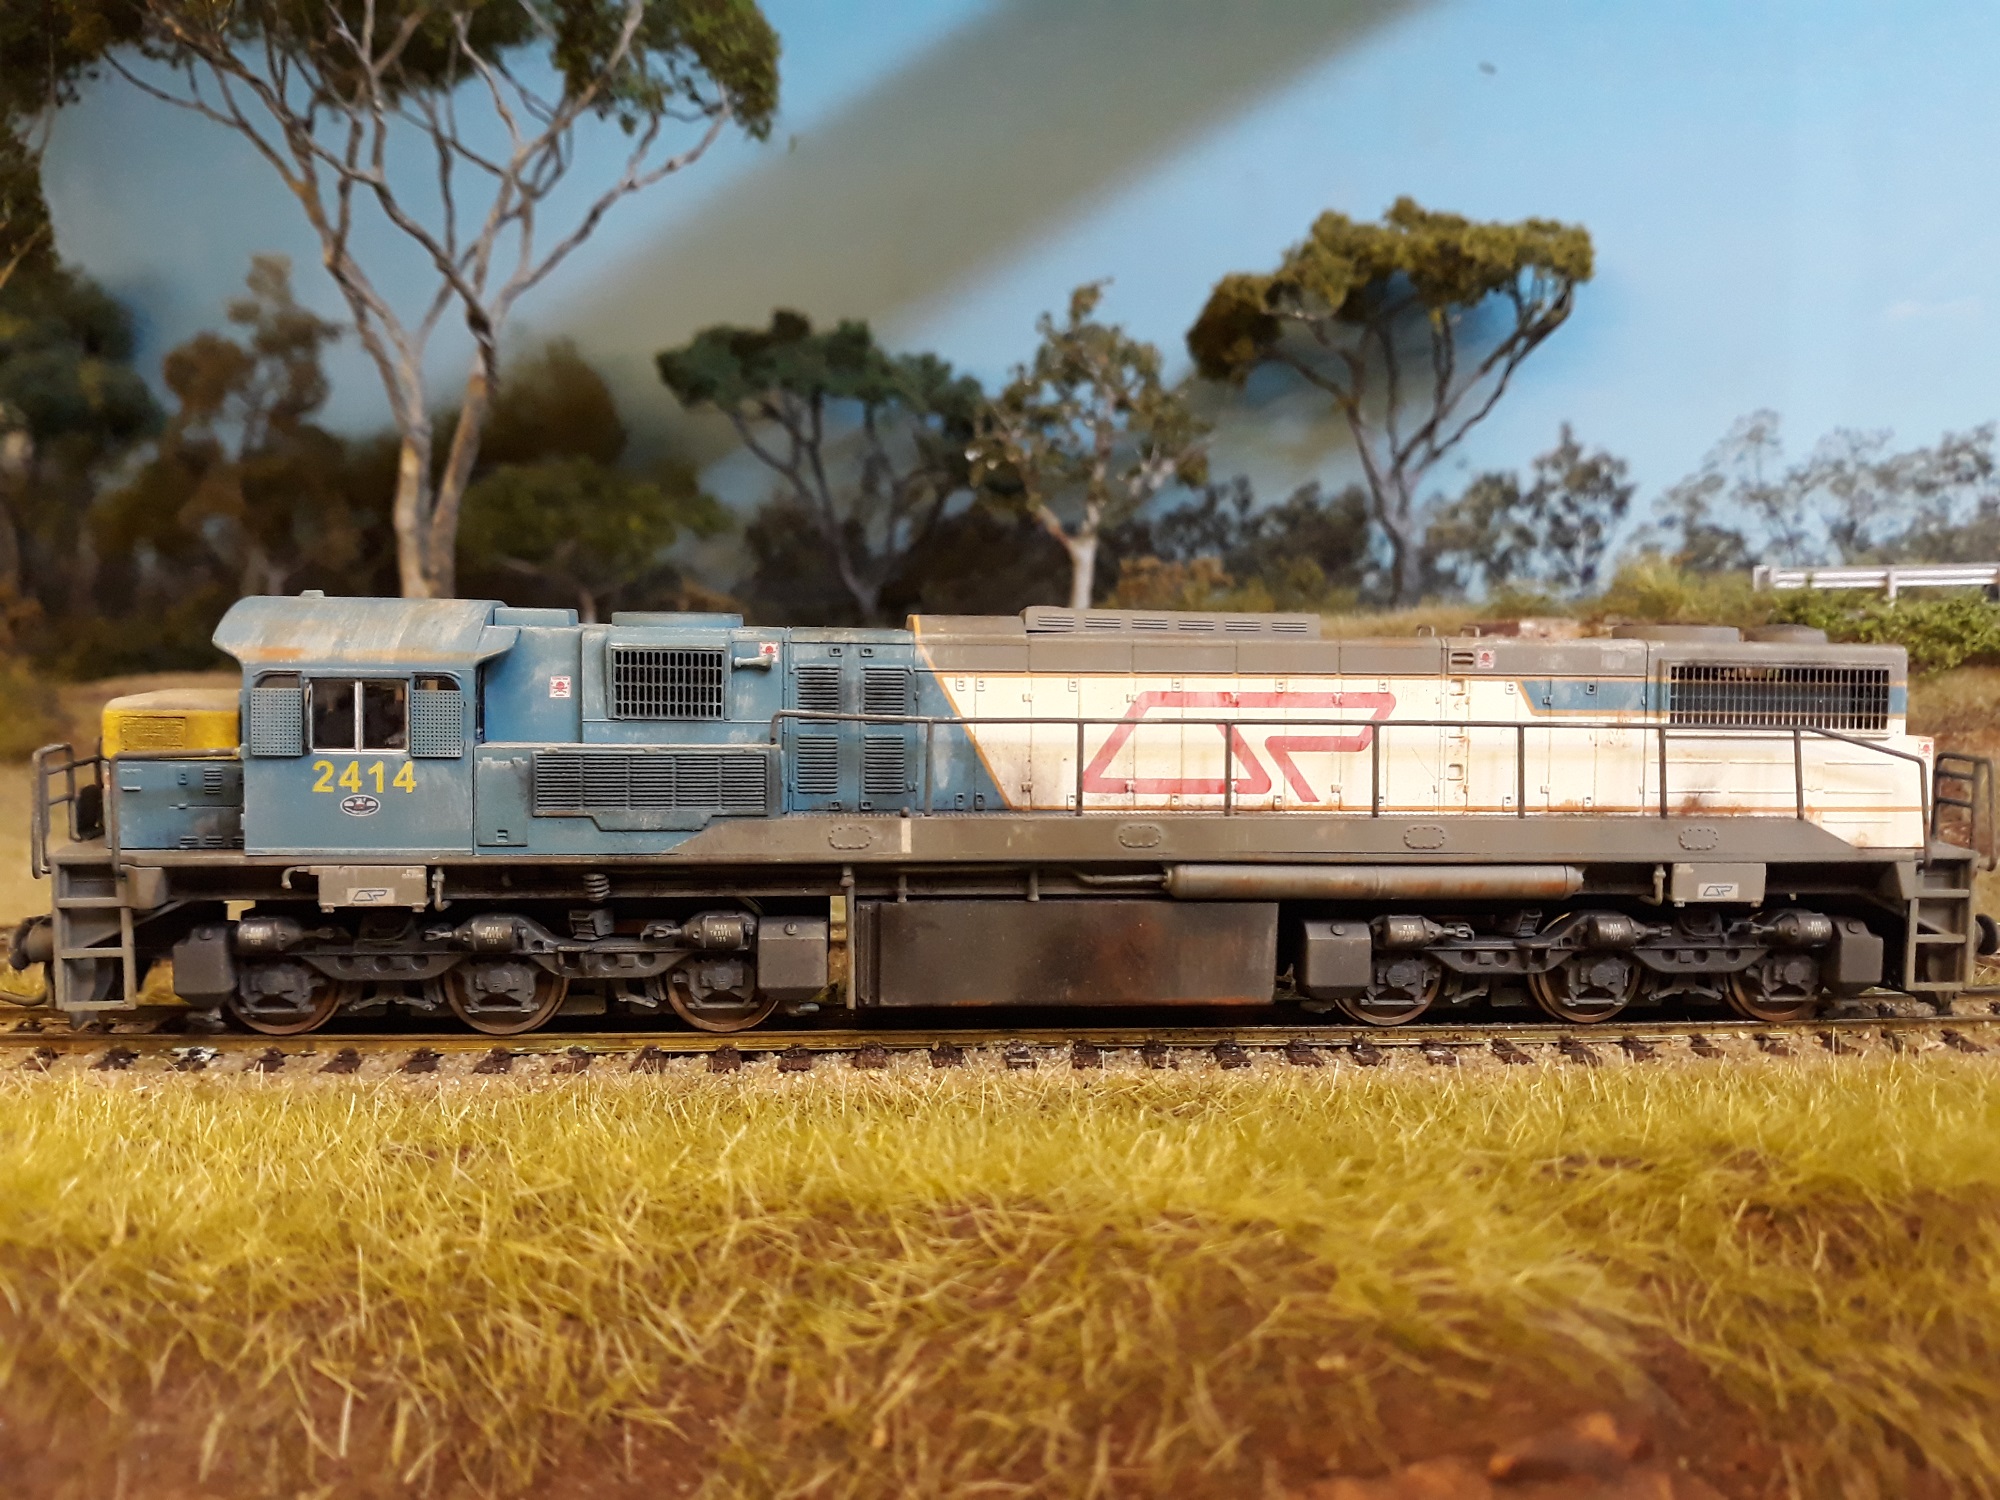
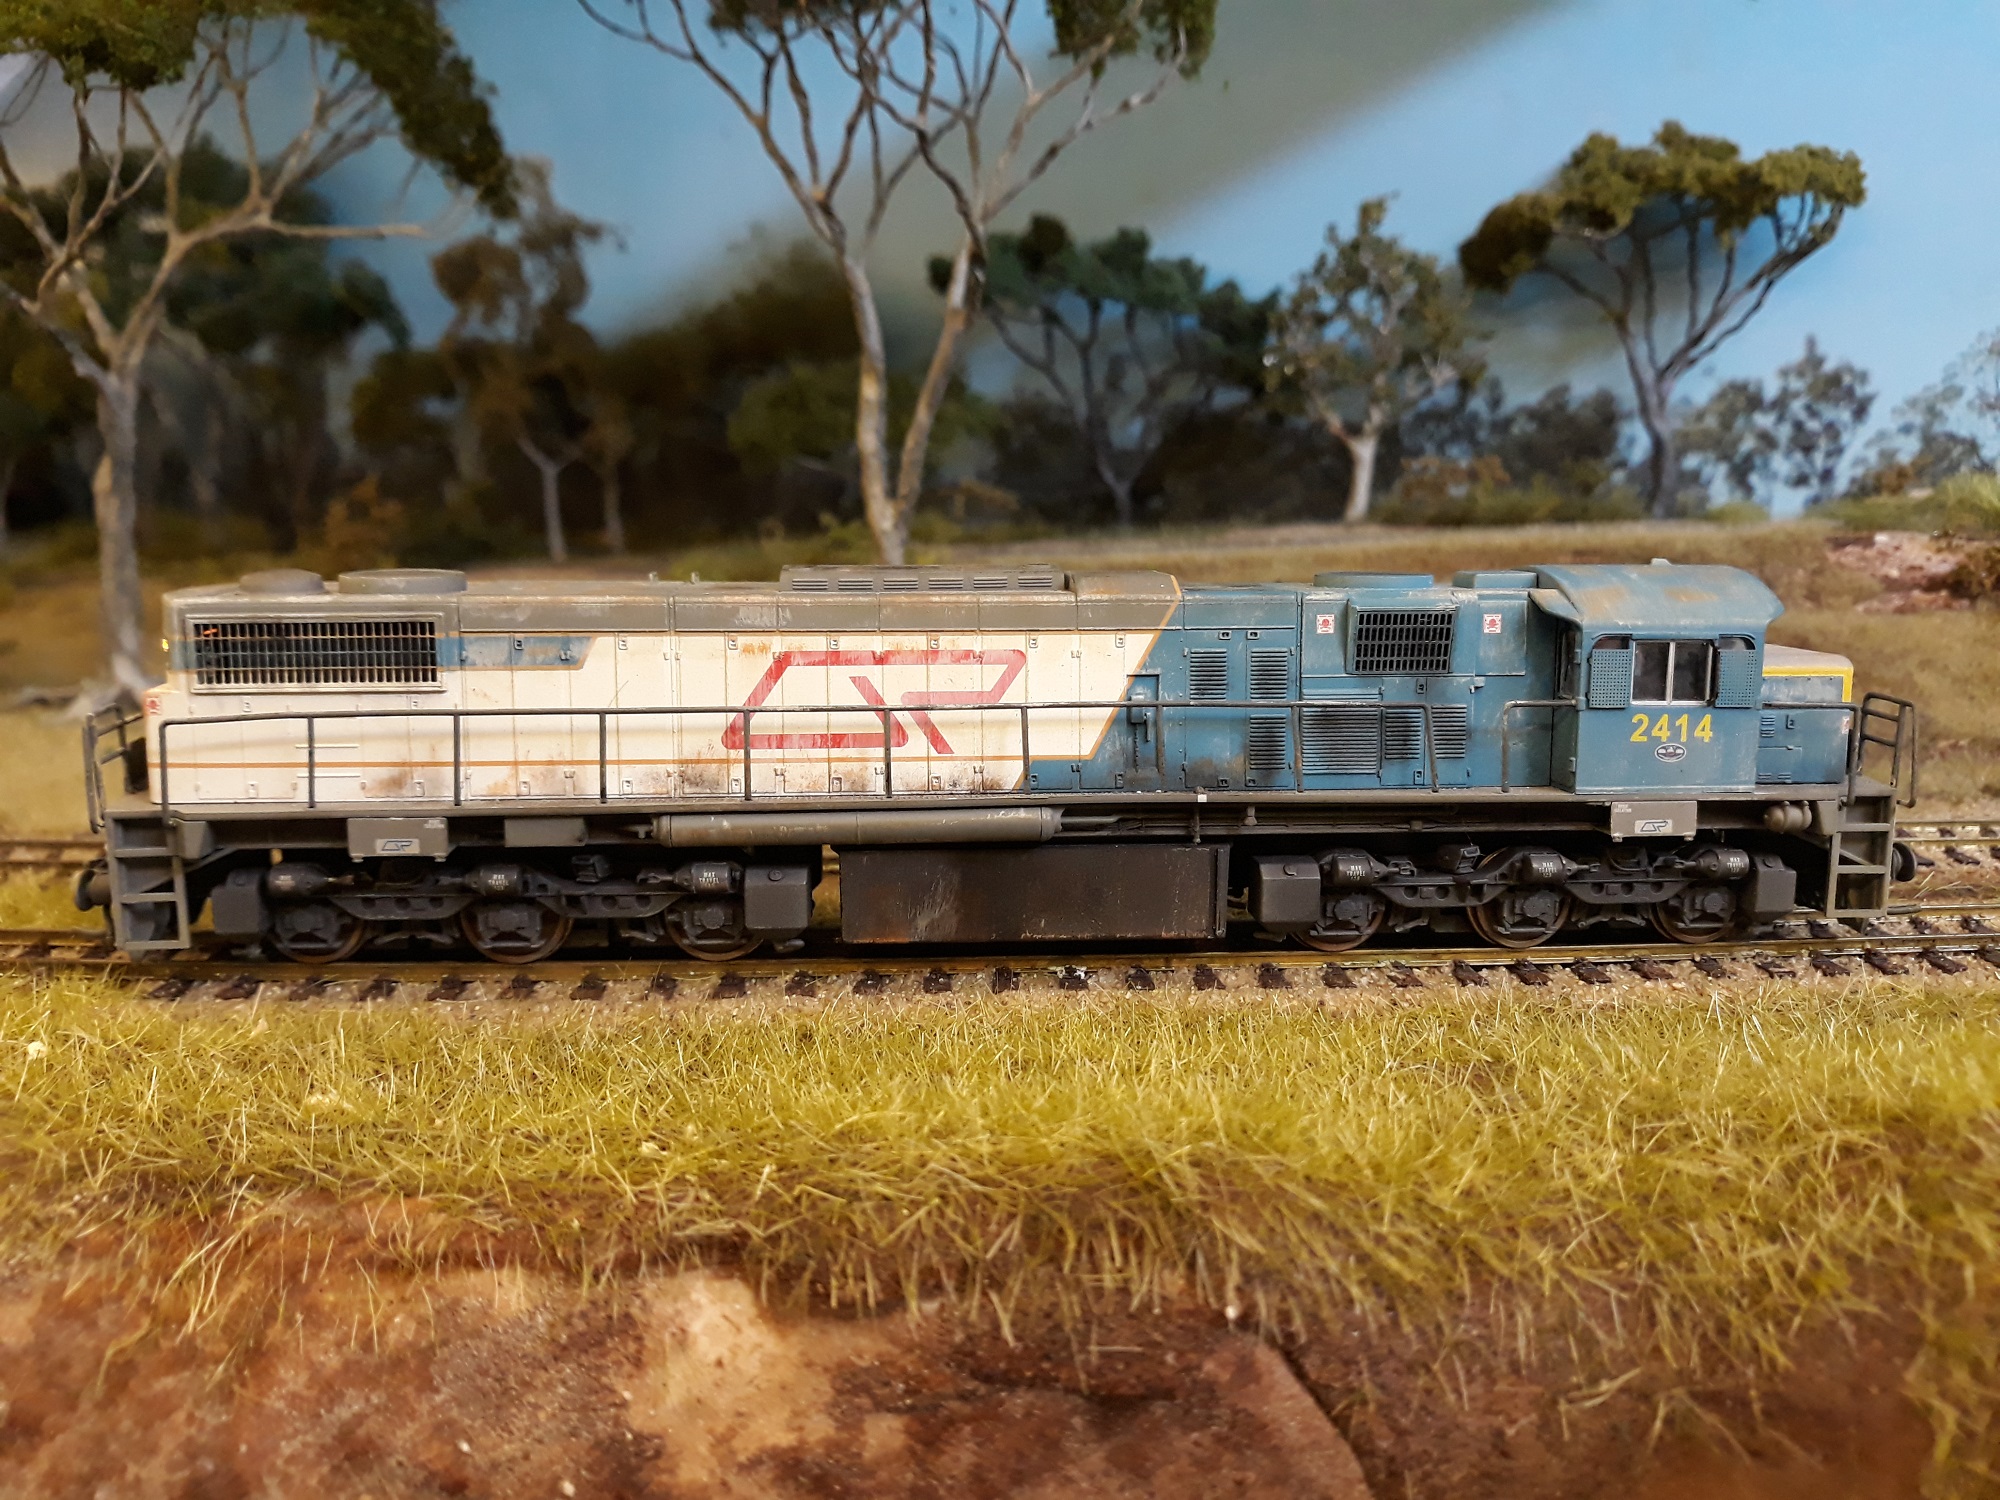
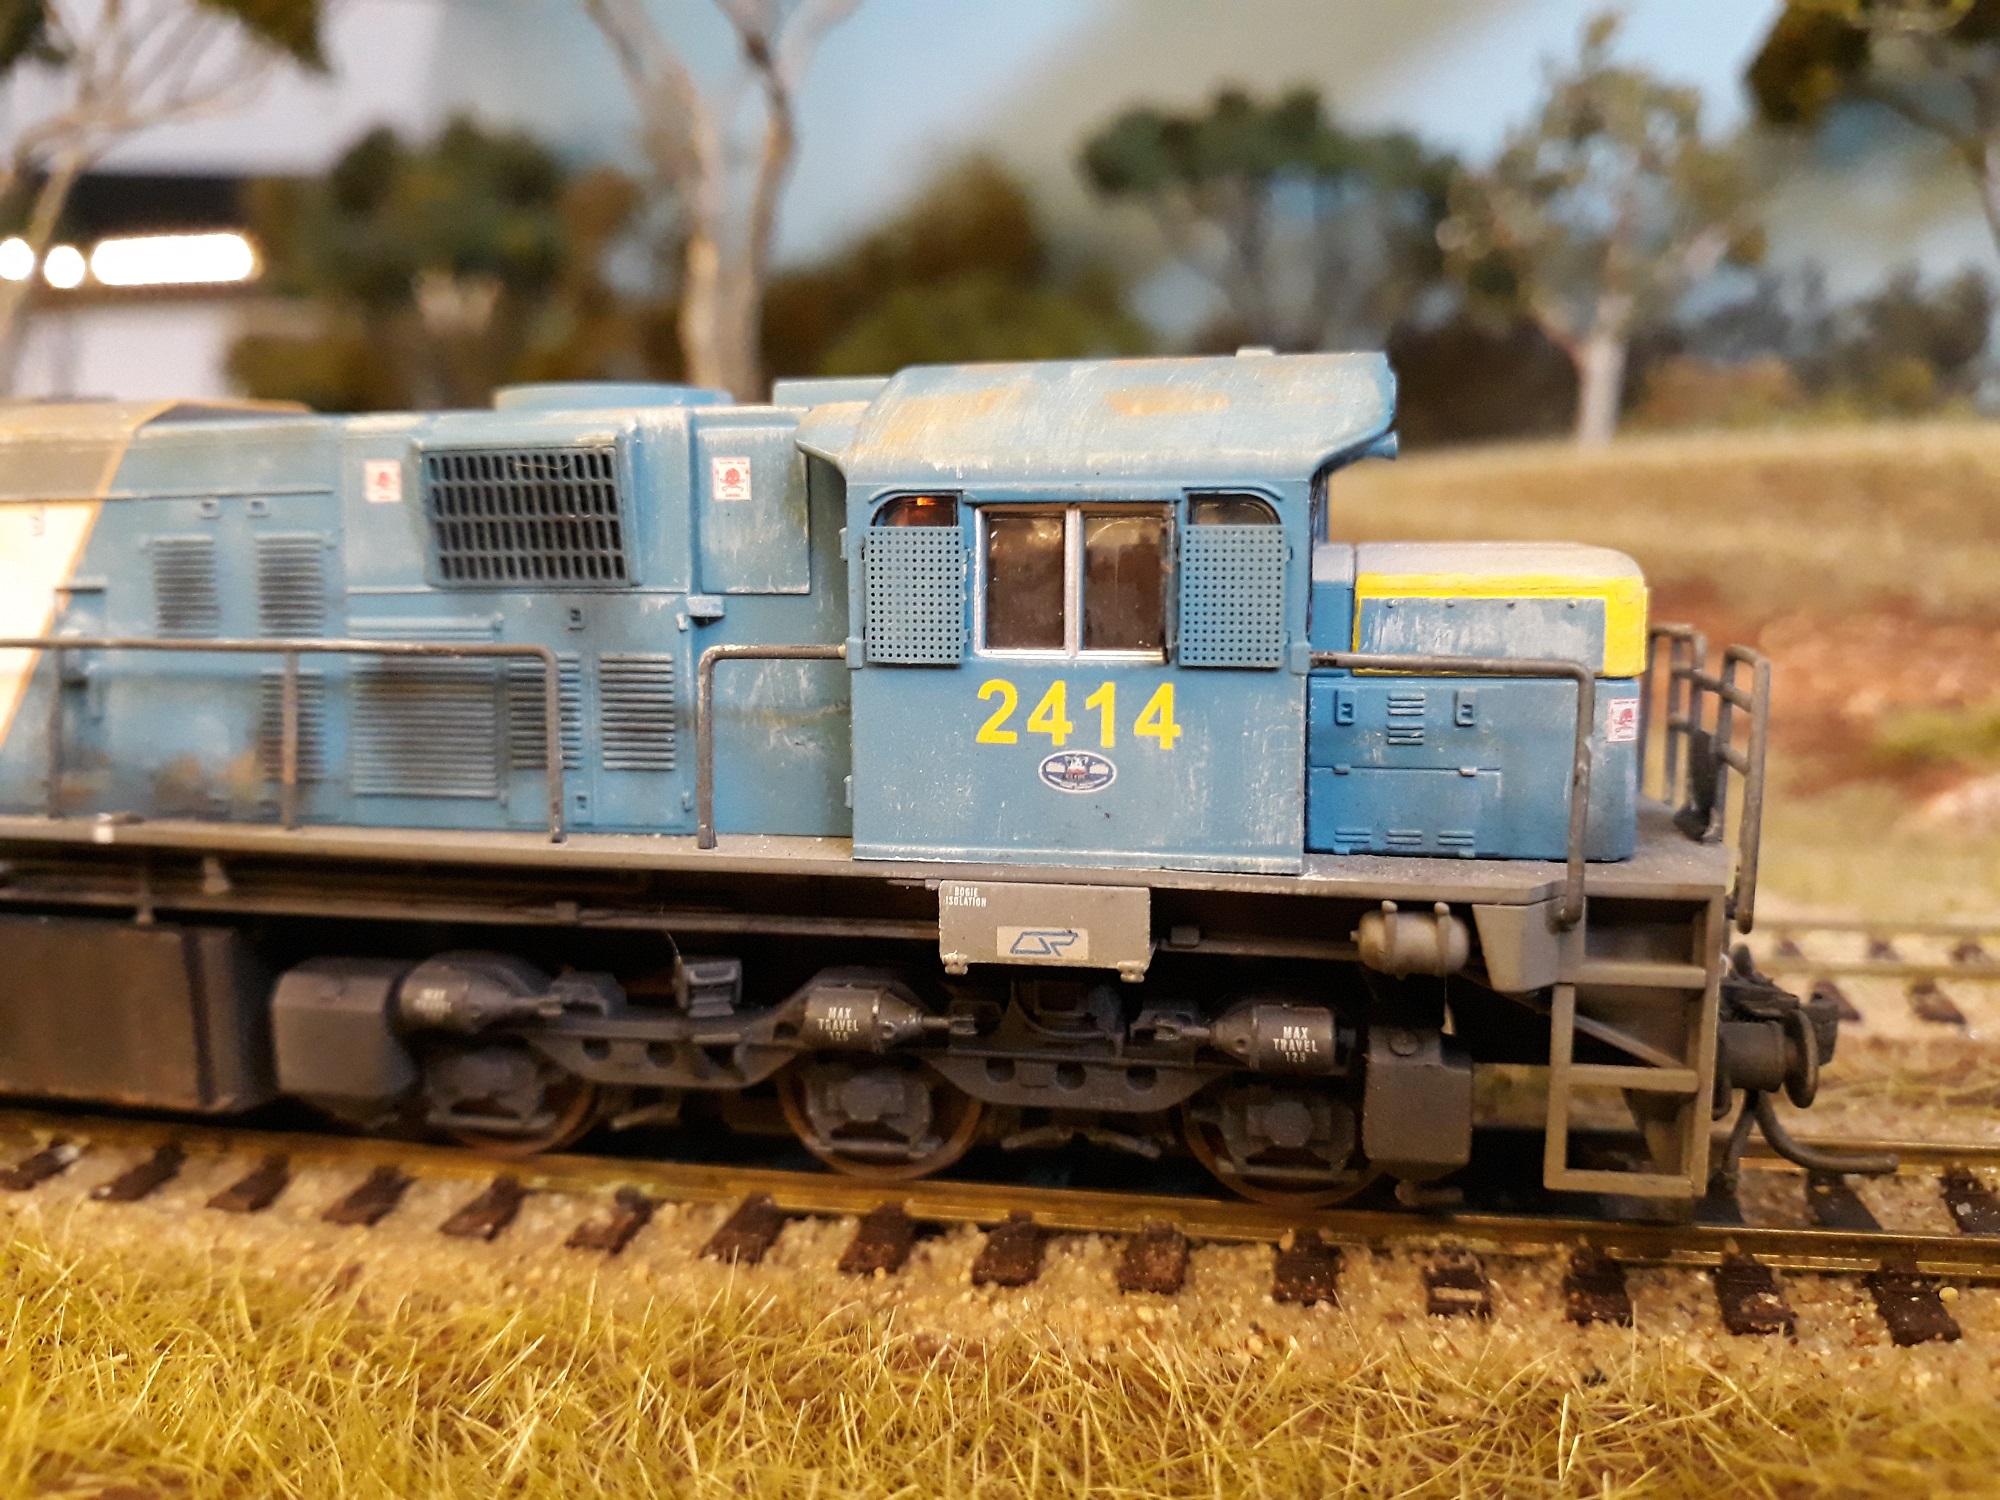
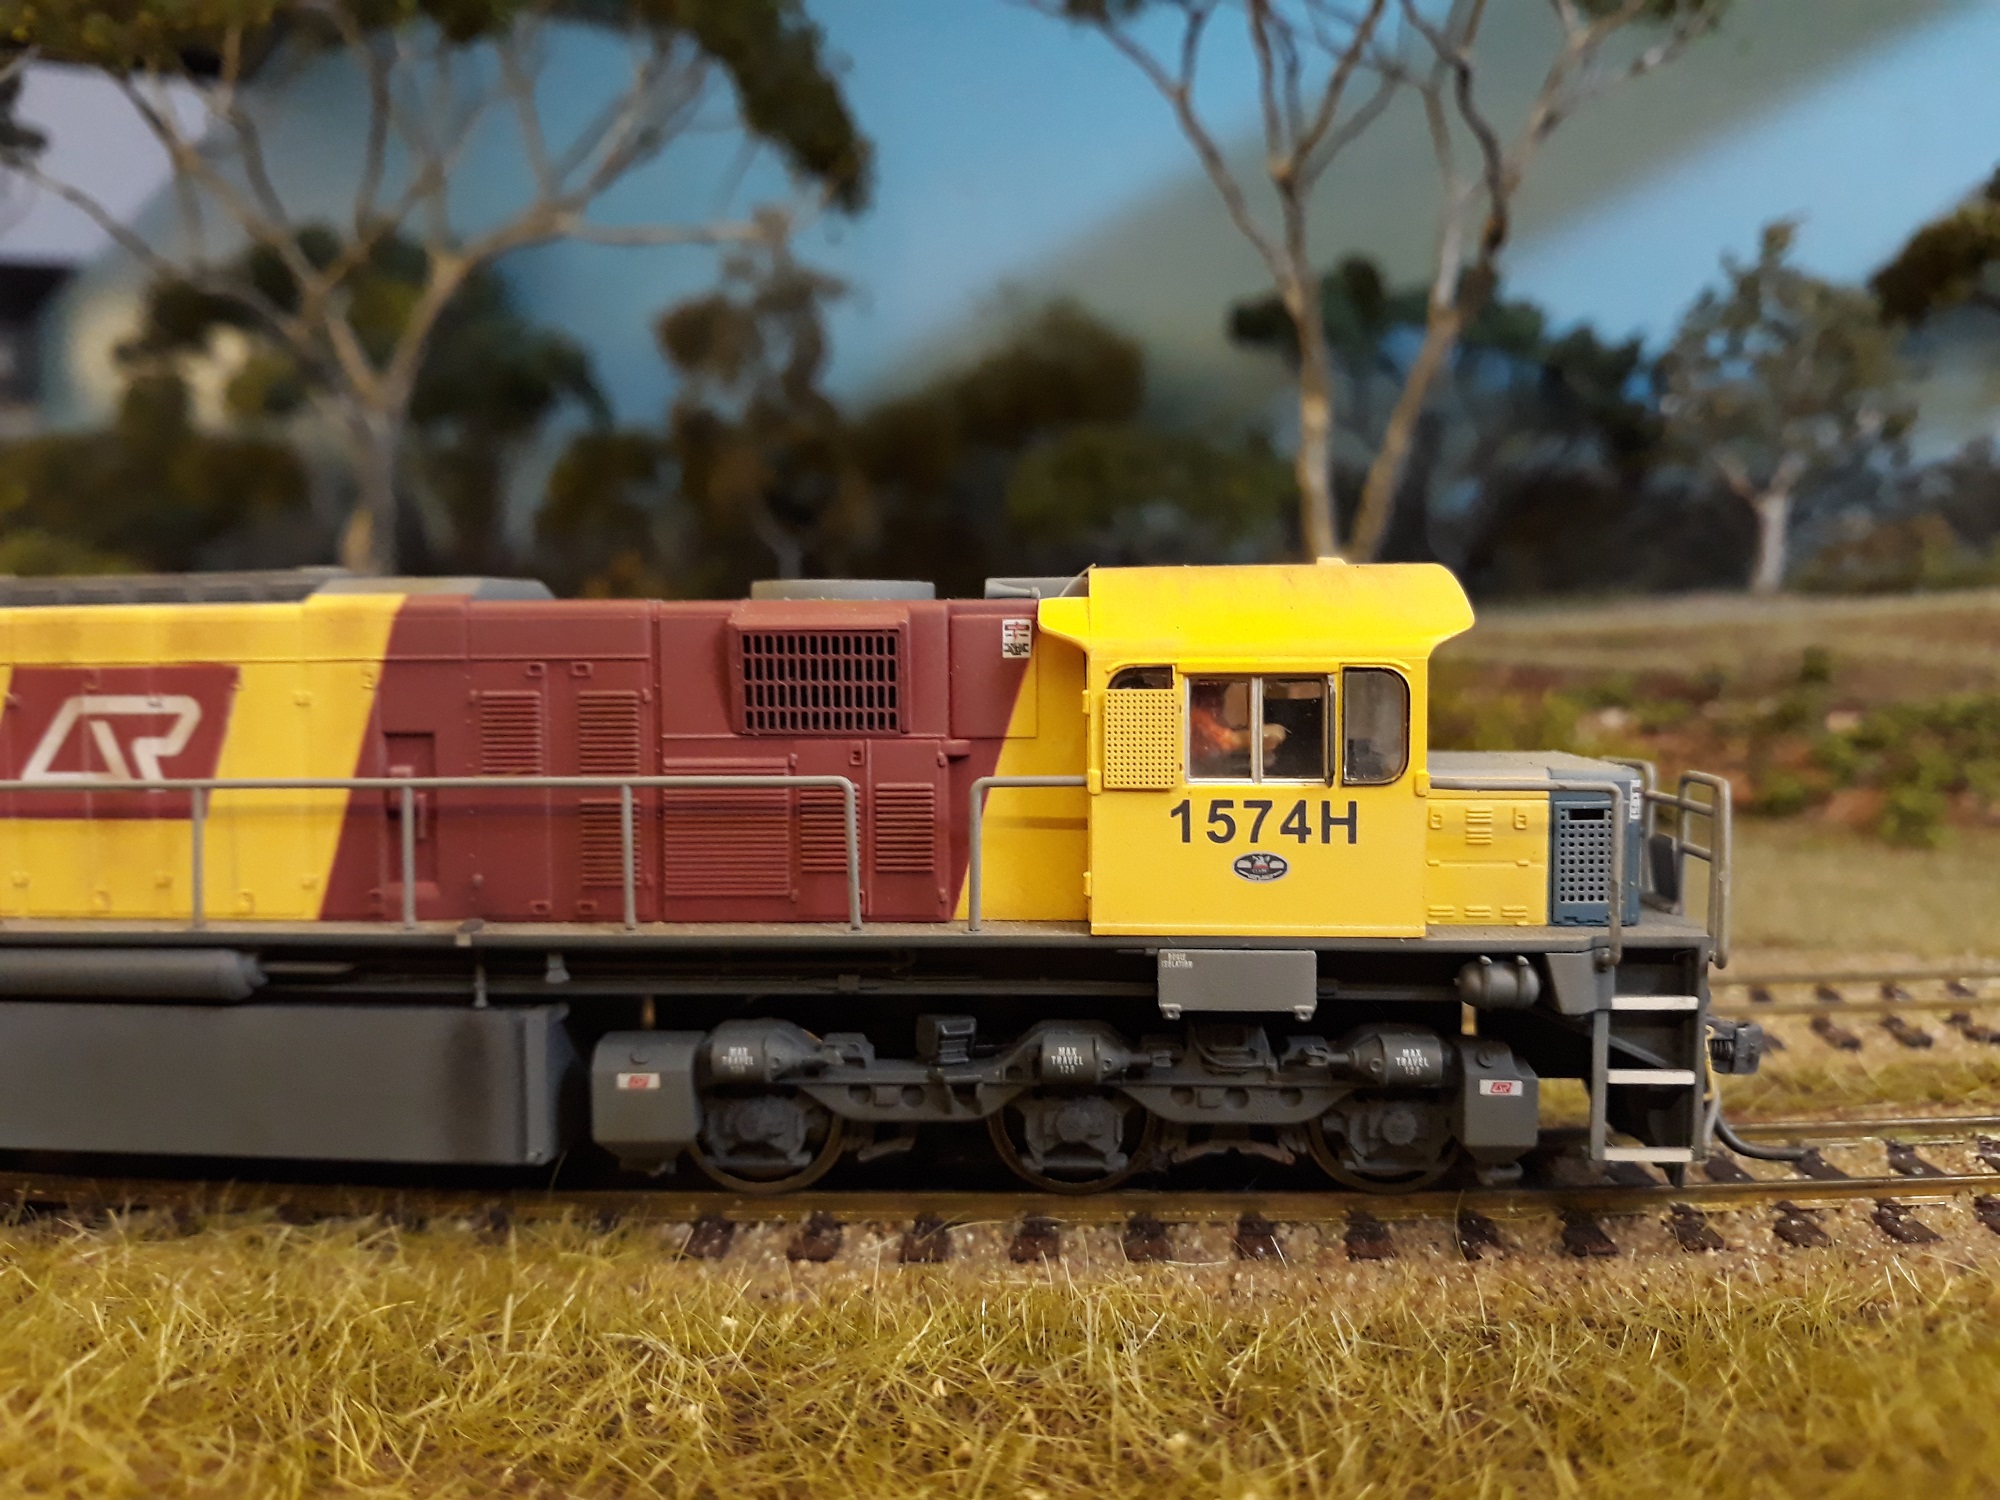
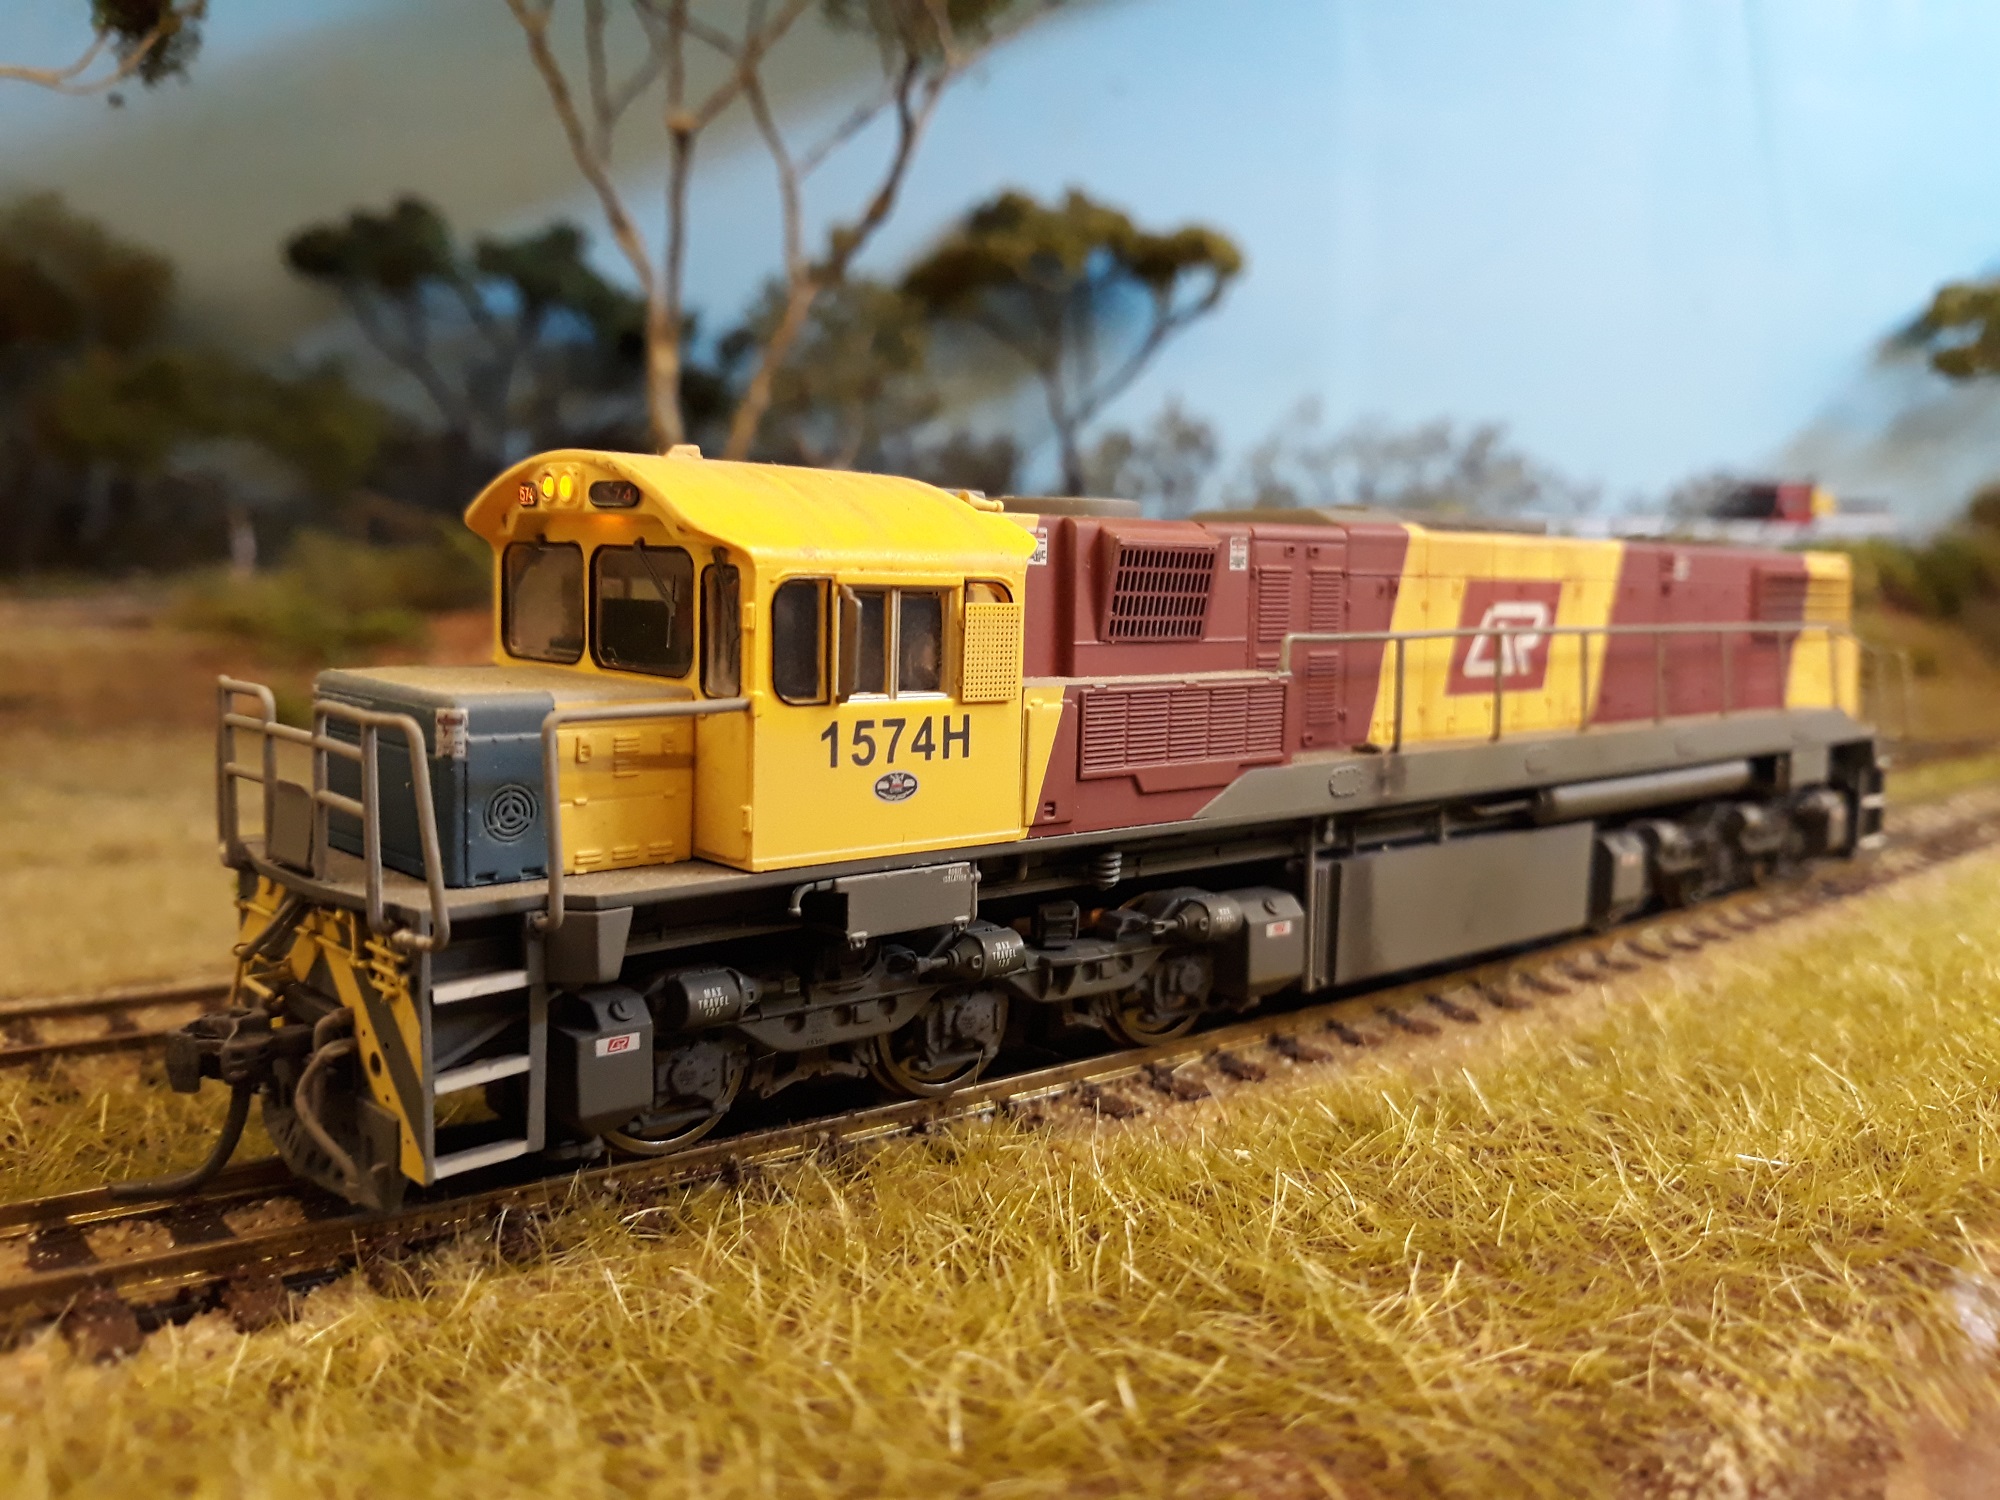
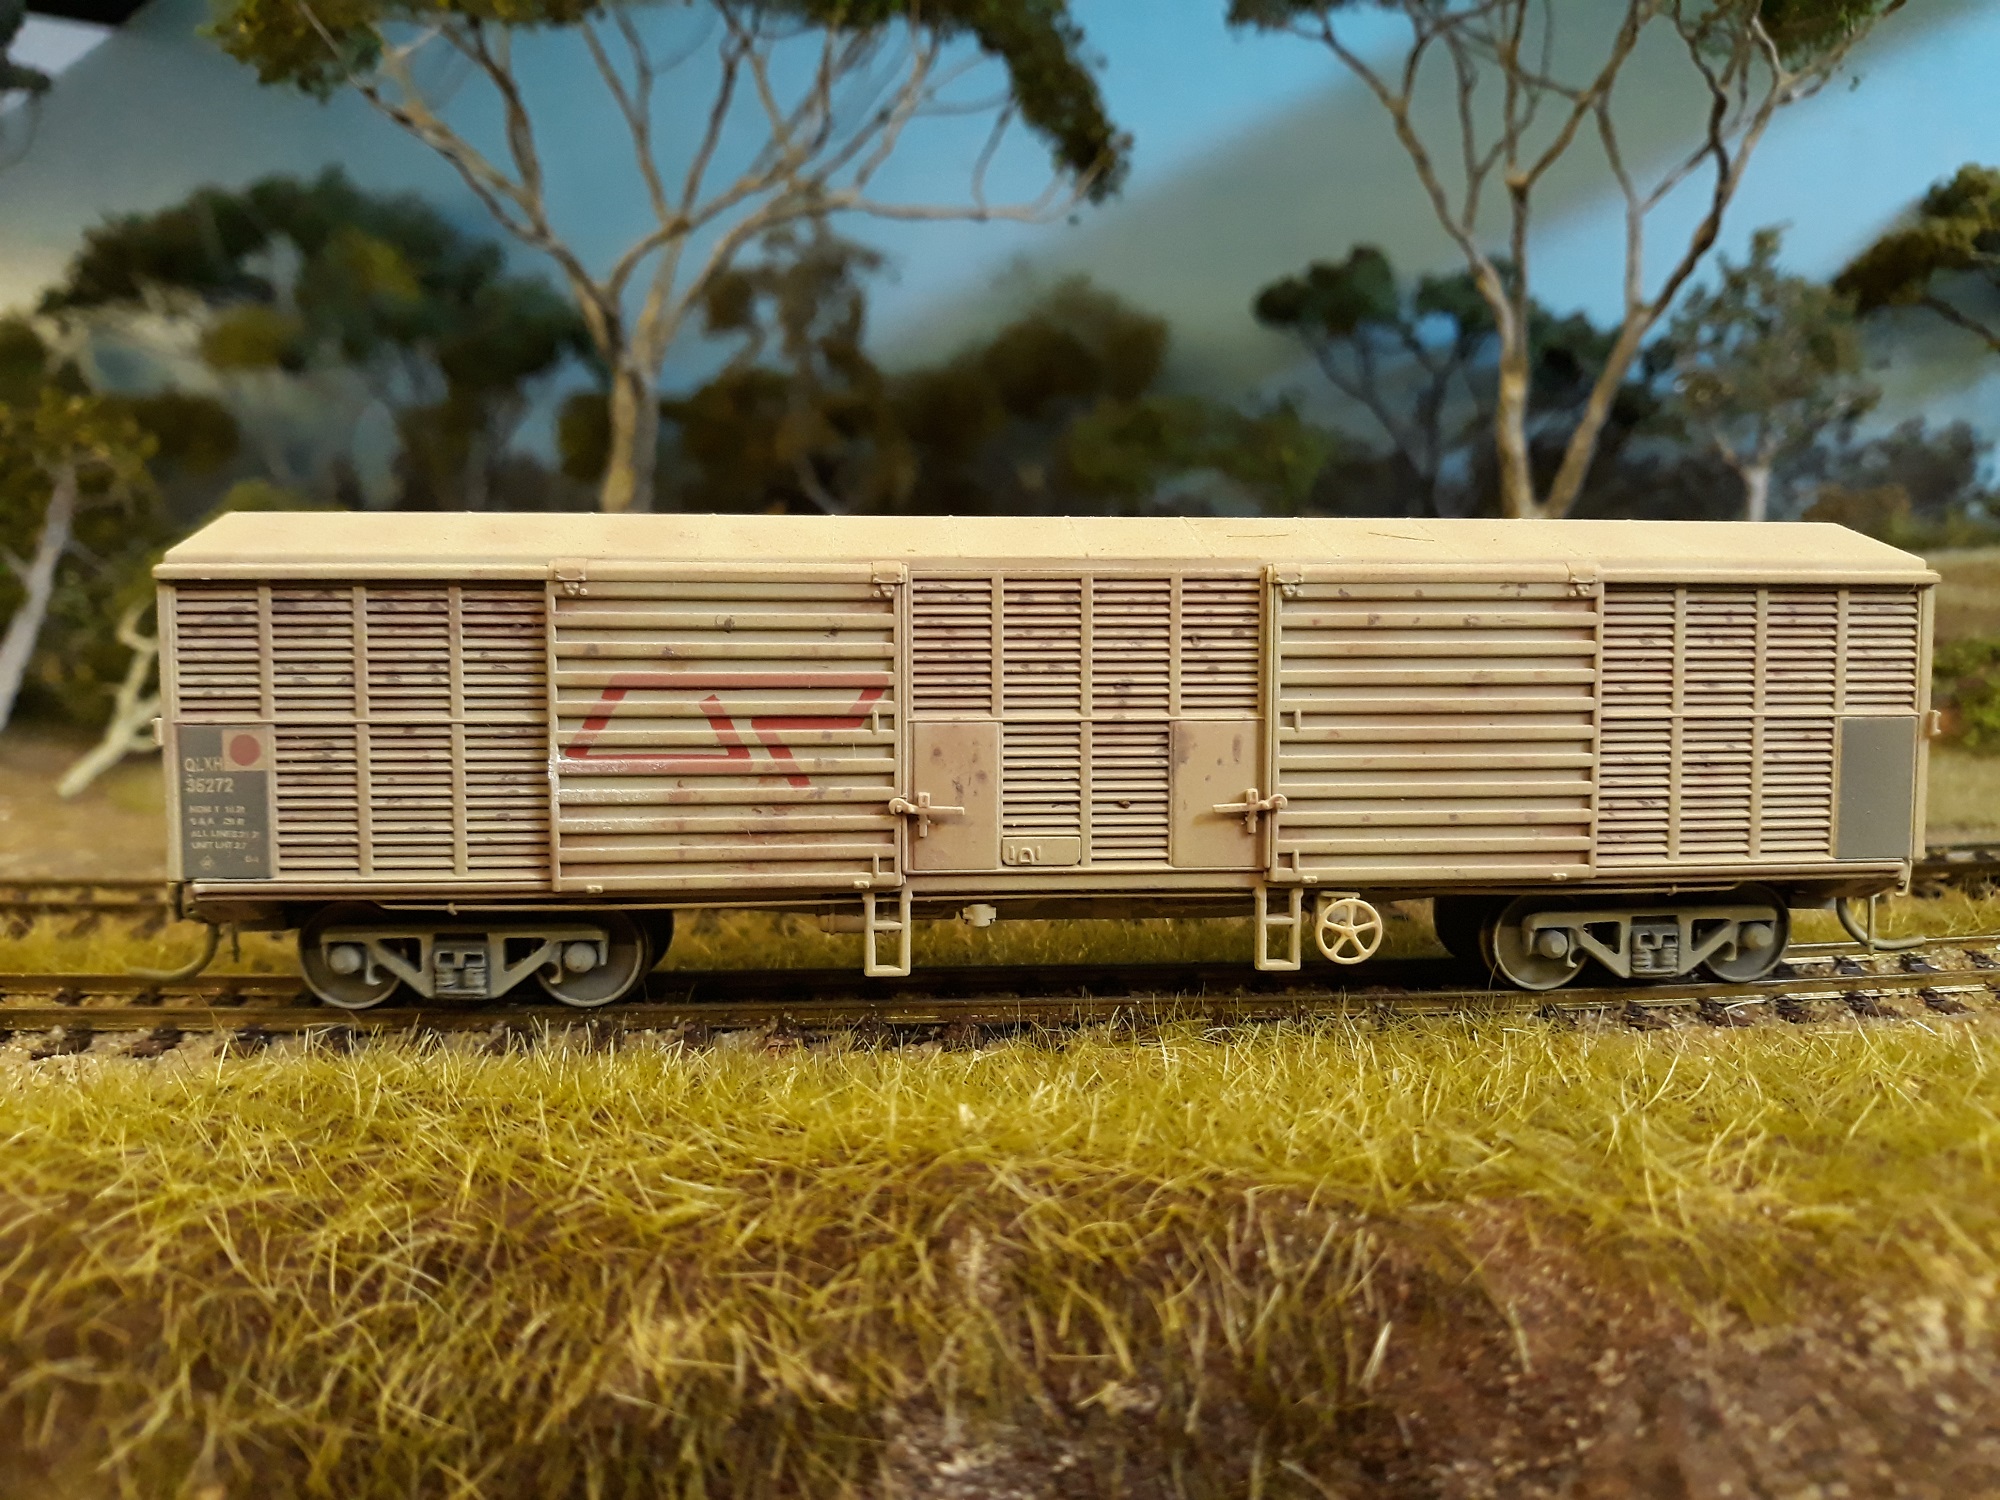
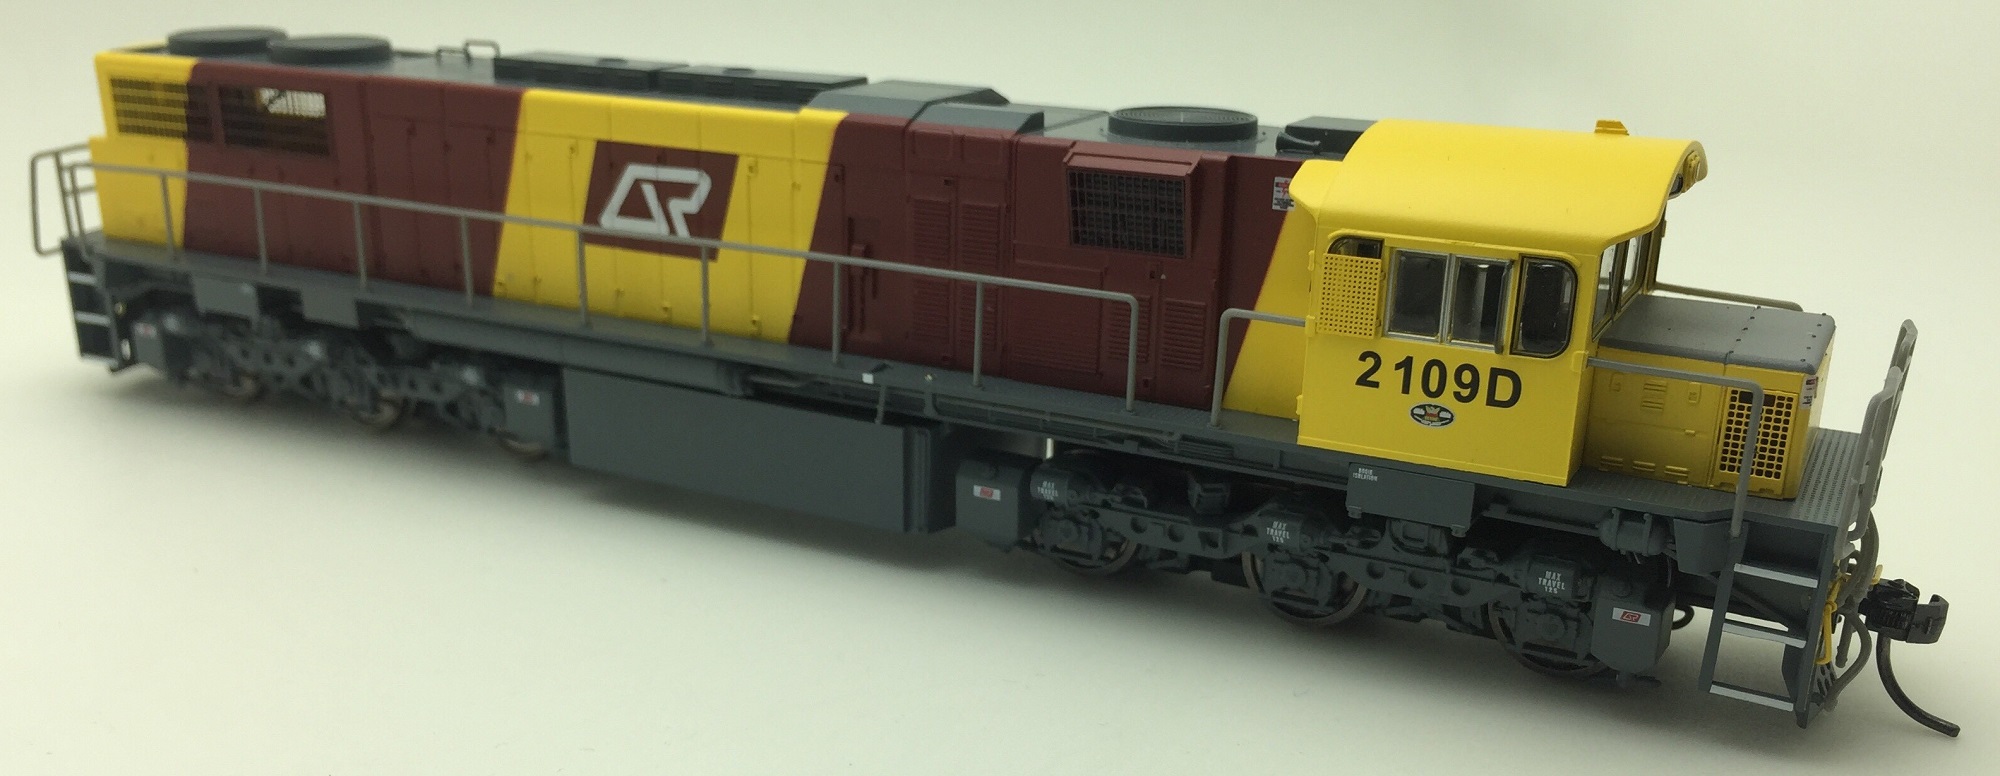
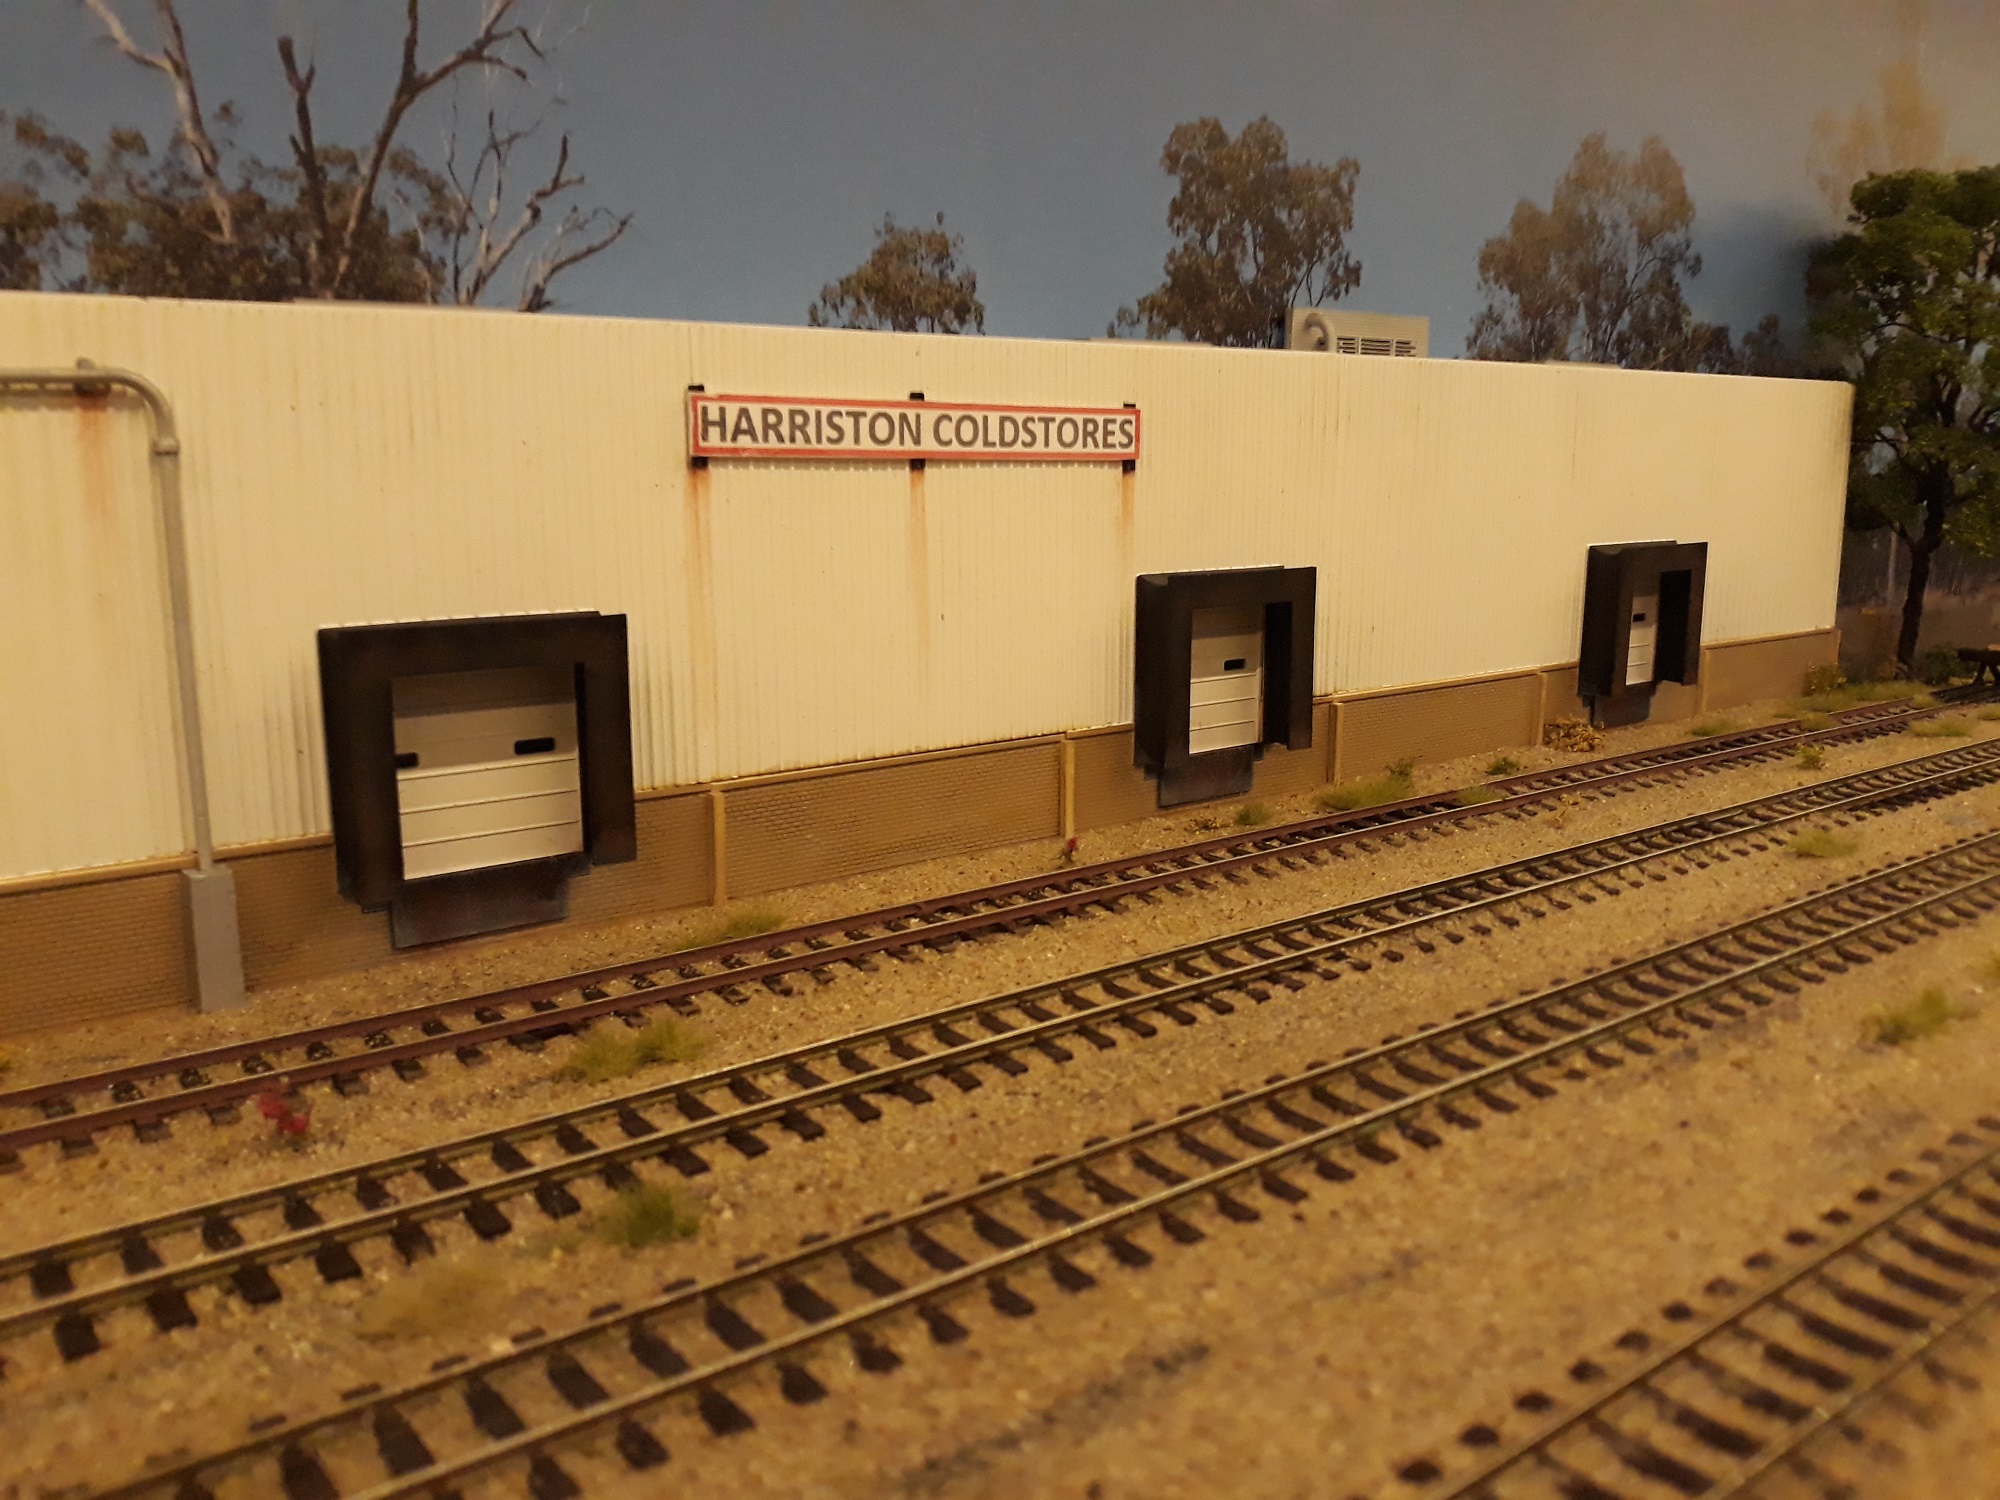
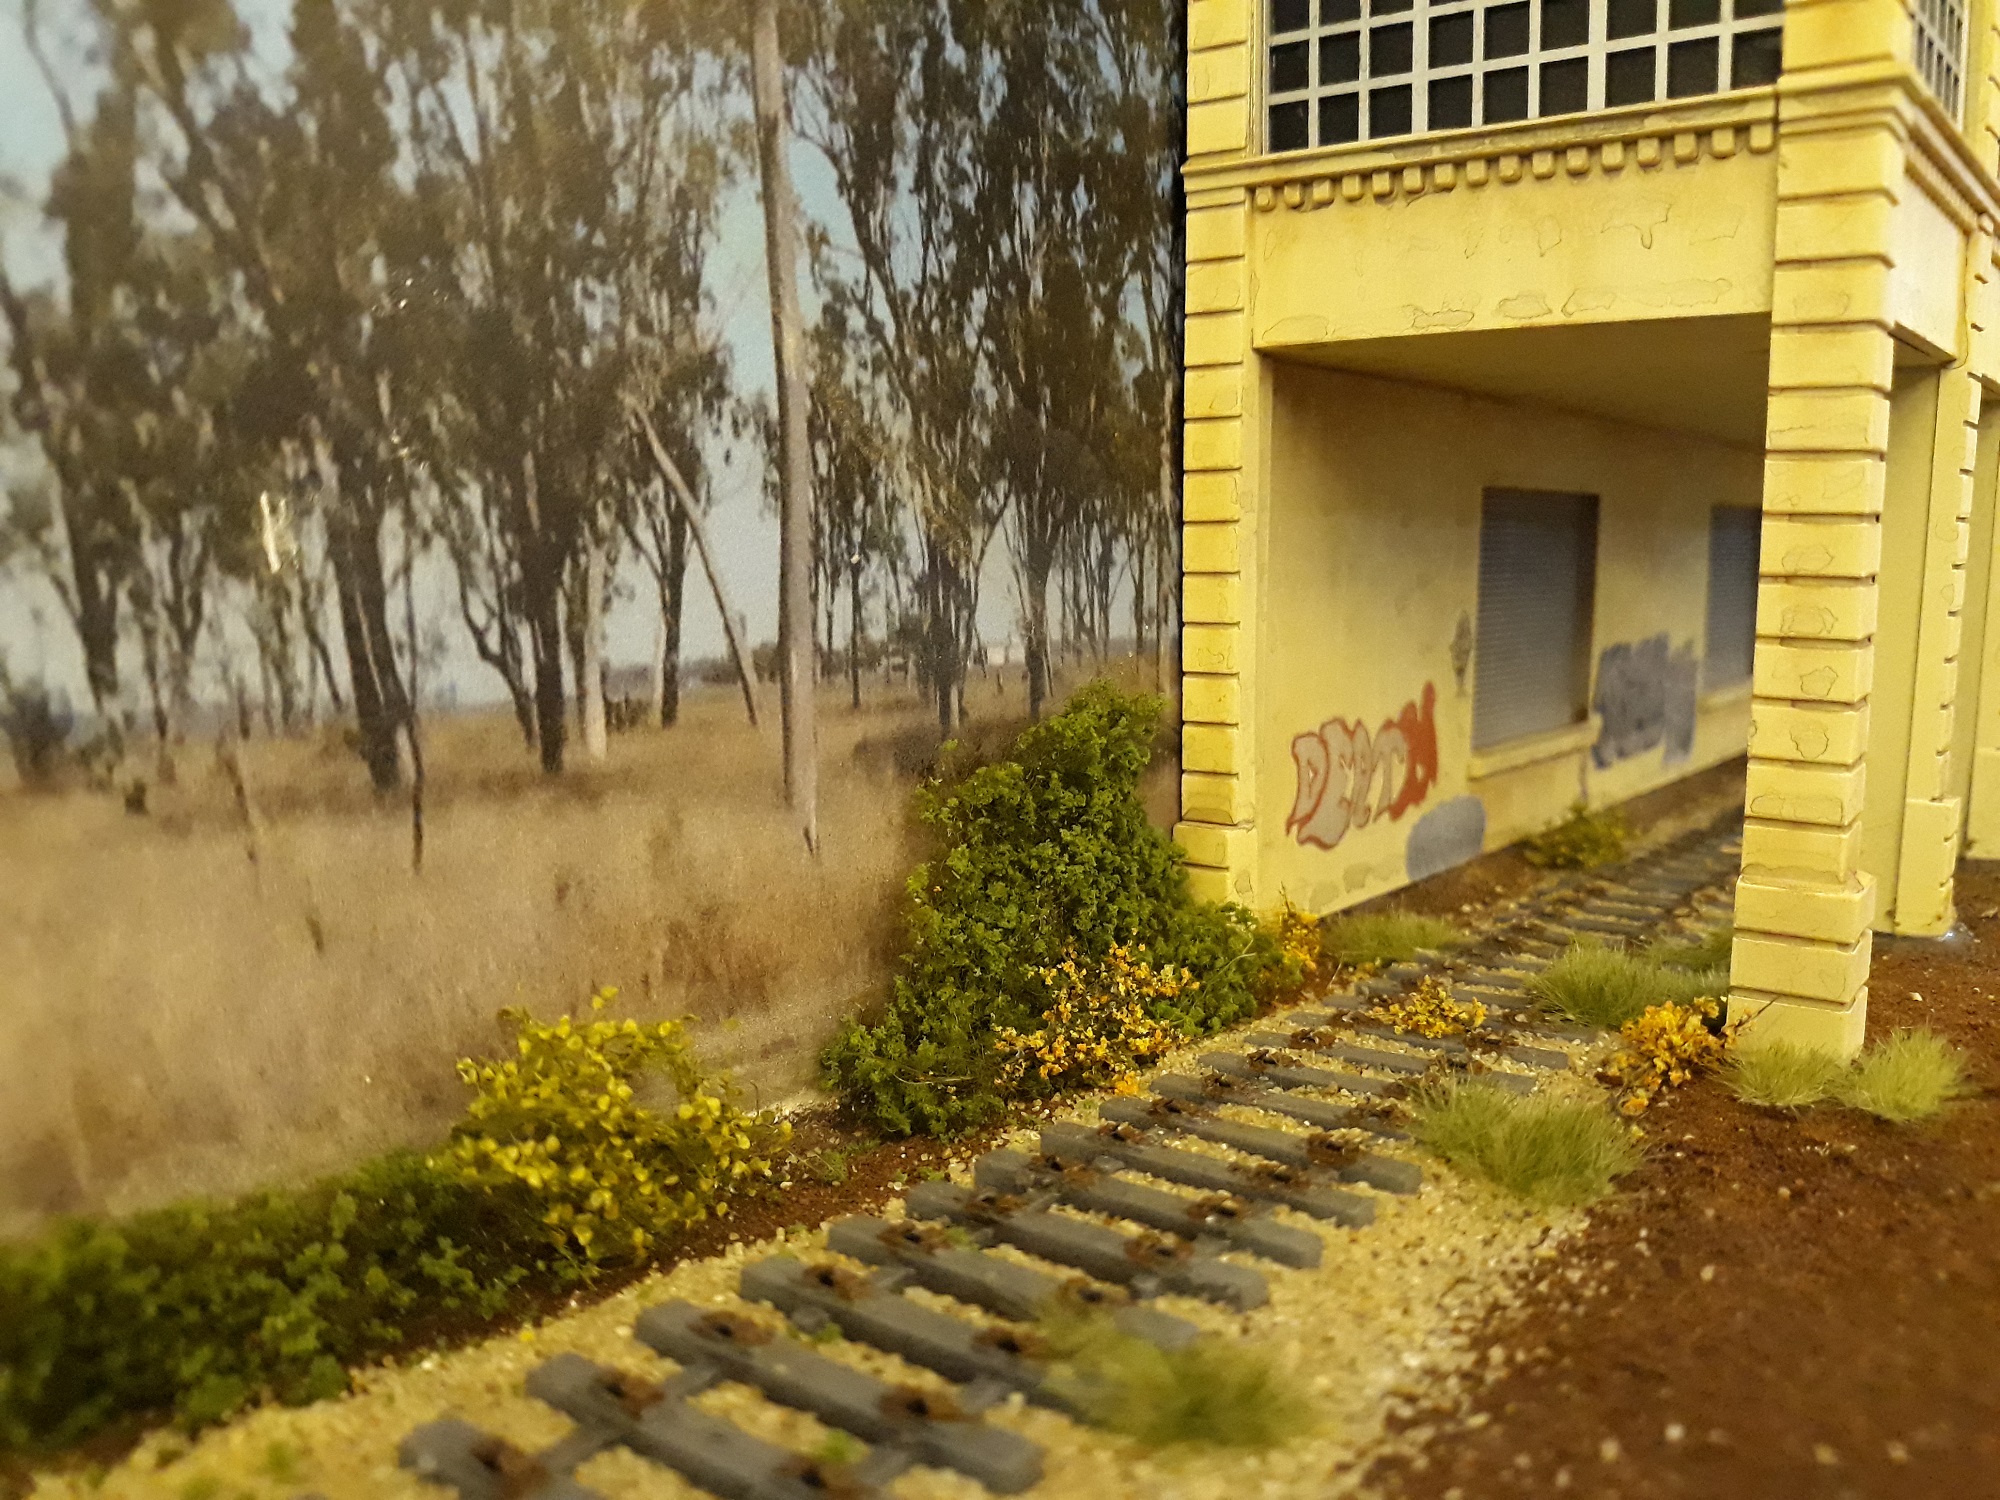
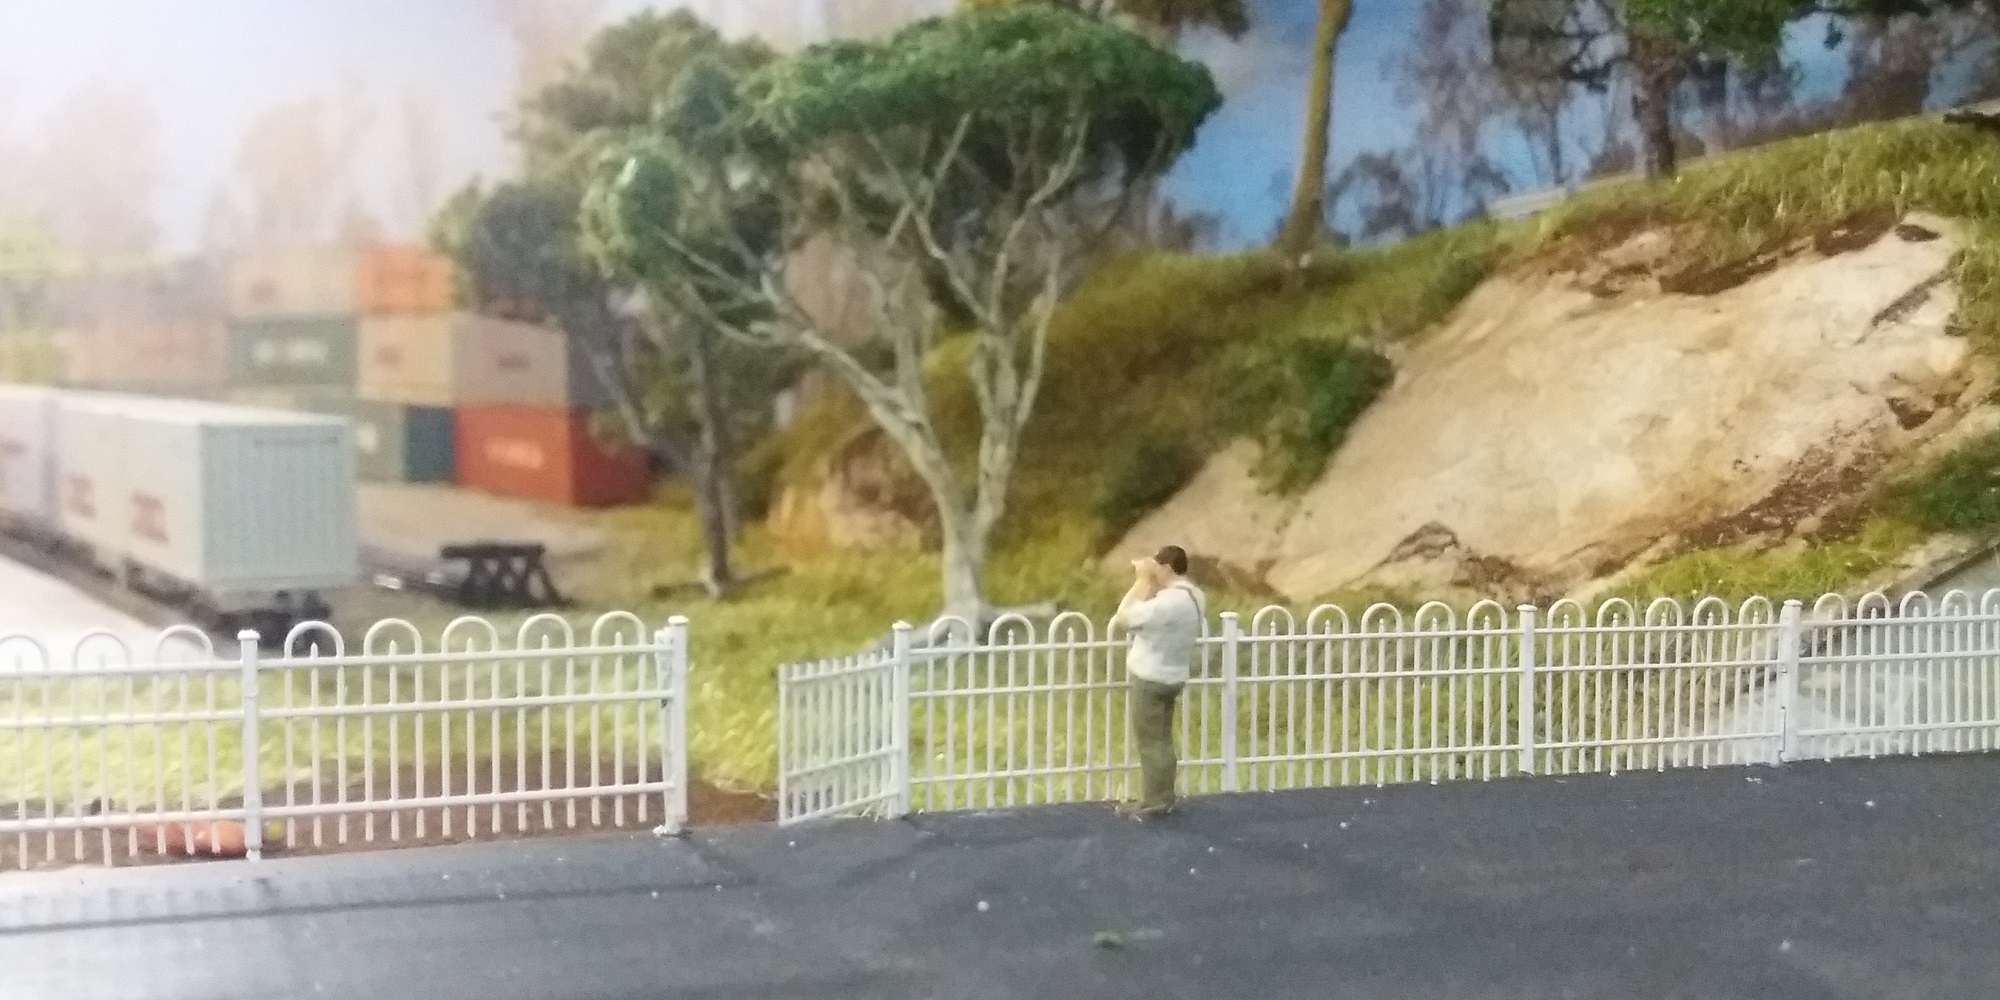
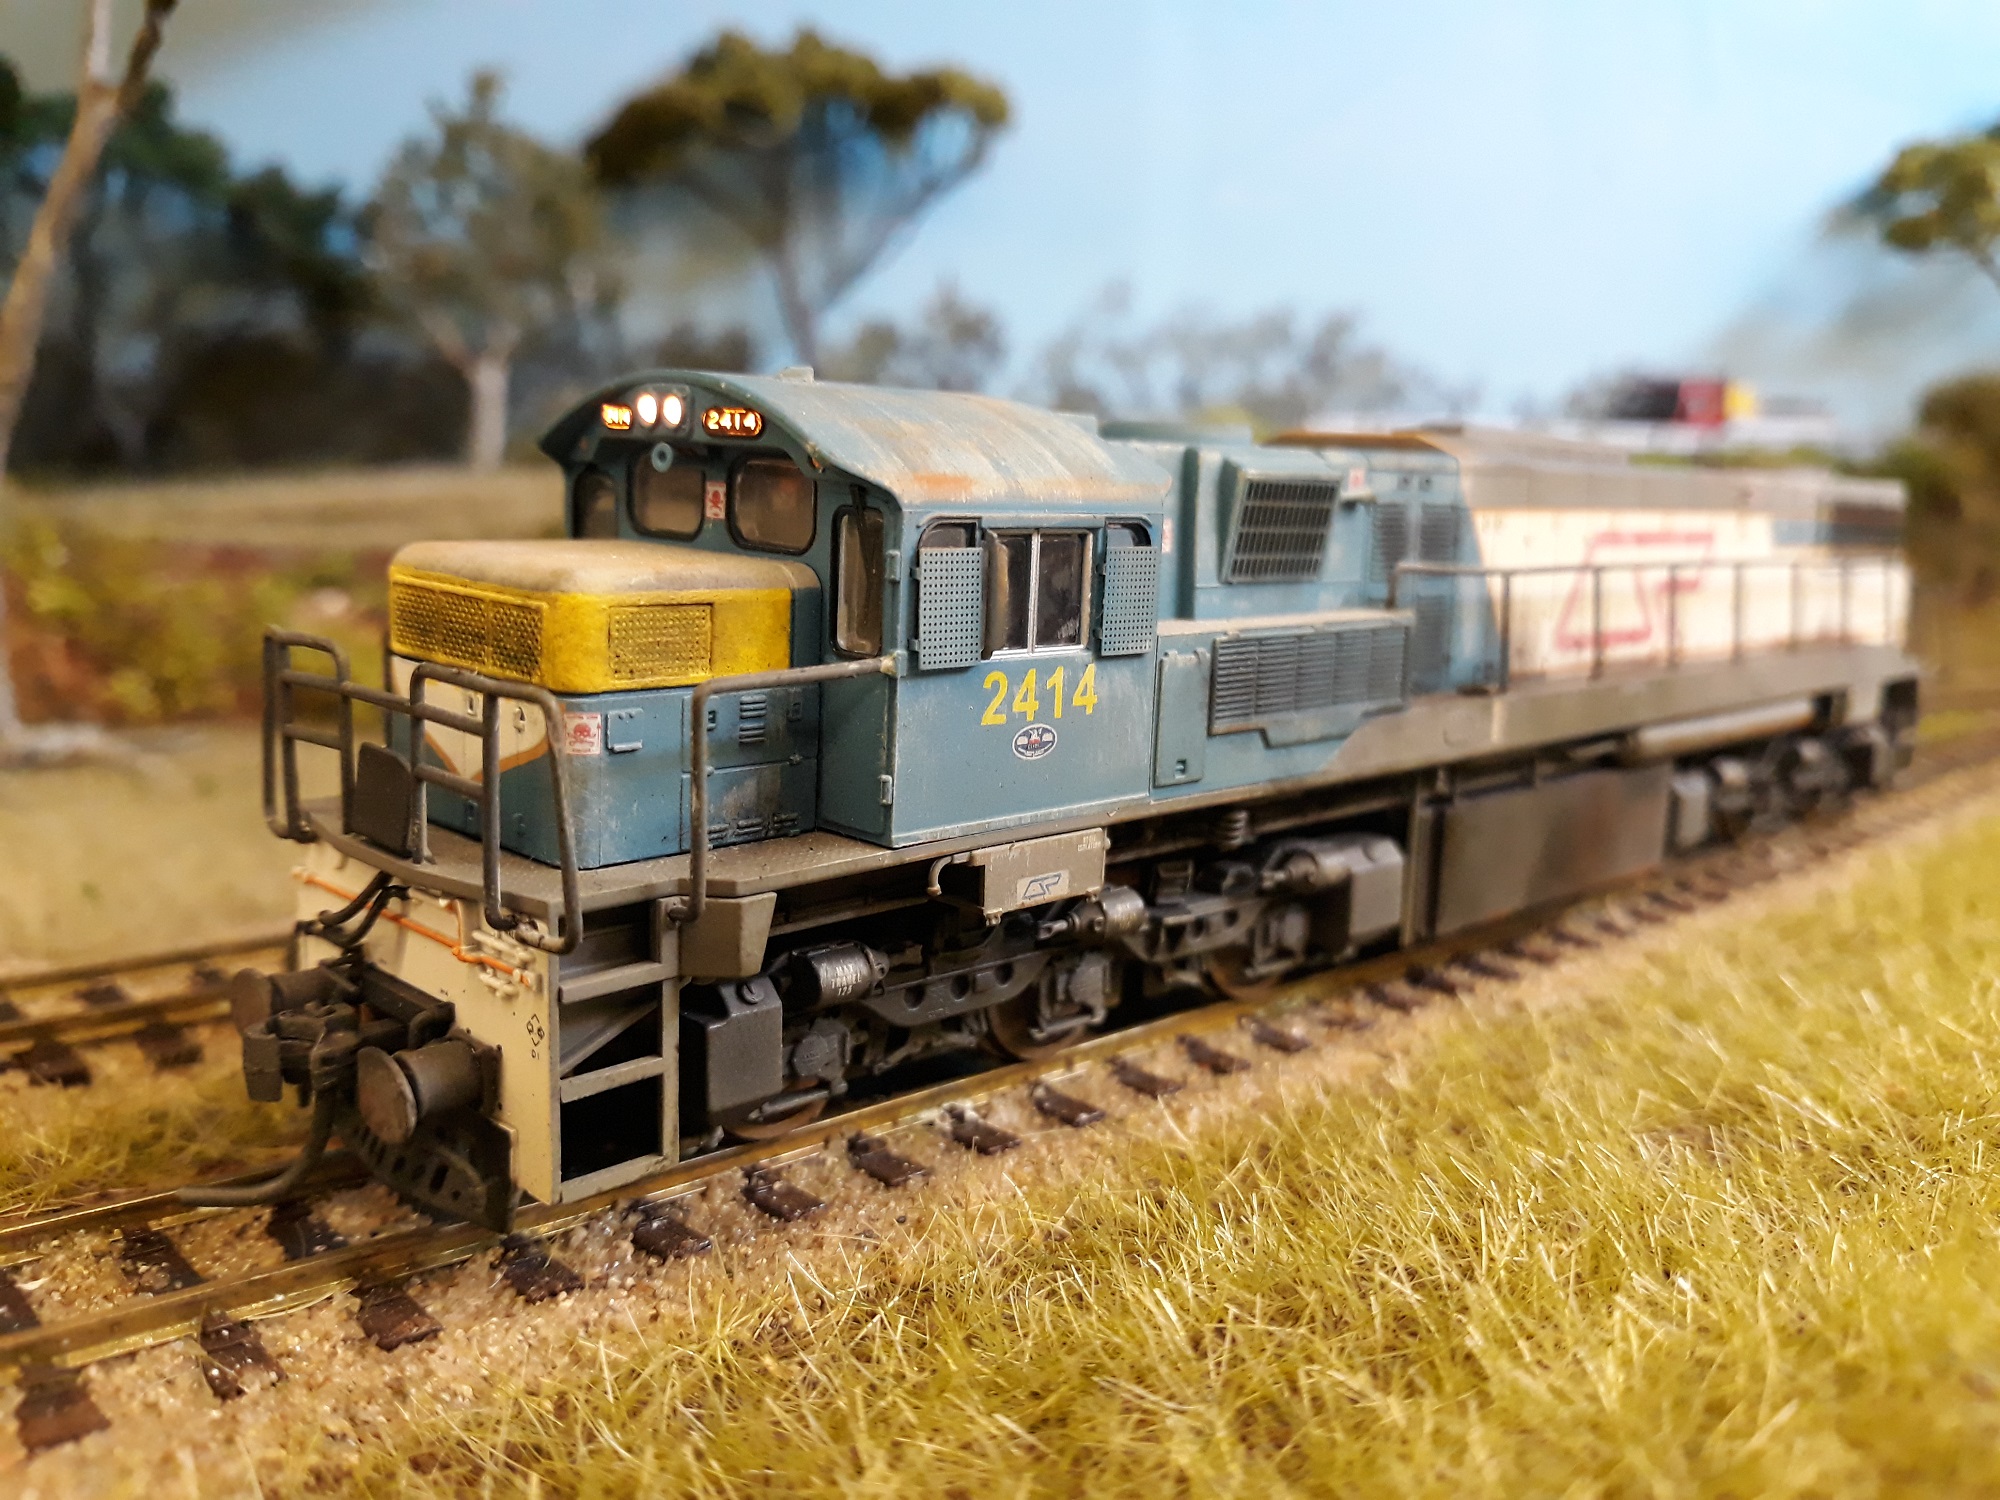
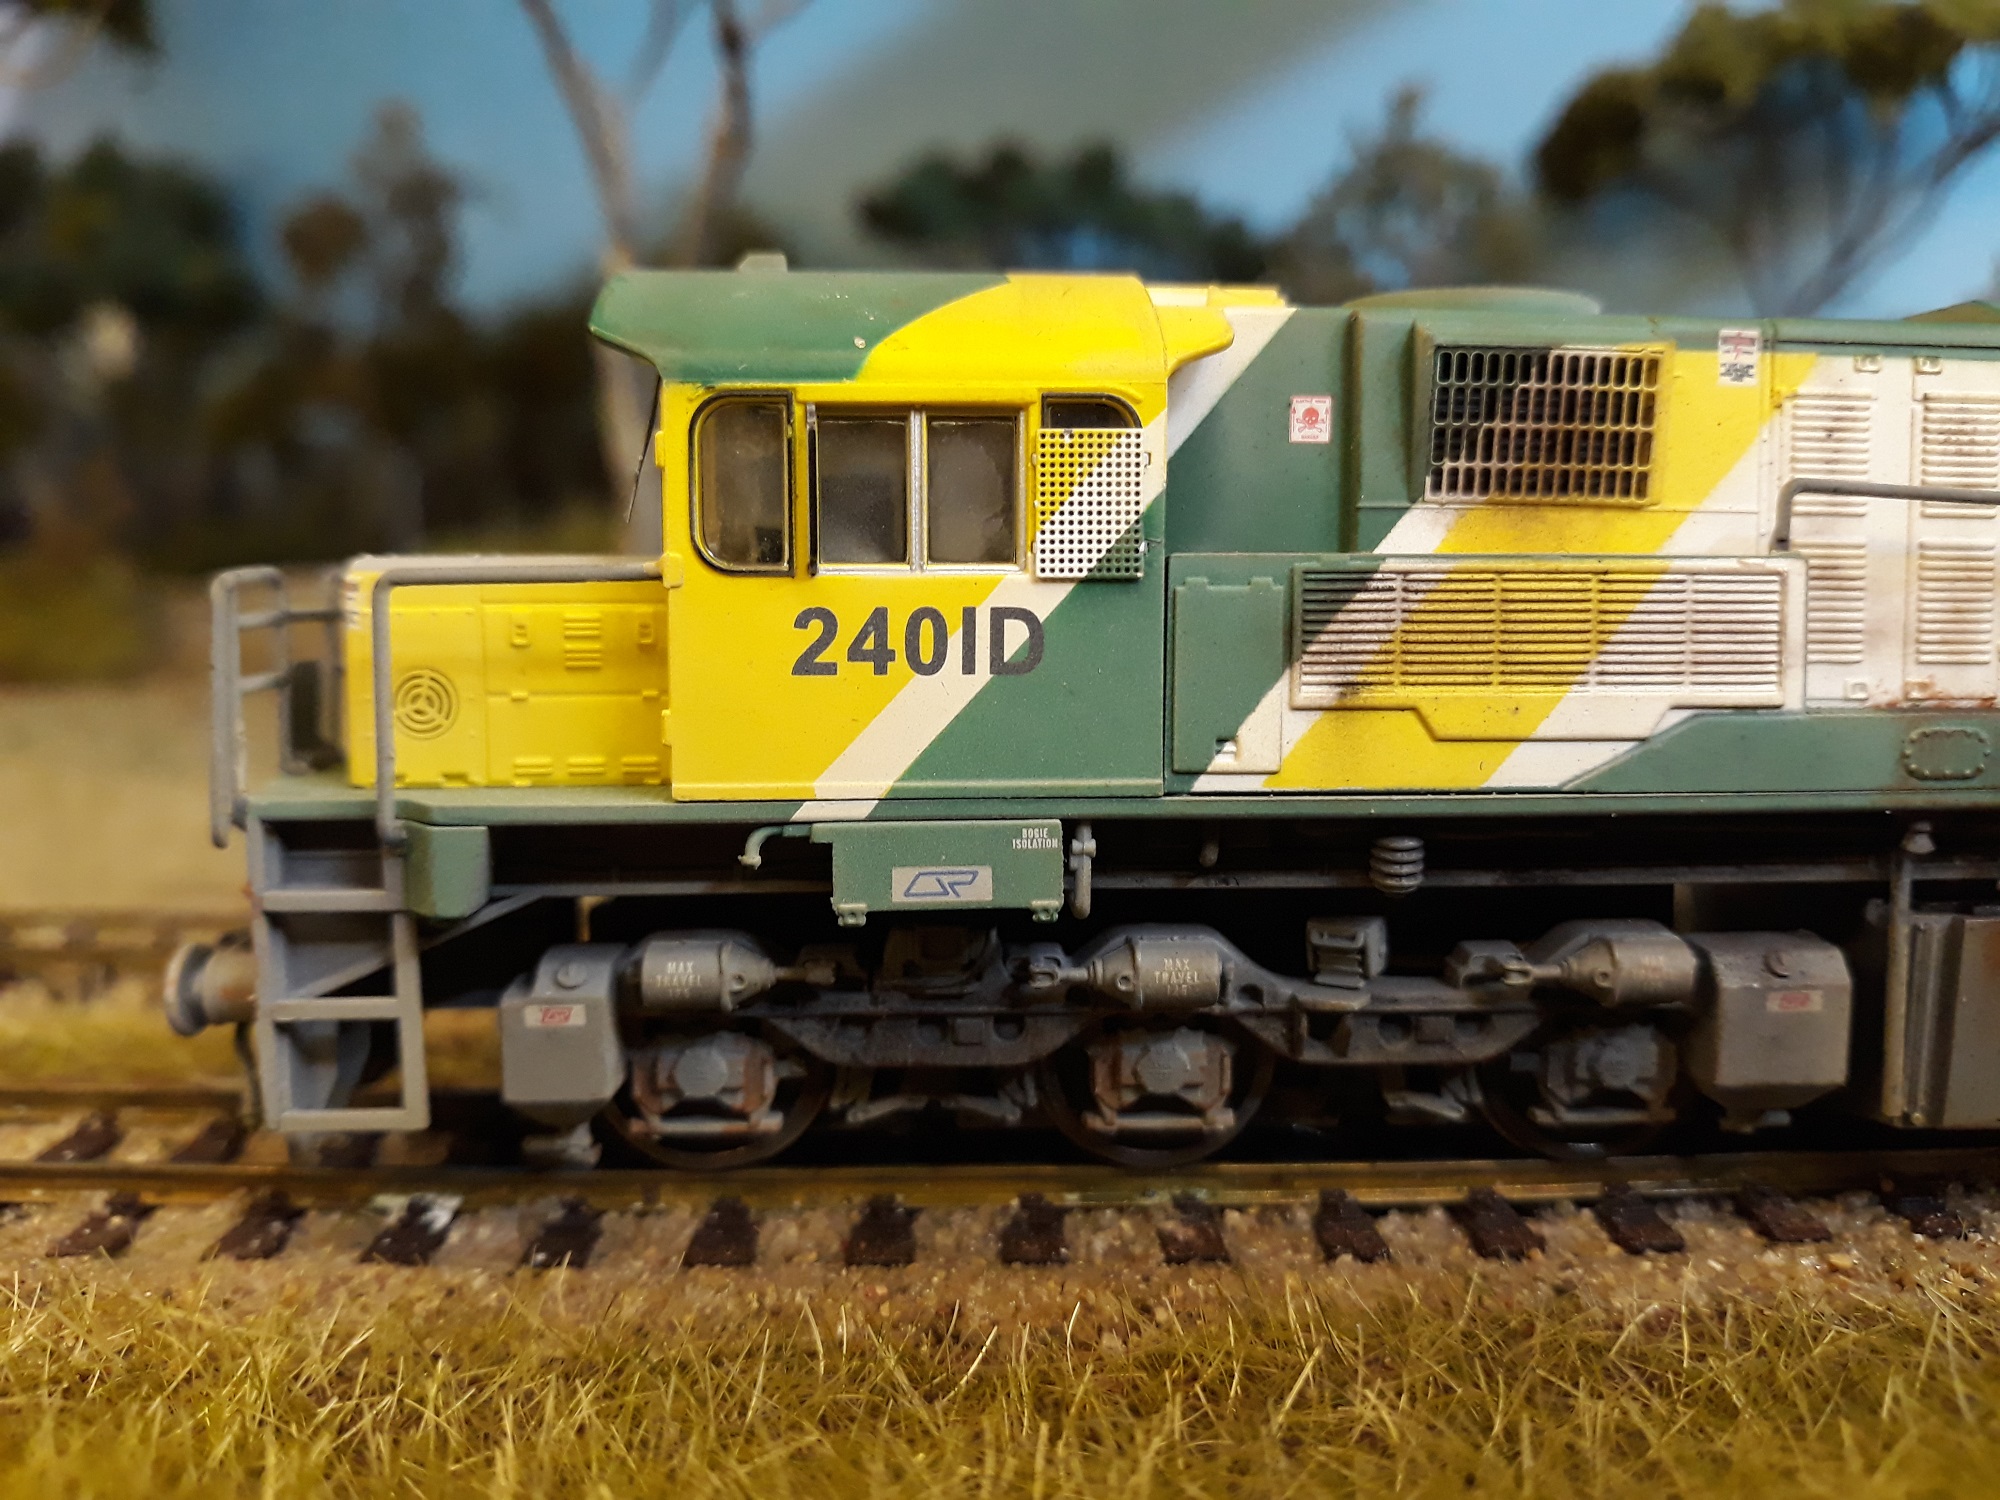
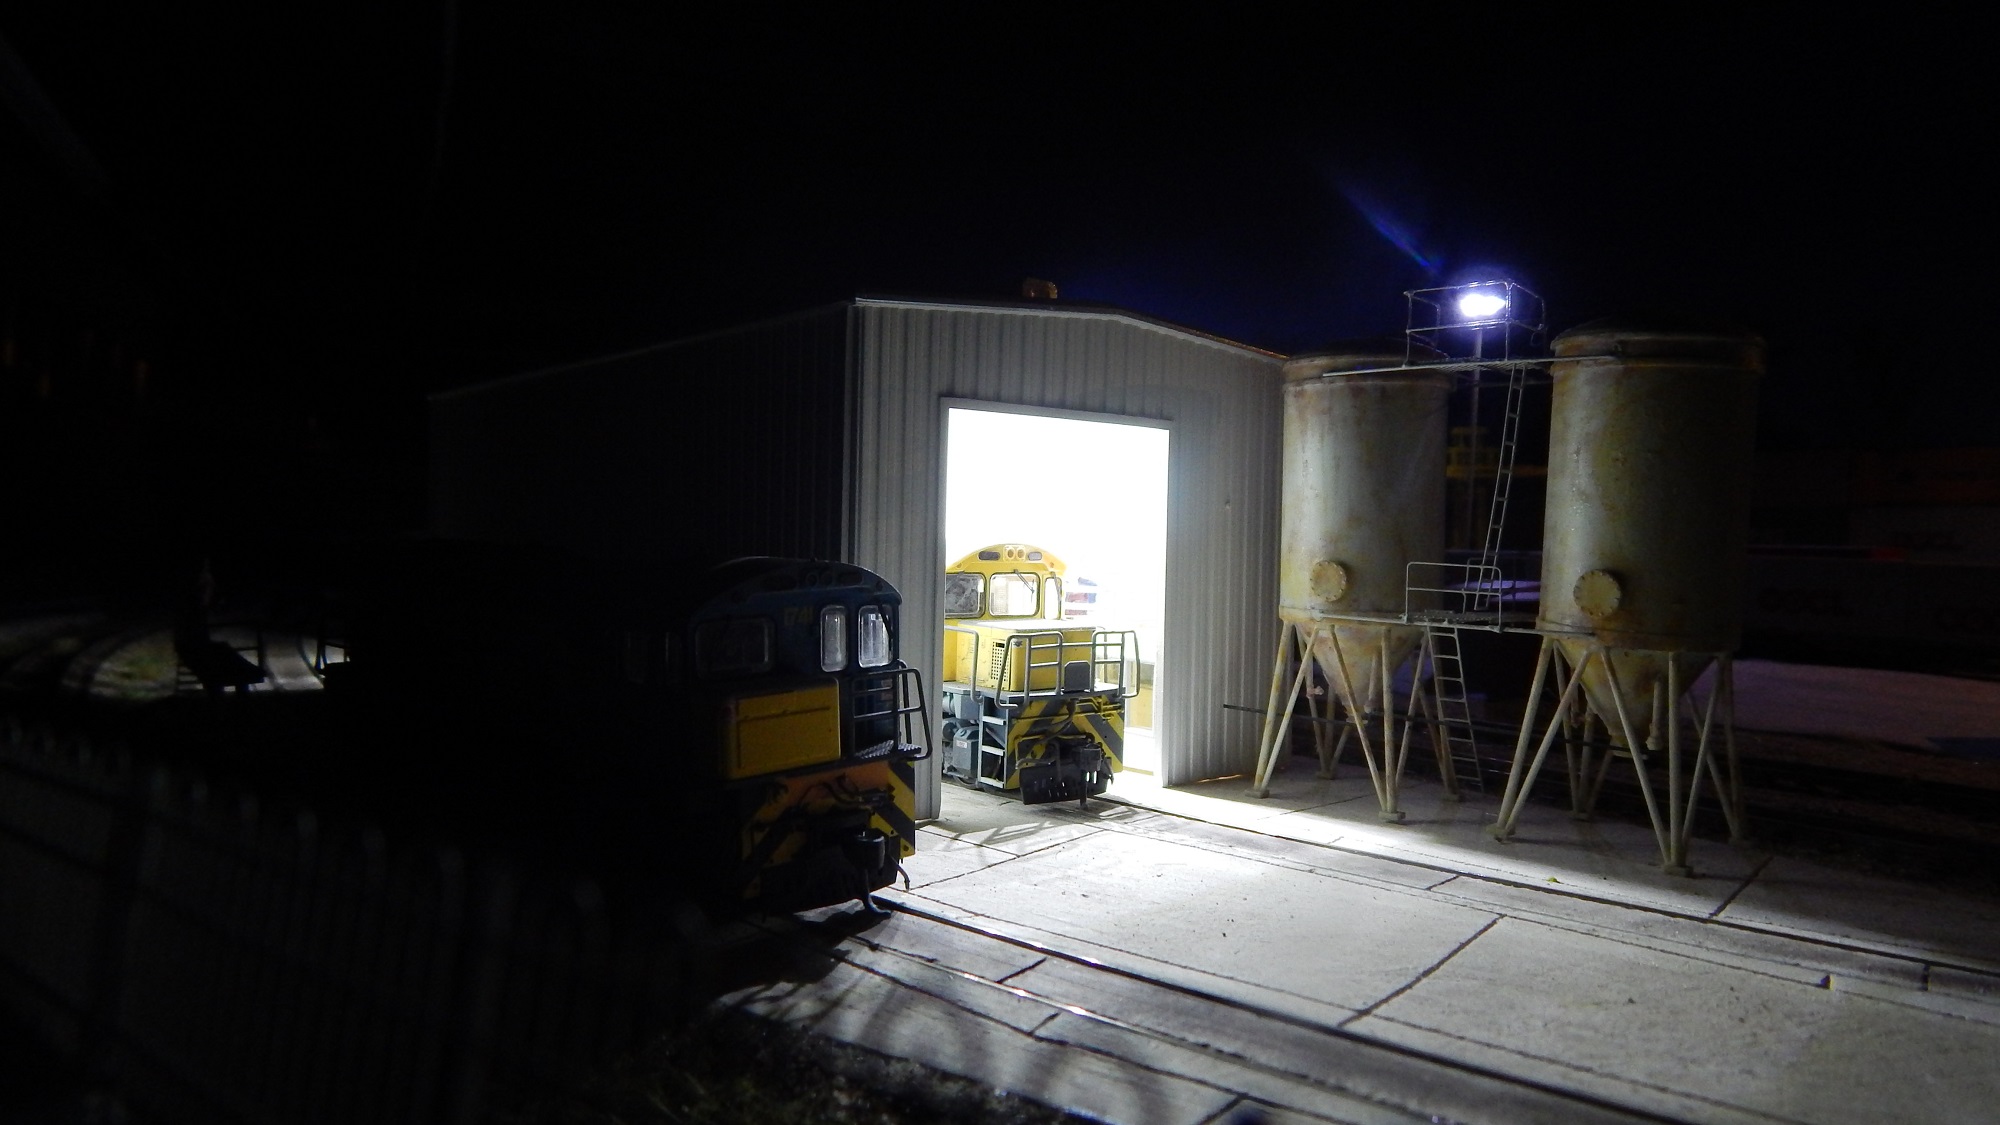
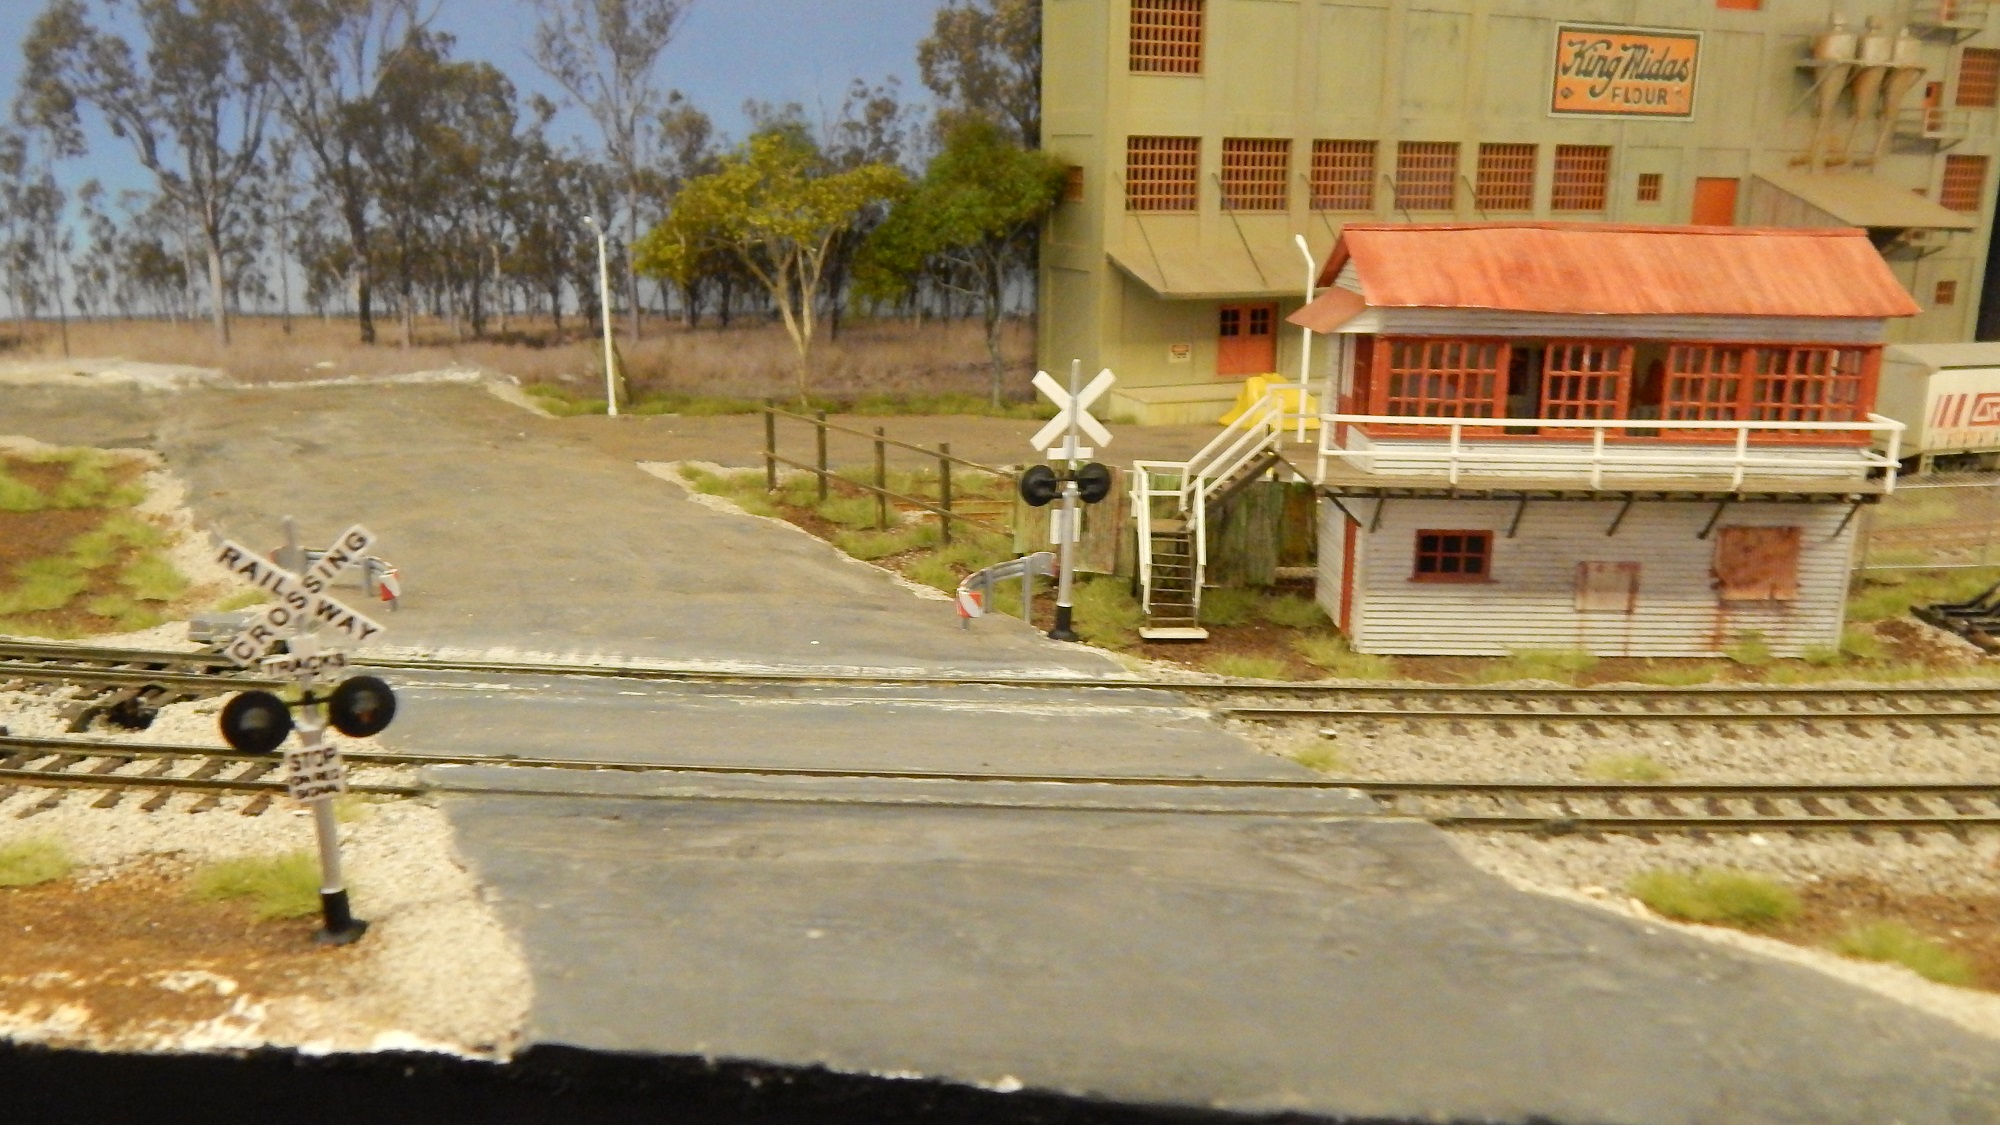
After recent events here at the Wuiske Asylum, we’ve decided to make some changes on the Wuiske Models layout. We’re backdating it!


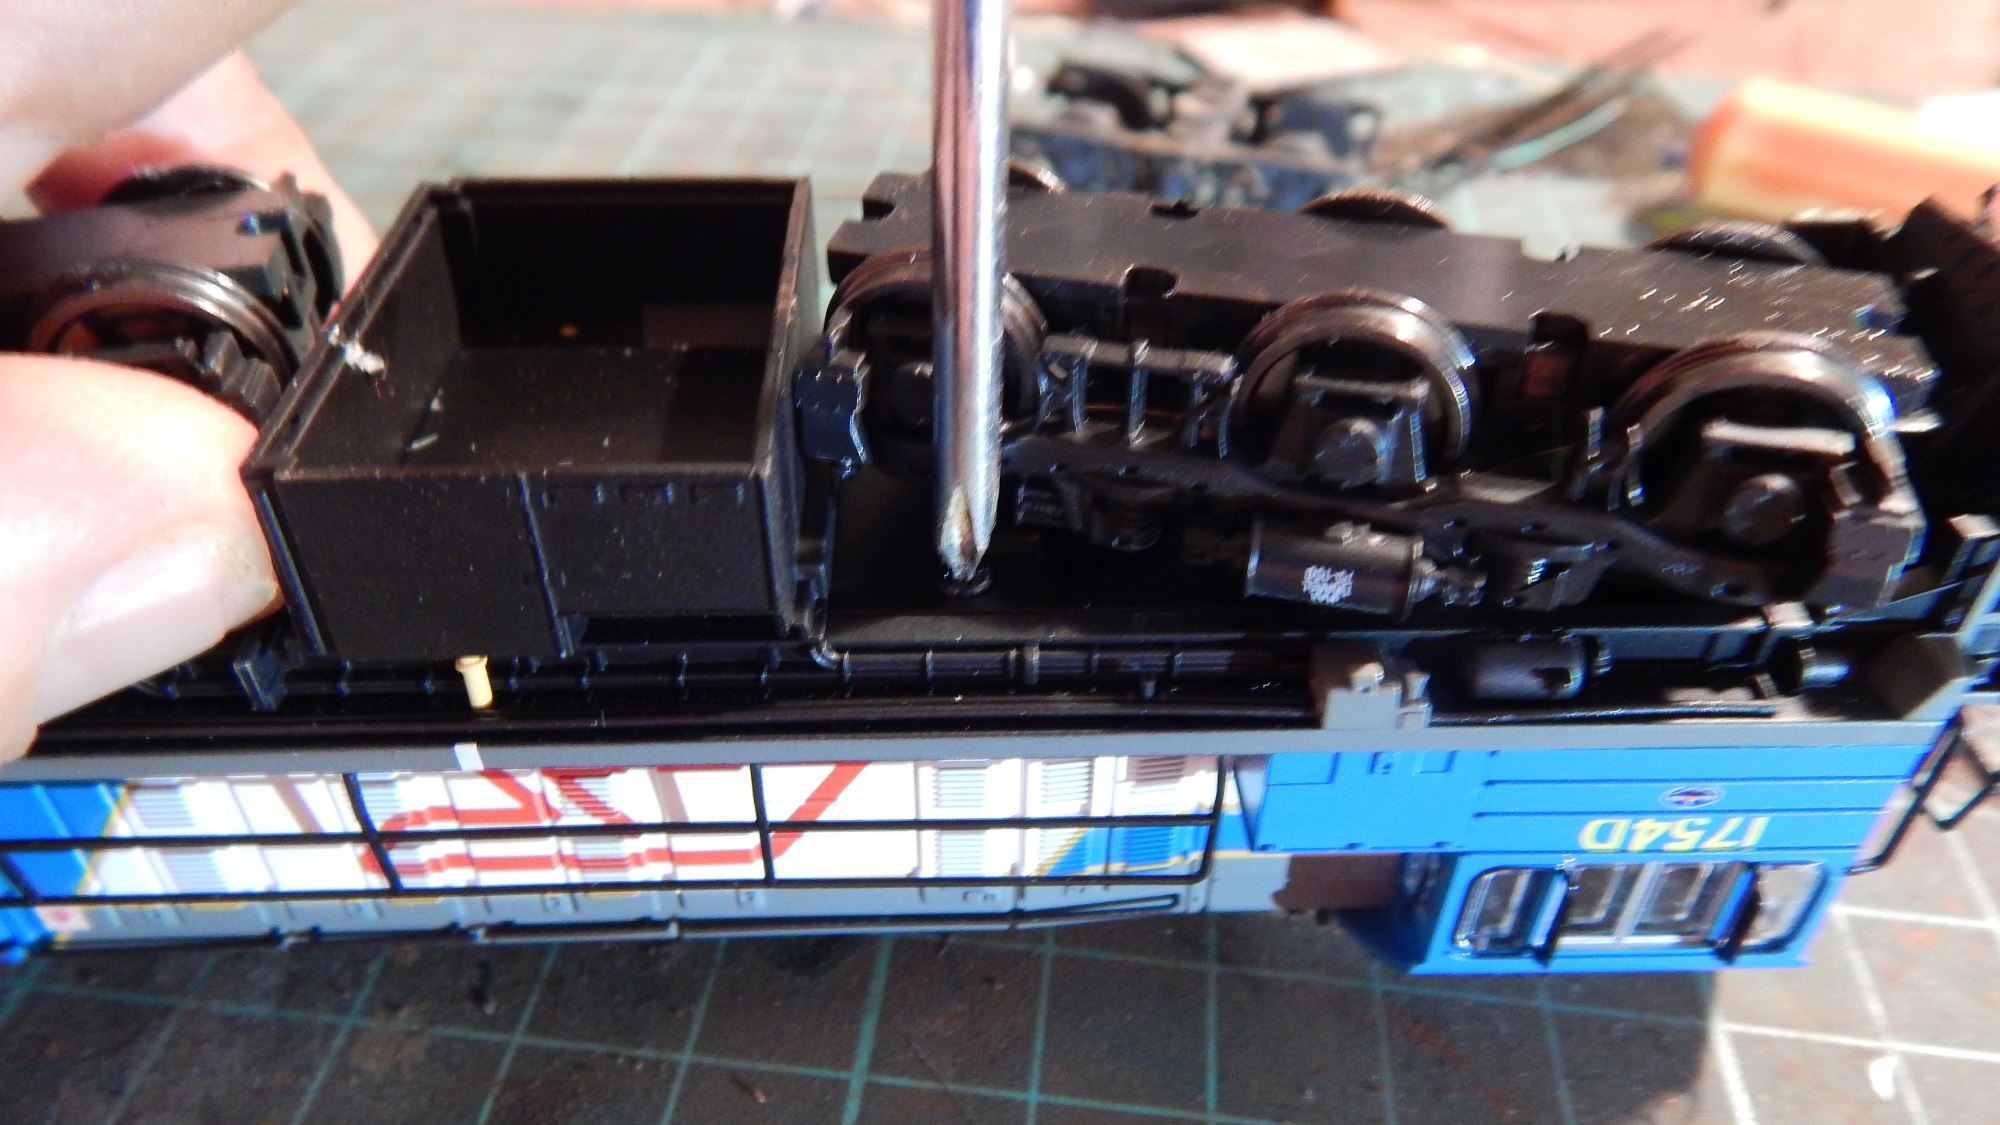
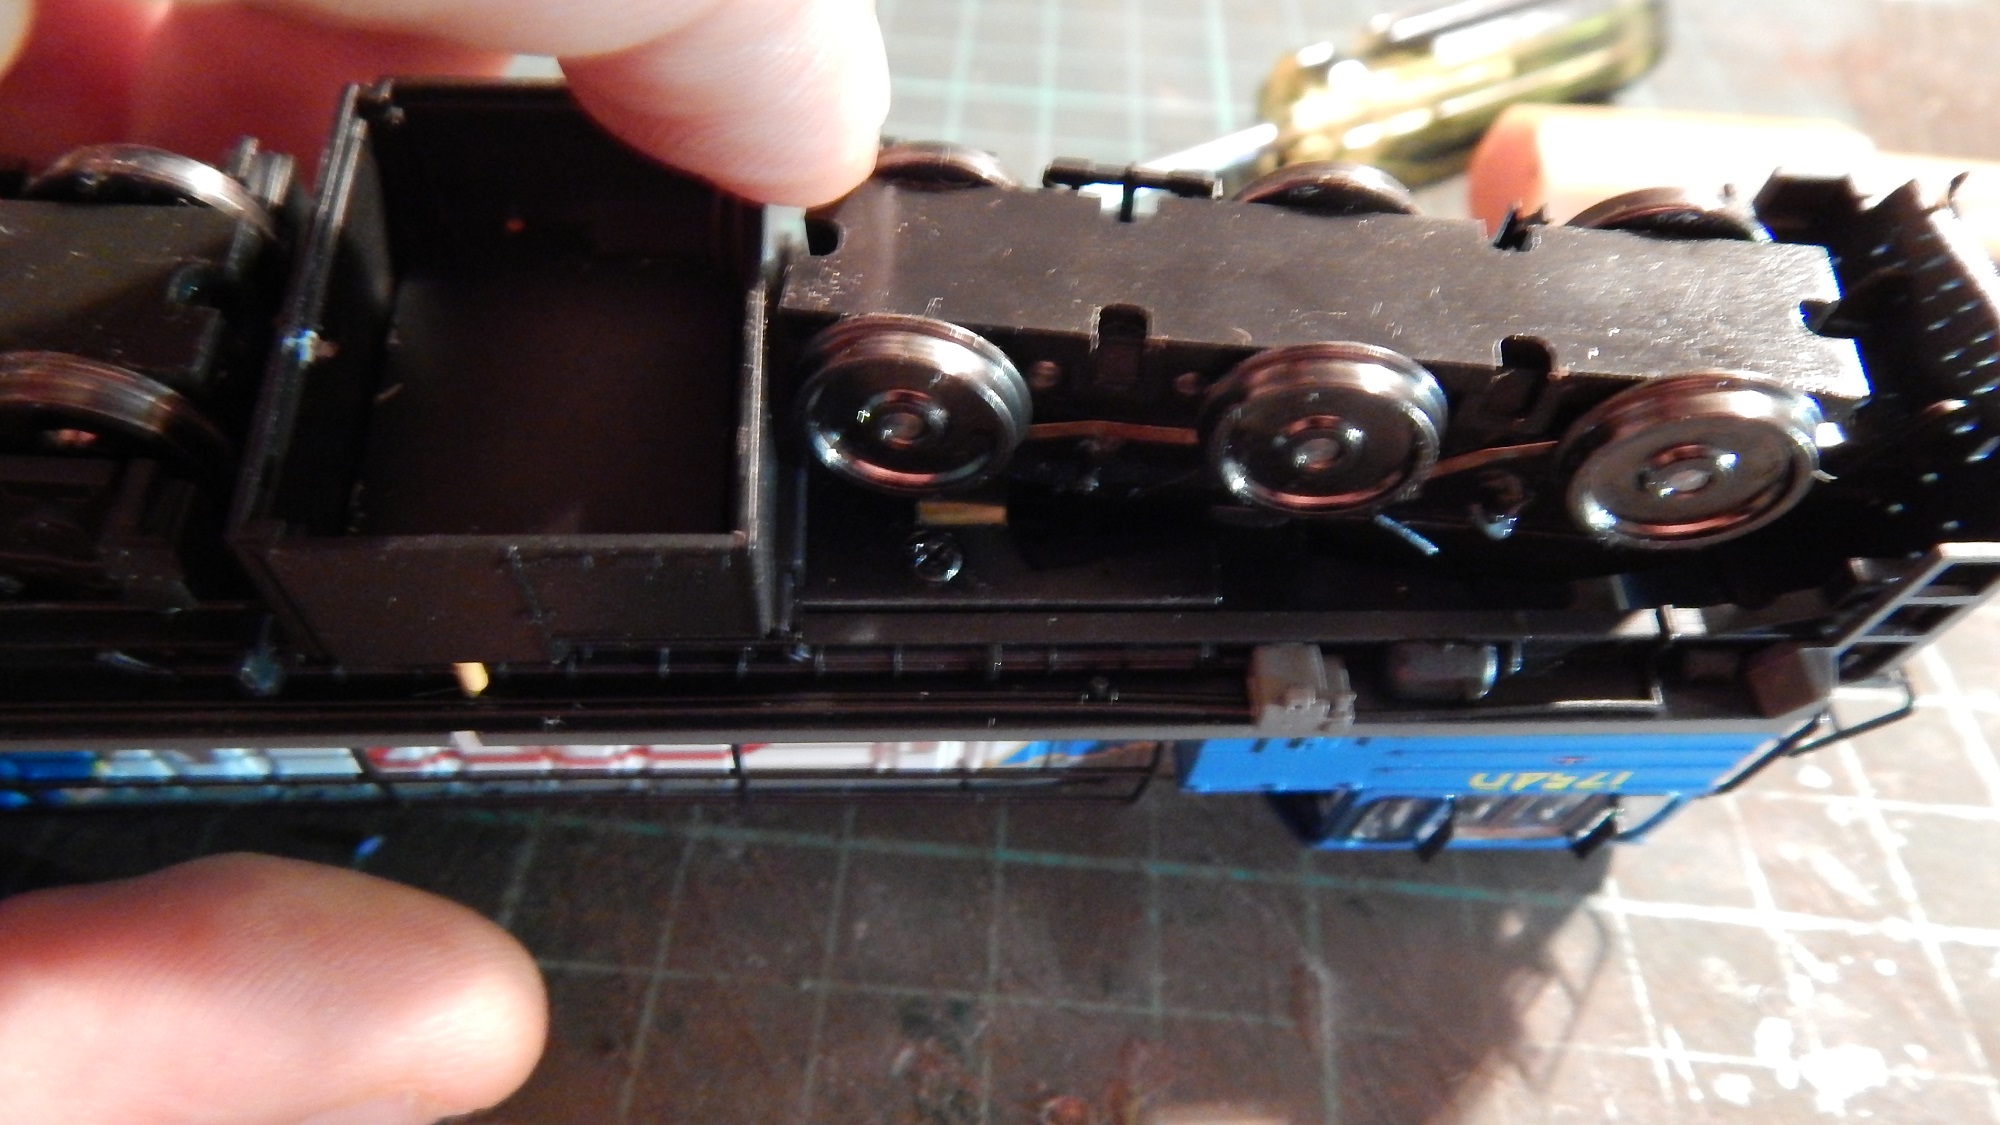
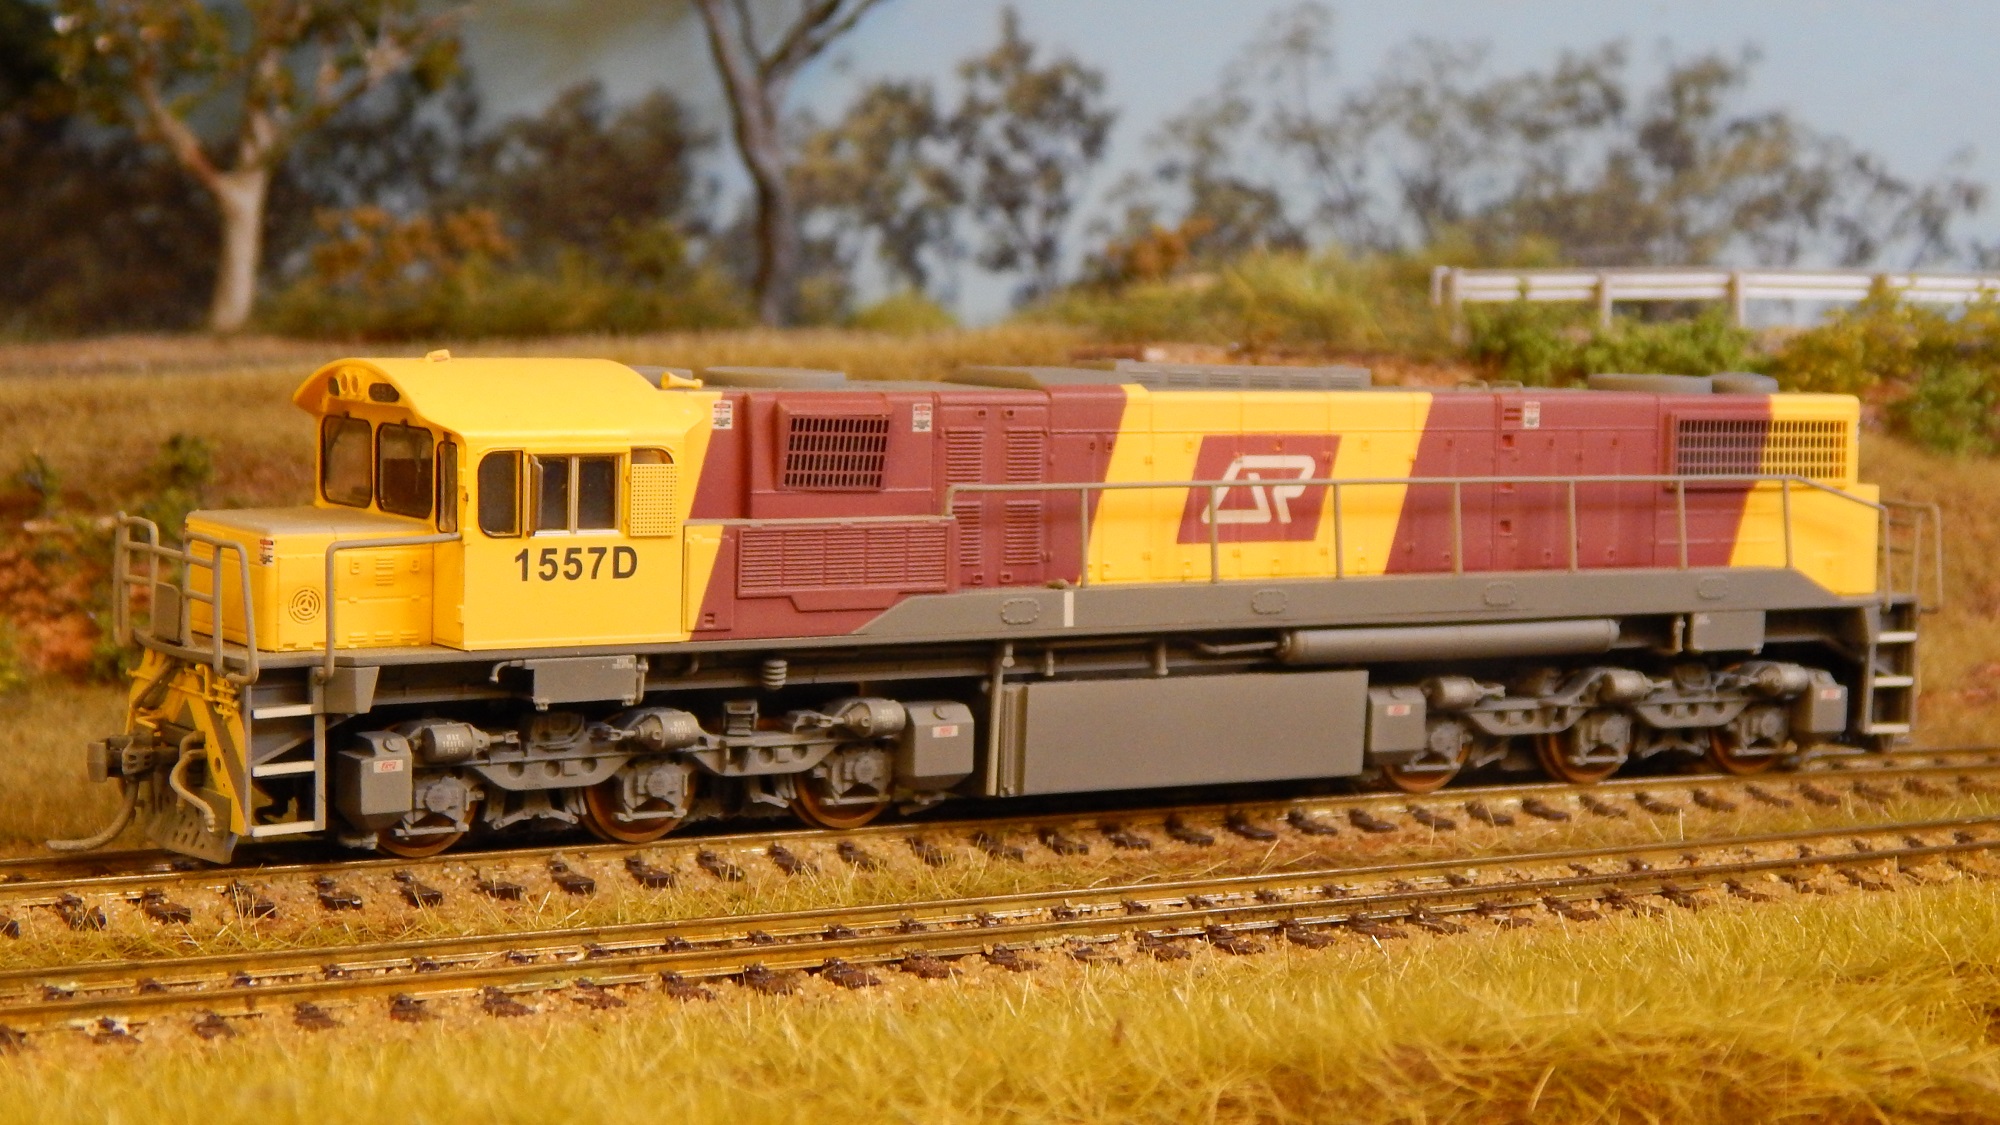
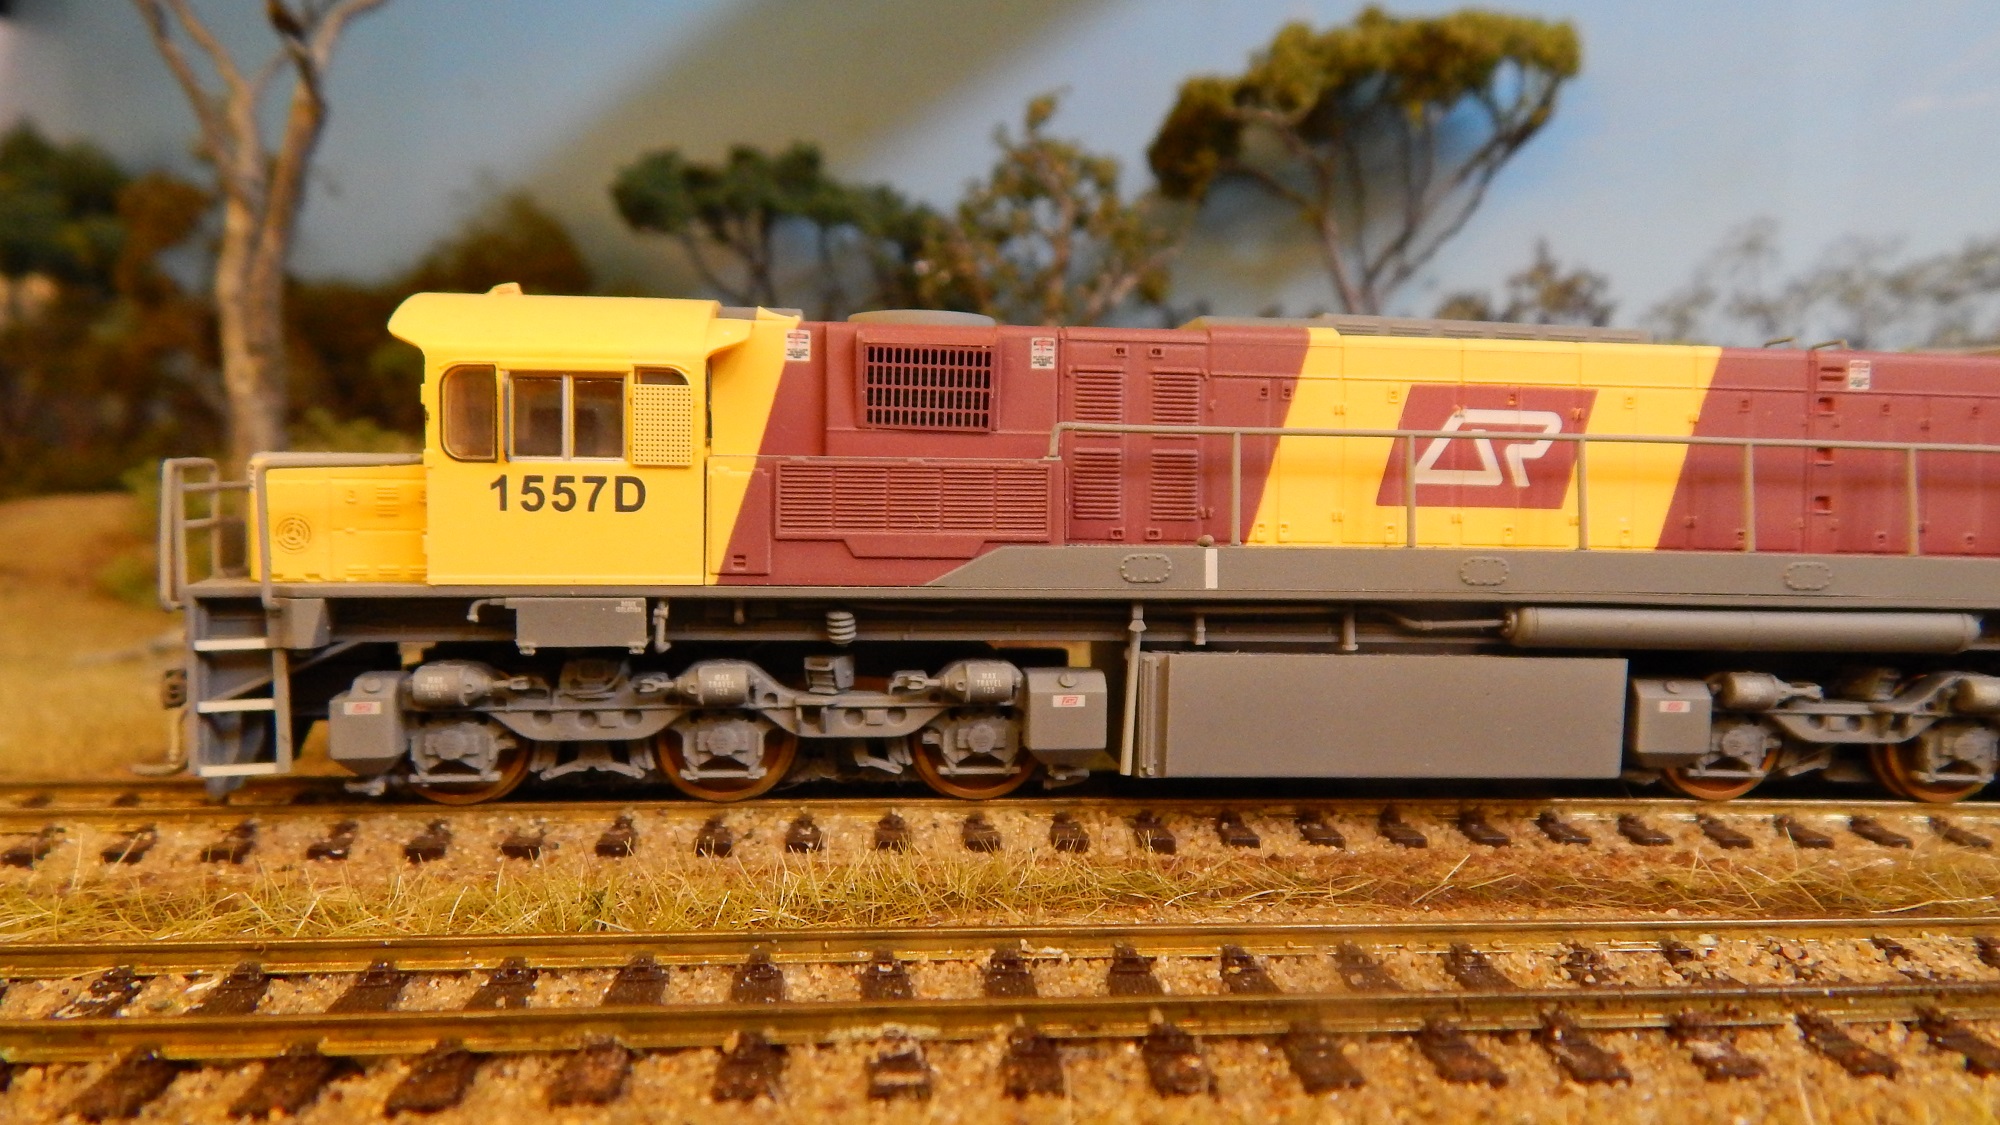
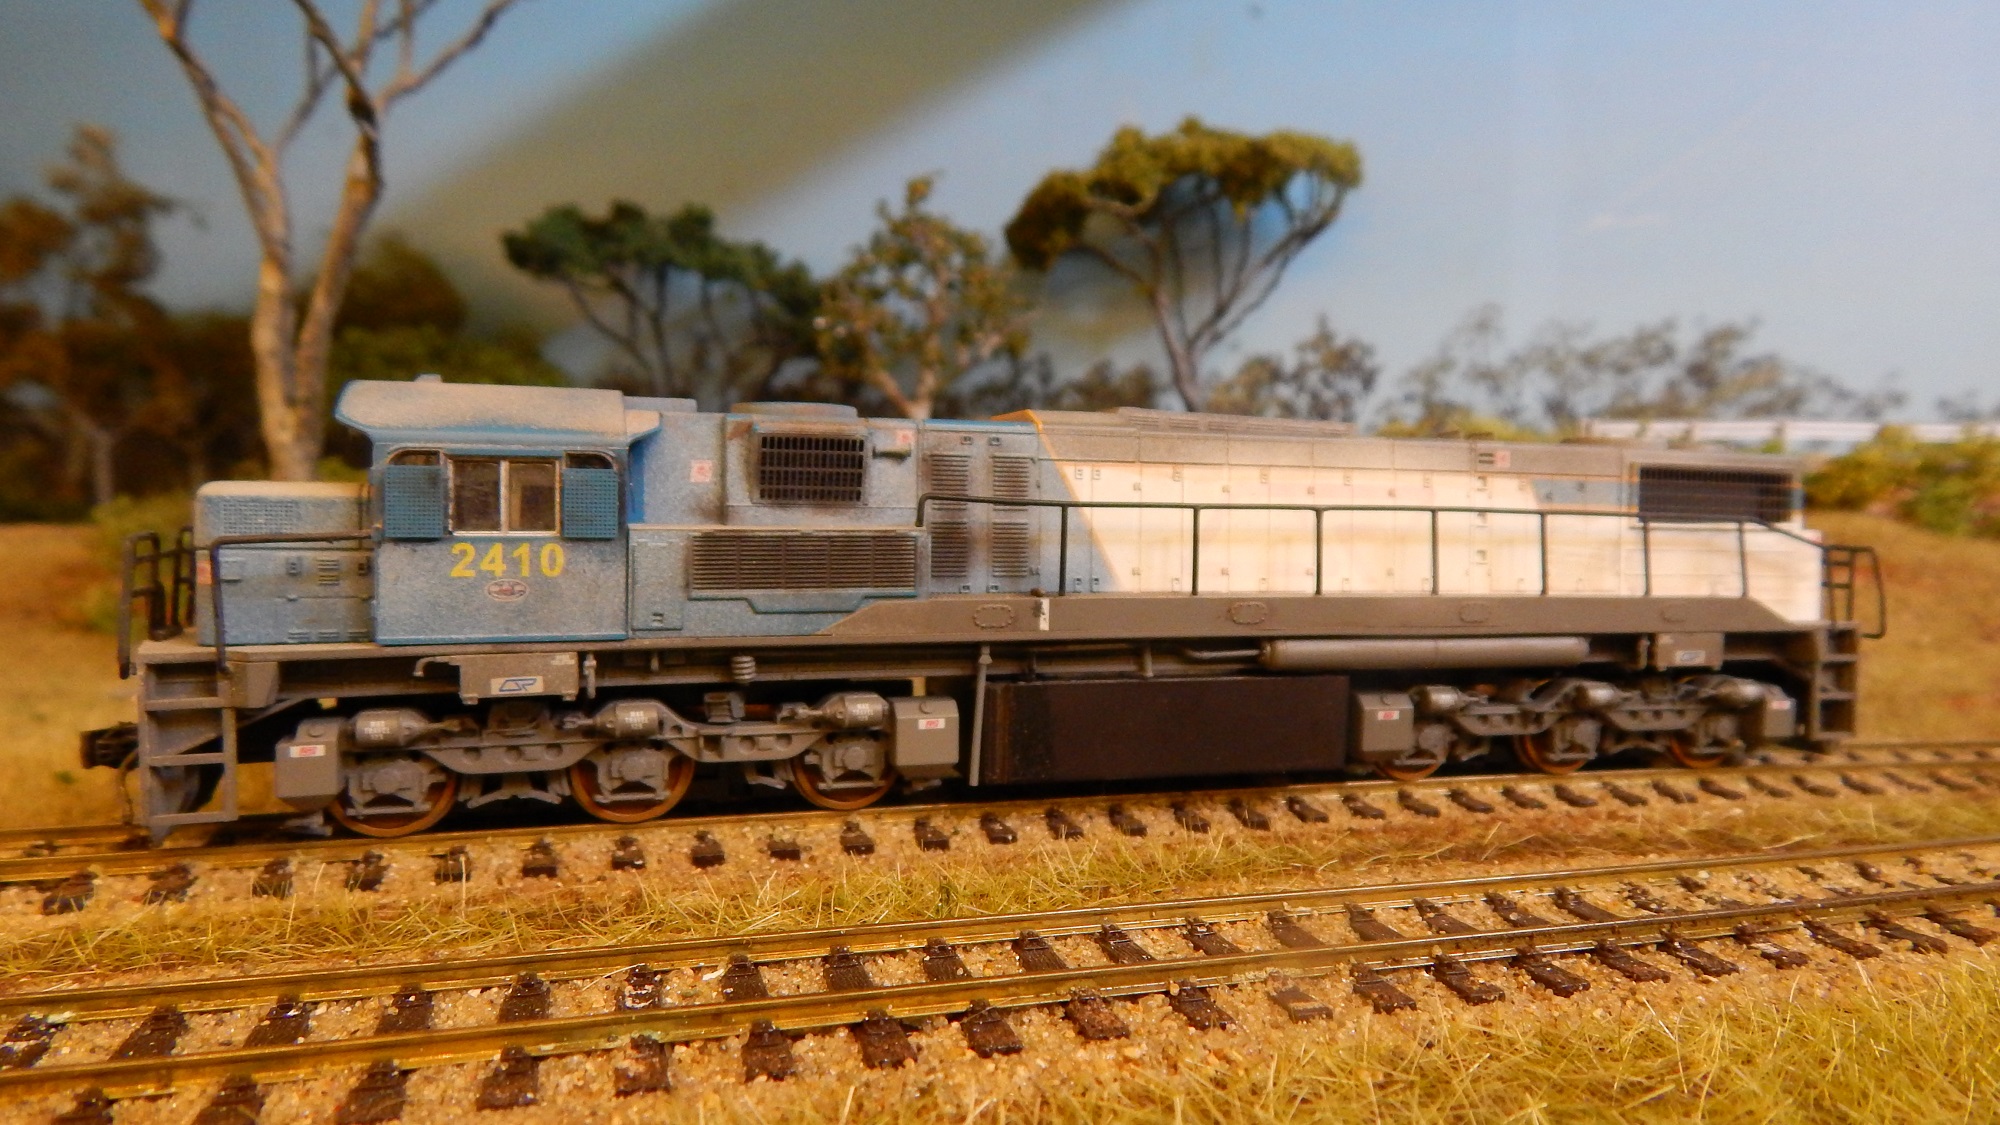
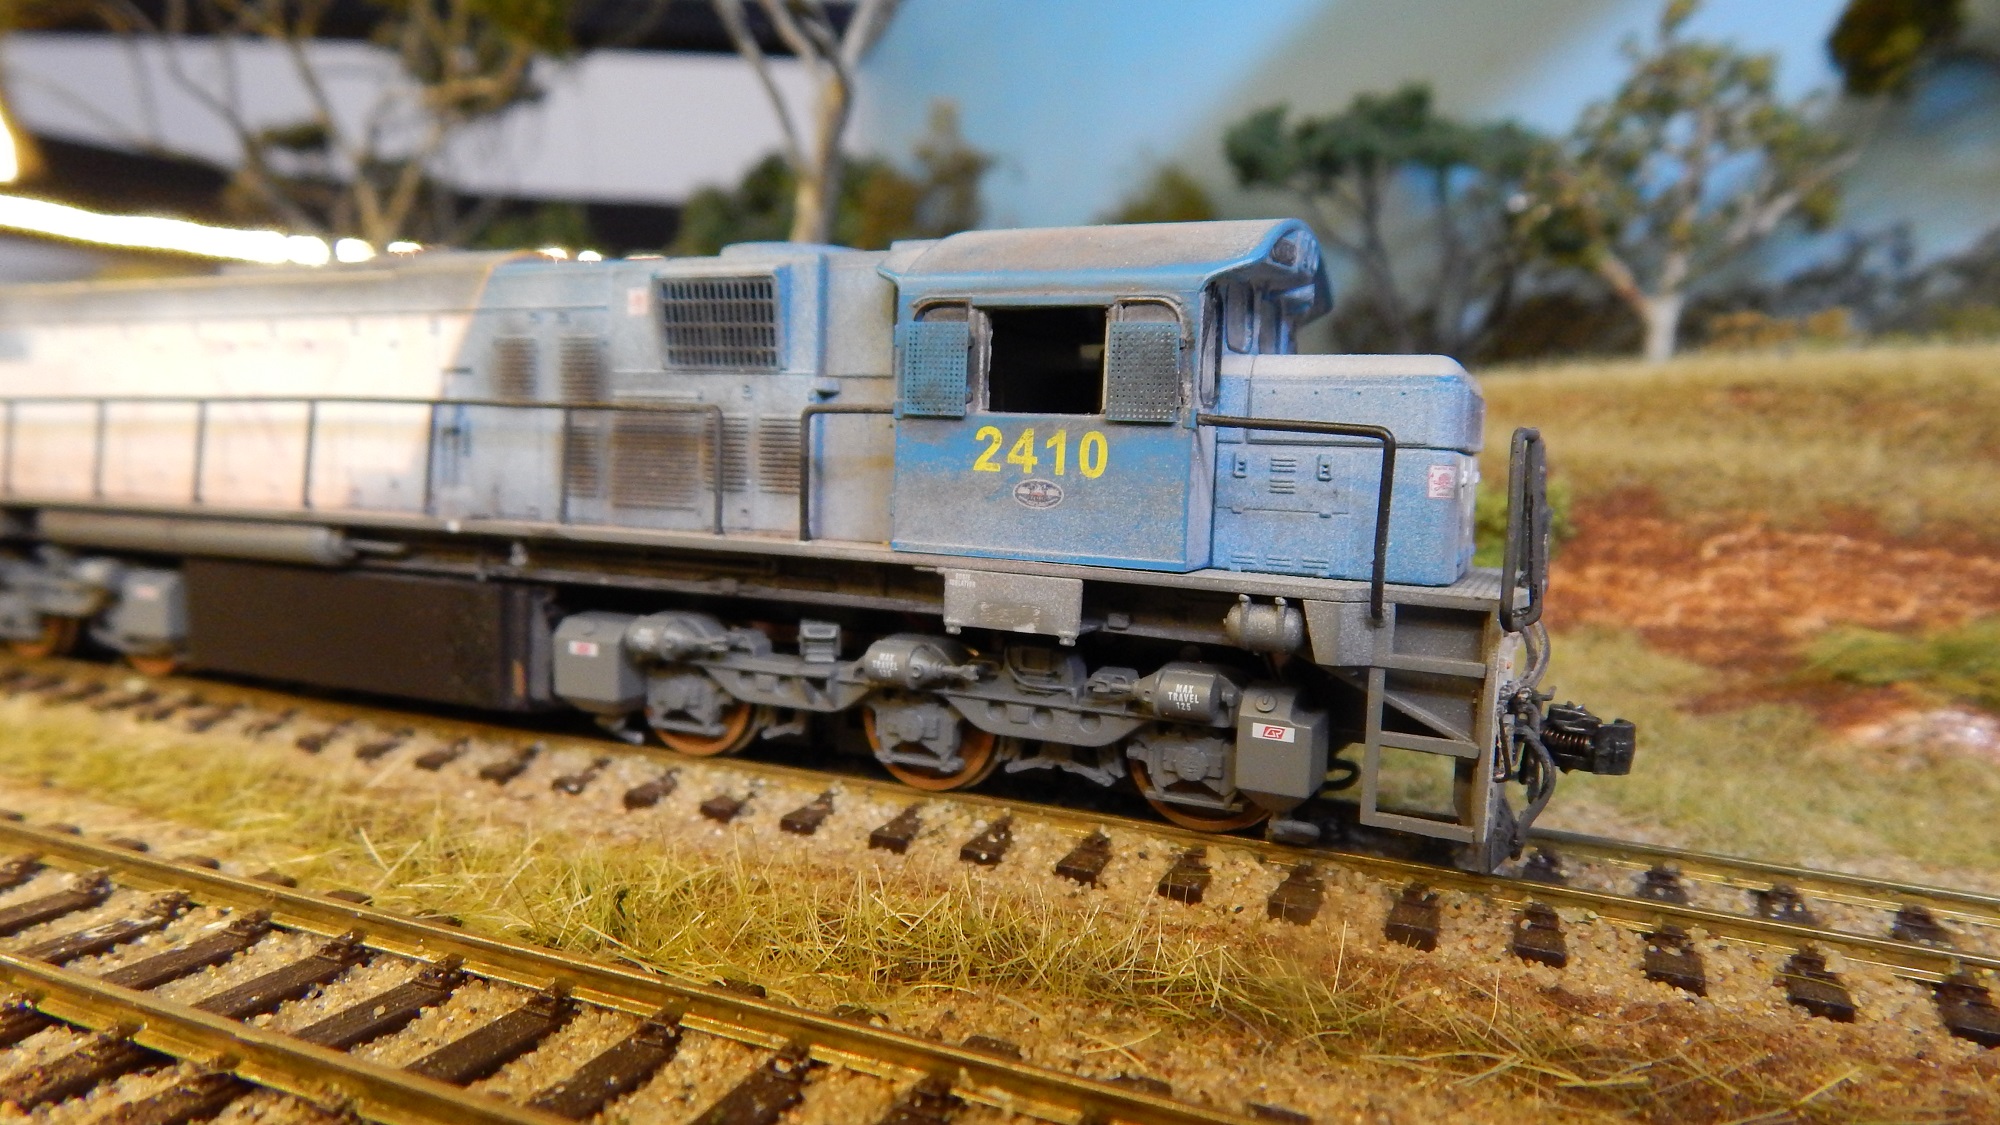
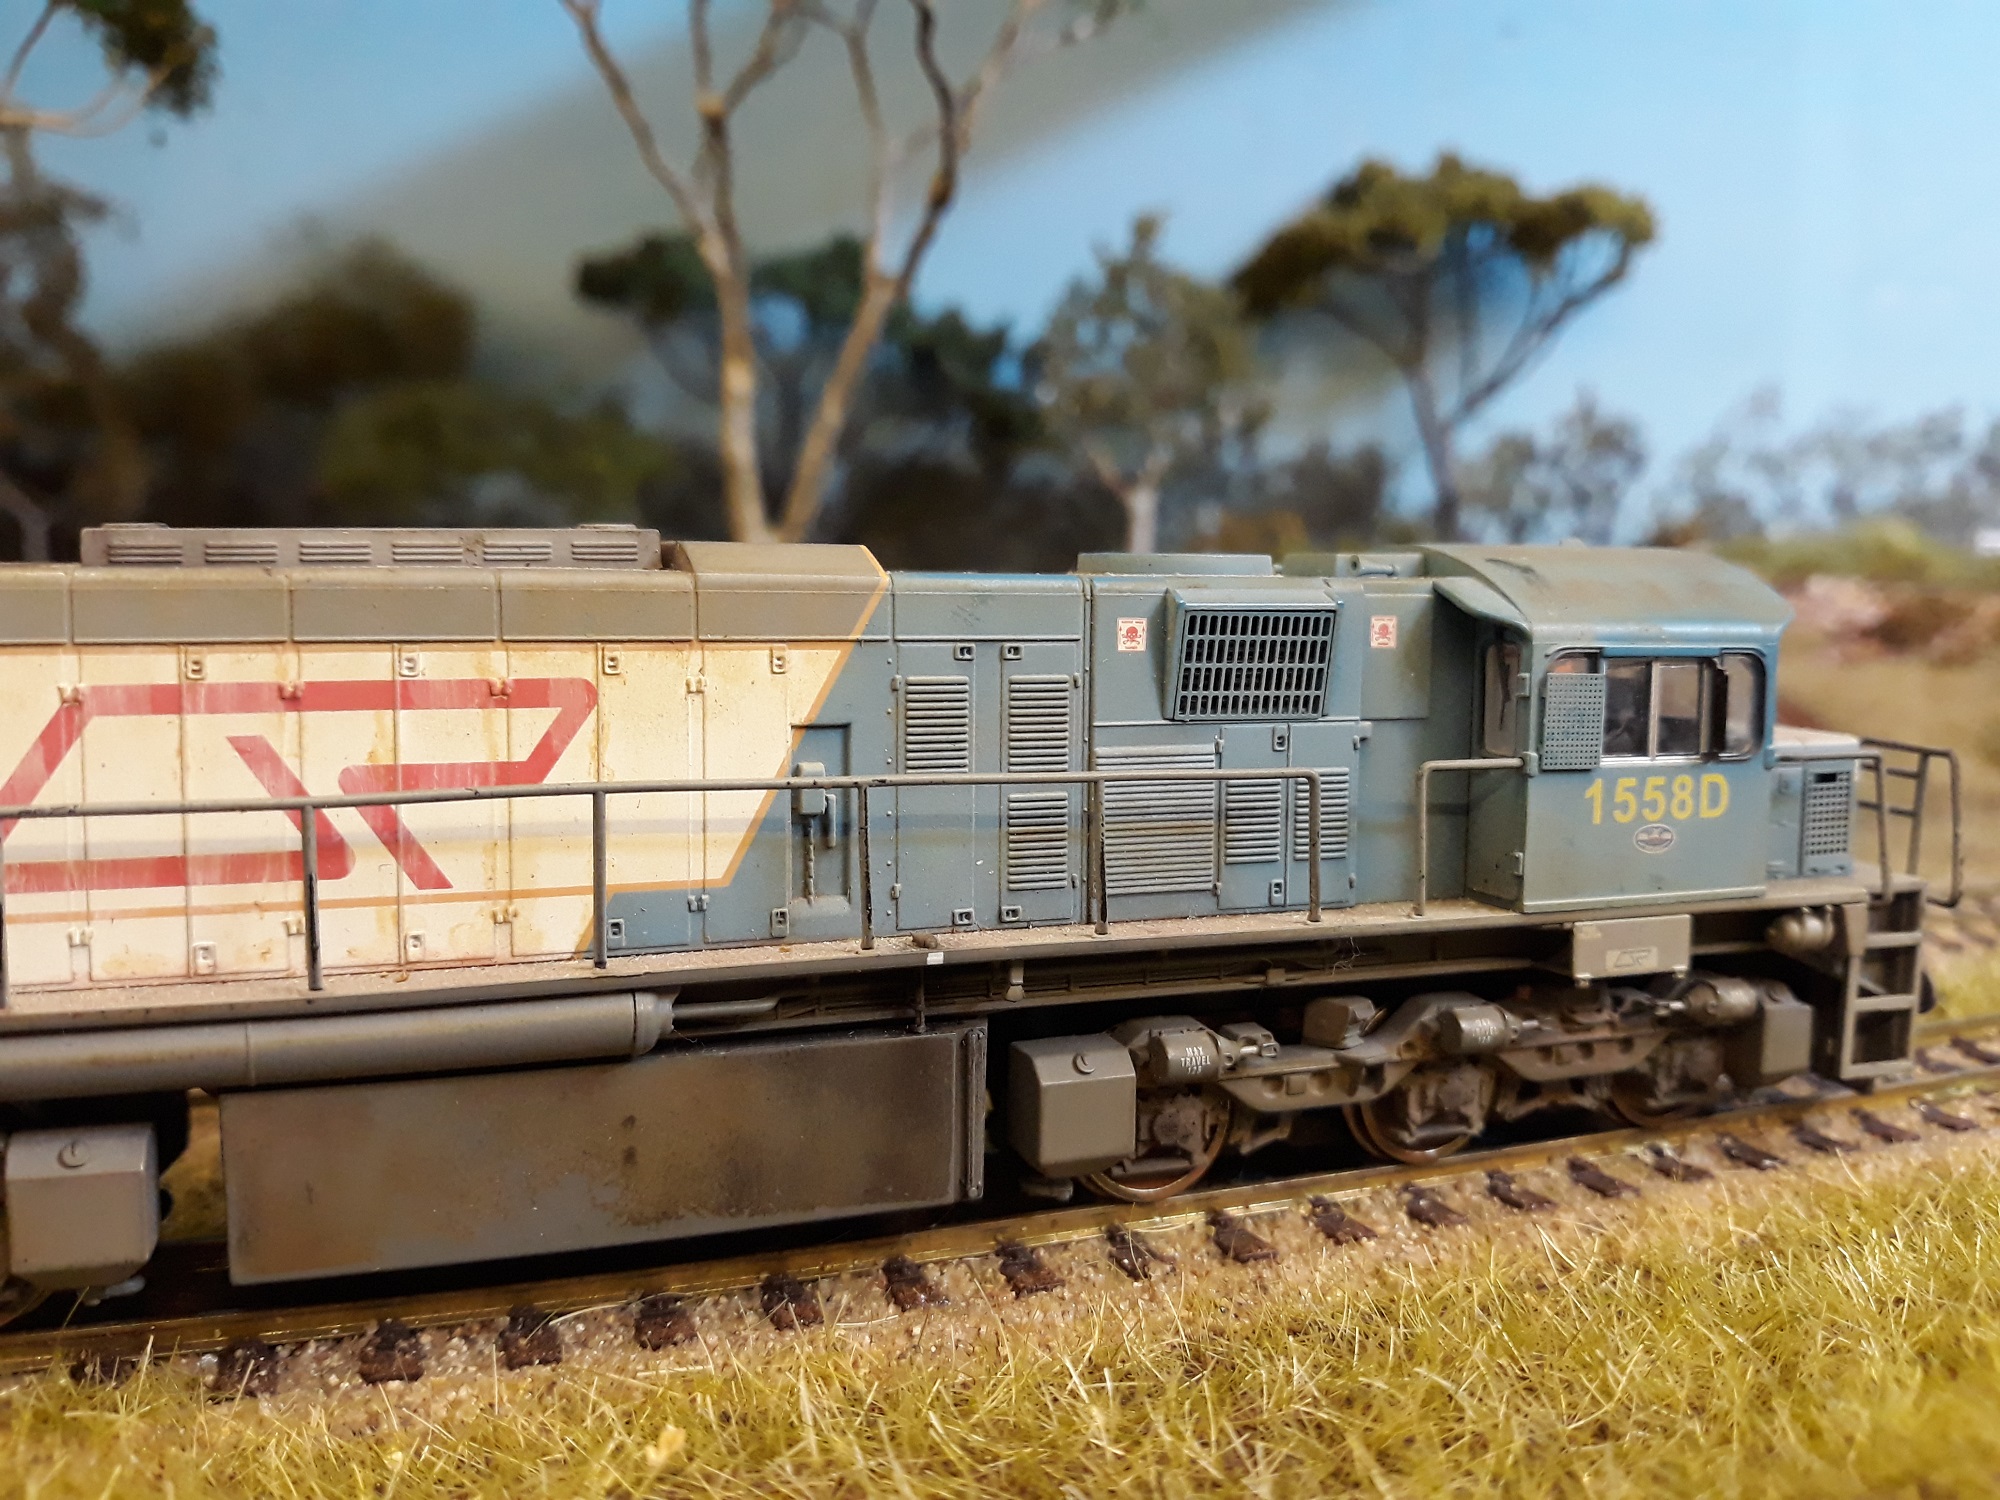
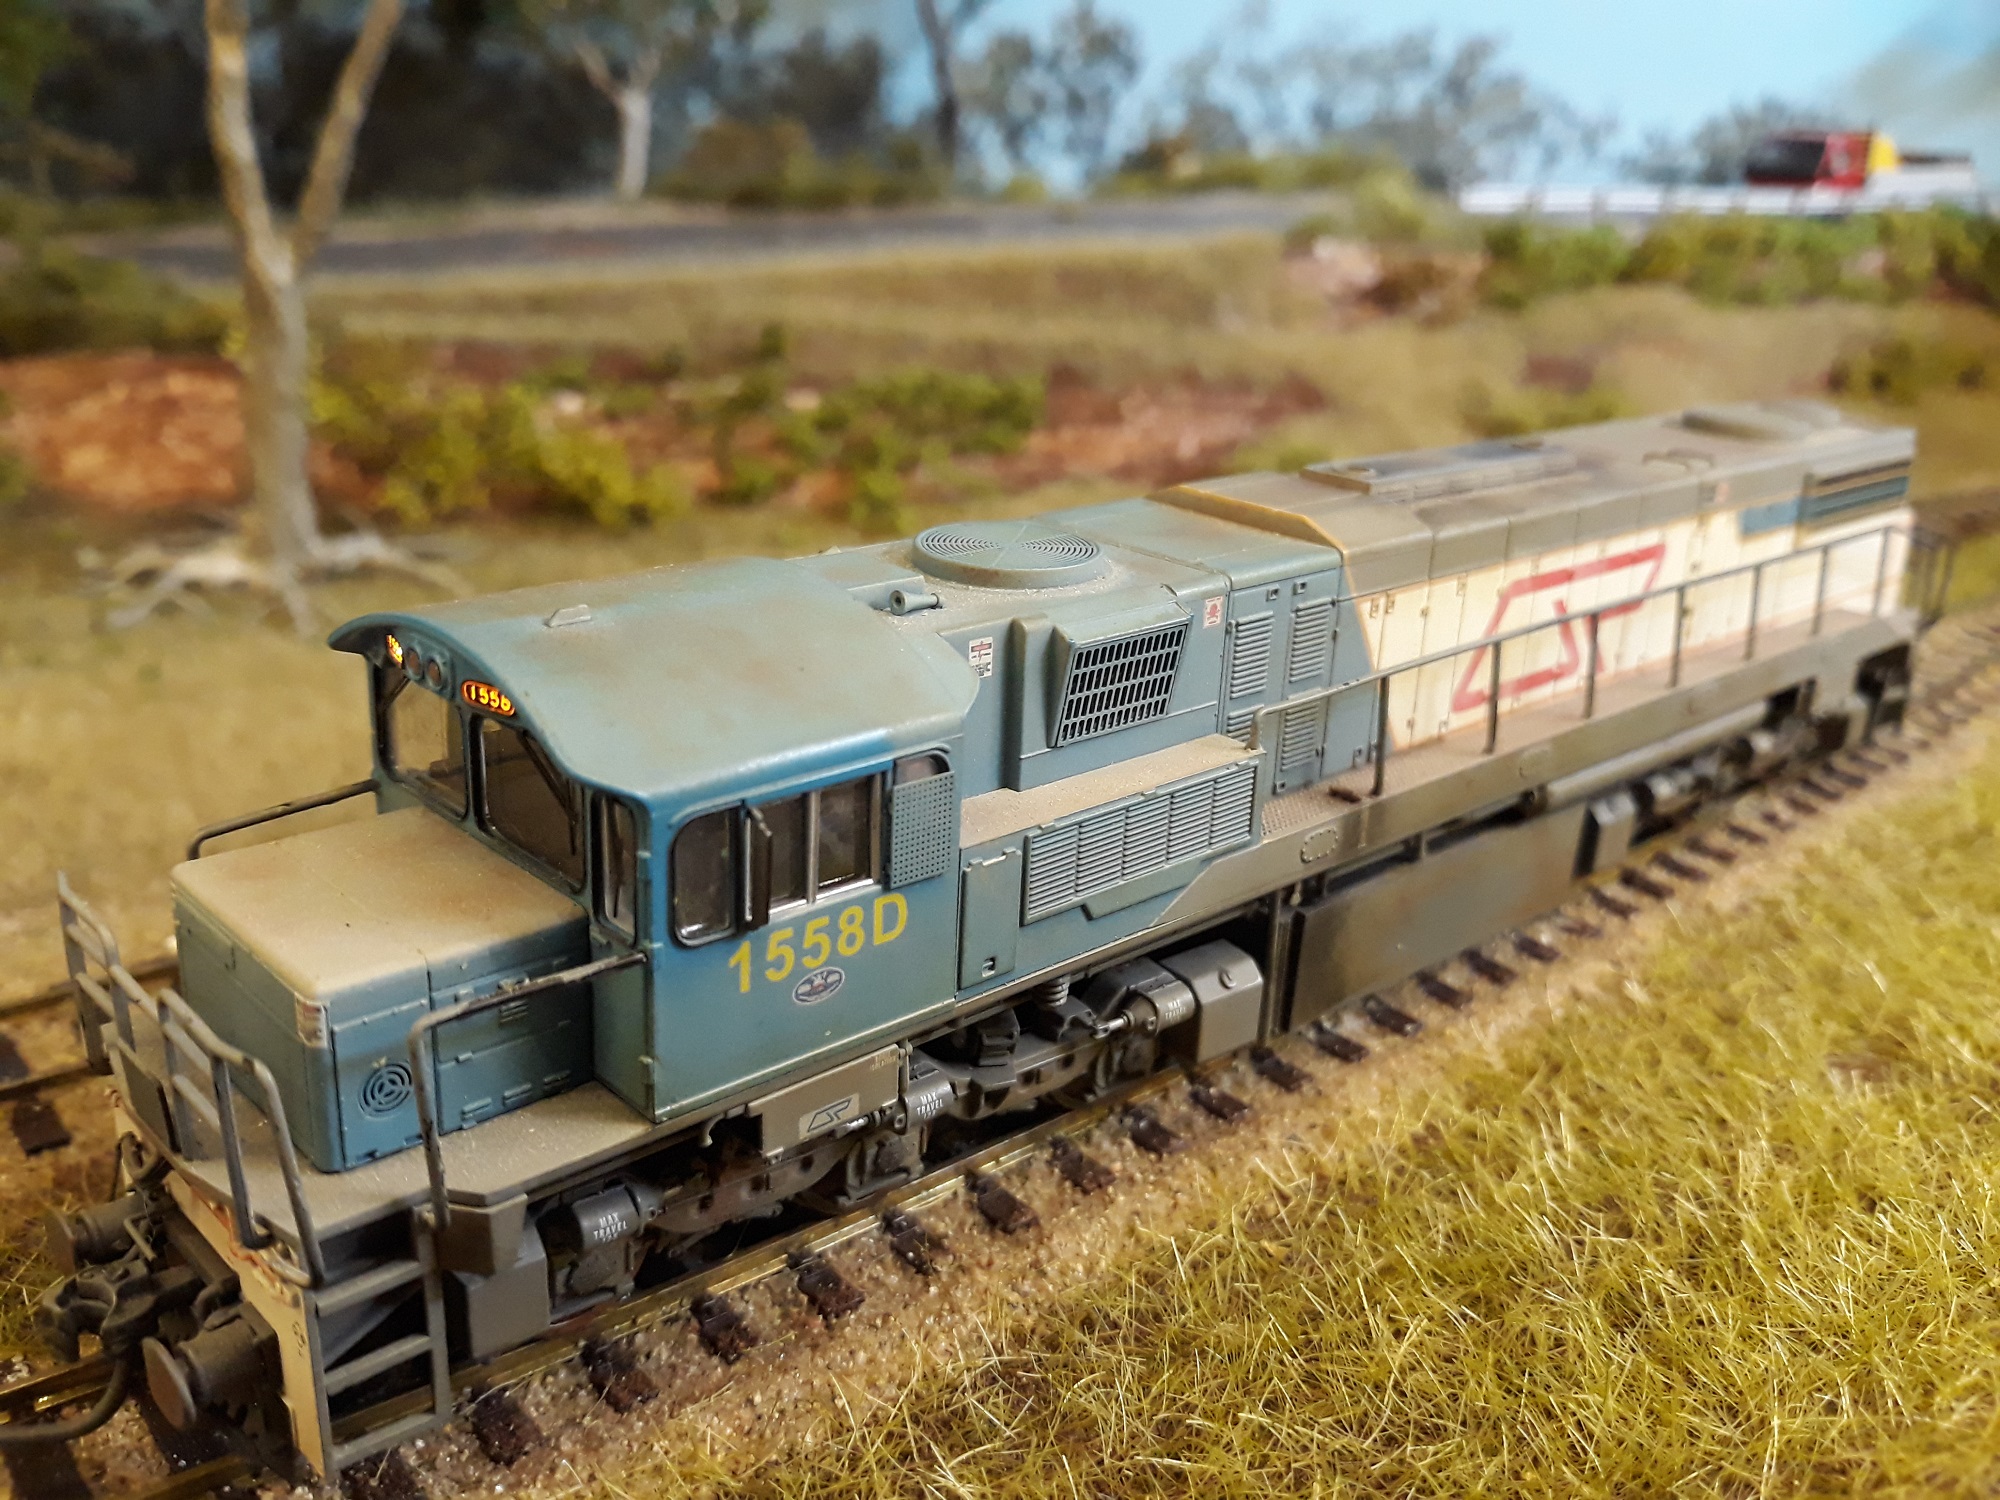
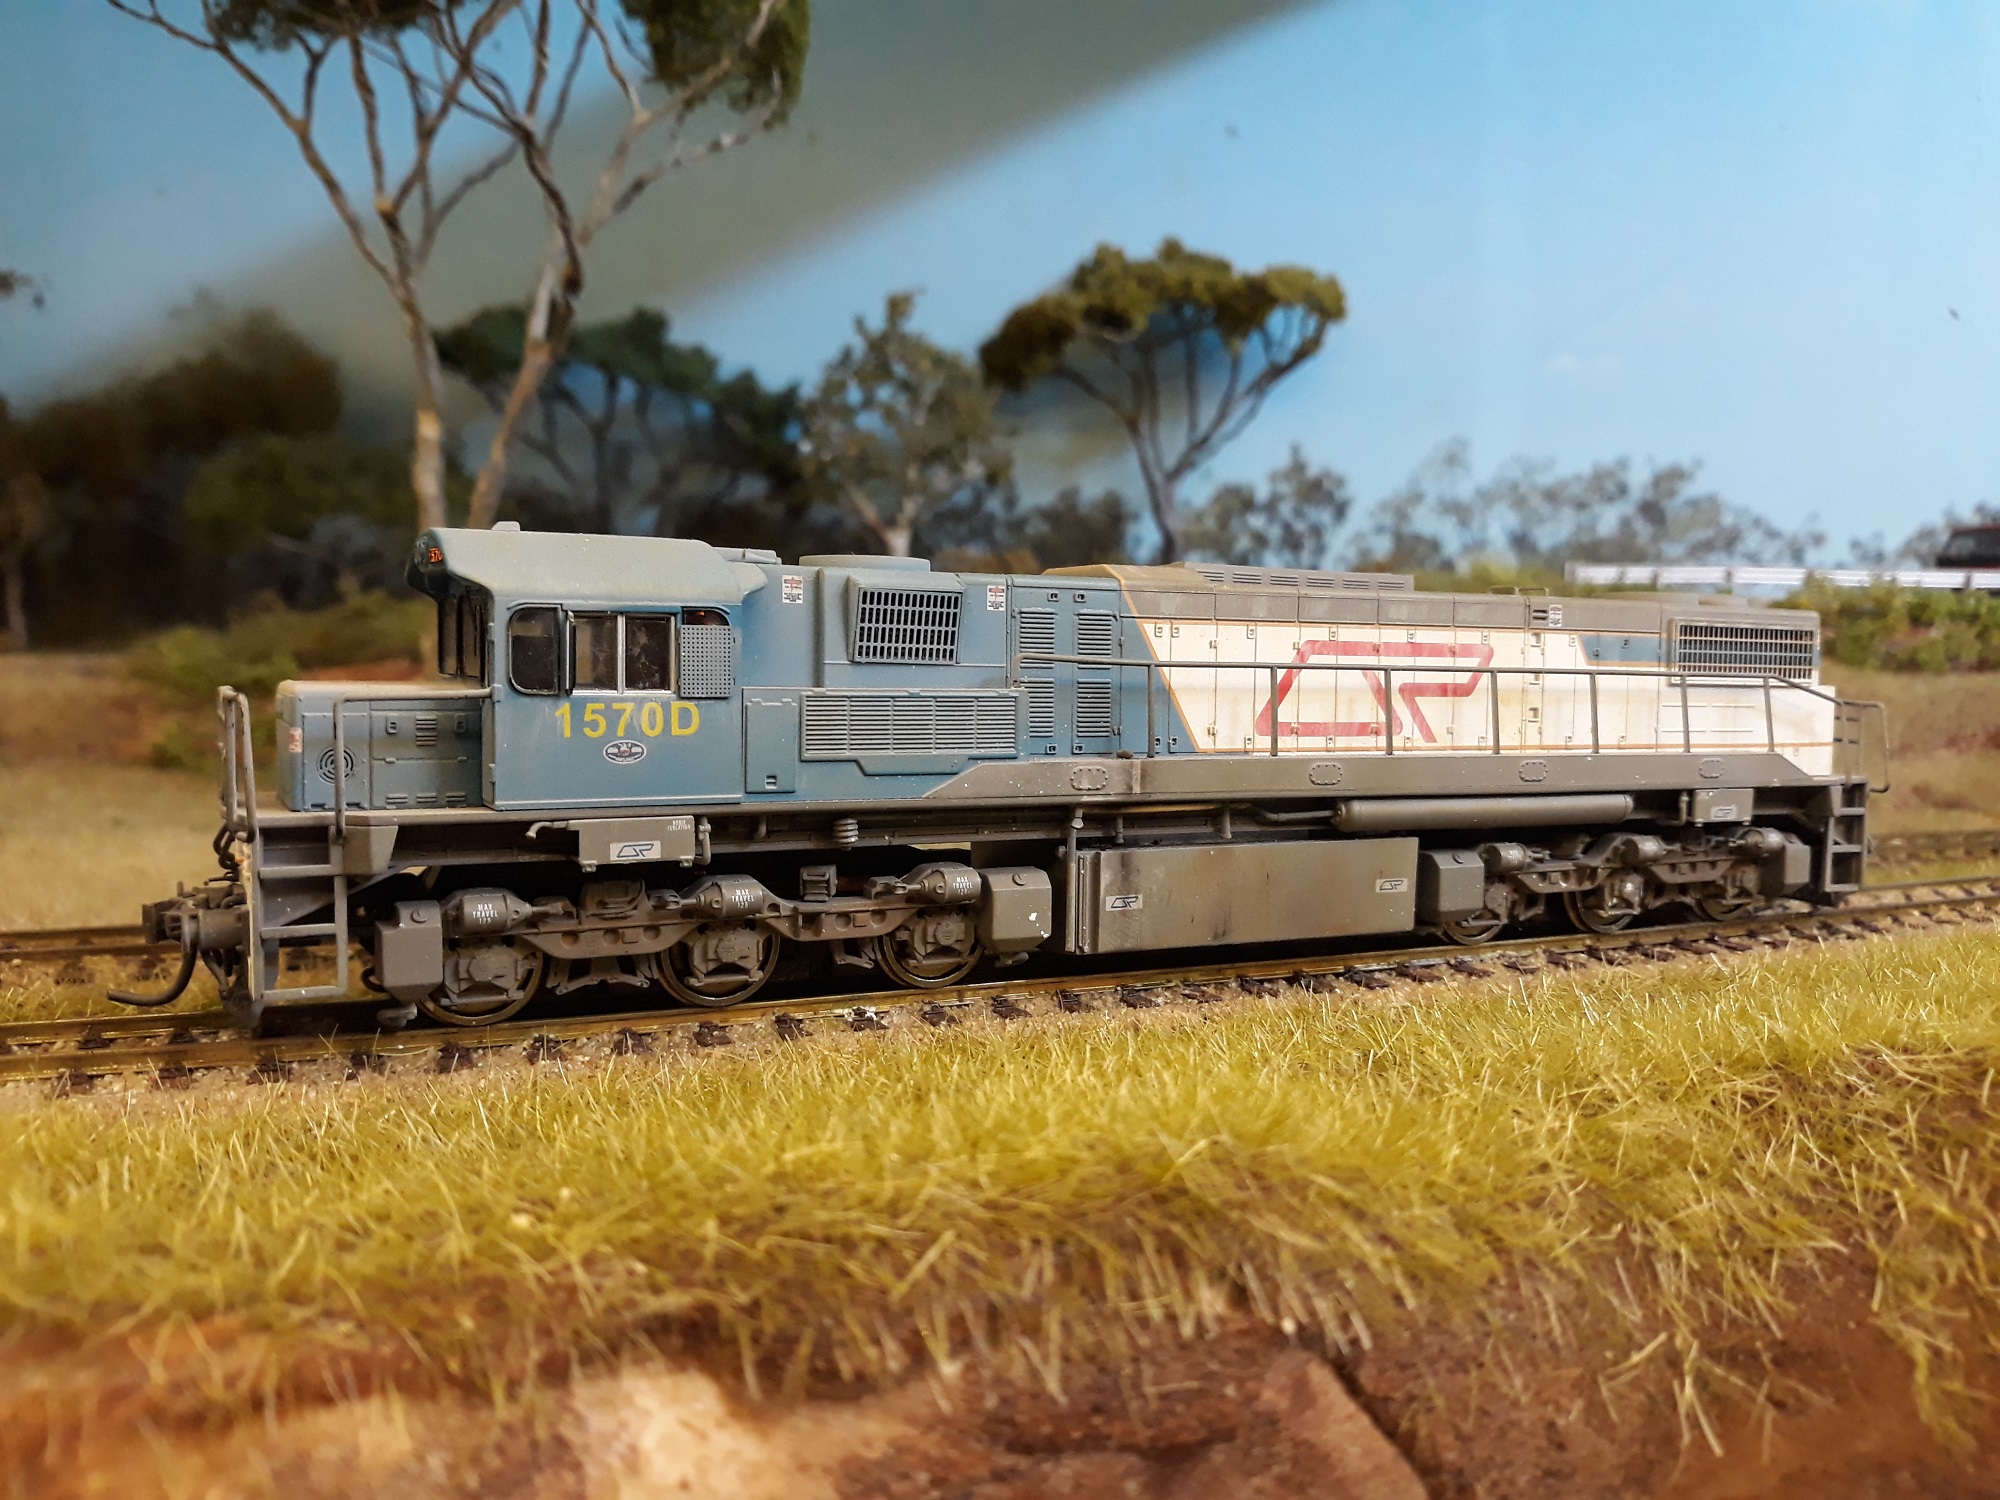
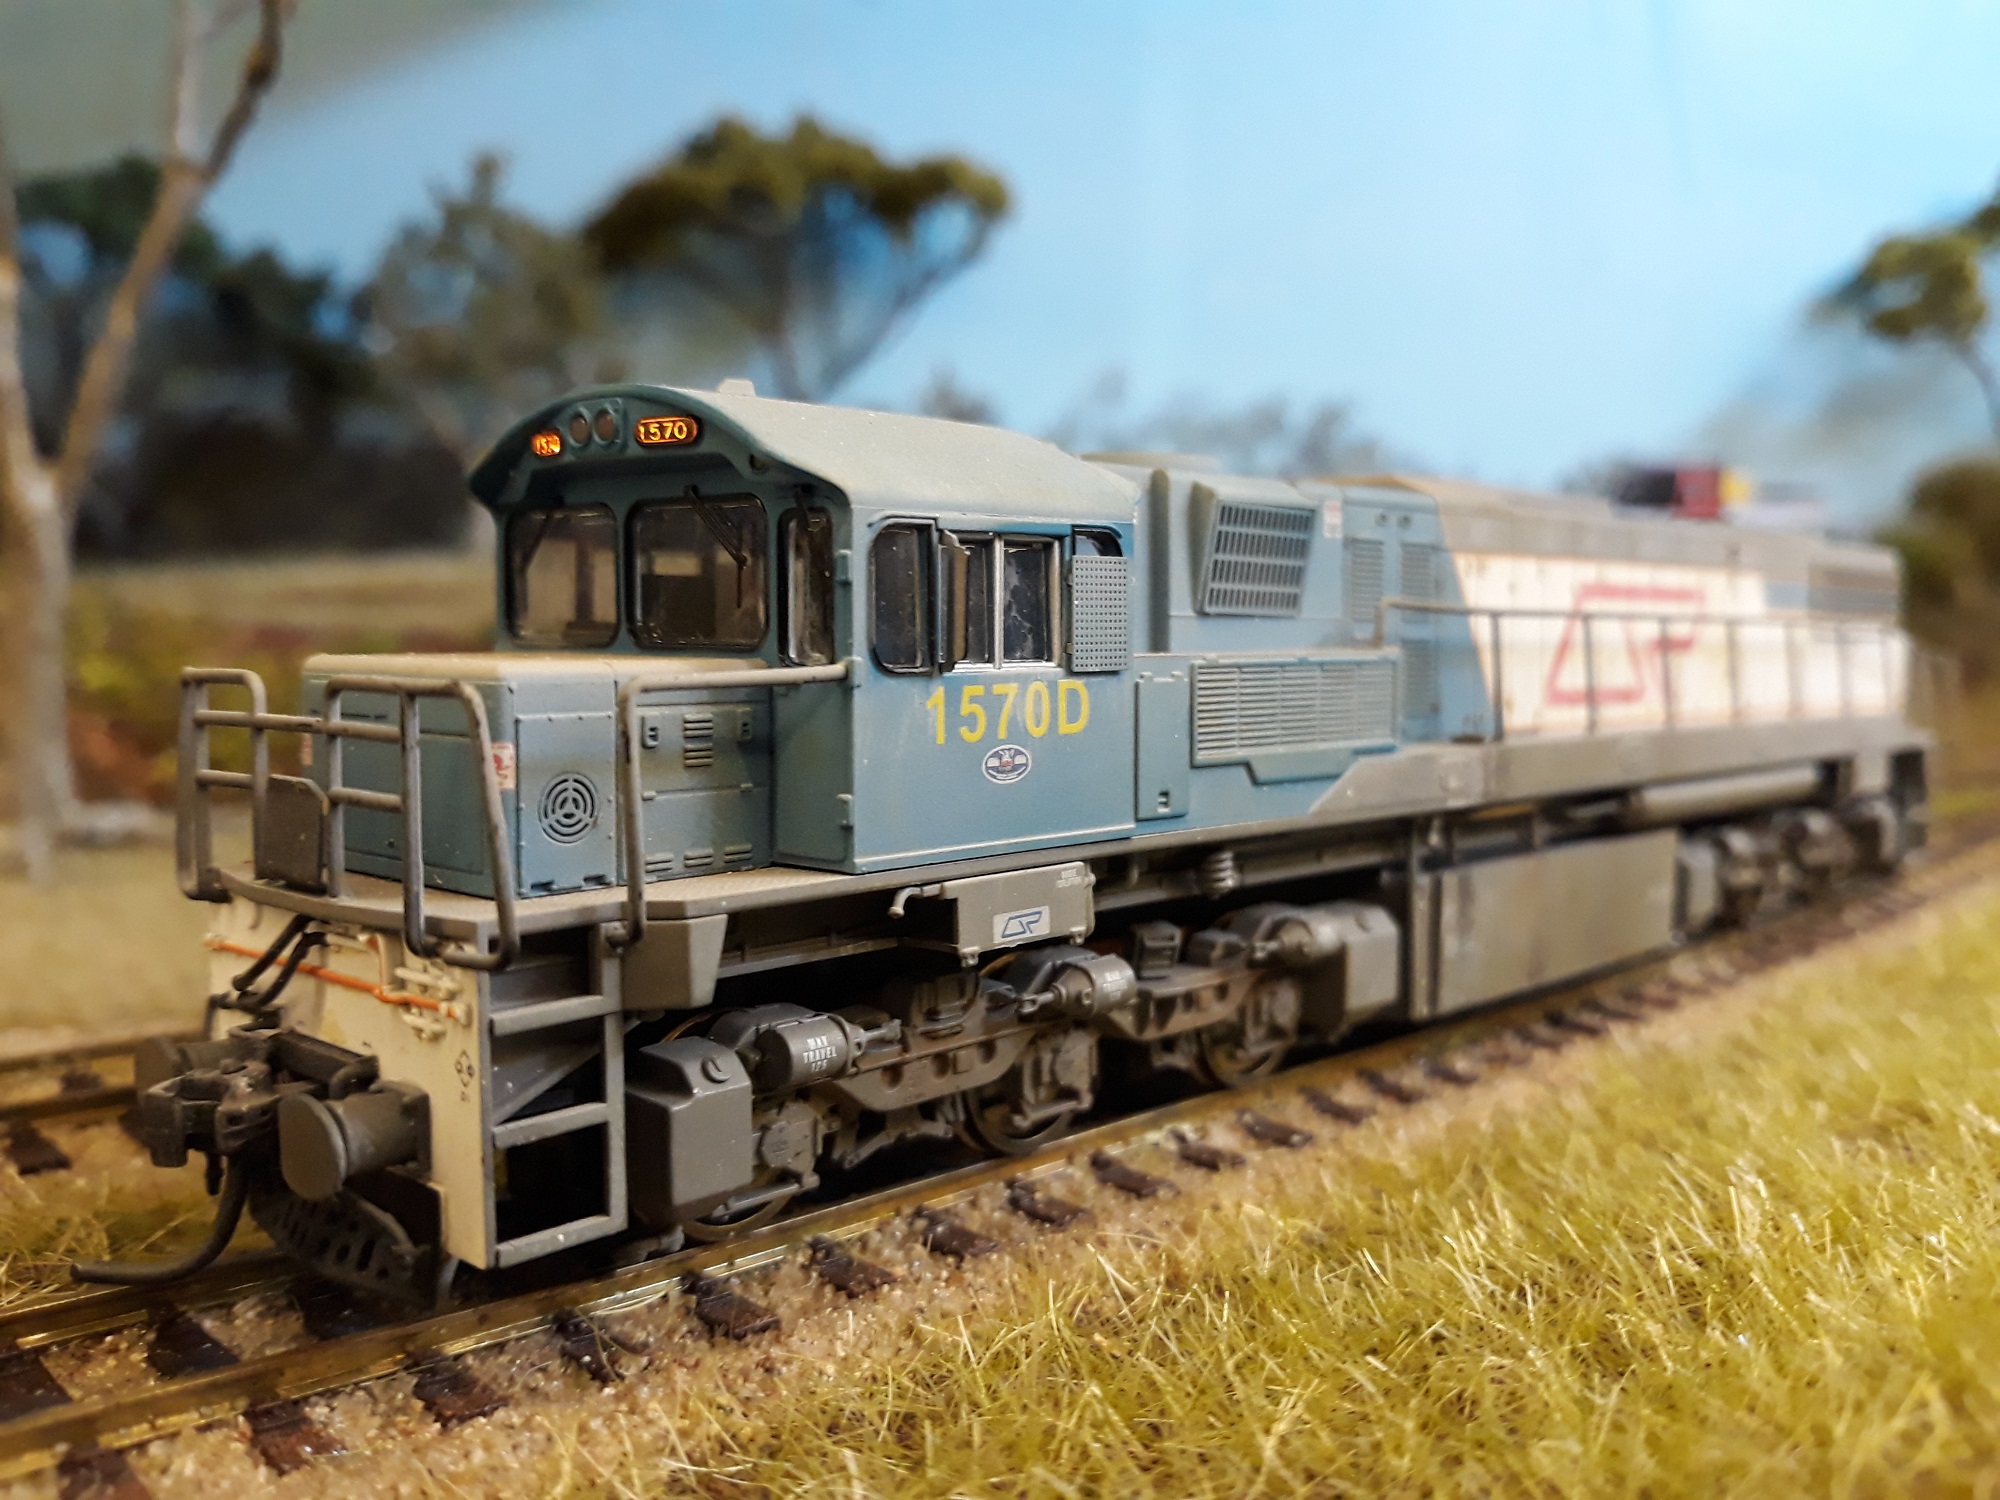
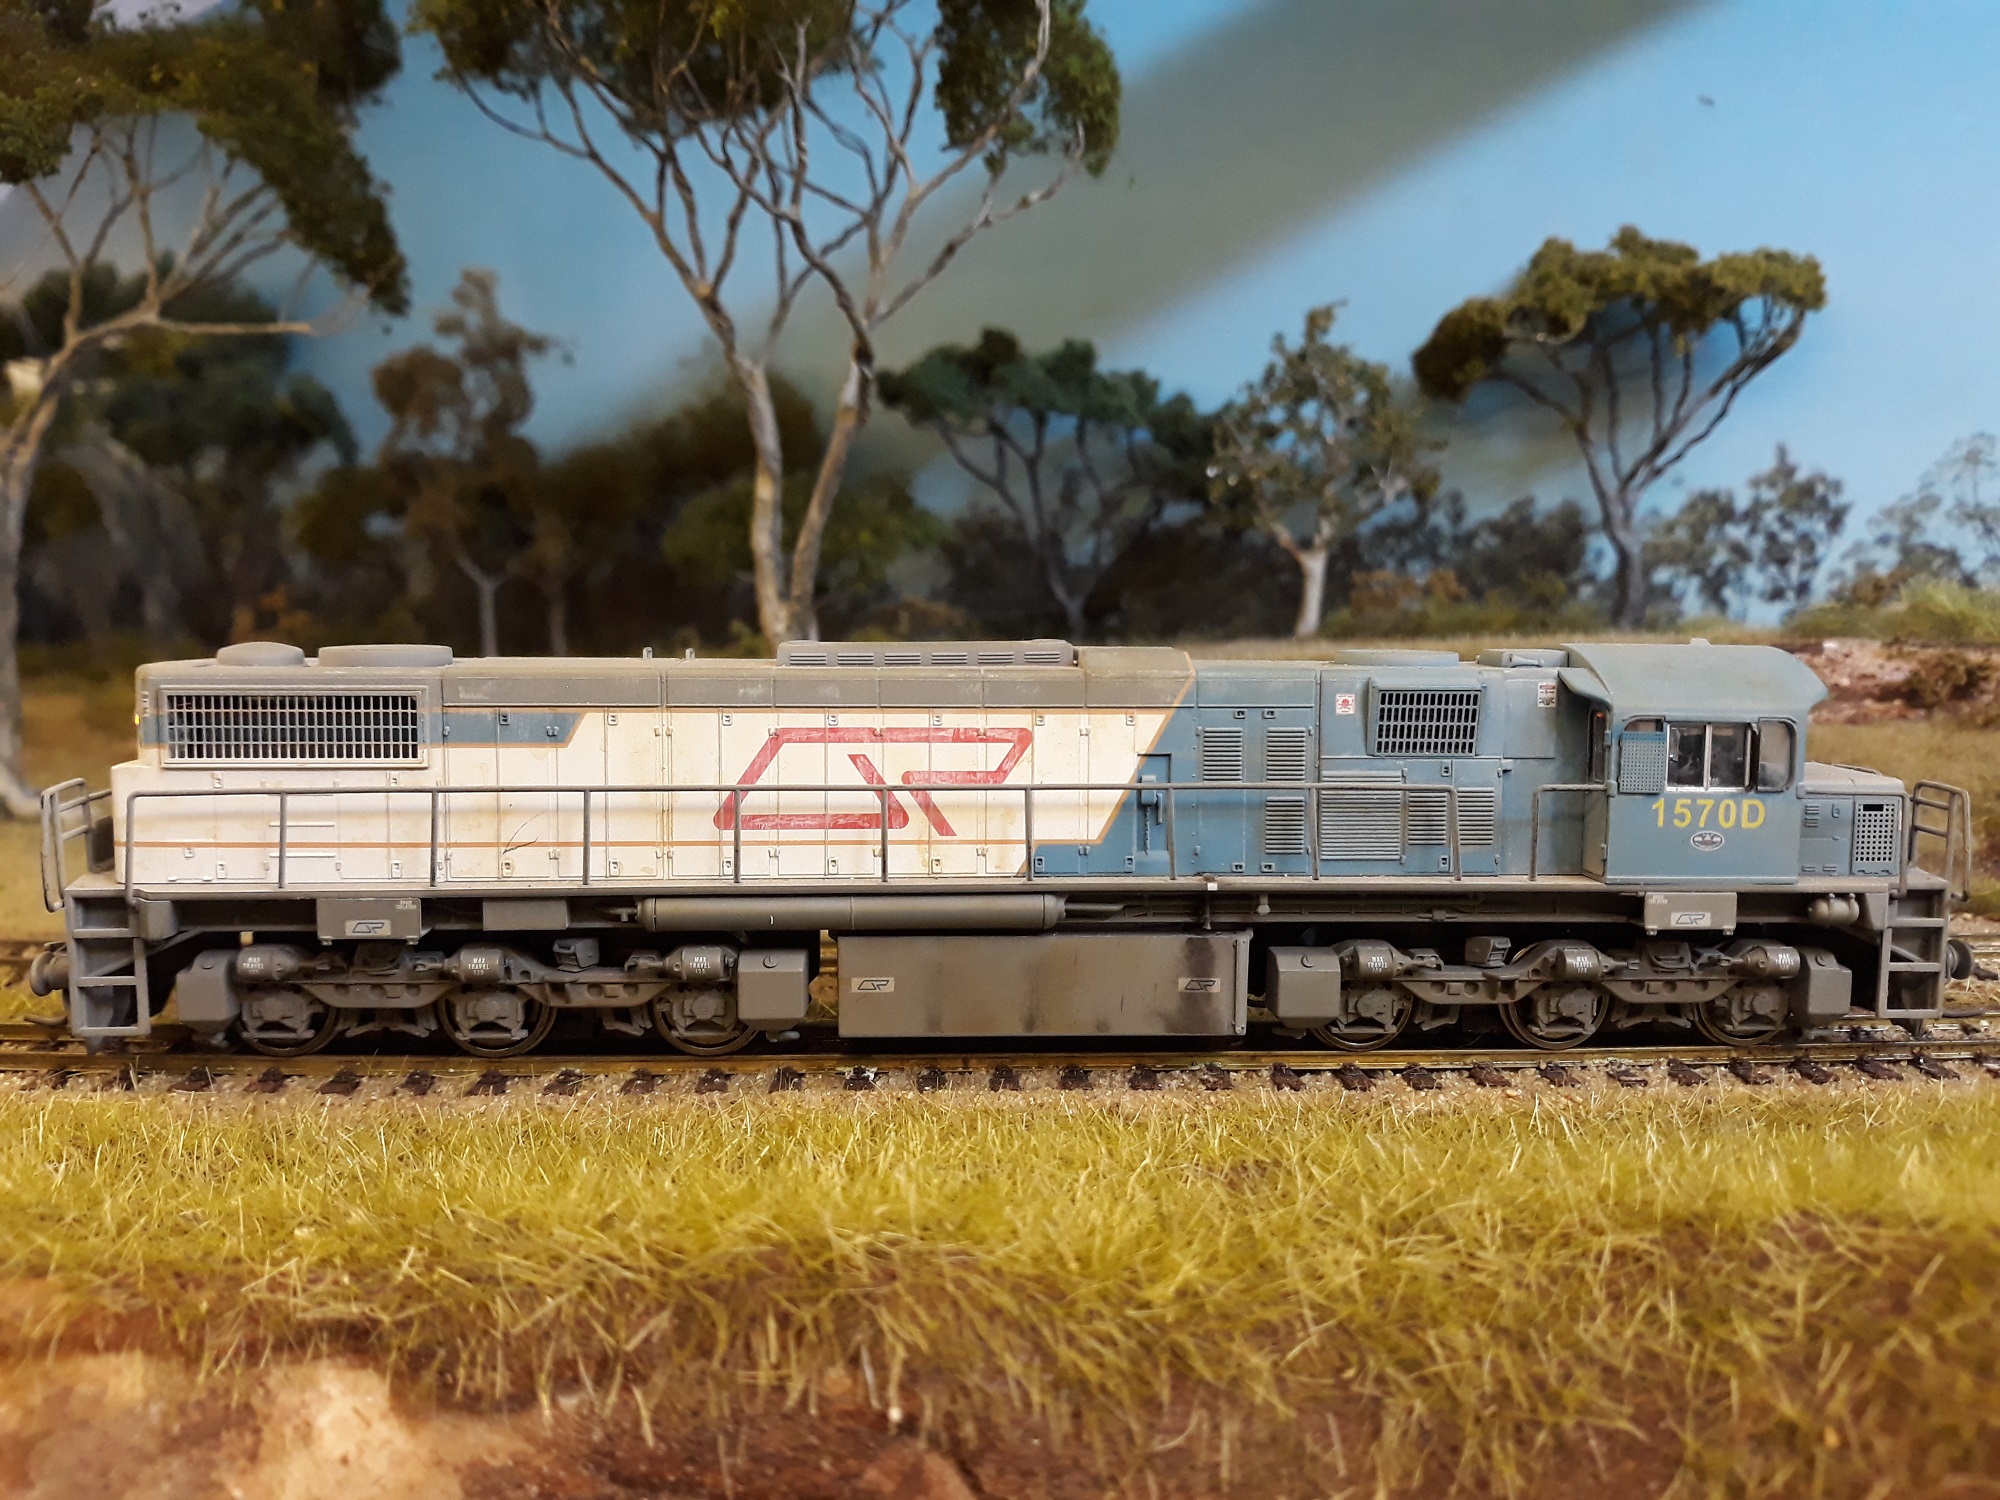
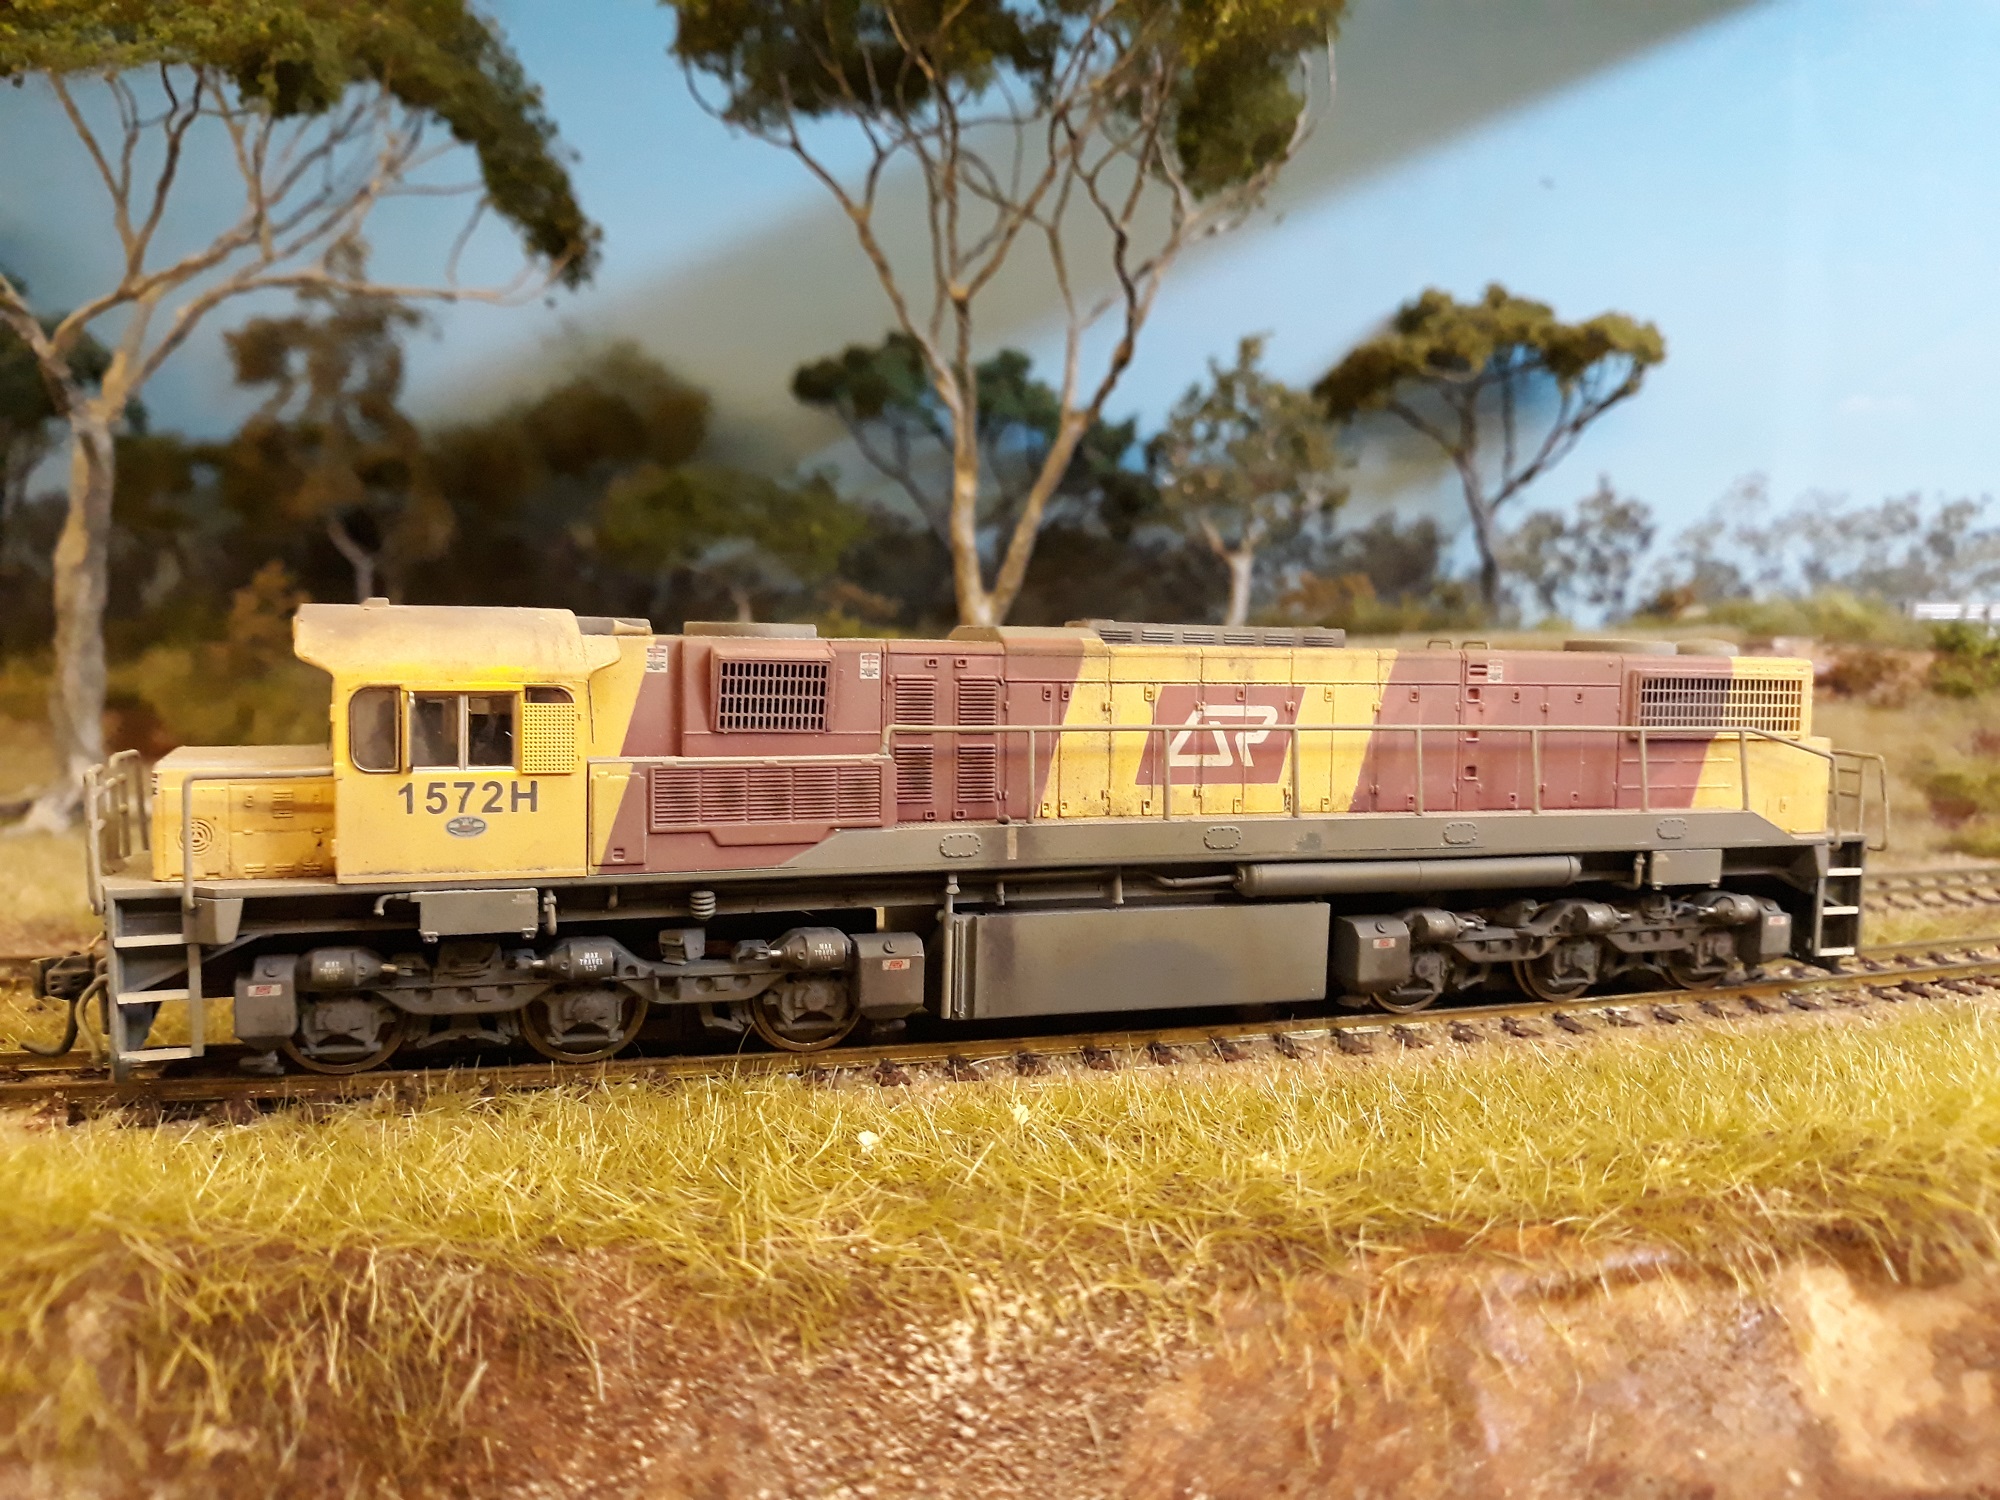
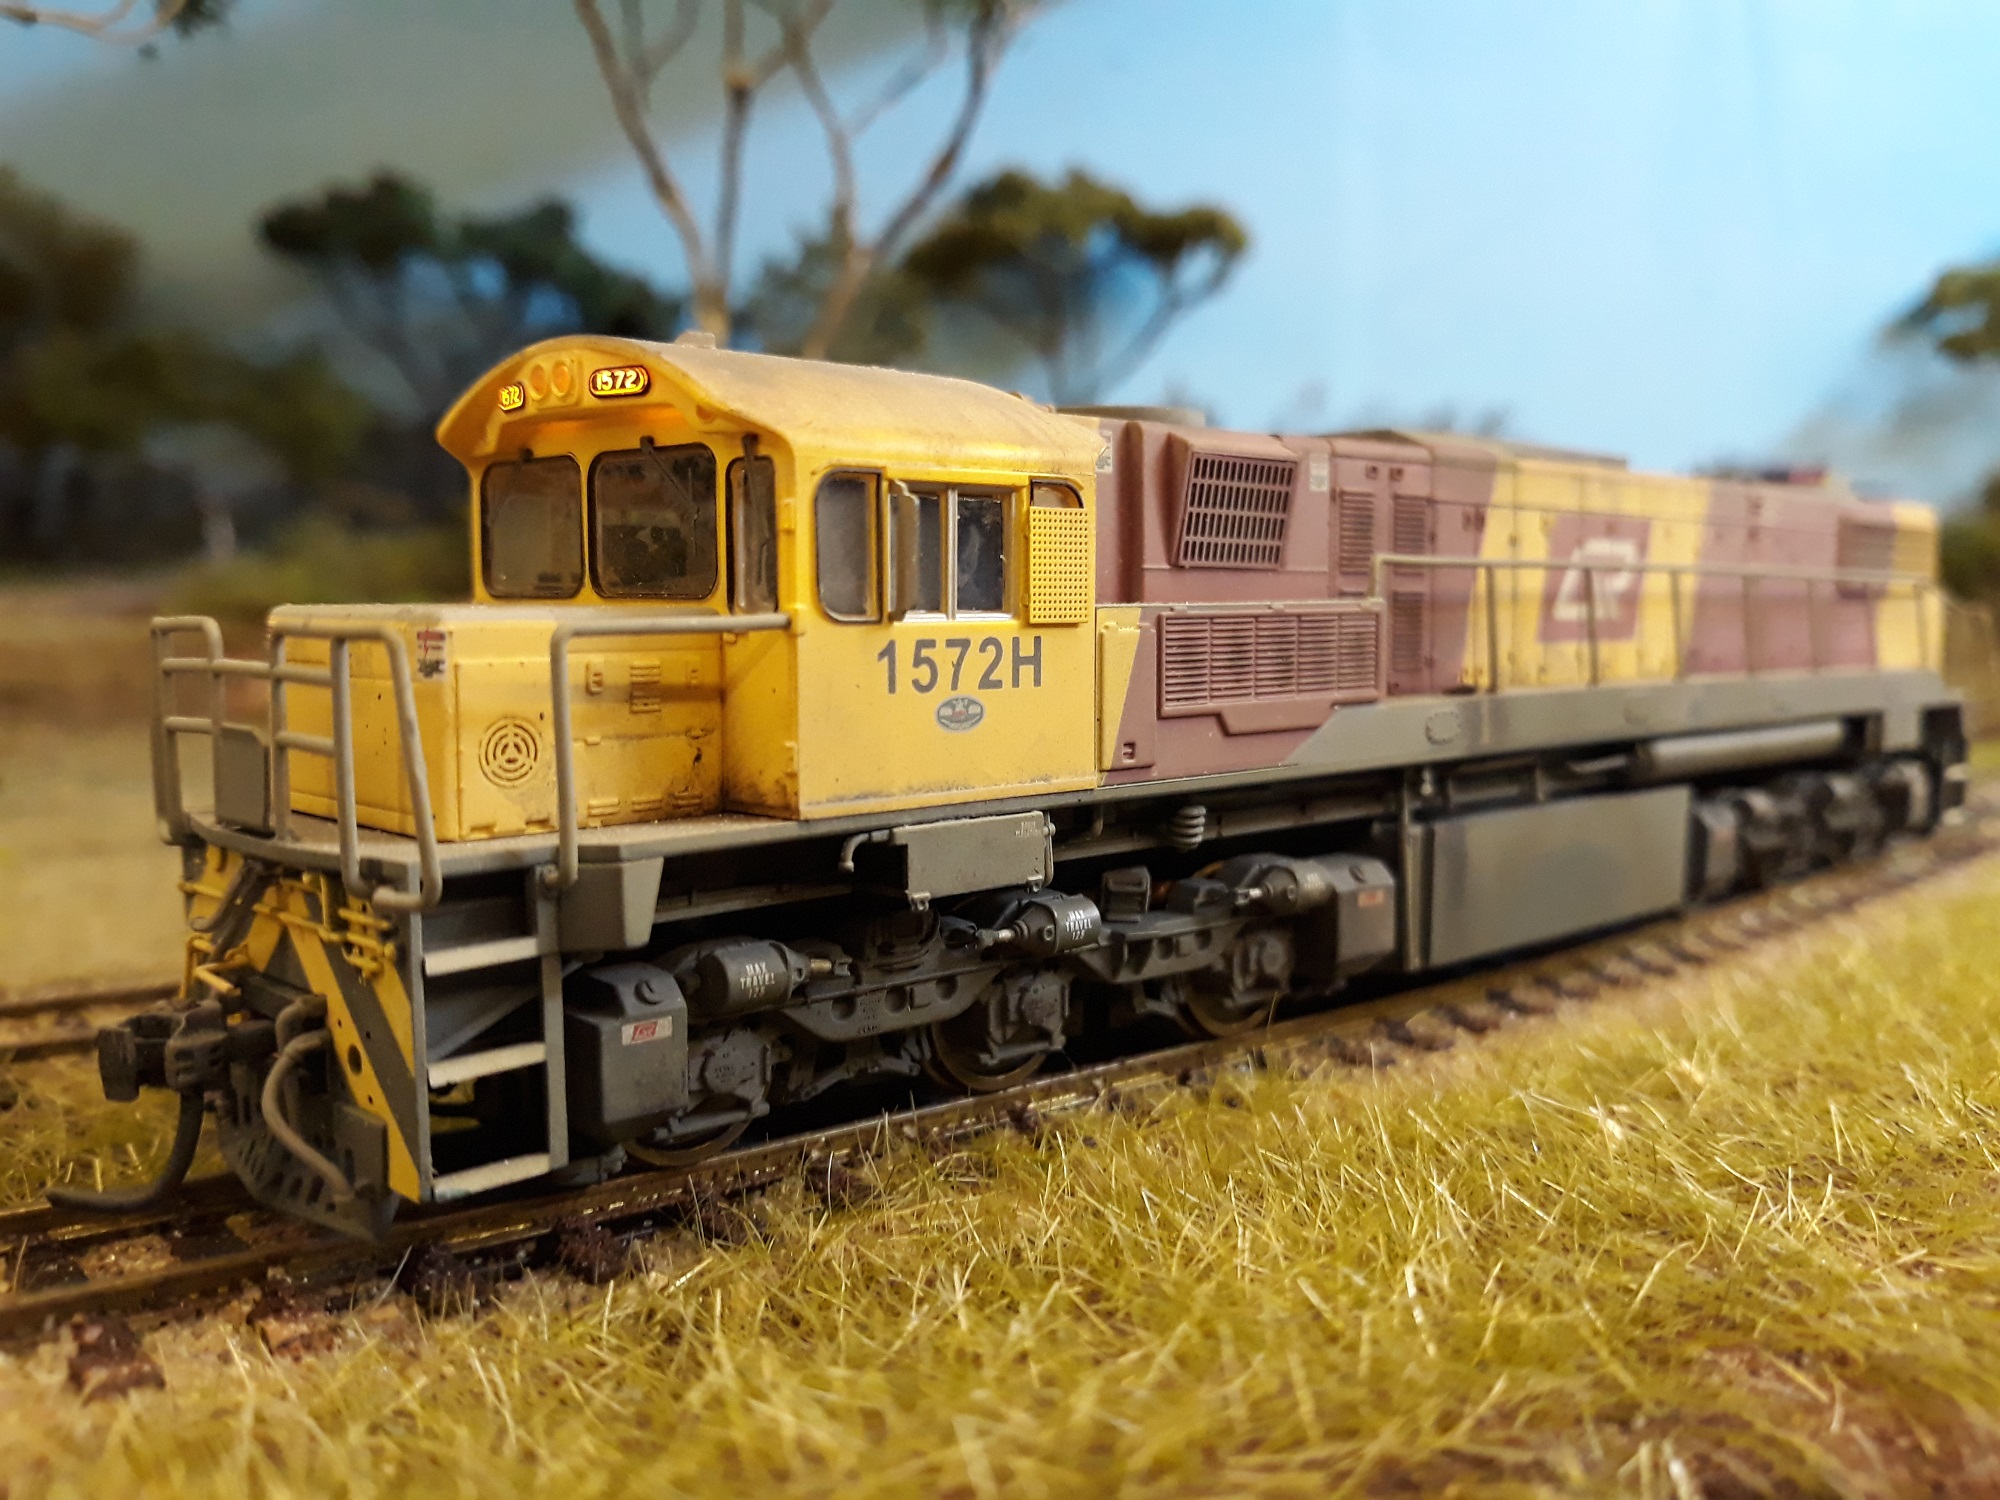
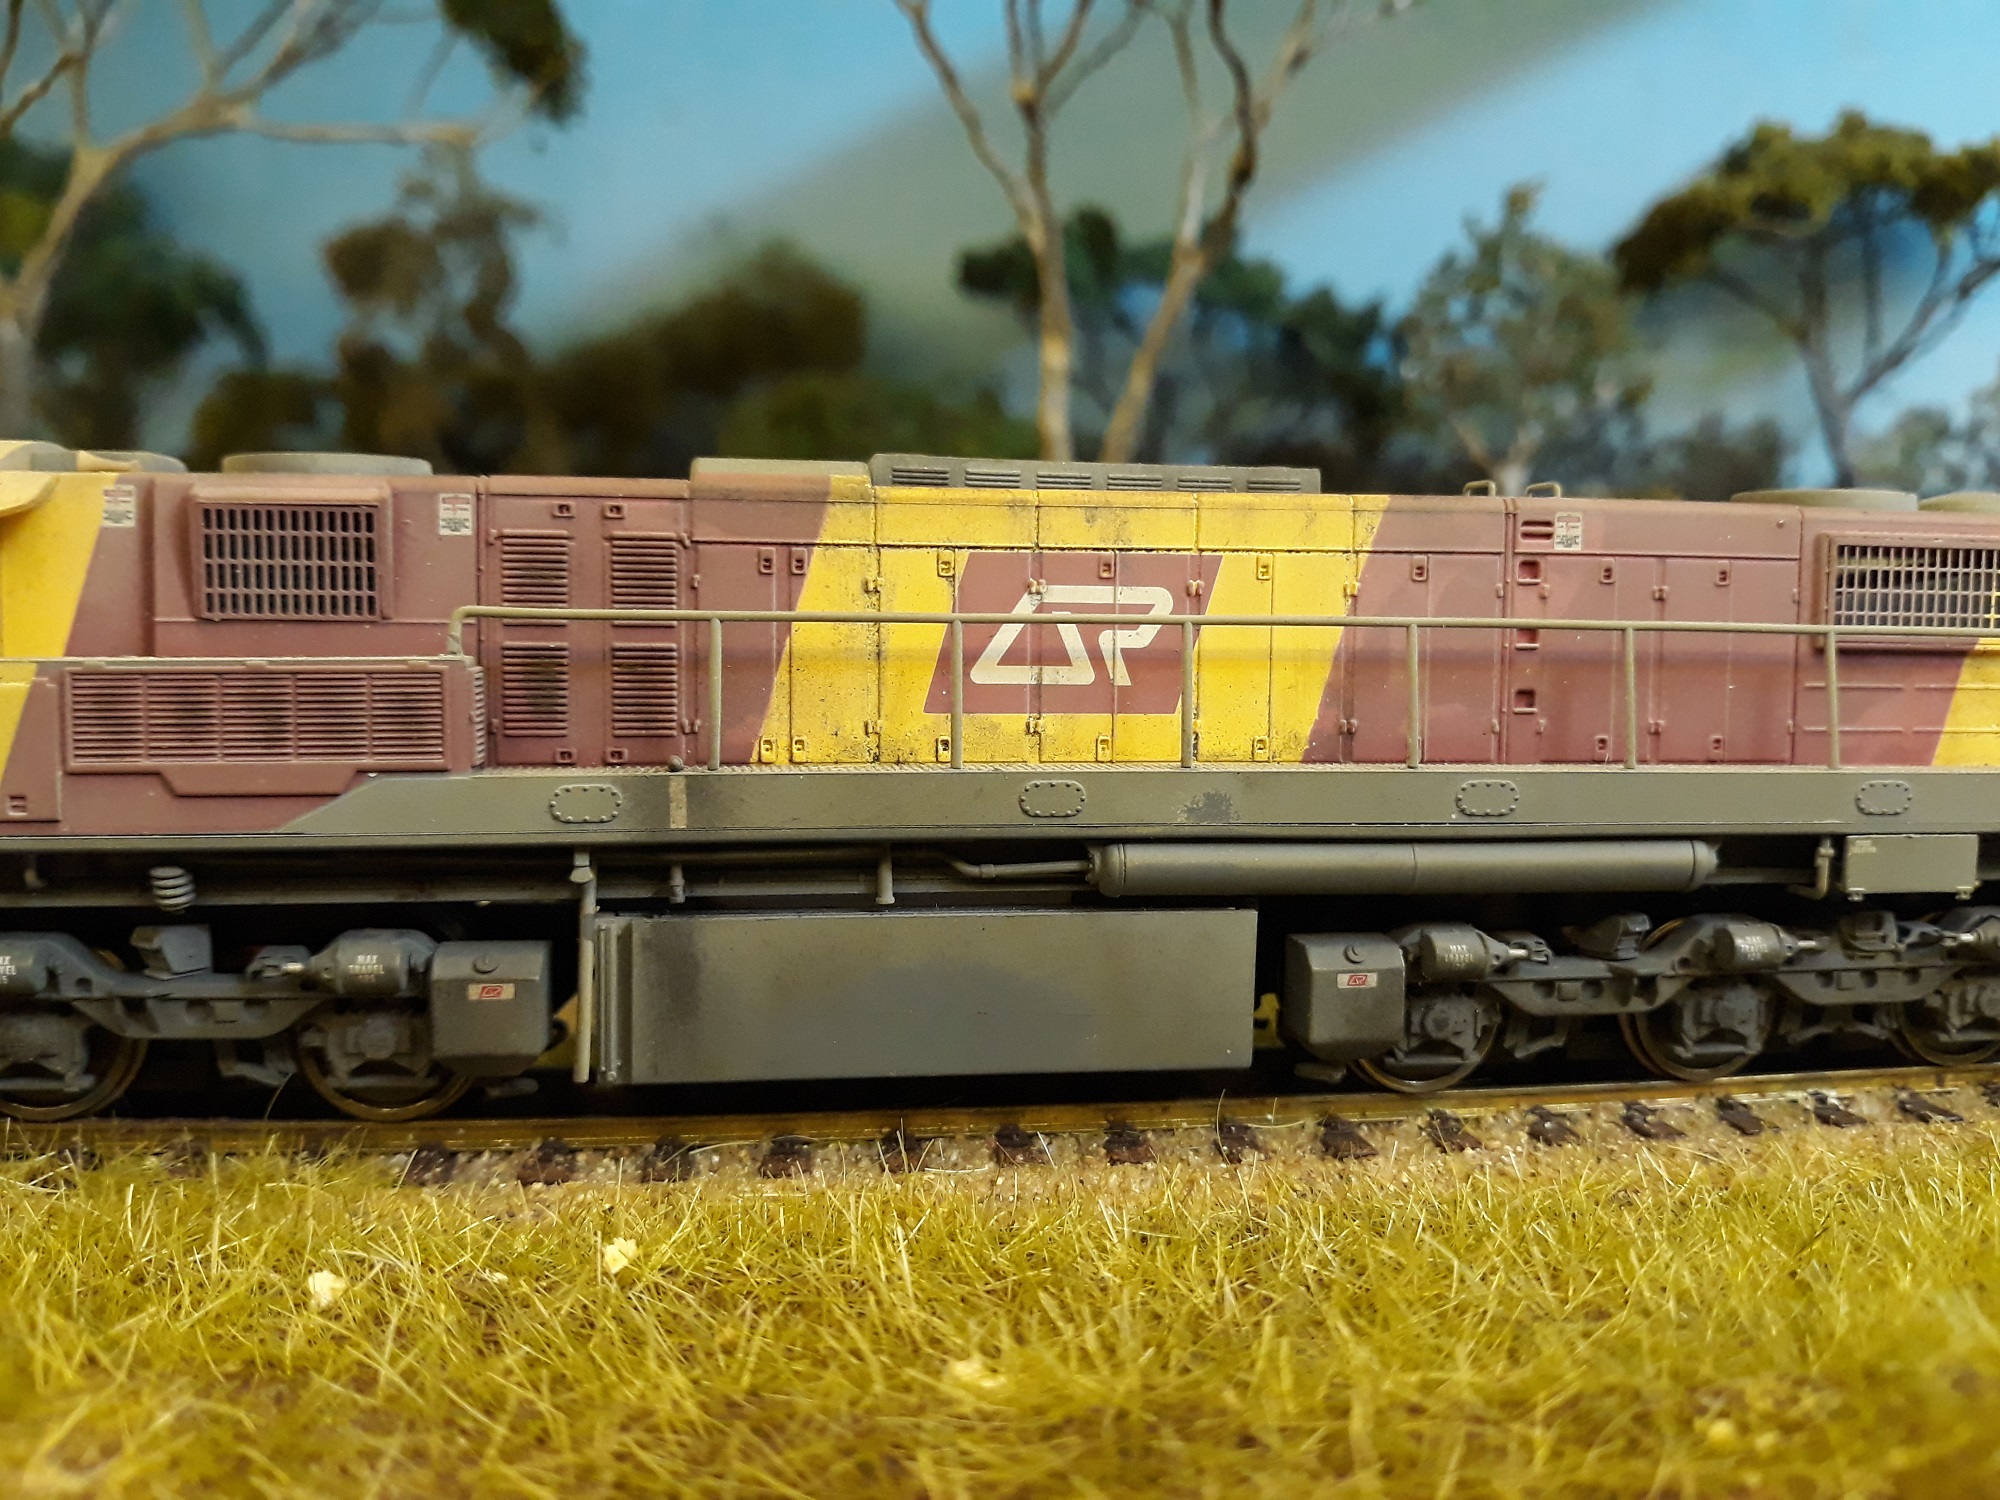
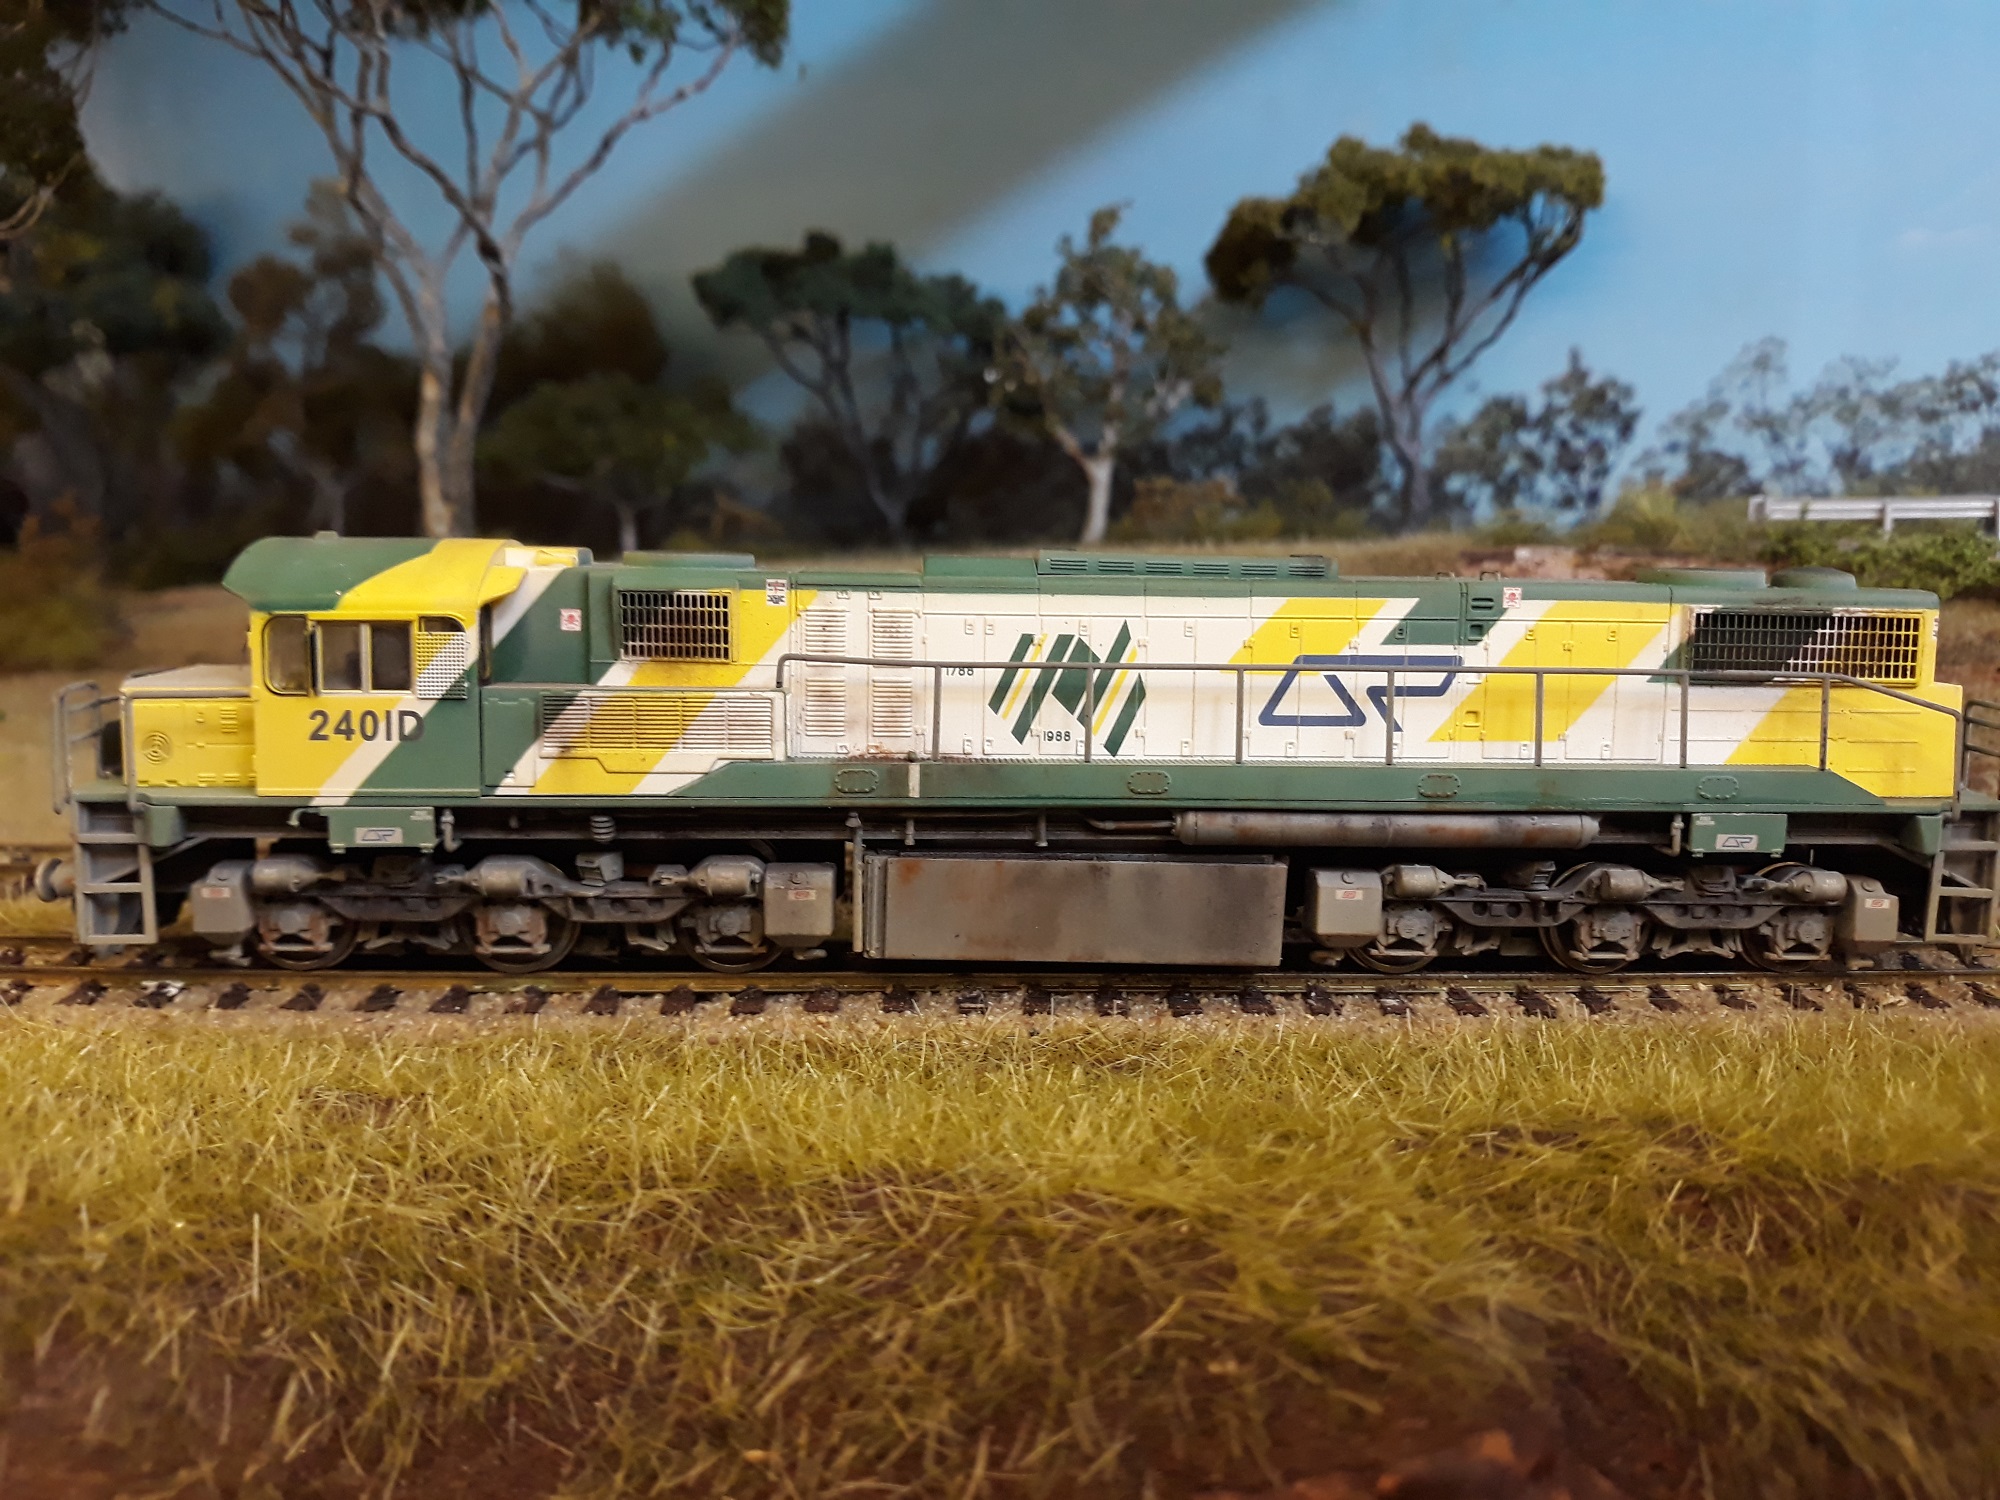
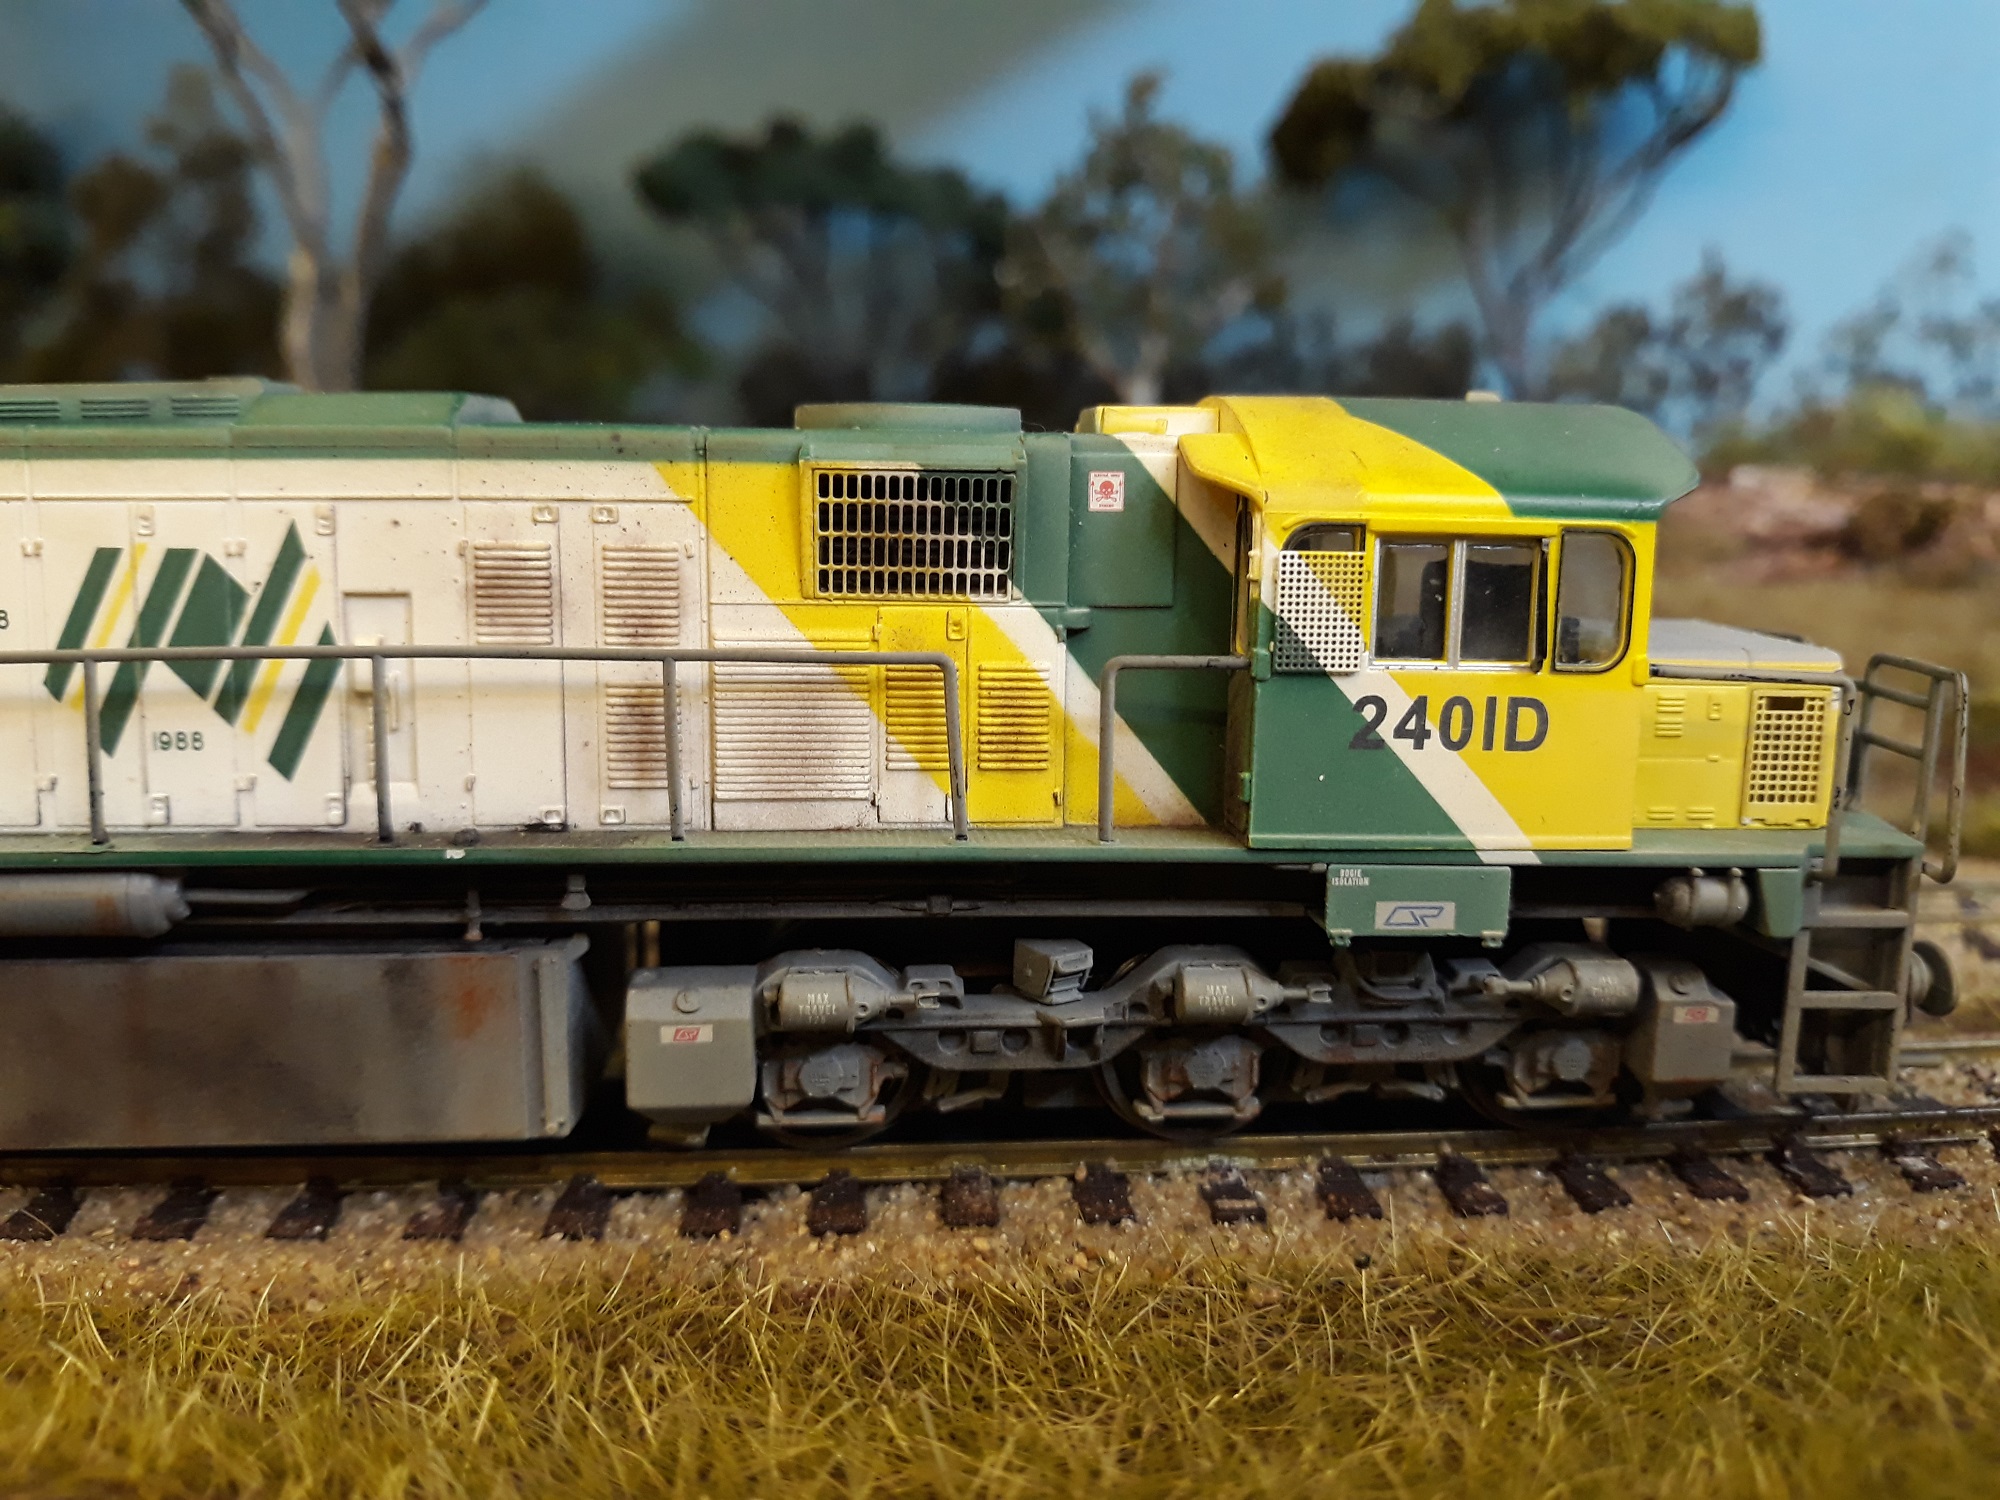
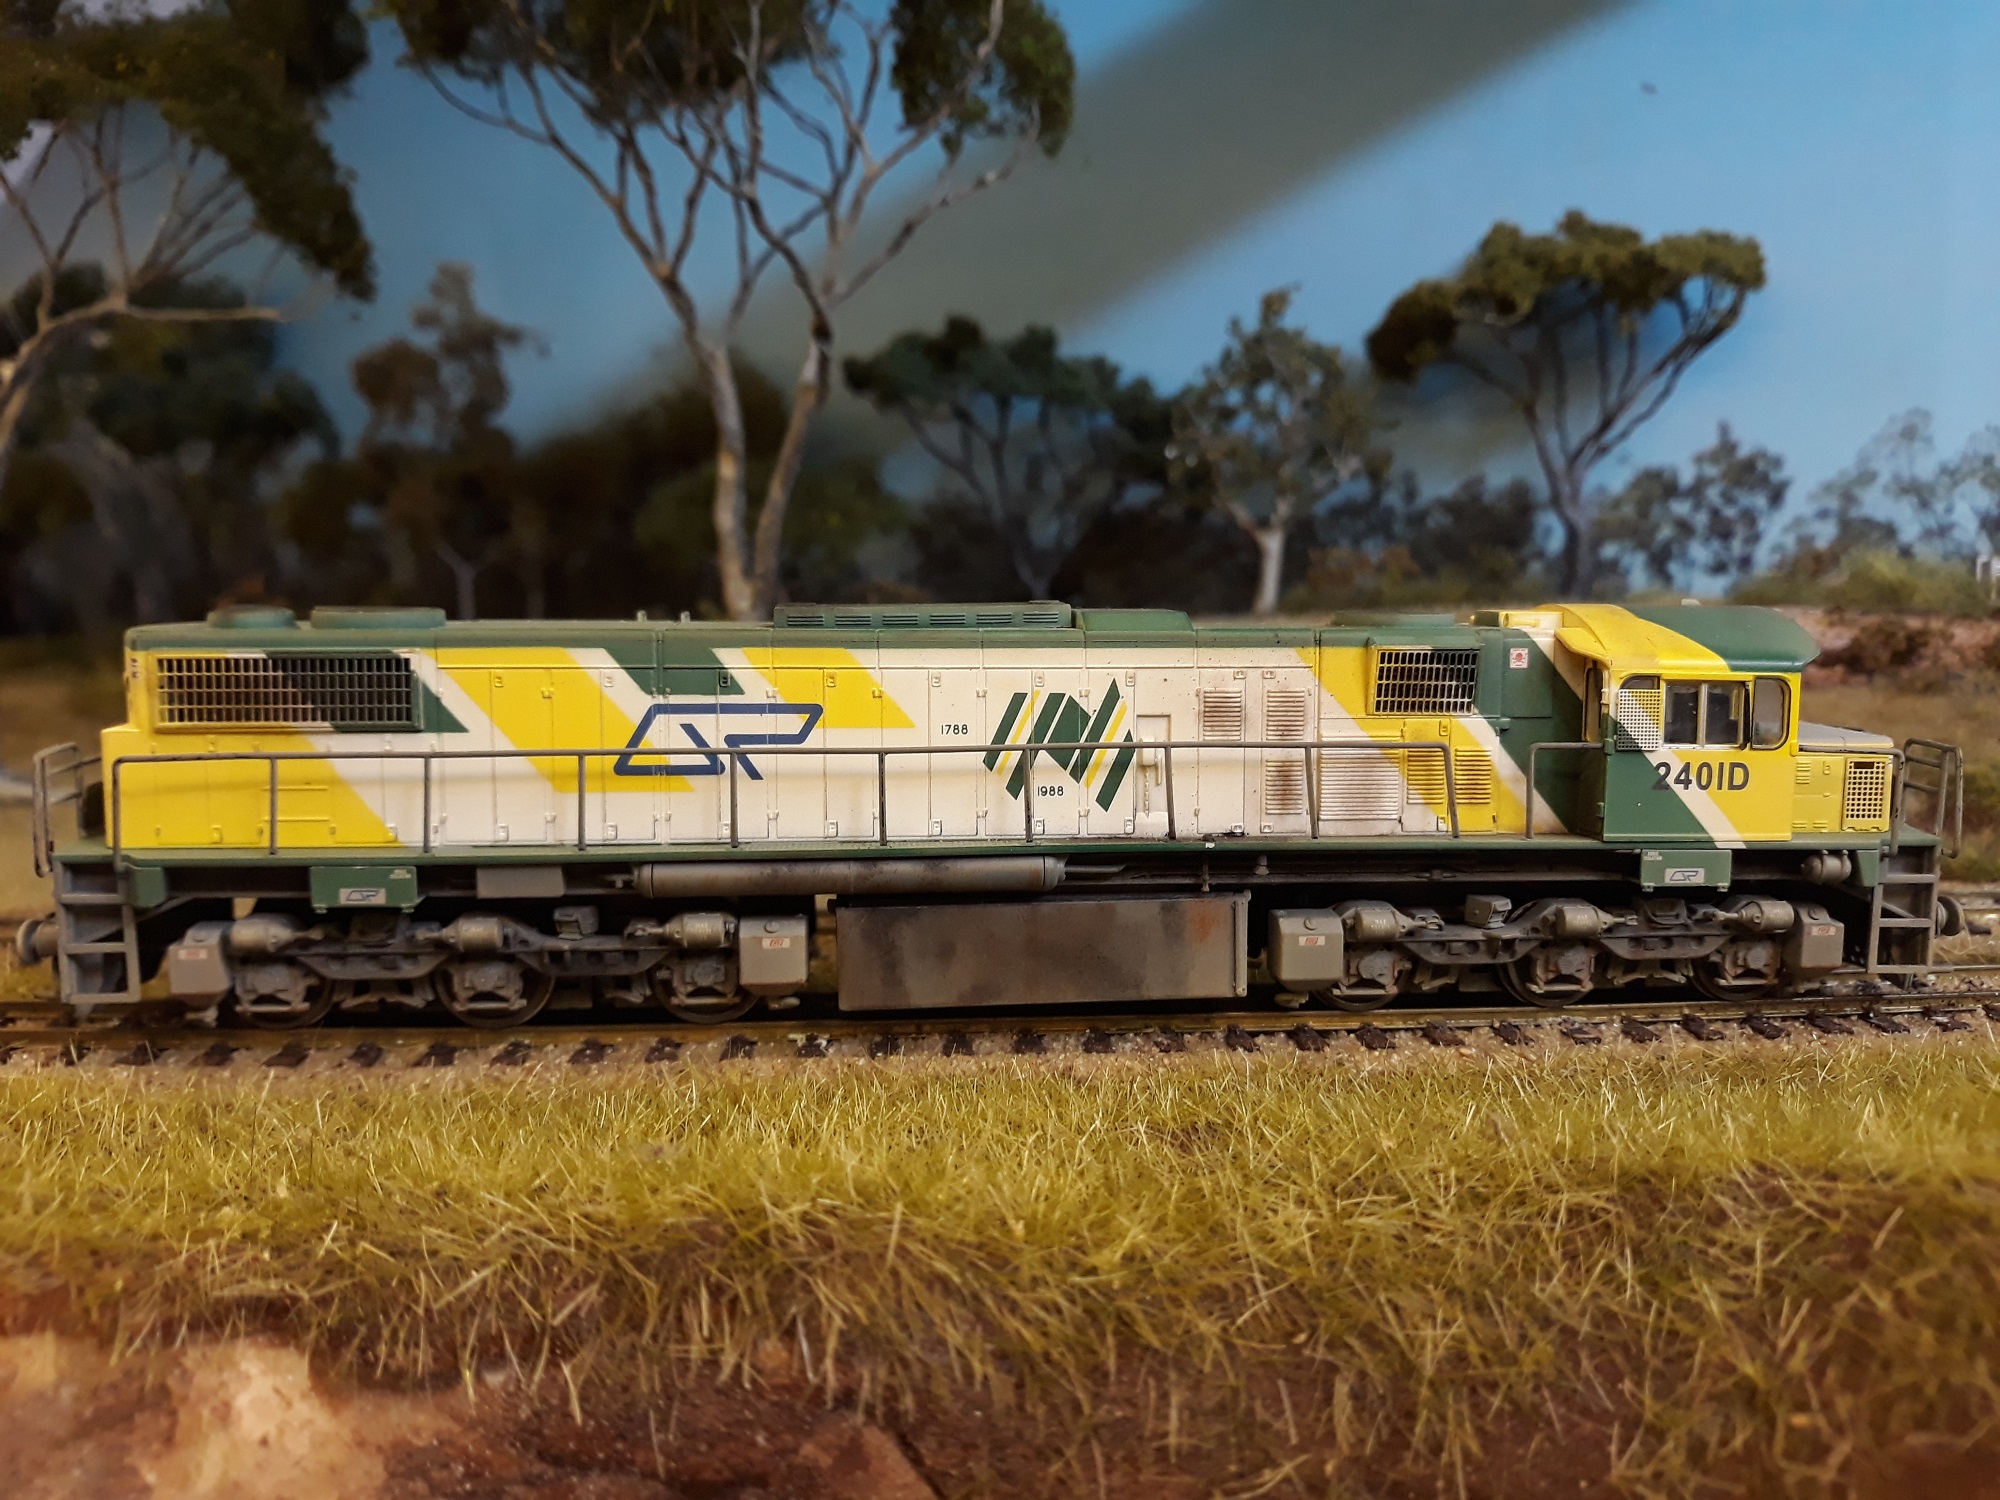
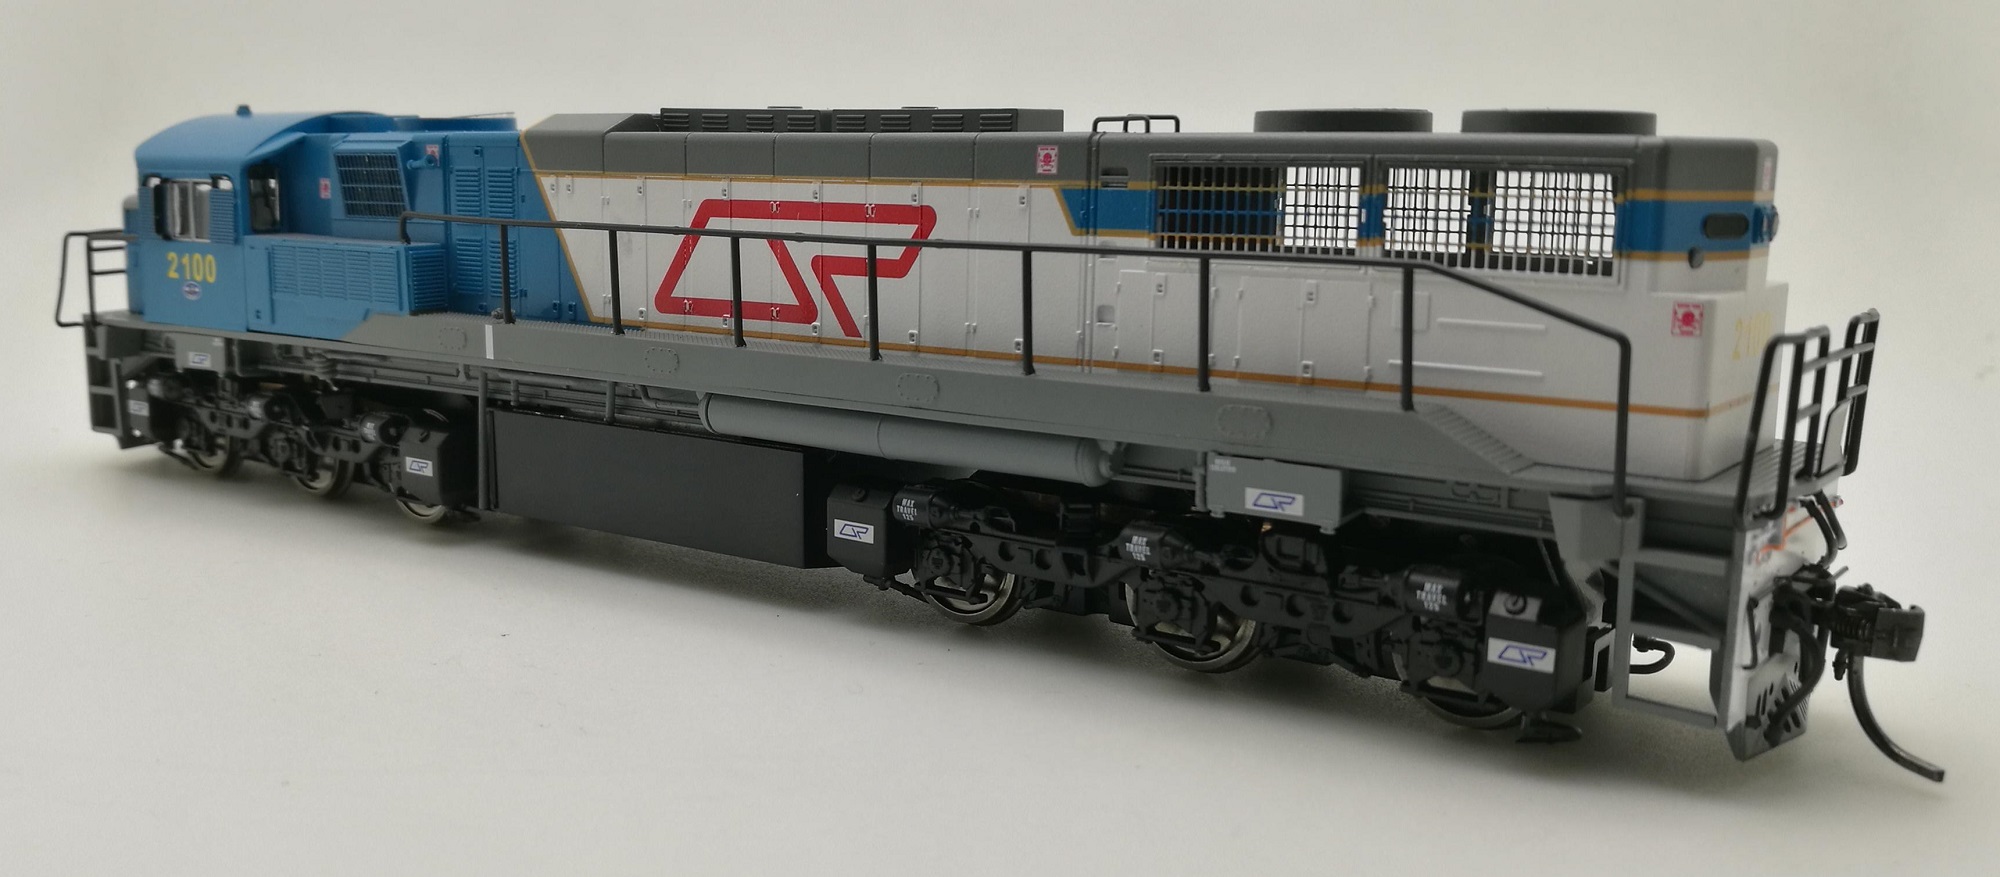
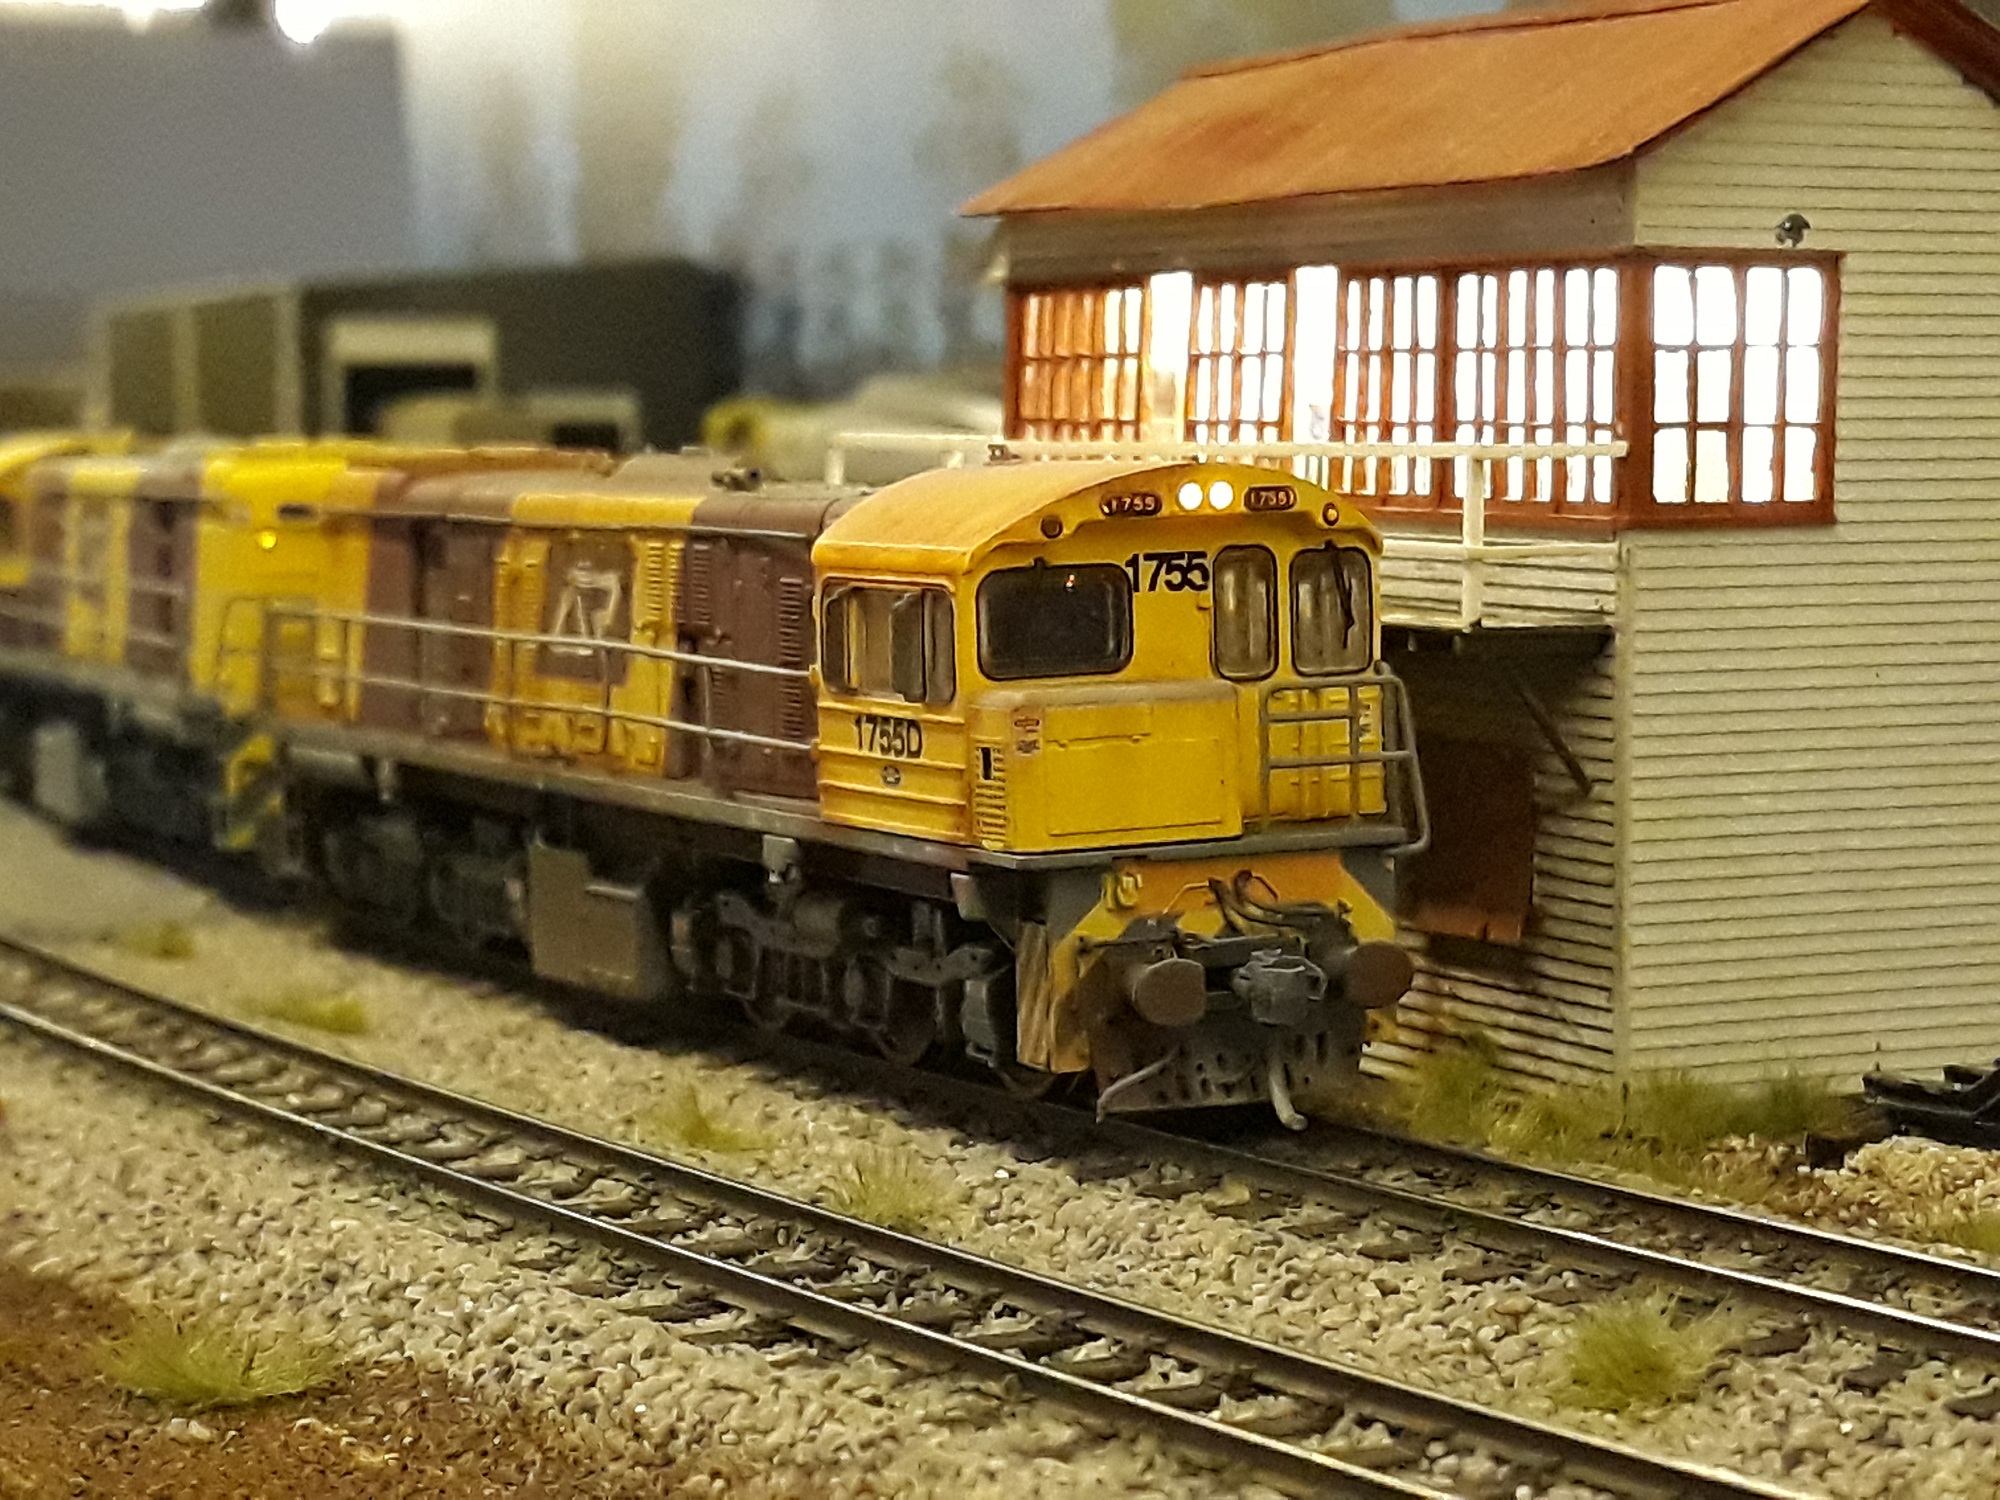
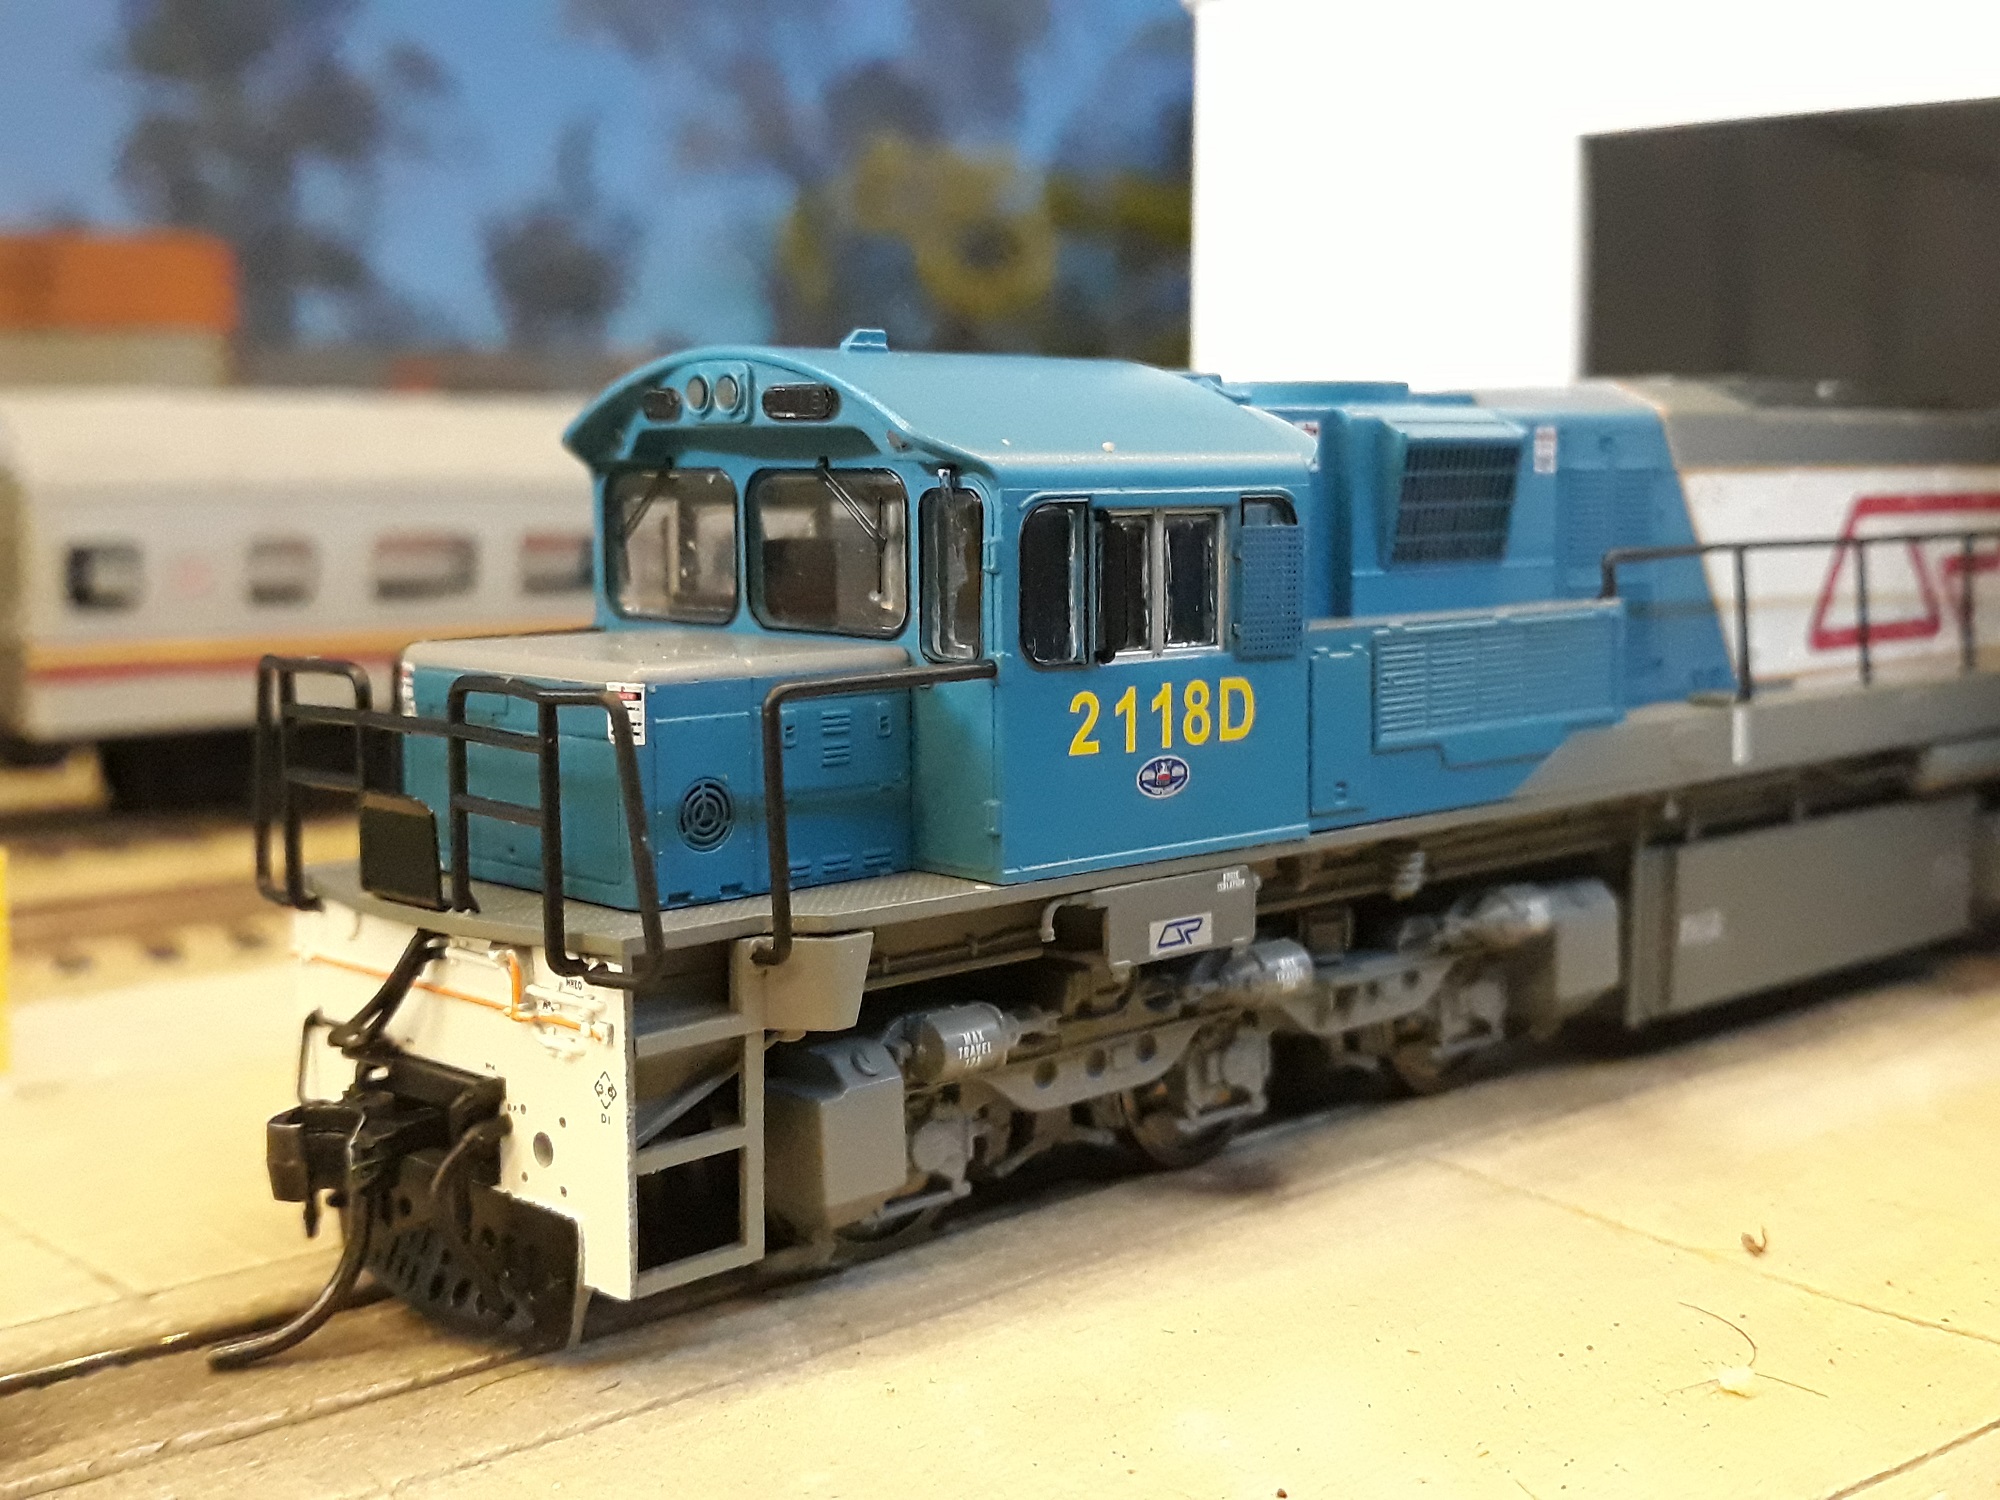
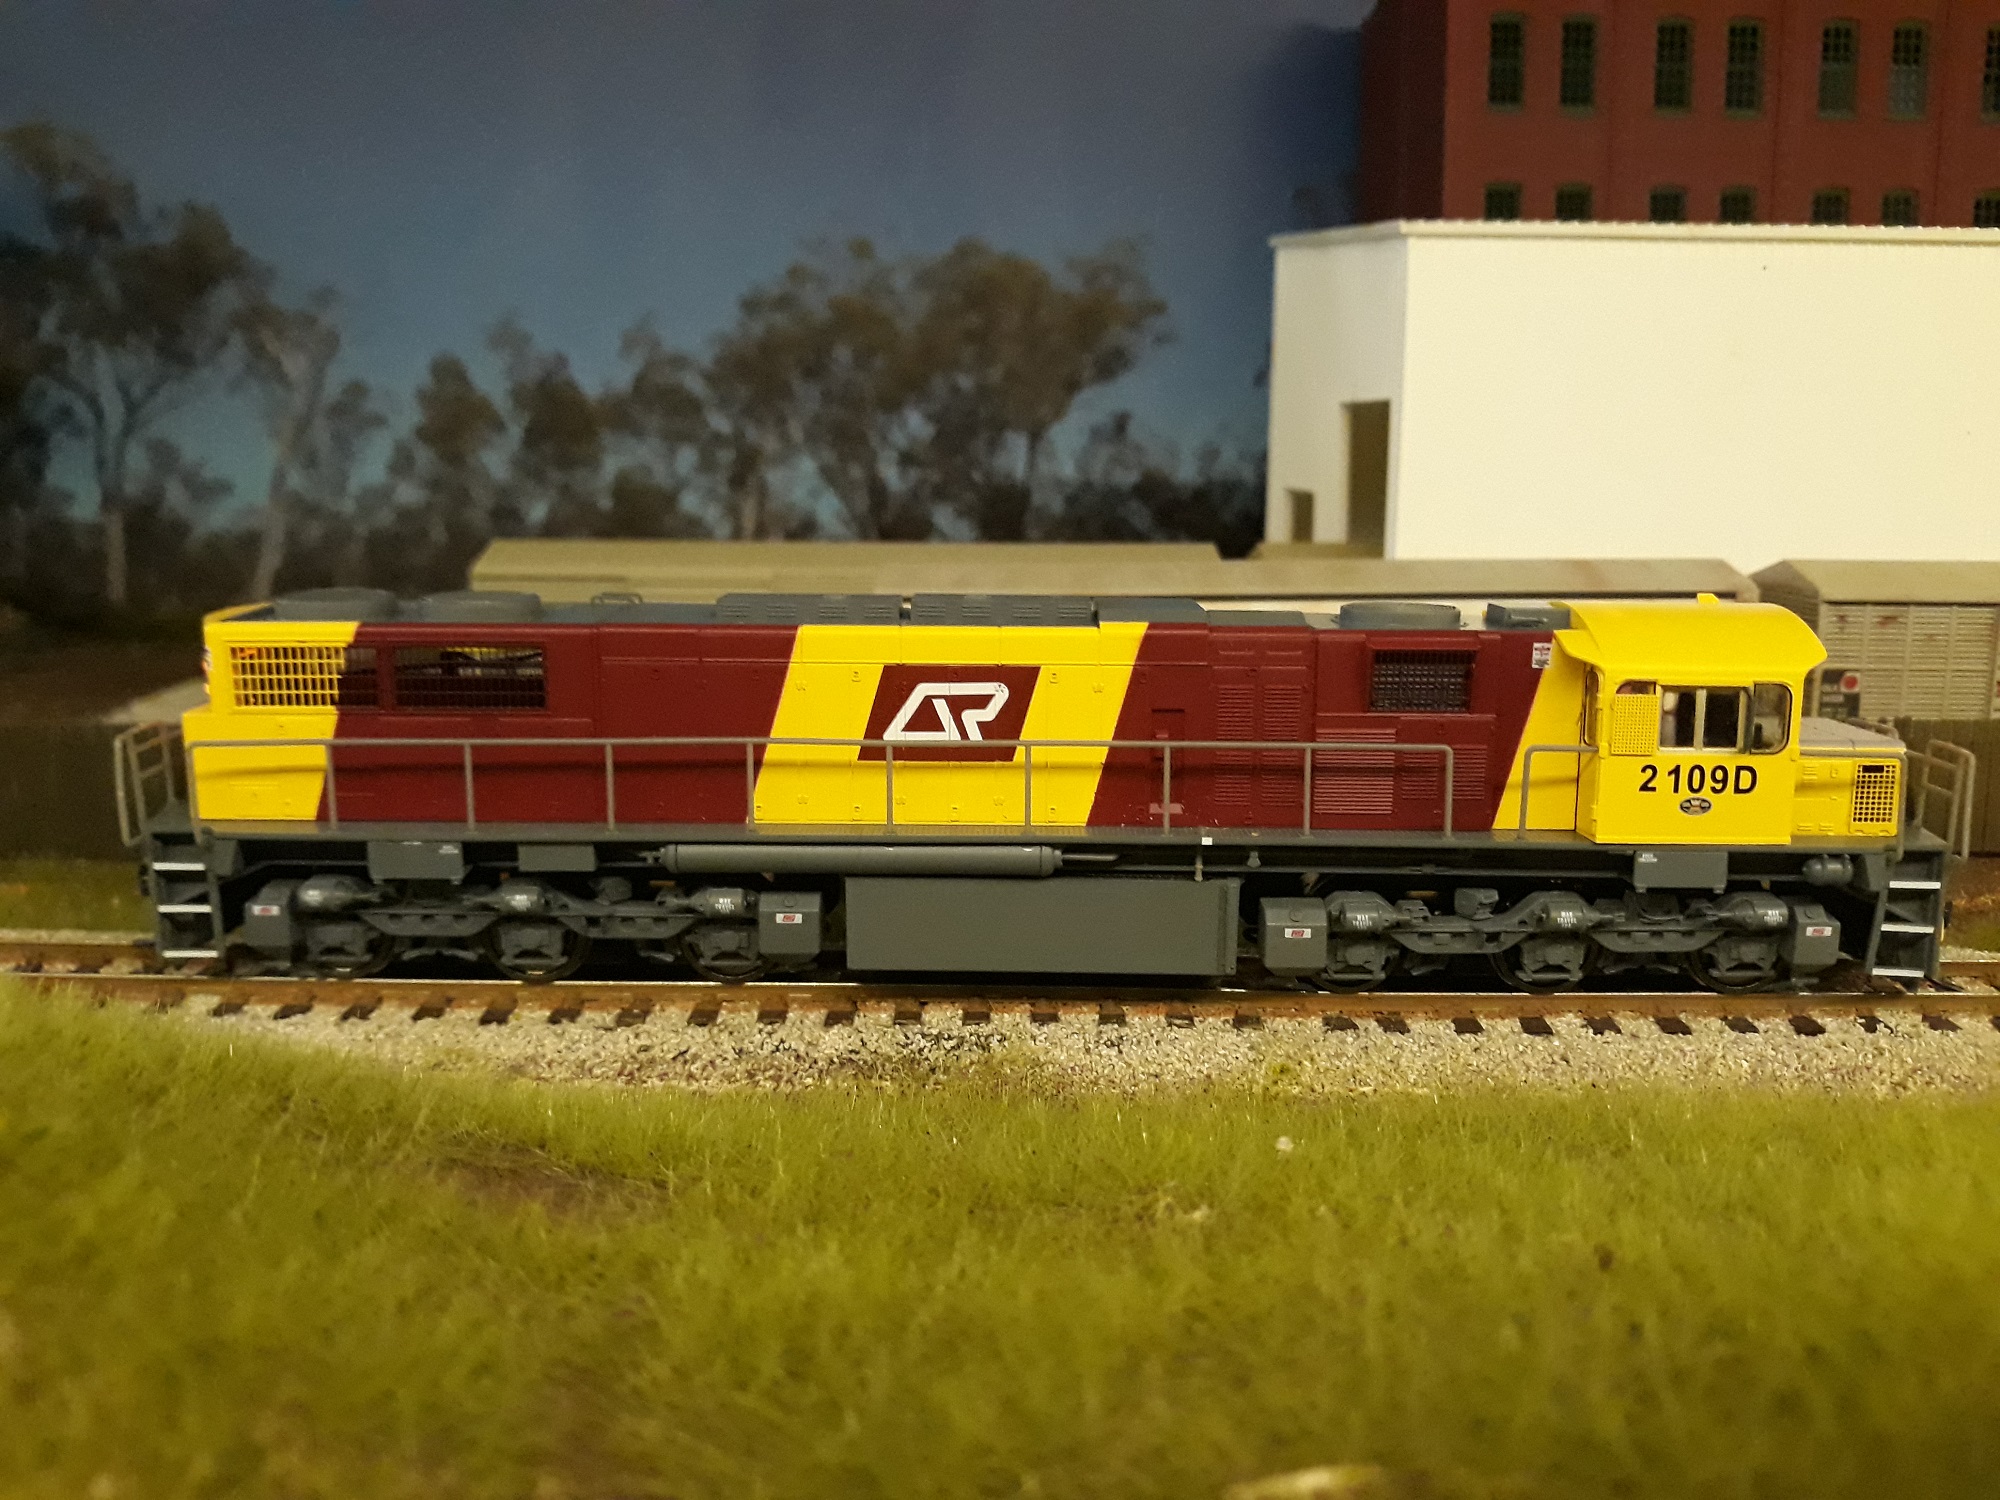
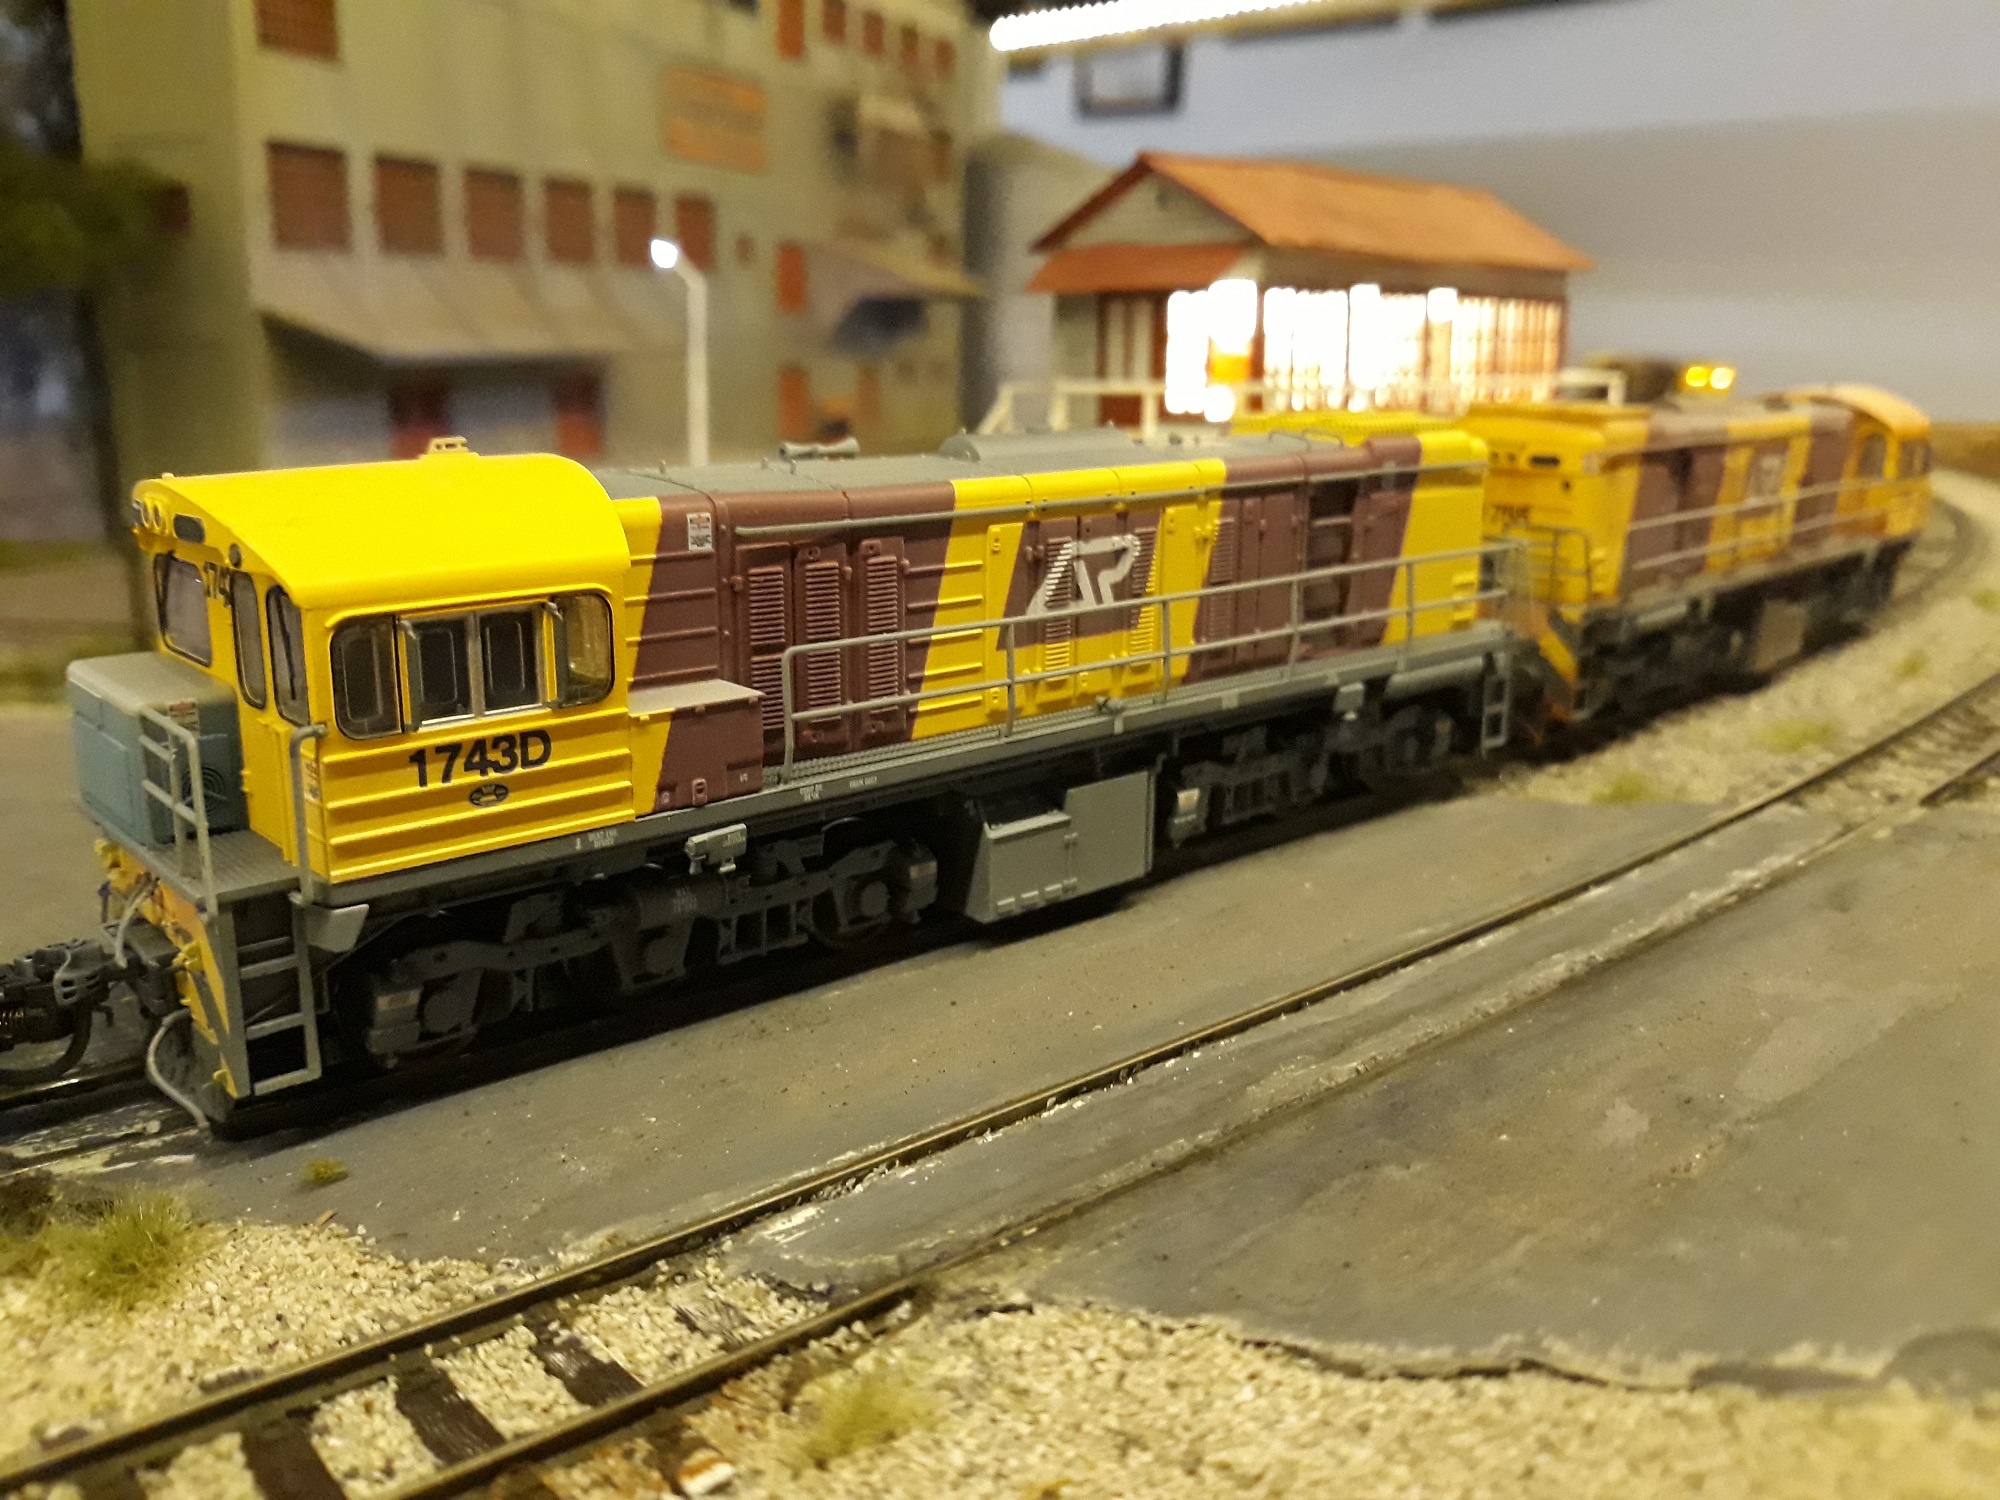
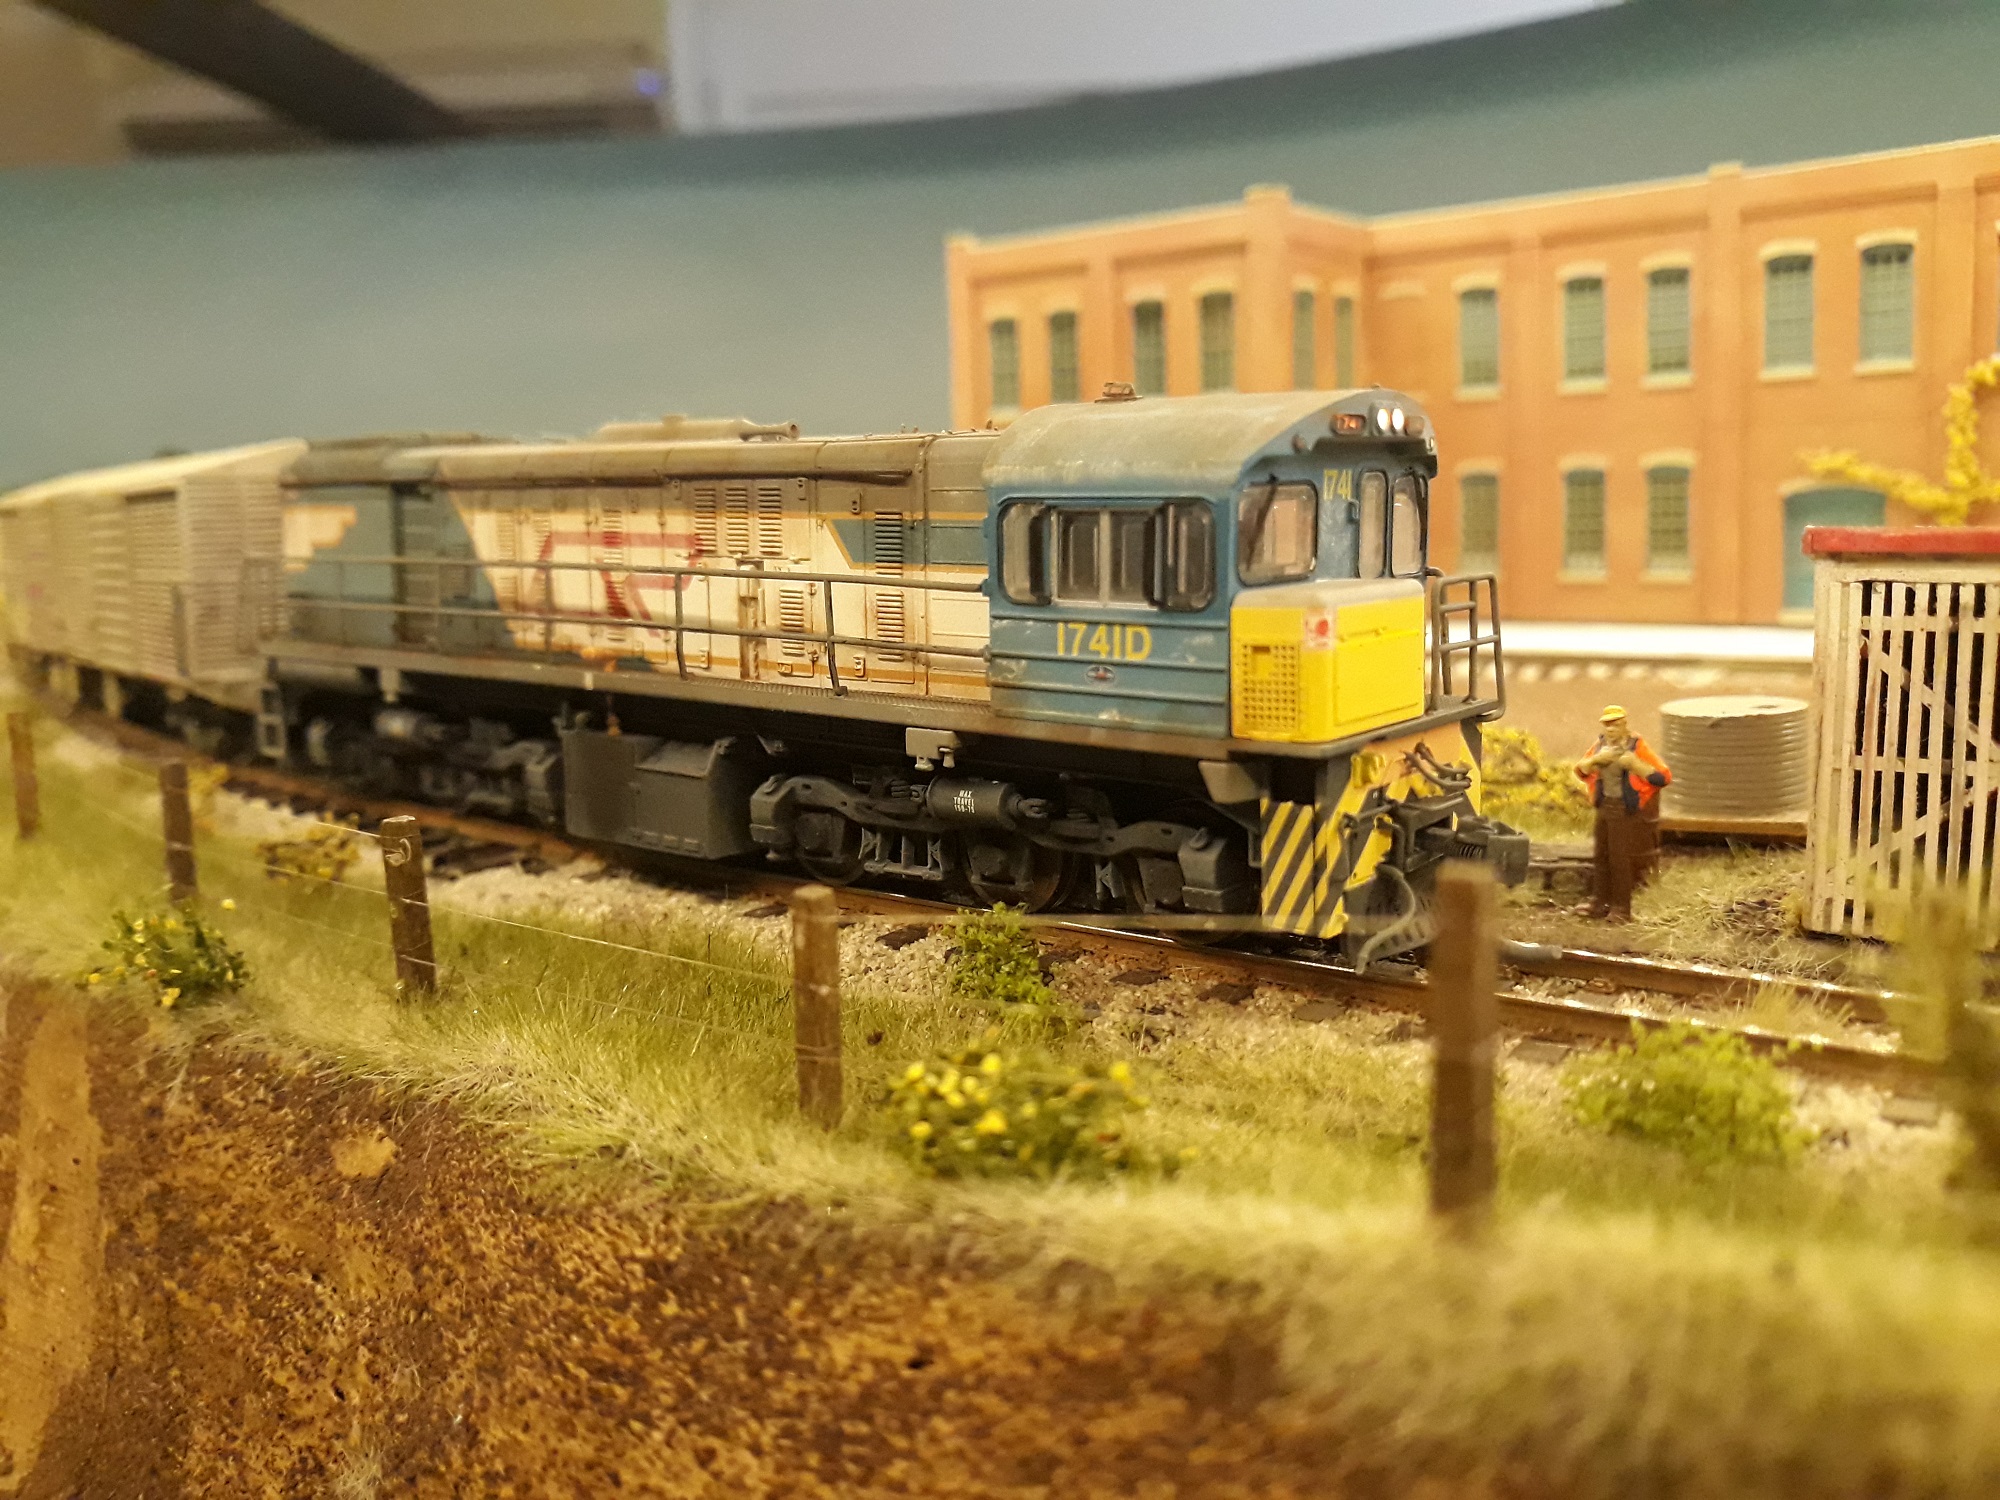
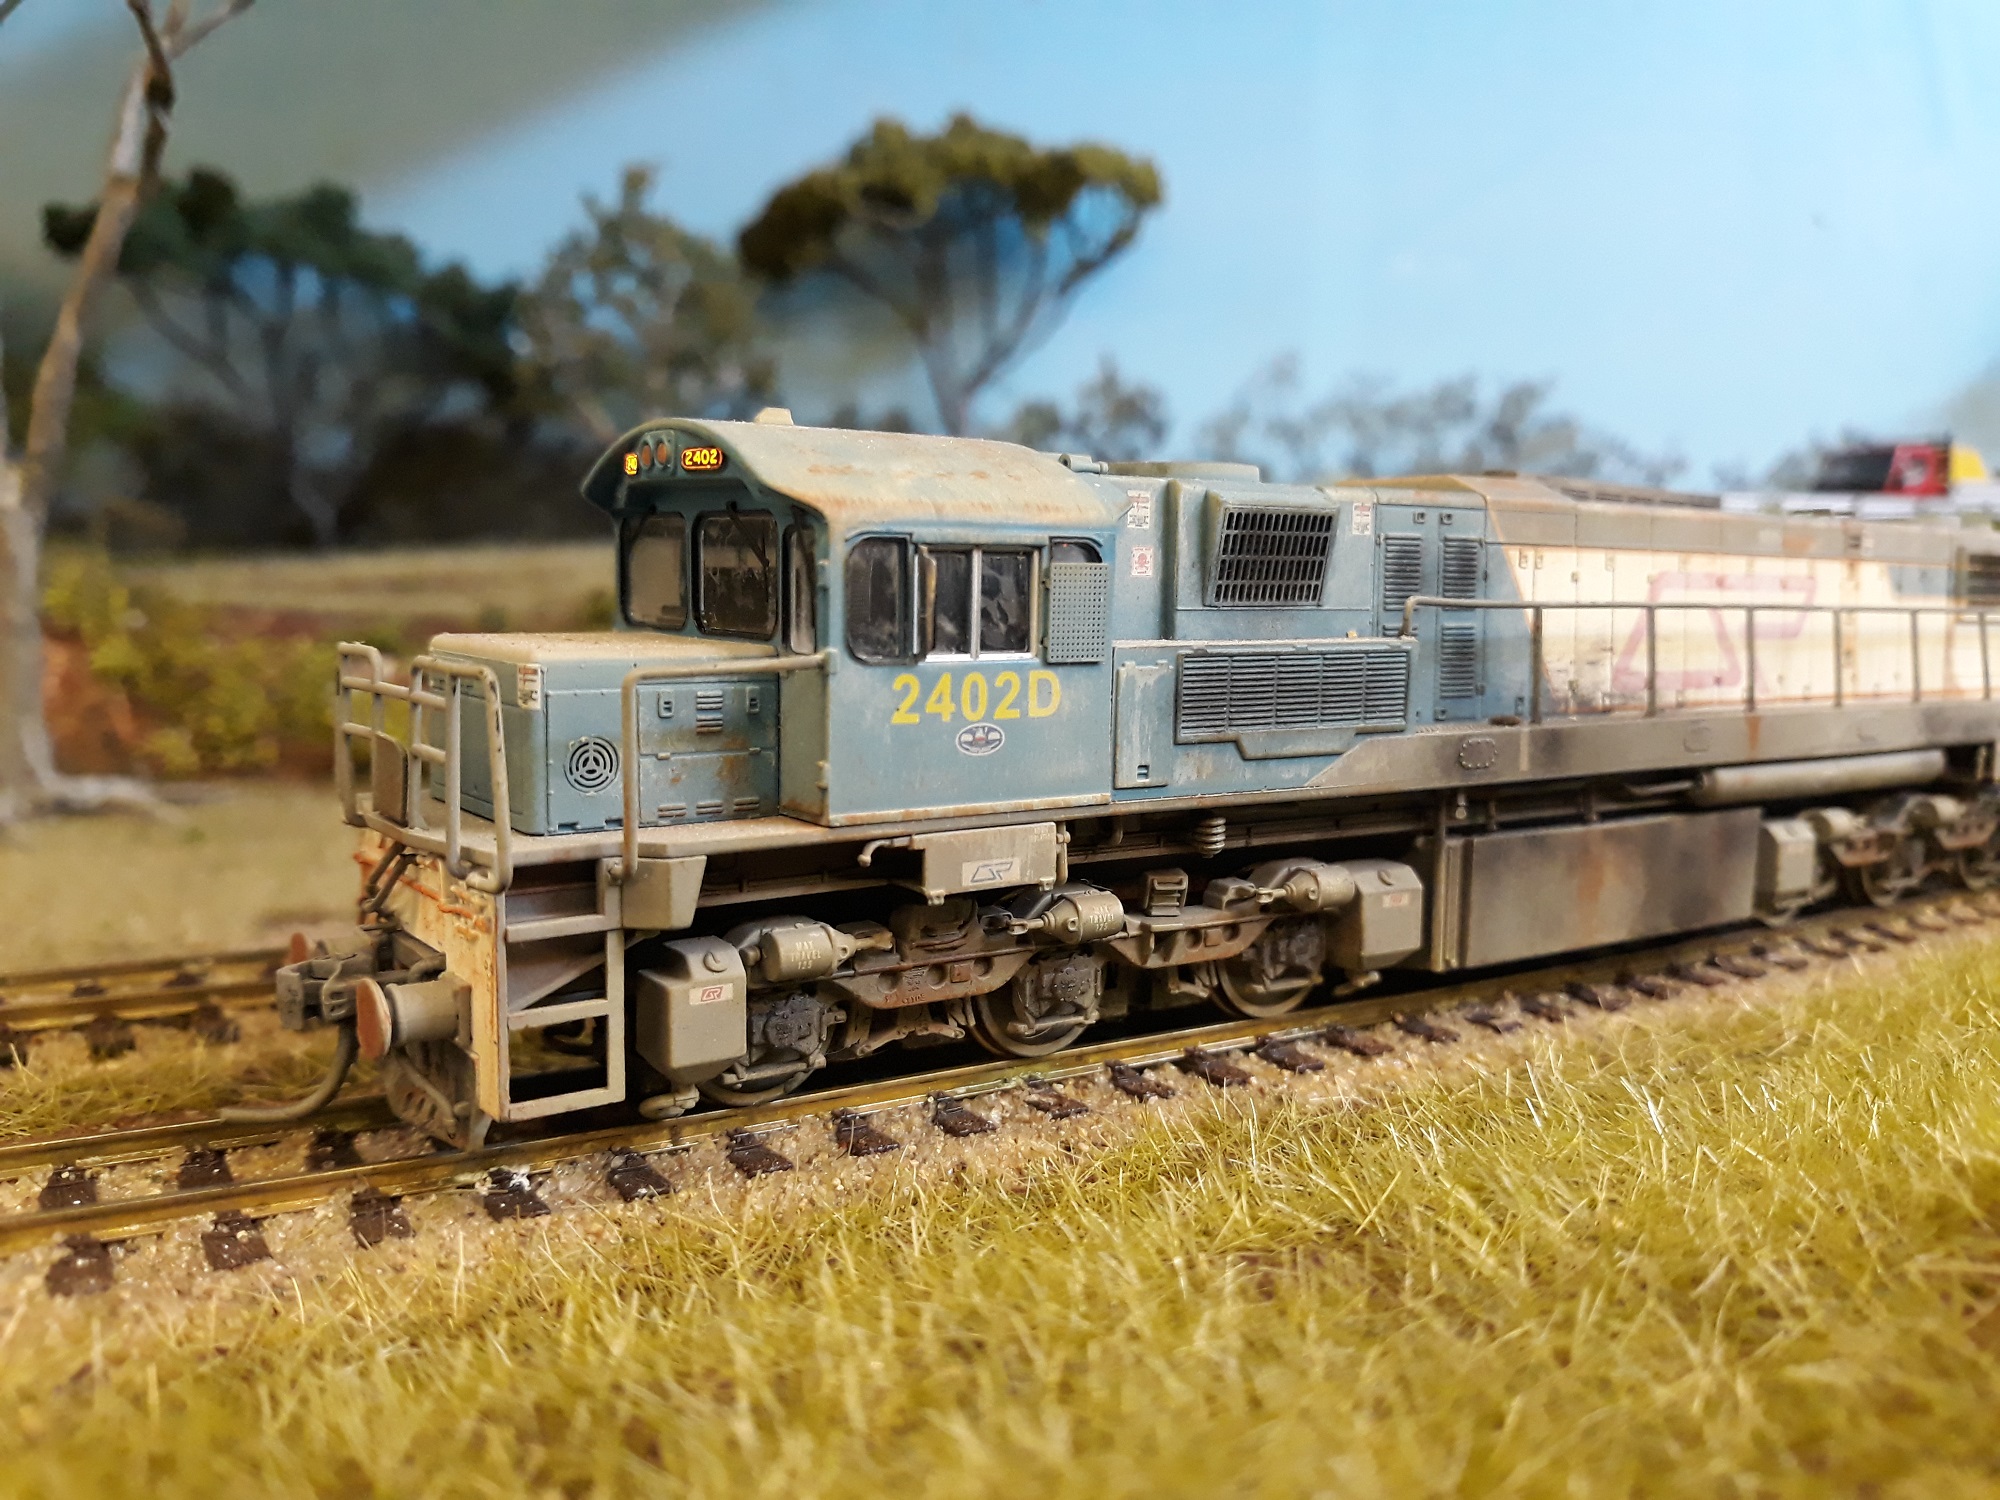
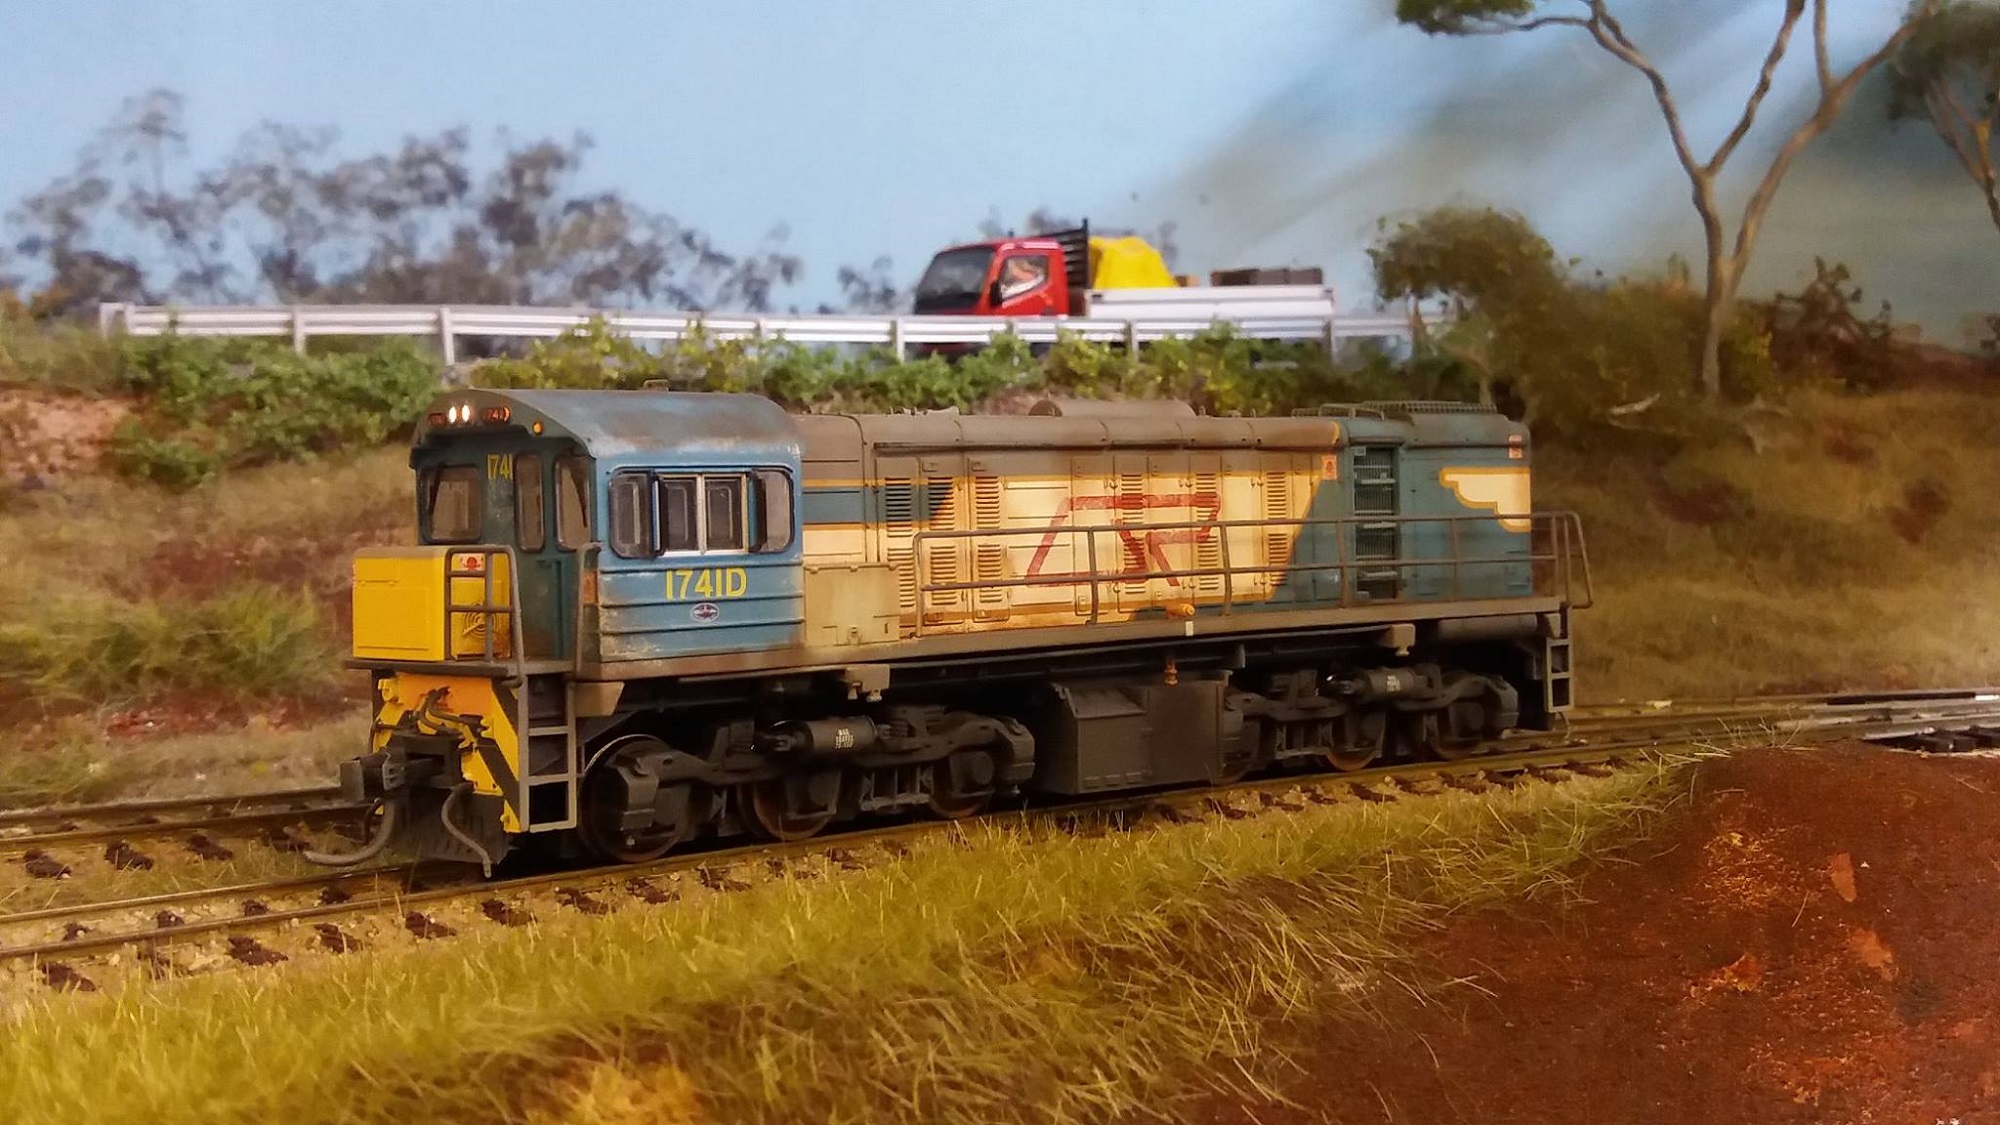
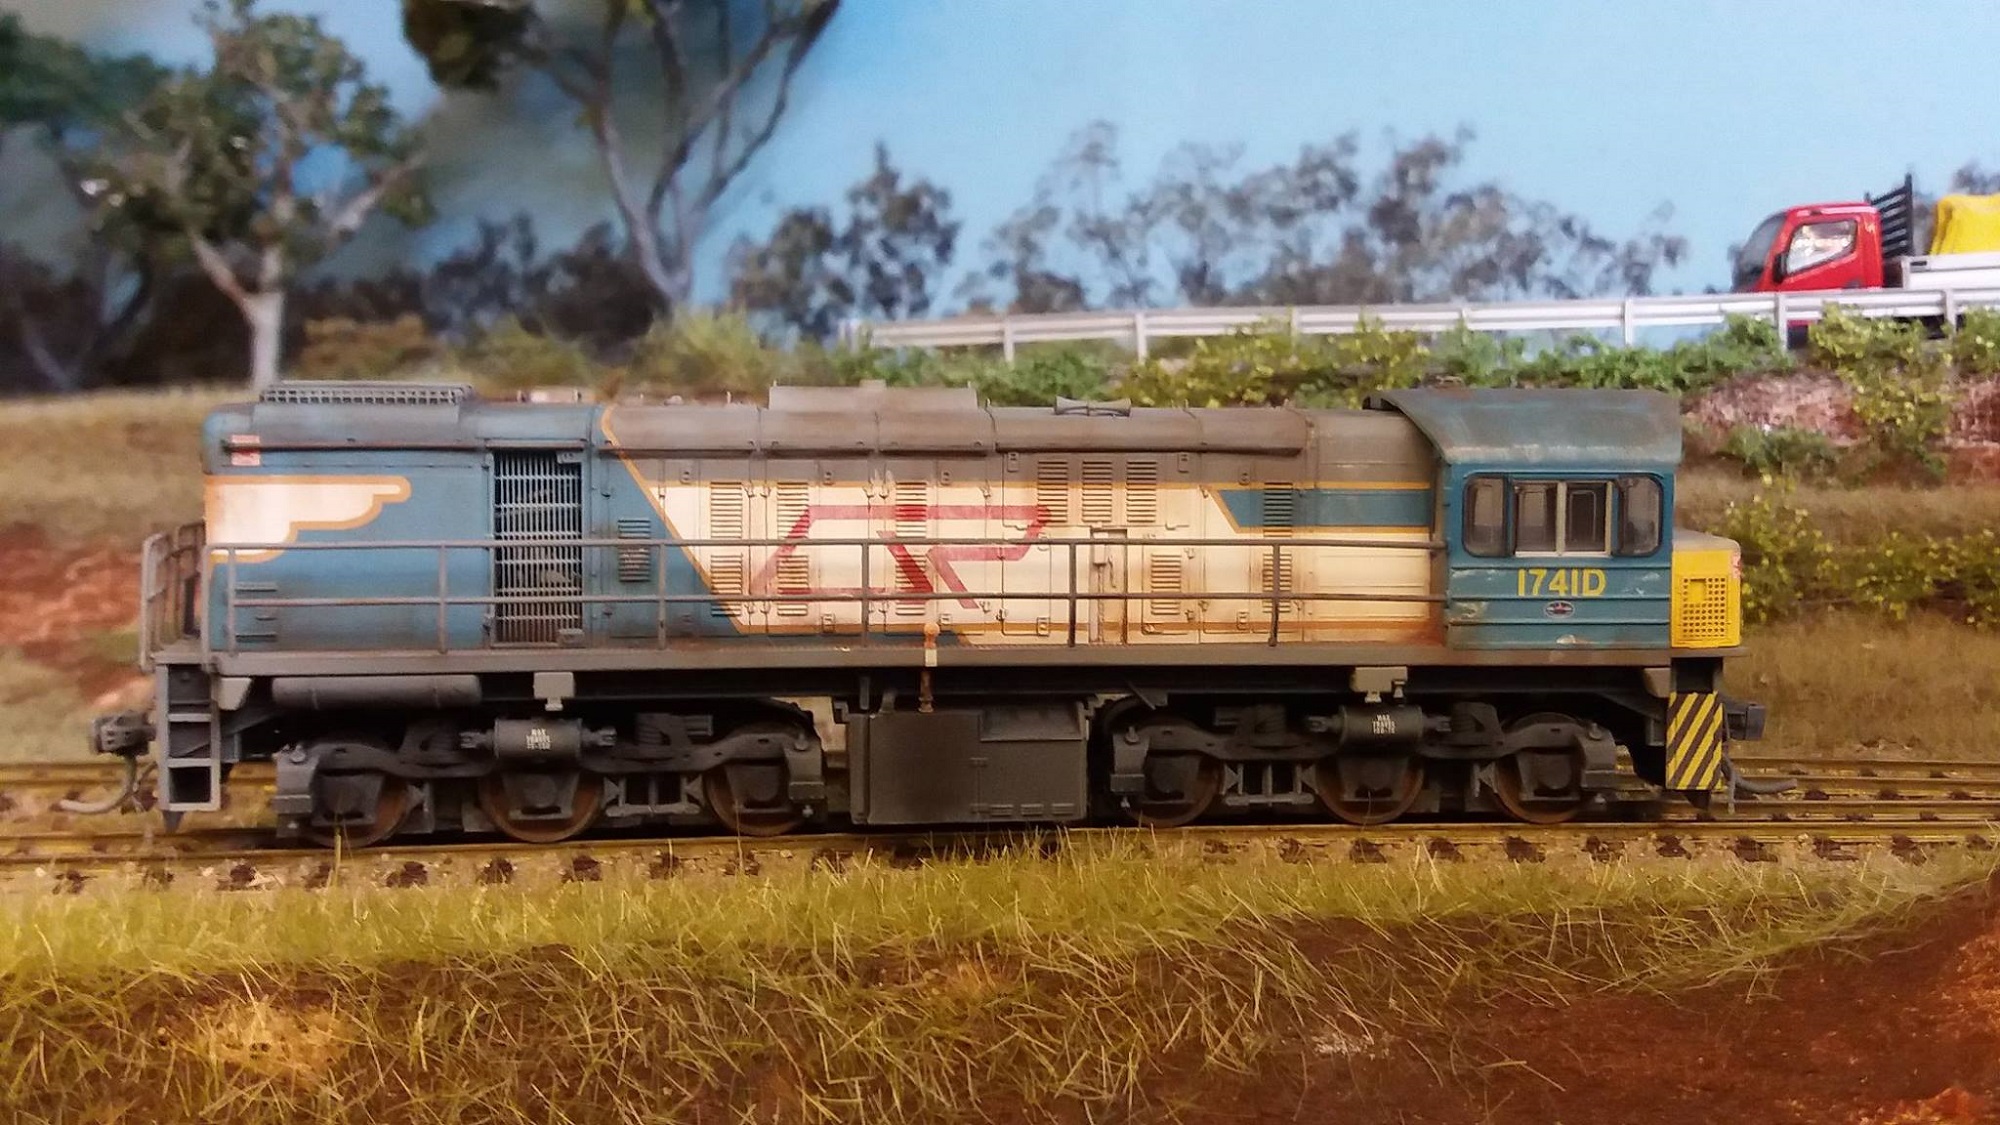
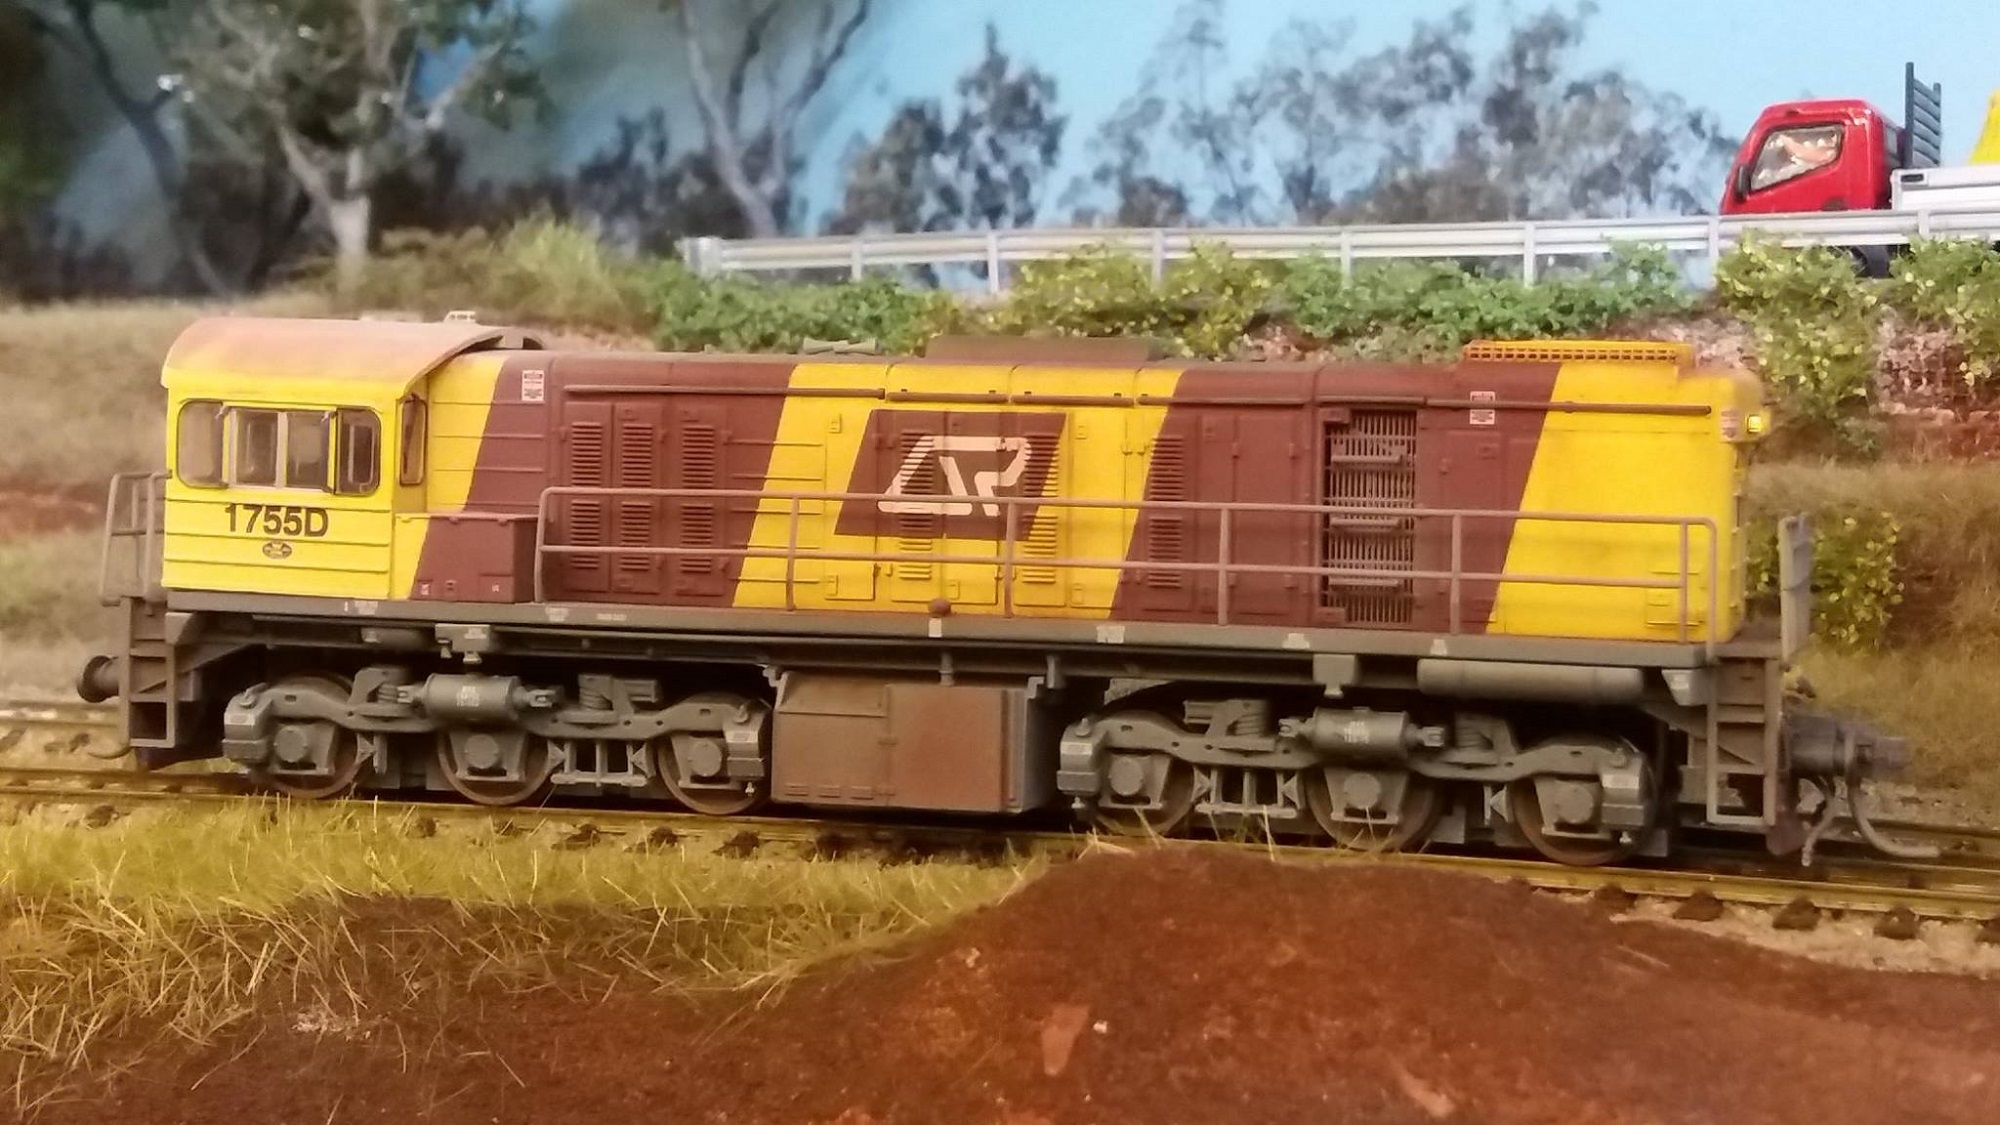
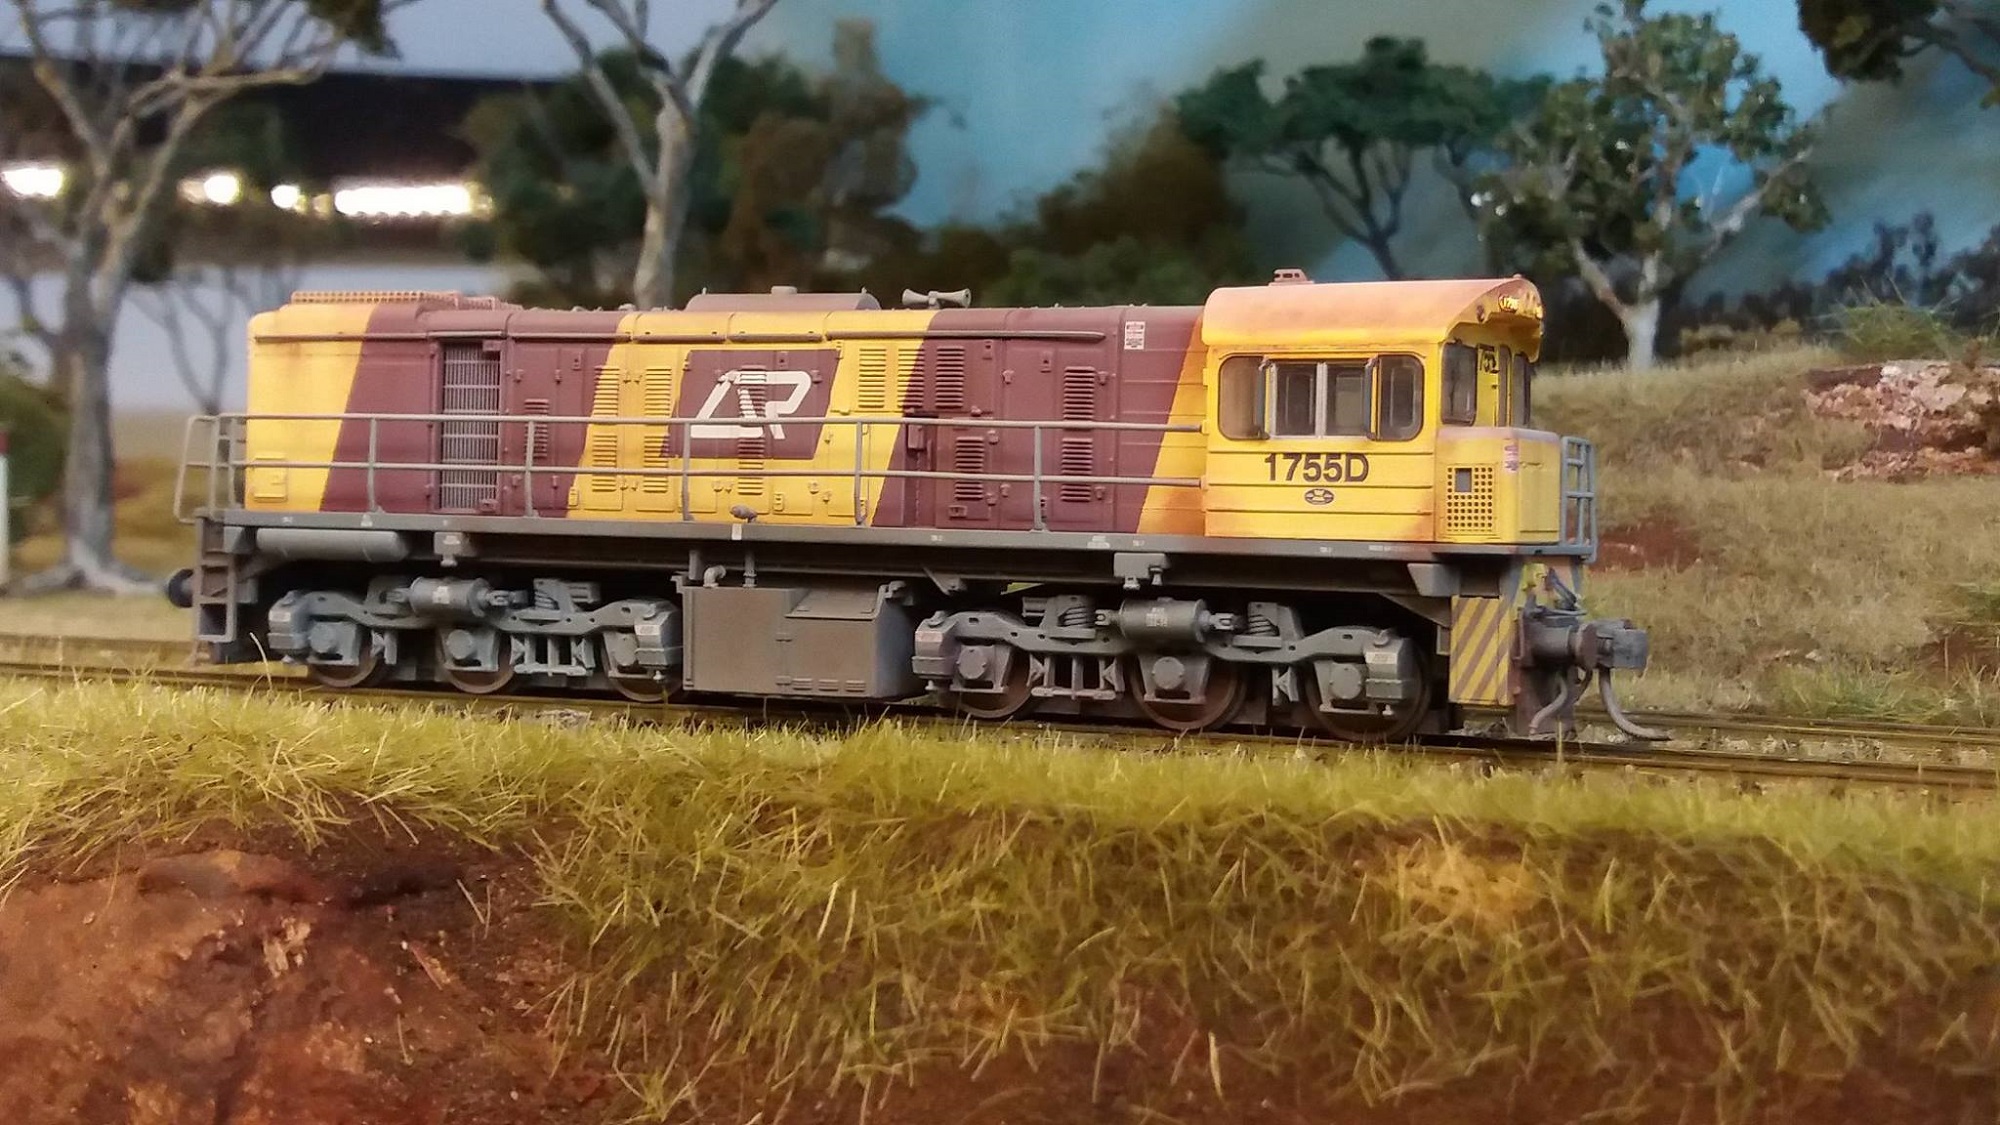
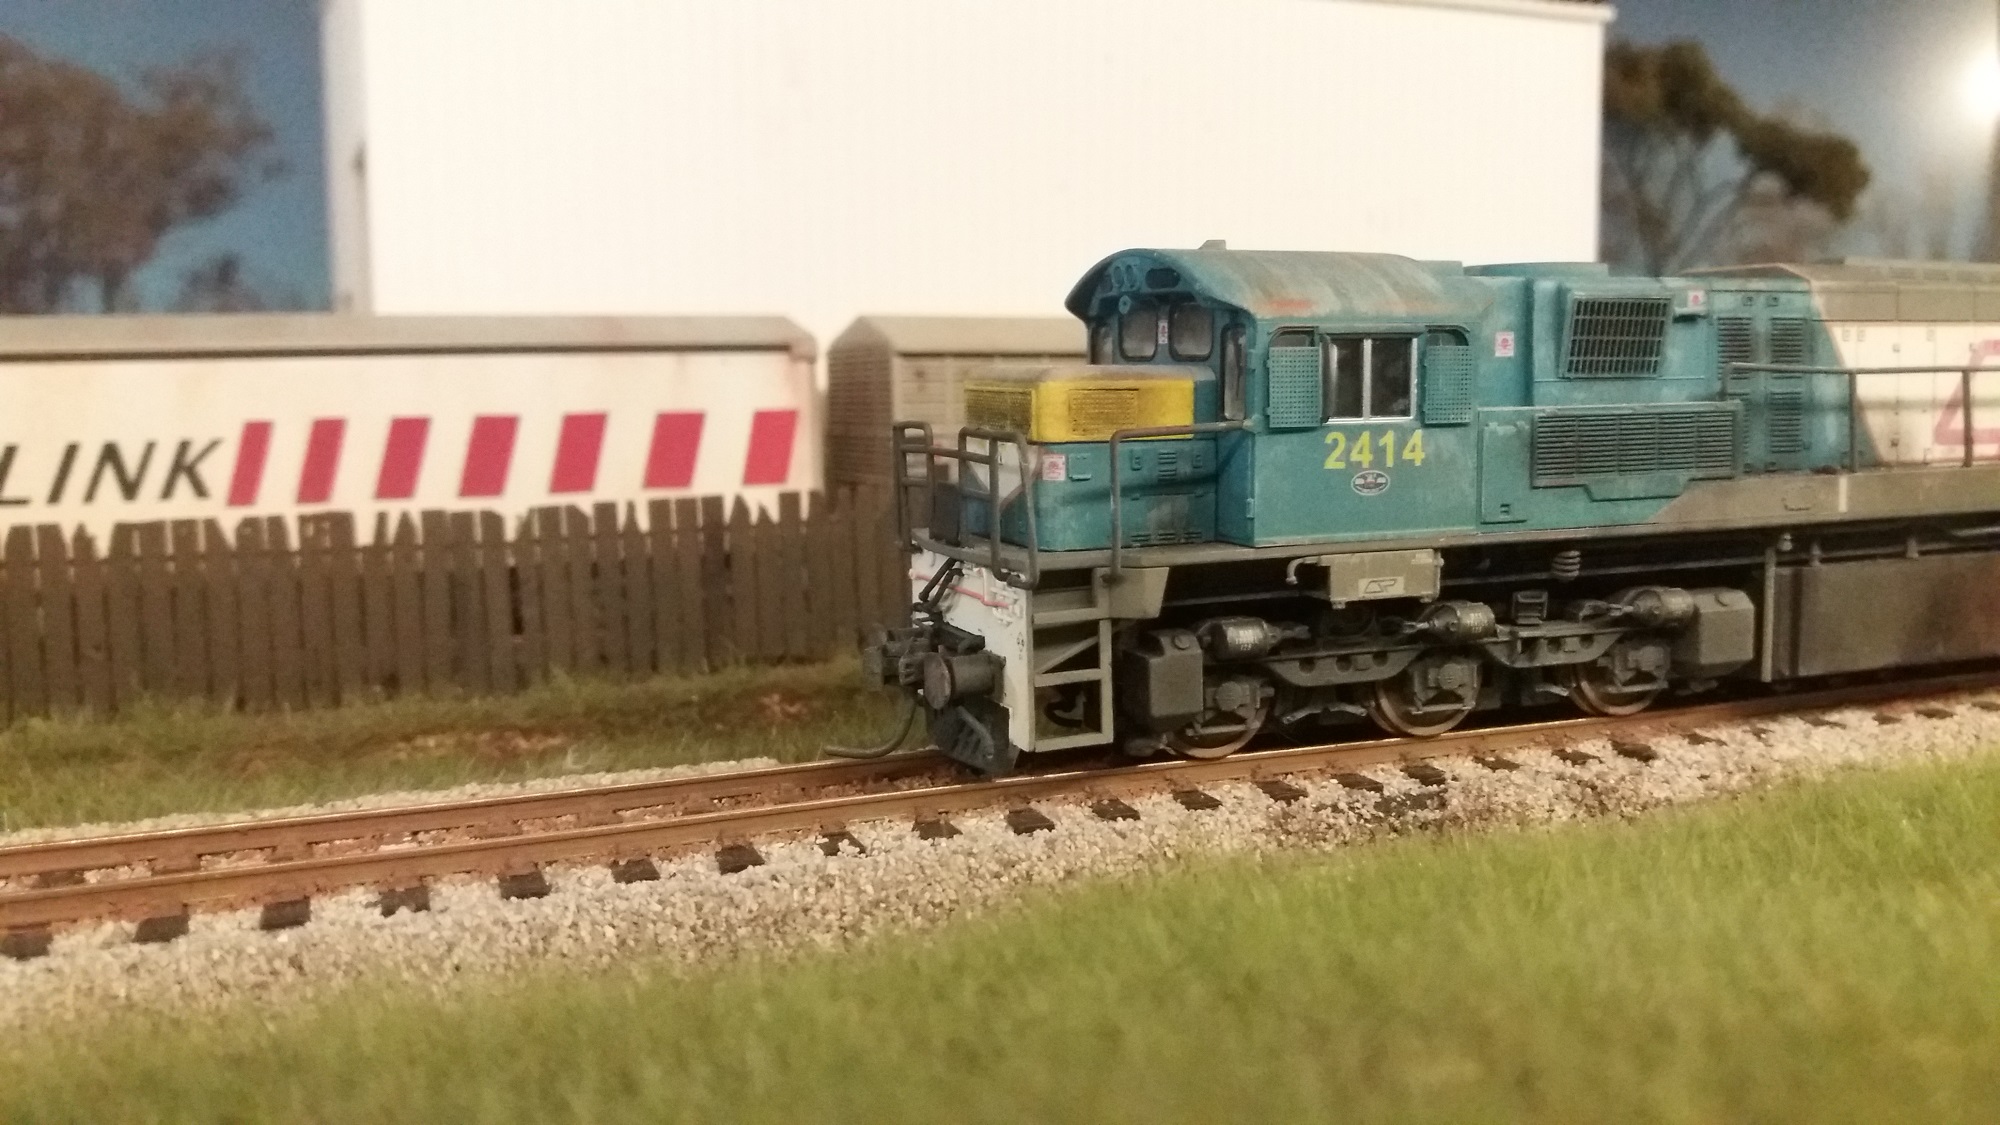
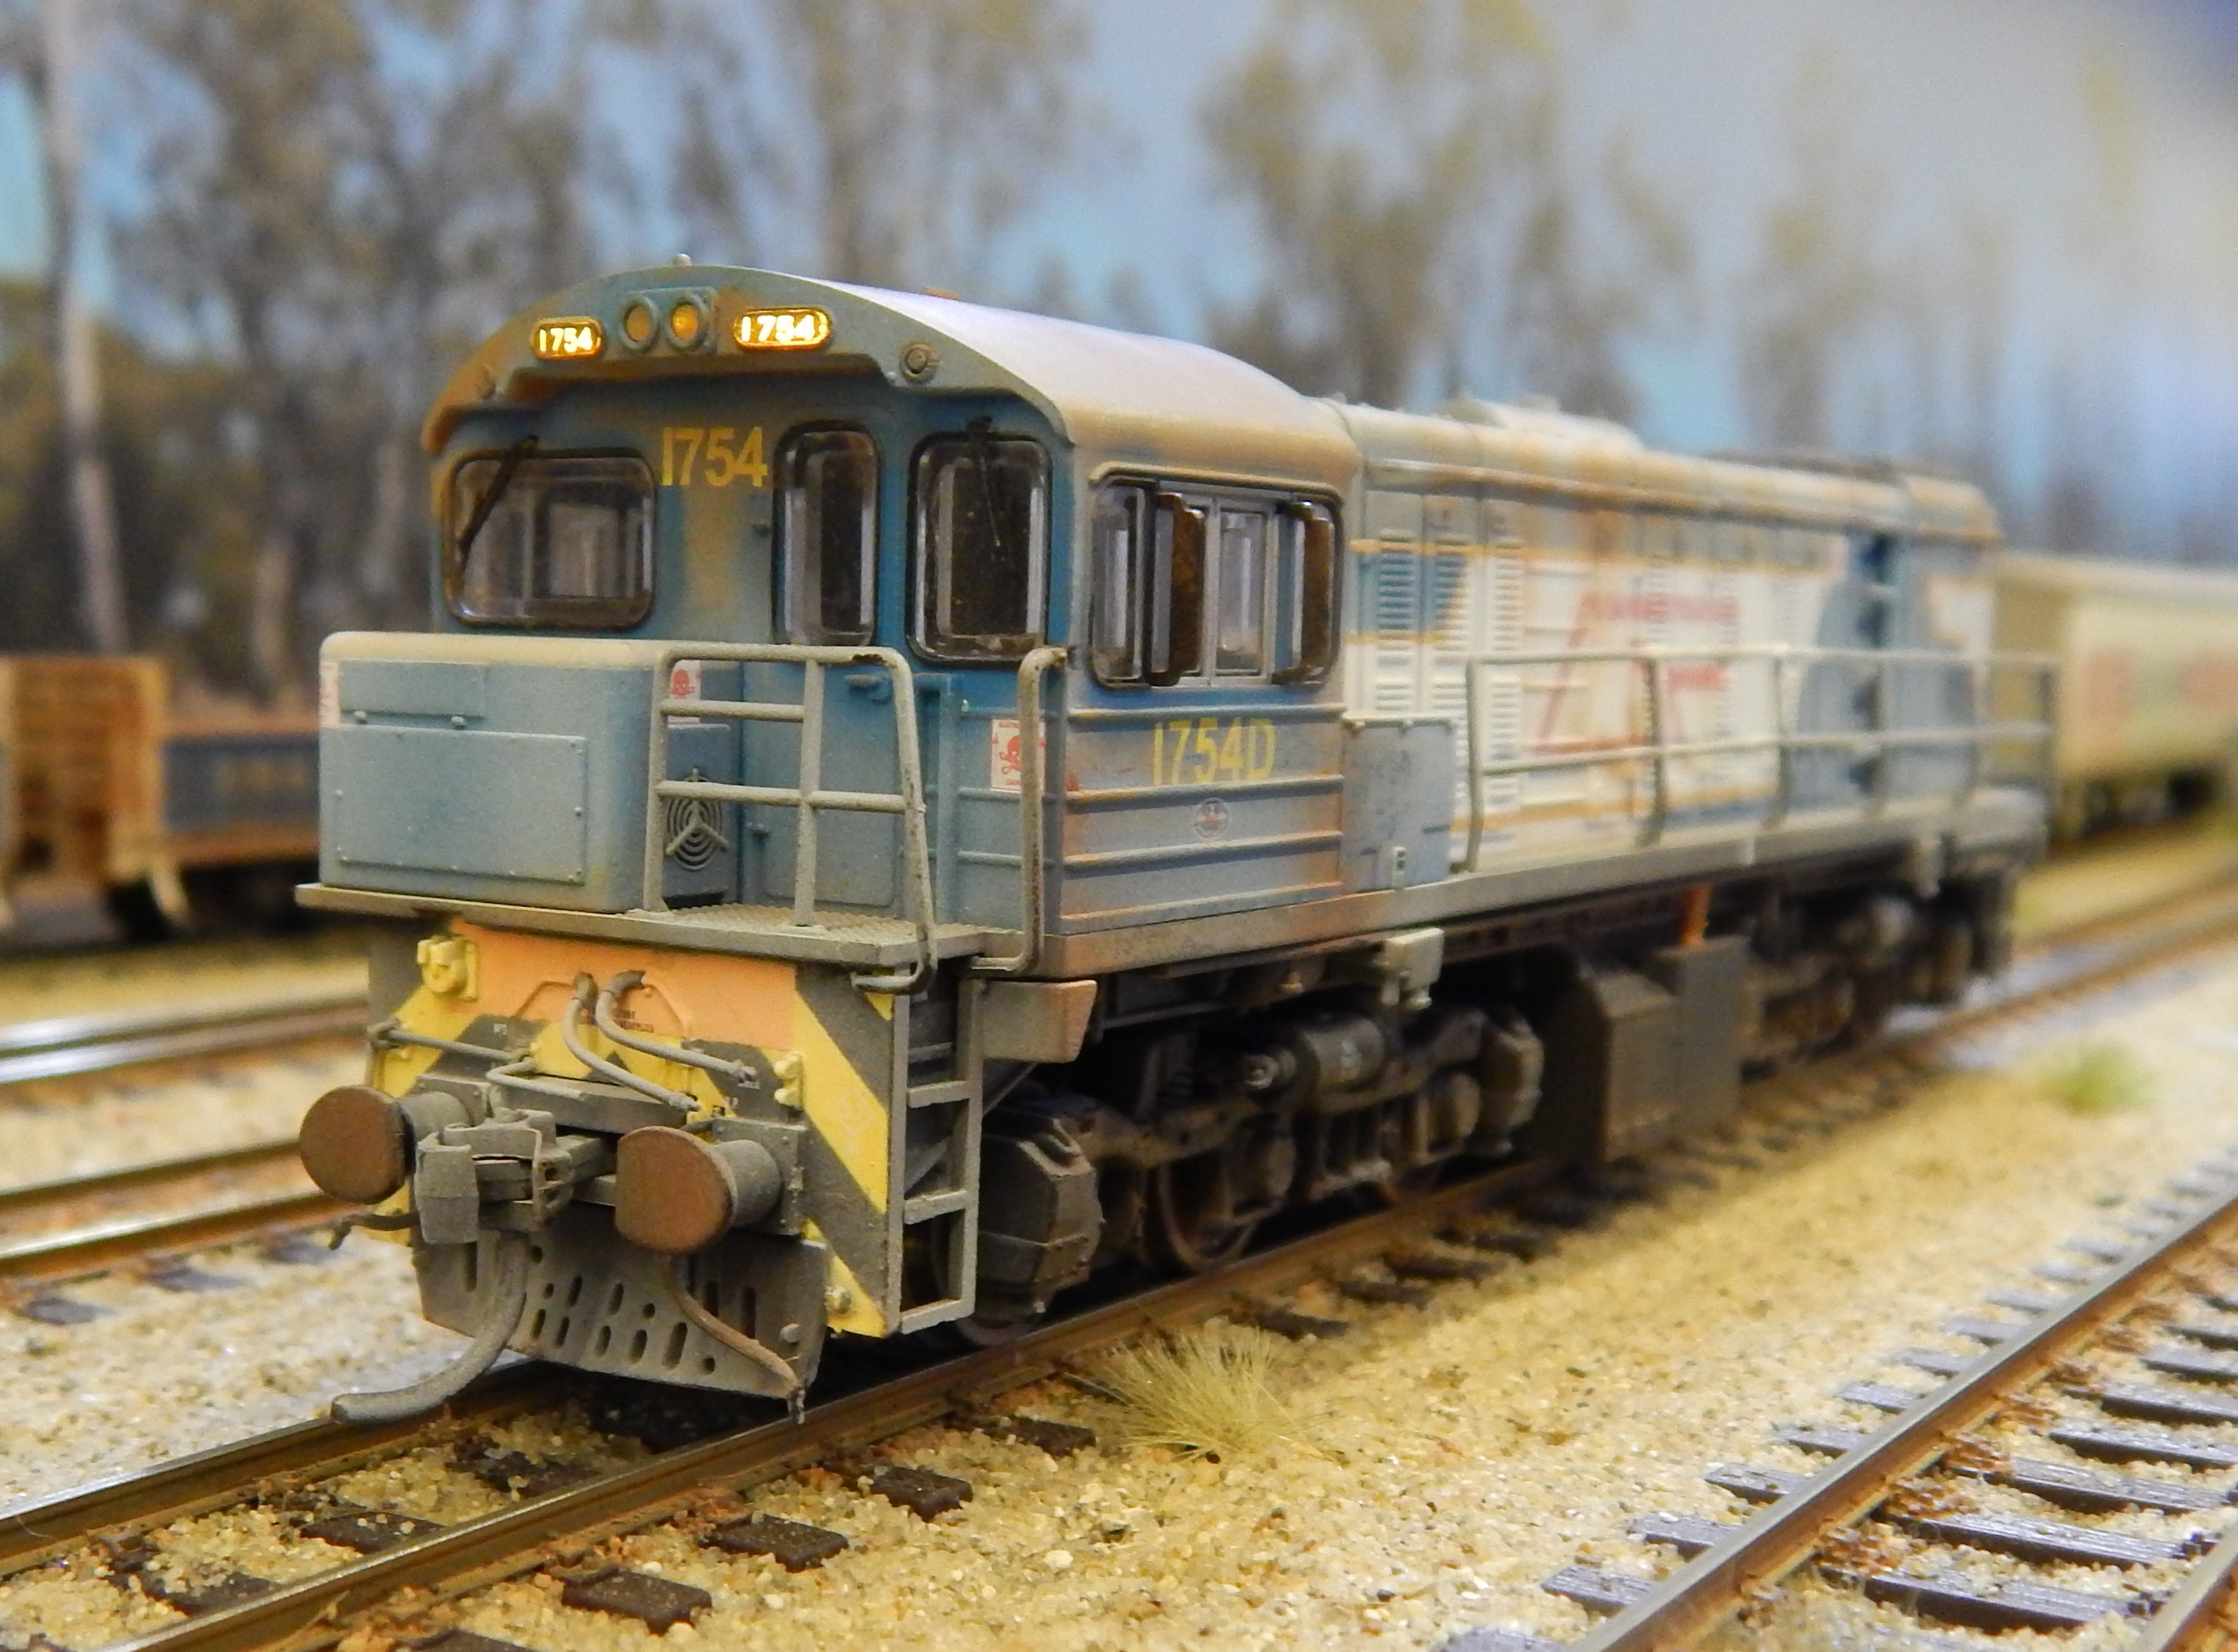
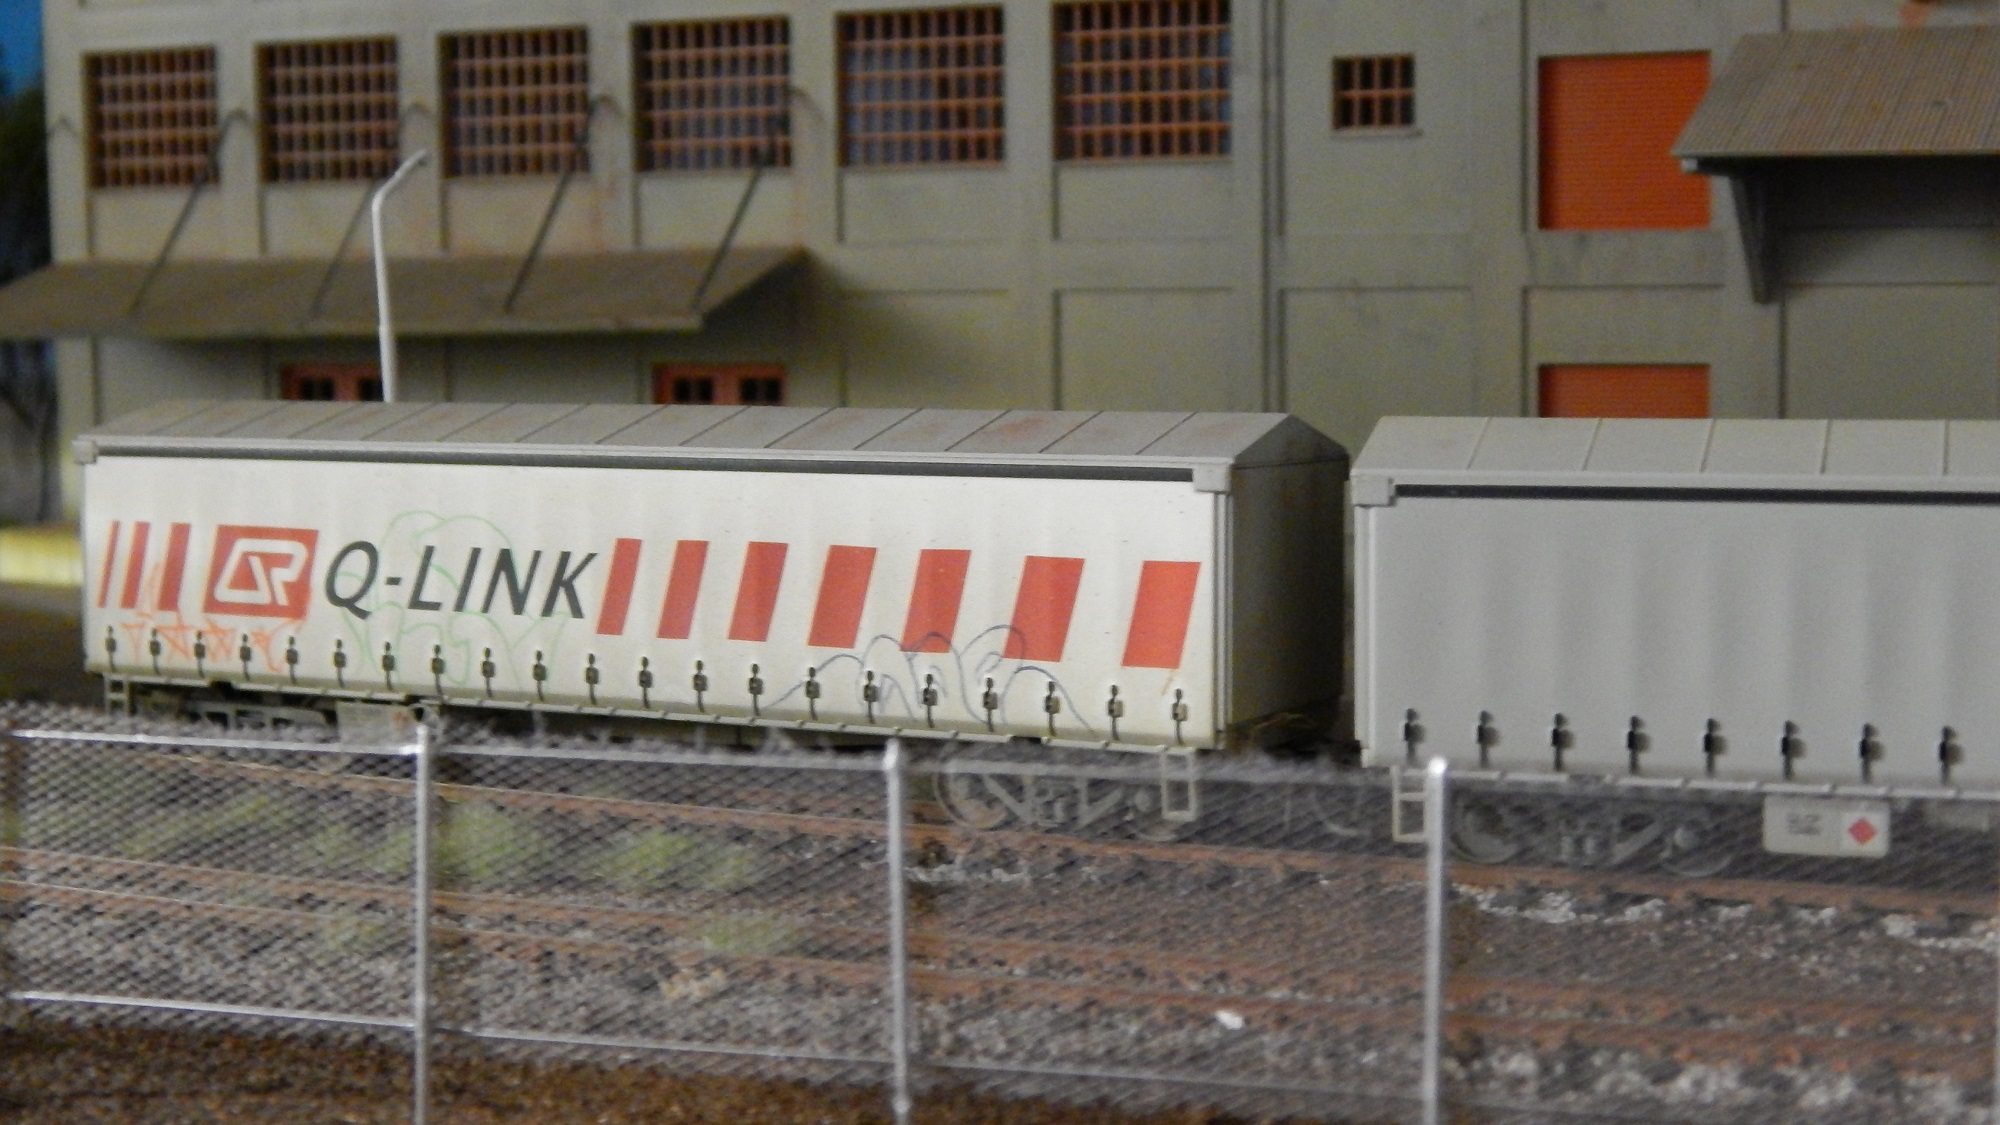
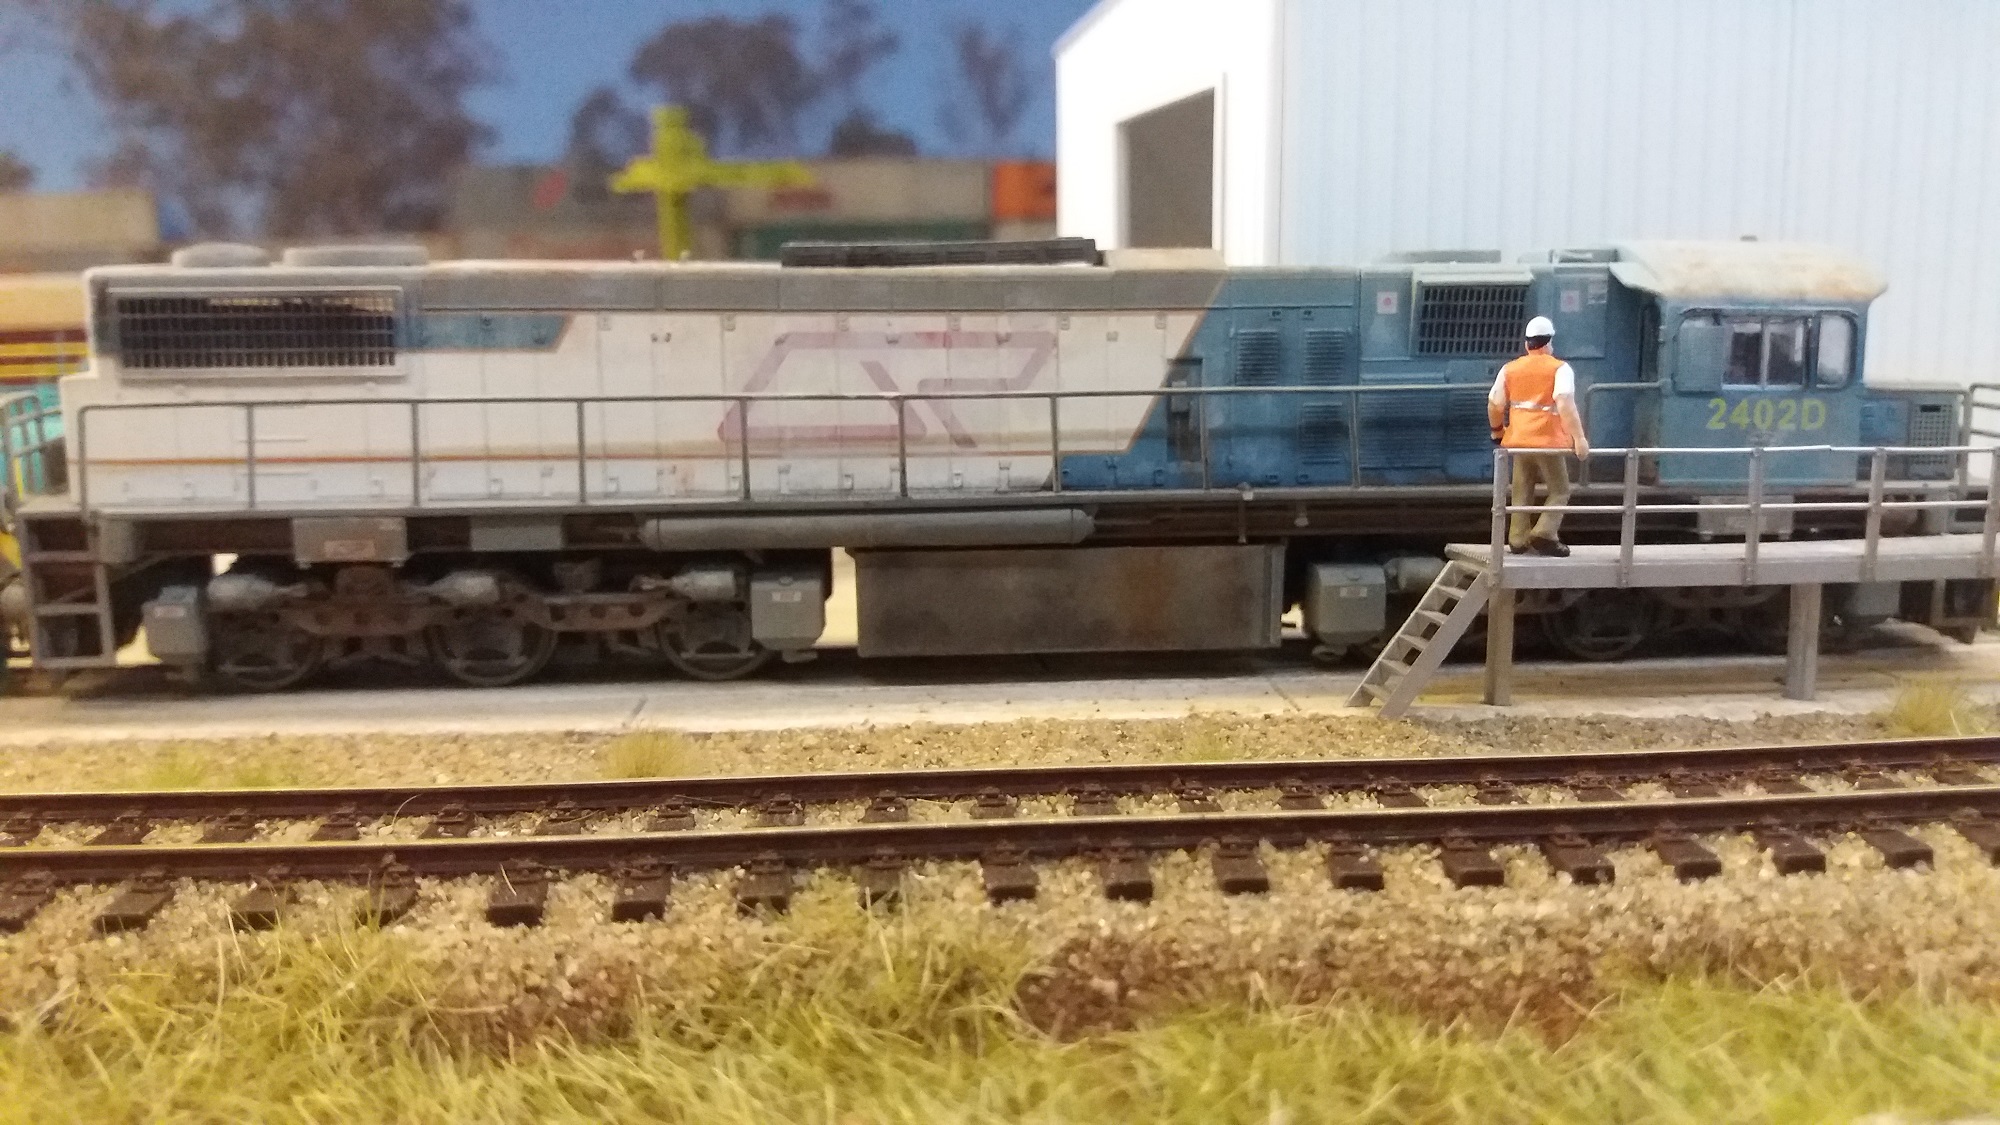
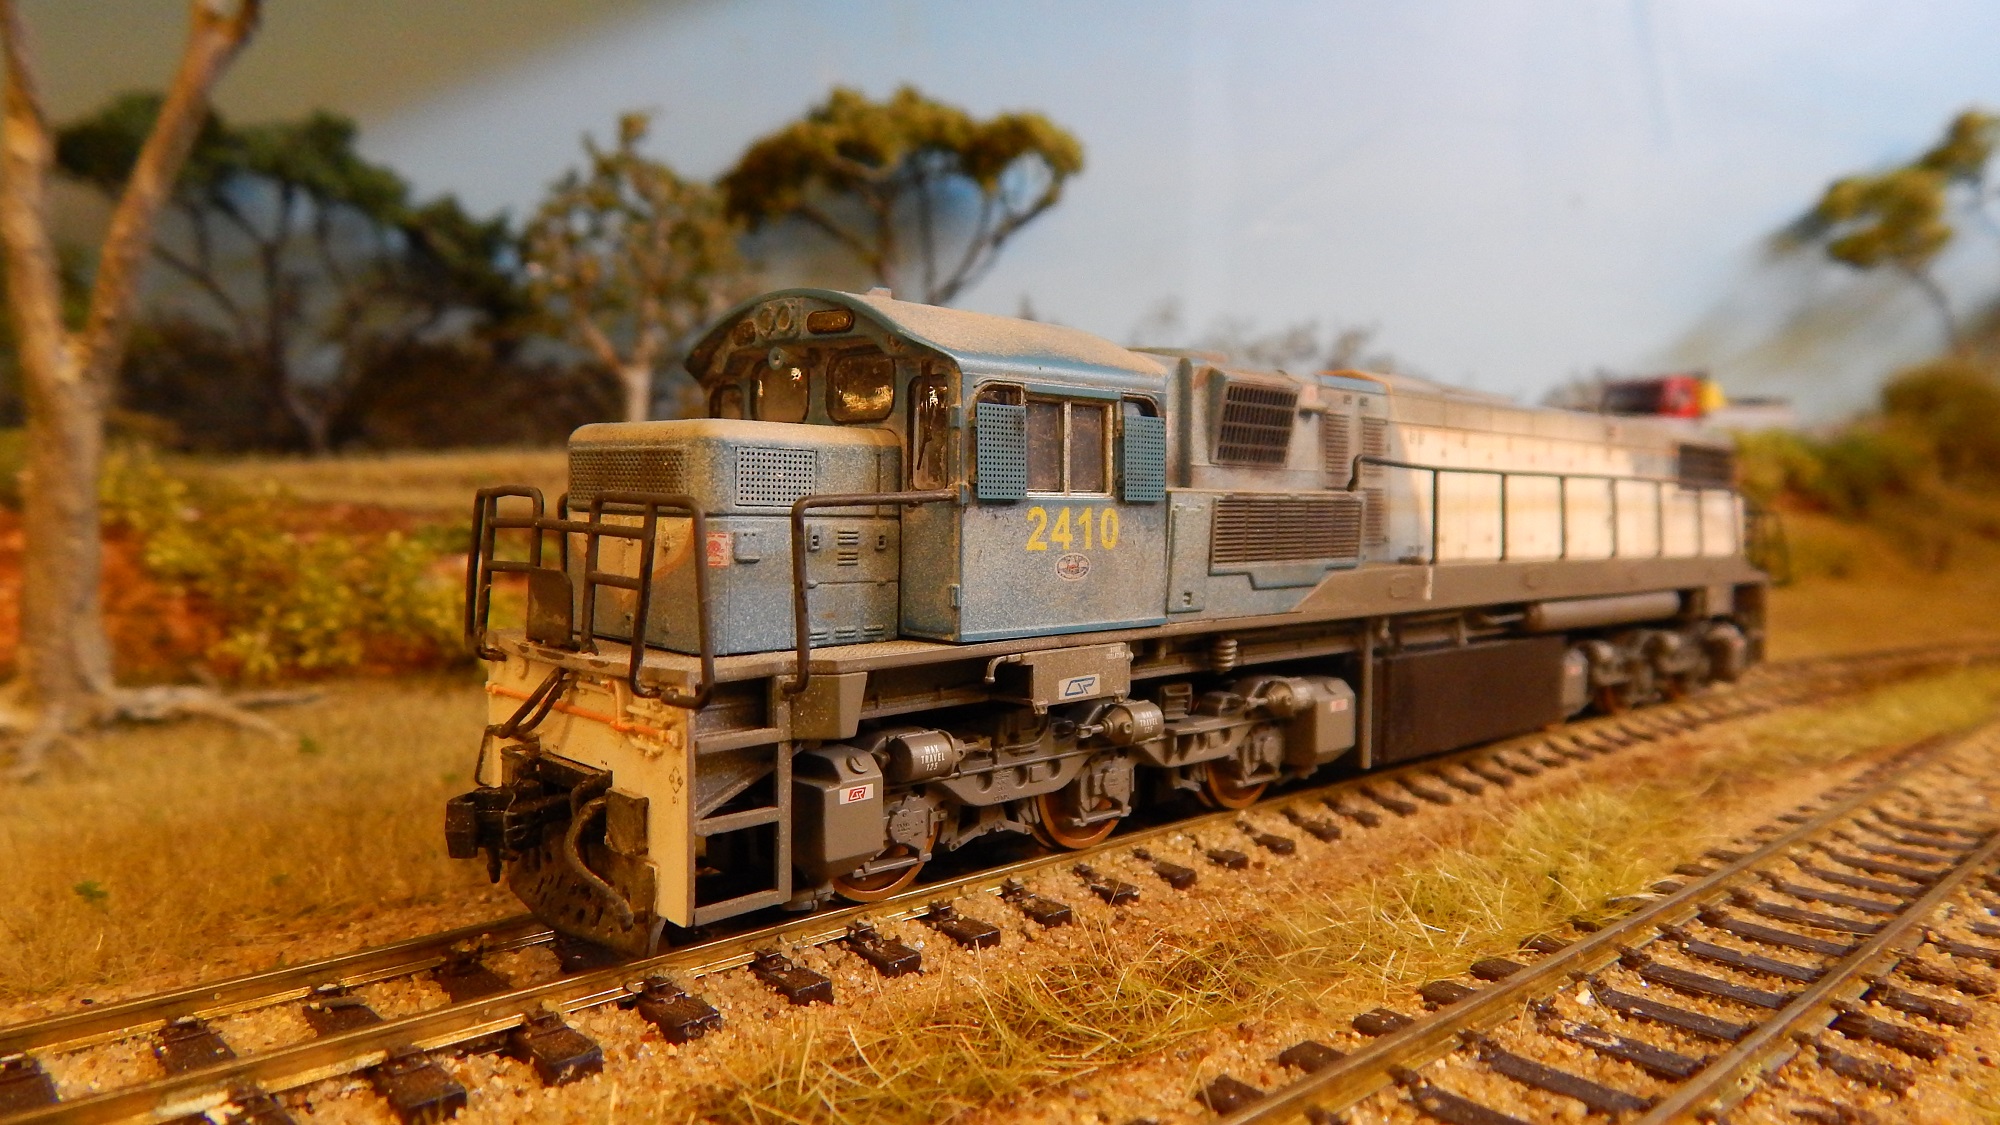
So with a new modeling period of about 1991, we can now run original 1720s, high nose 2400s and 2470 etc. Not to mention REAL TRAINS! Back when QR still acted like a railway and hauled “things”, train loads of “things” actually. All done with a myriad of wagons with 78,000 different classes and bogie types… Ahhhhh this should be fun.


We recently had a visit to Planet Jandowae from Stephen Colclough (formerly of 3 Foot 6 Models fame), we were led to believe that he was going to show us “something we would like”. Obviously, we were cautious.


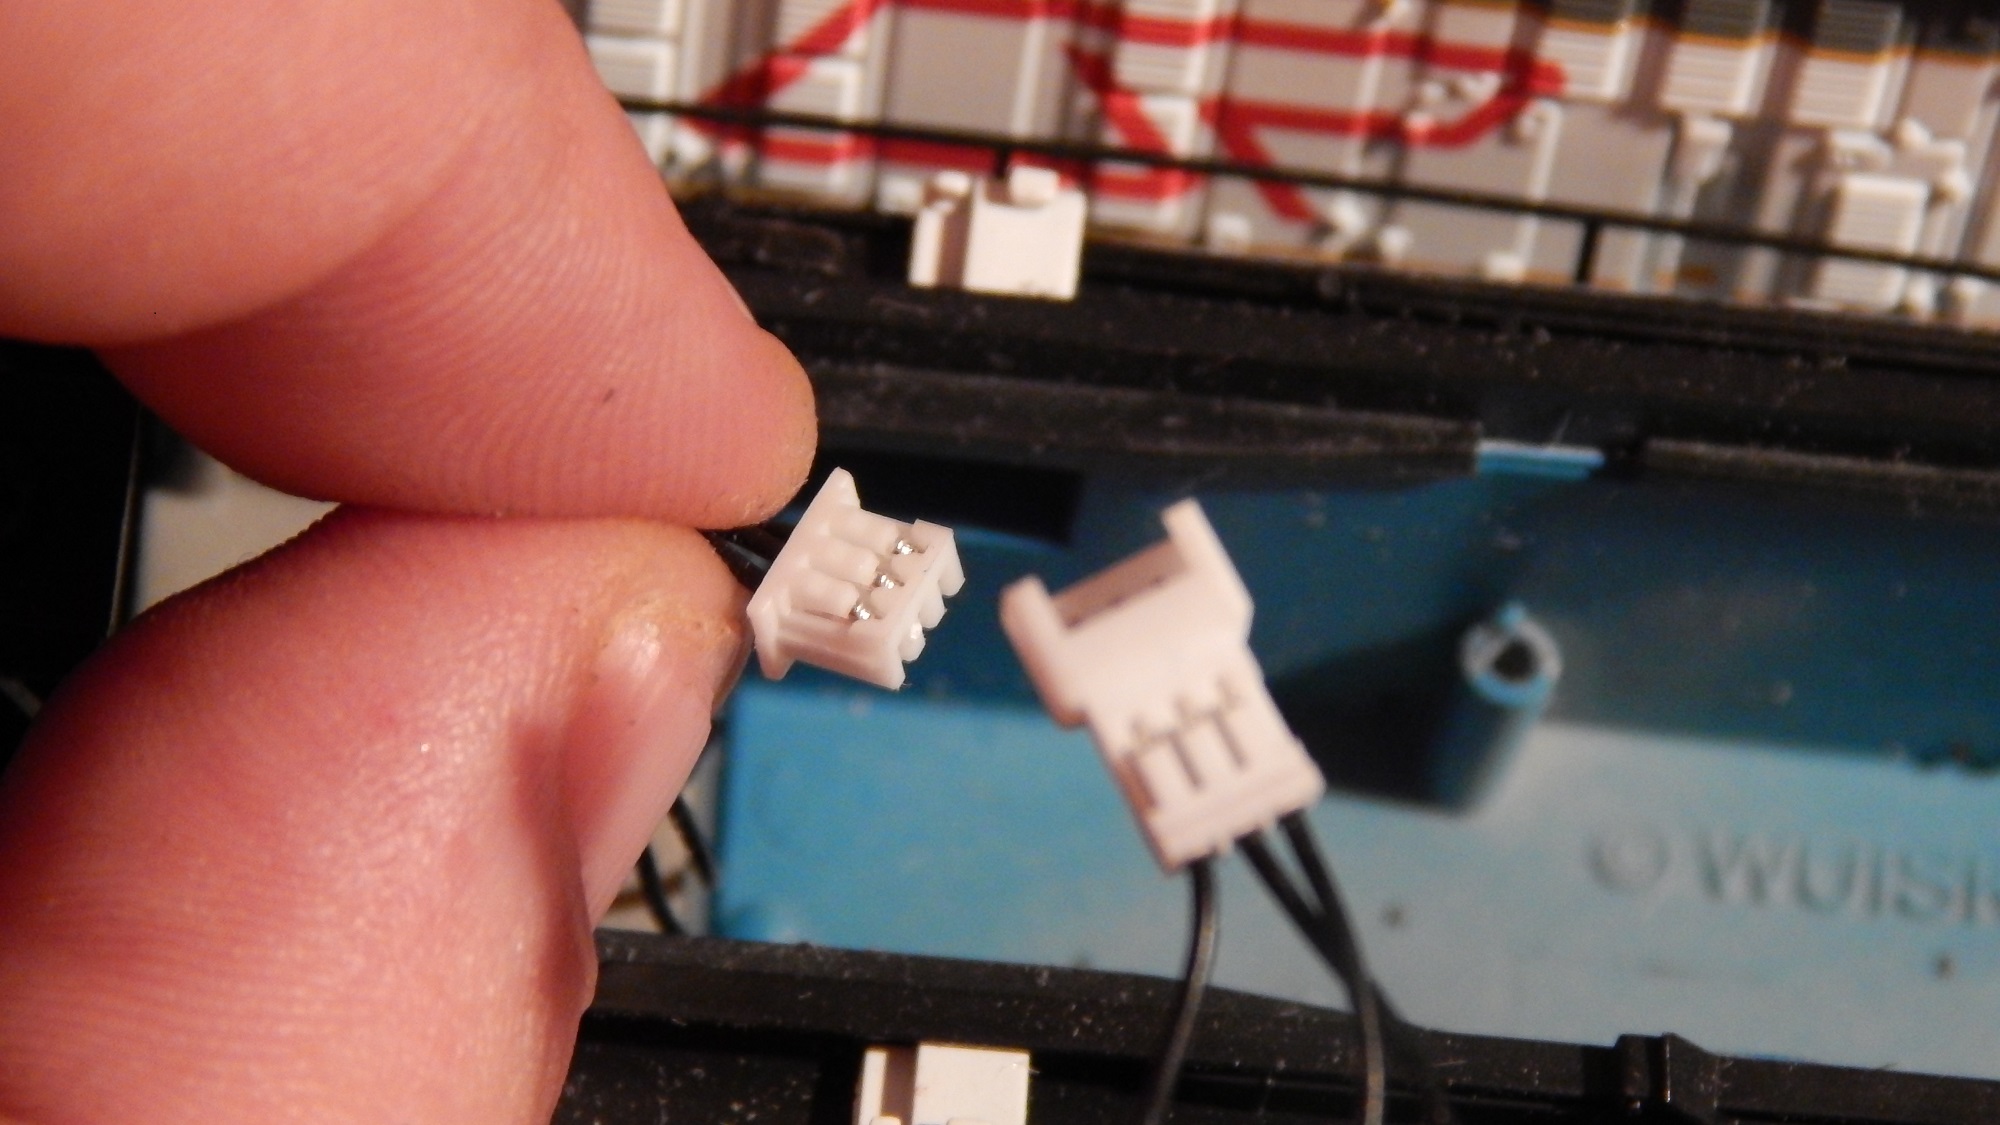
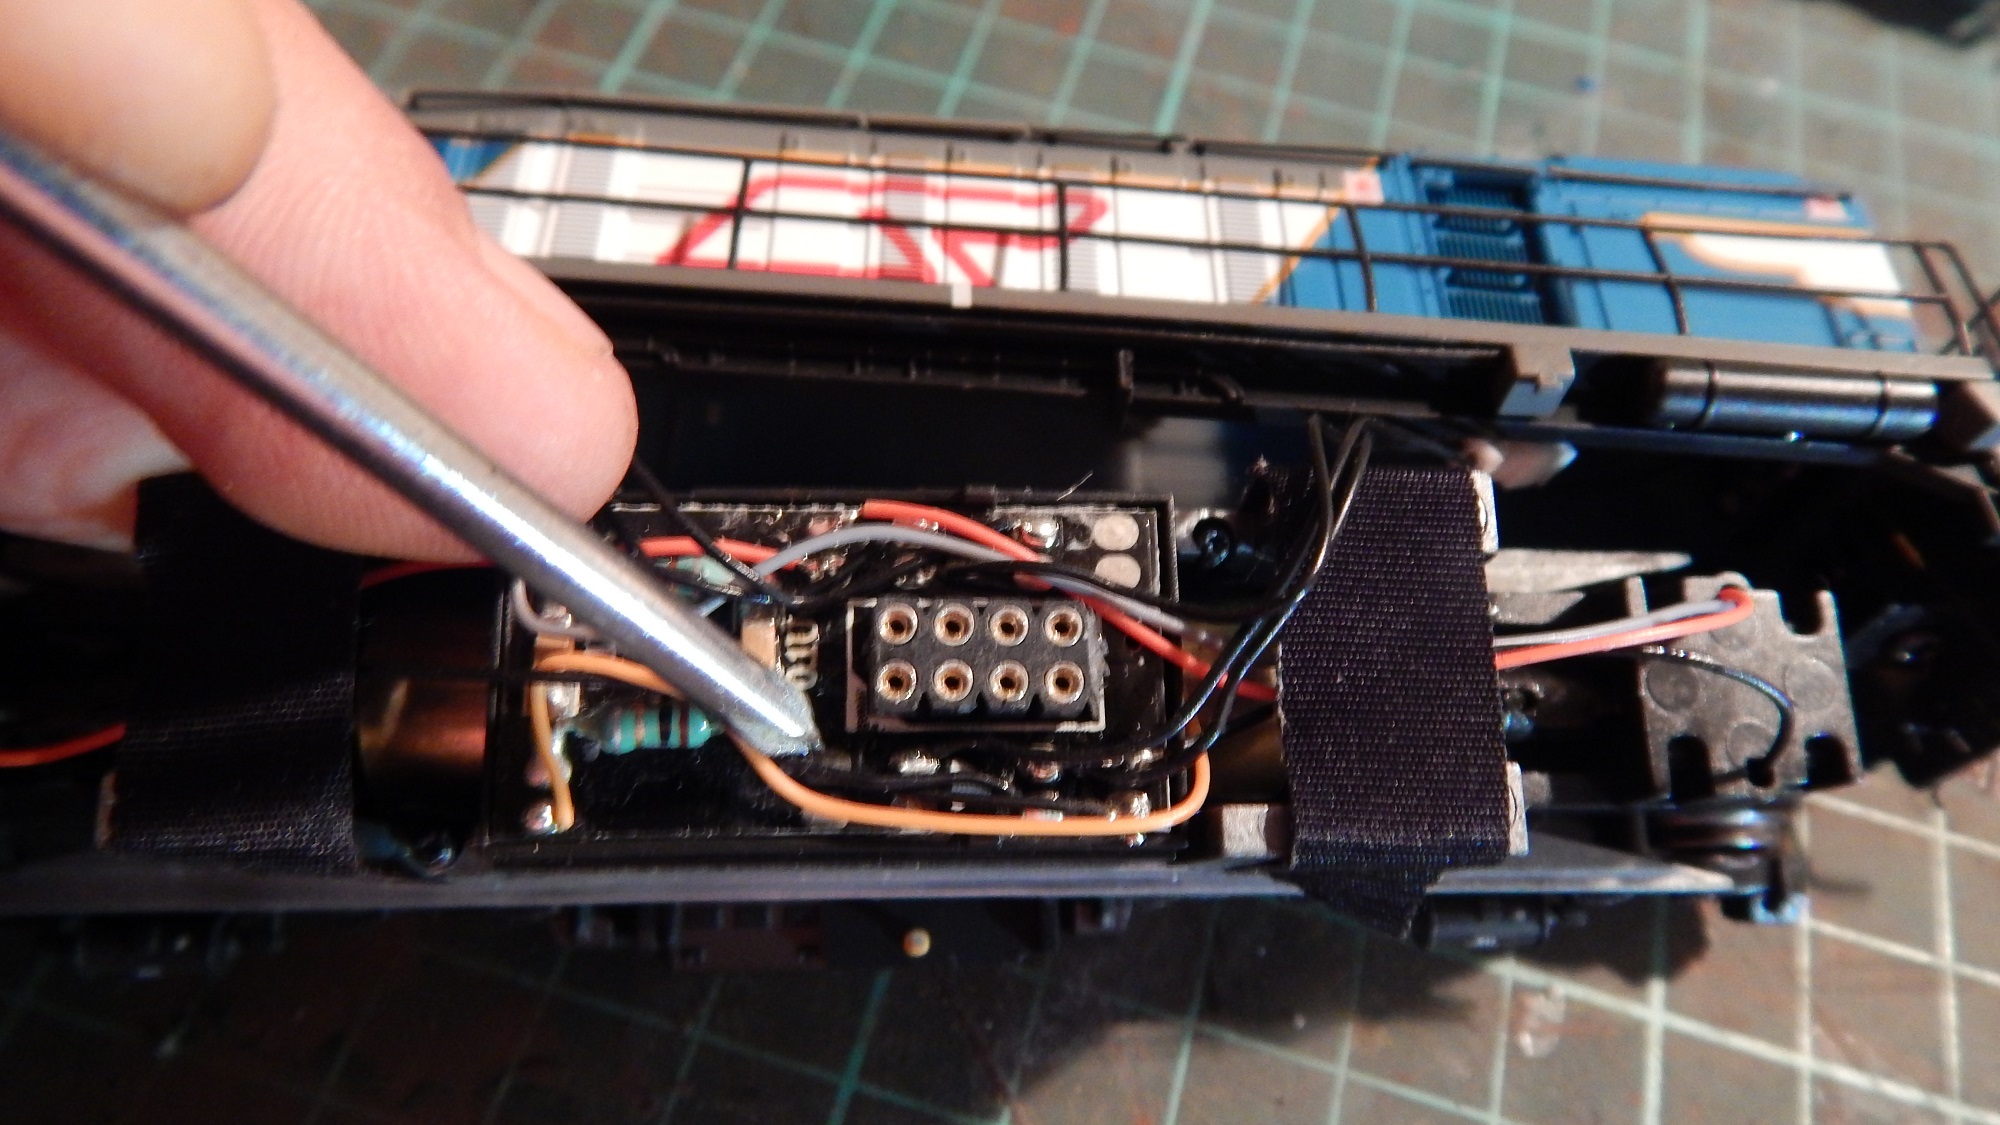
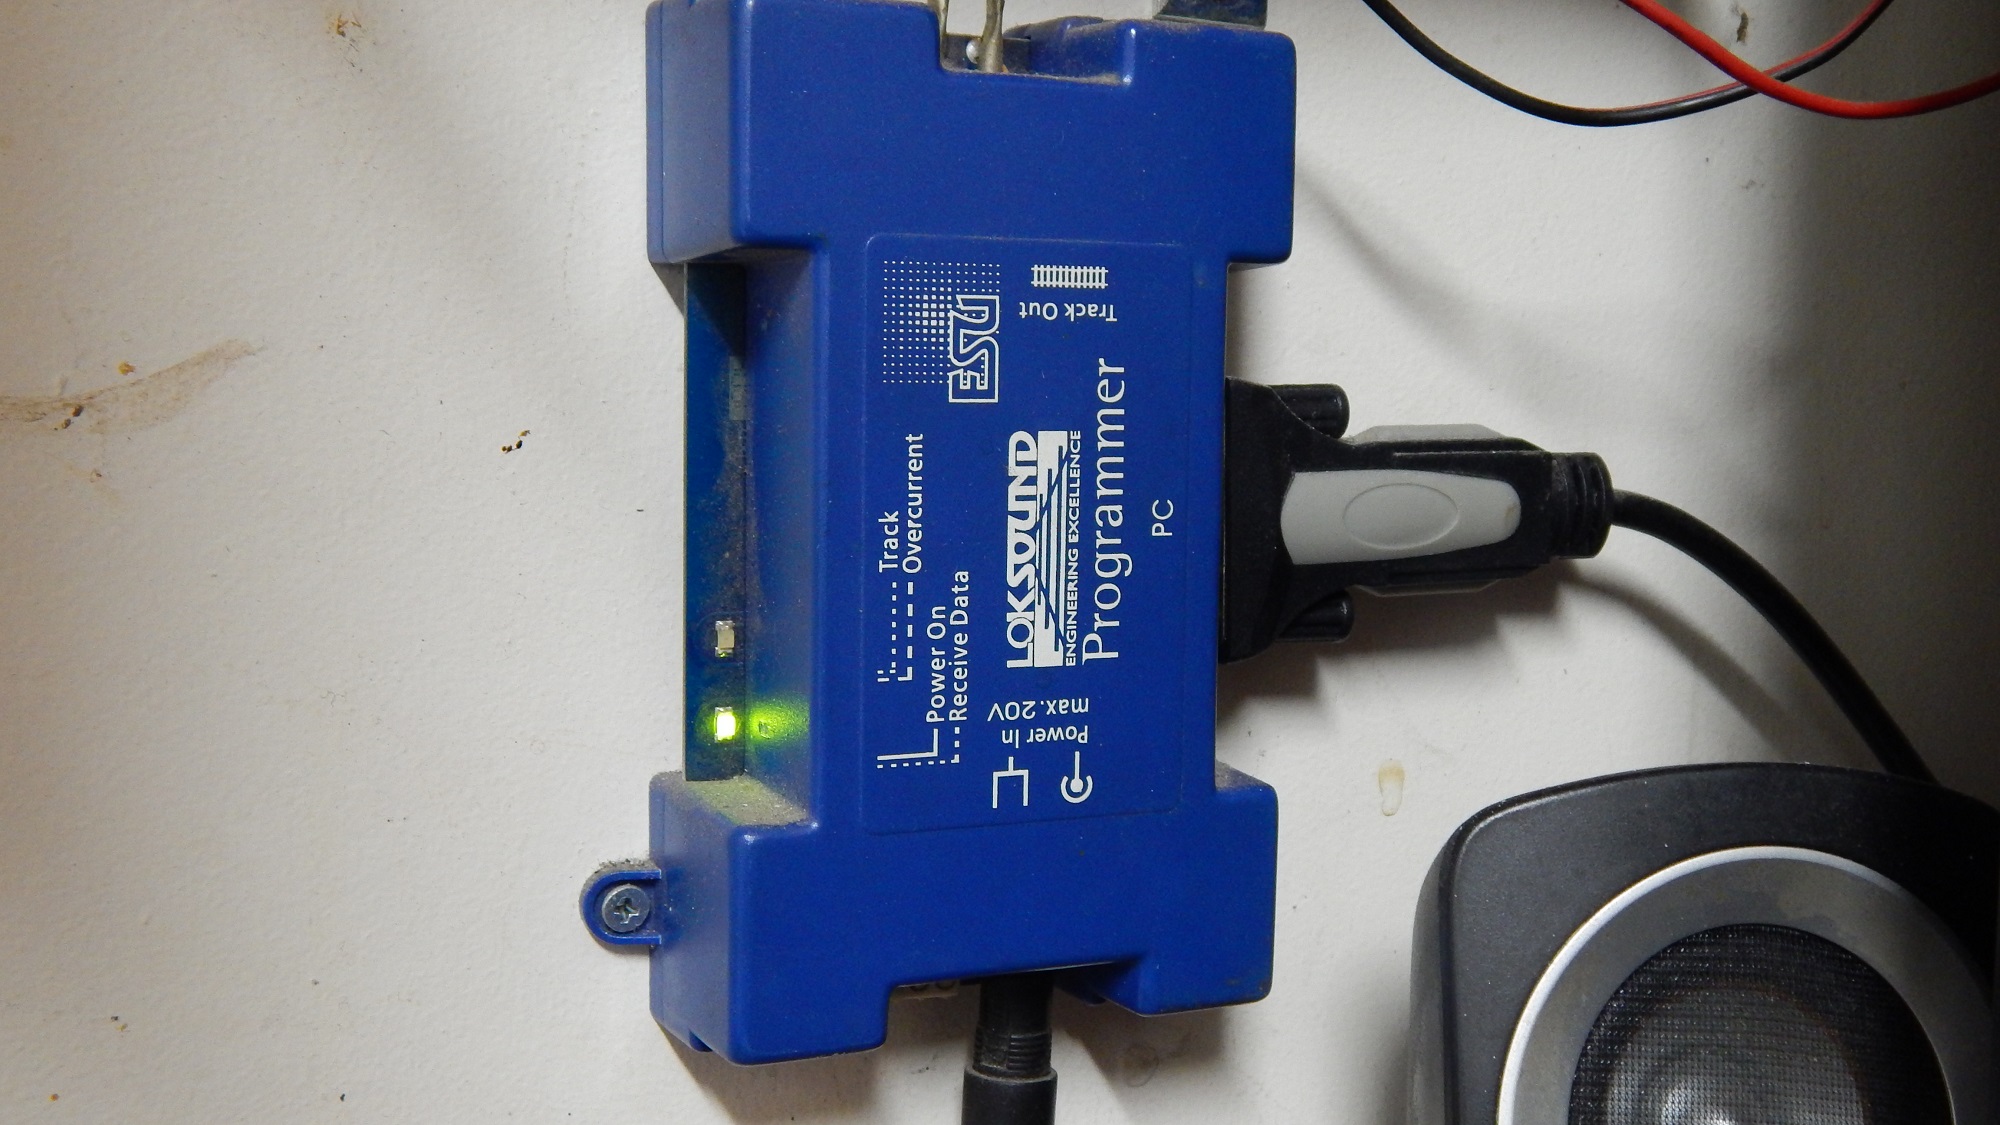
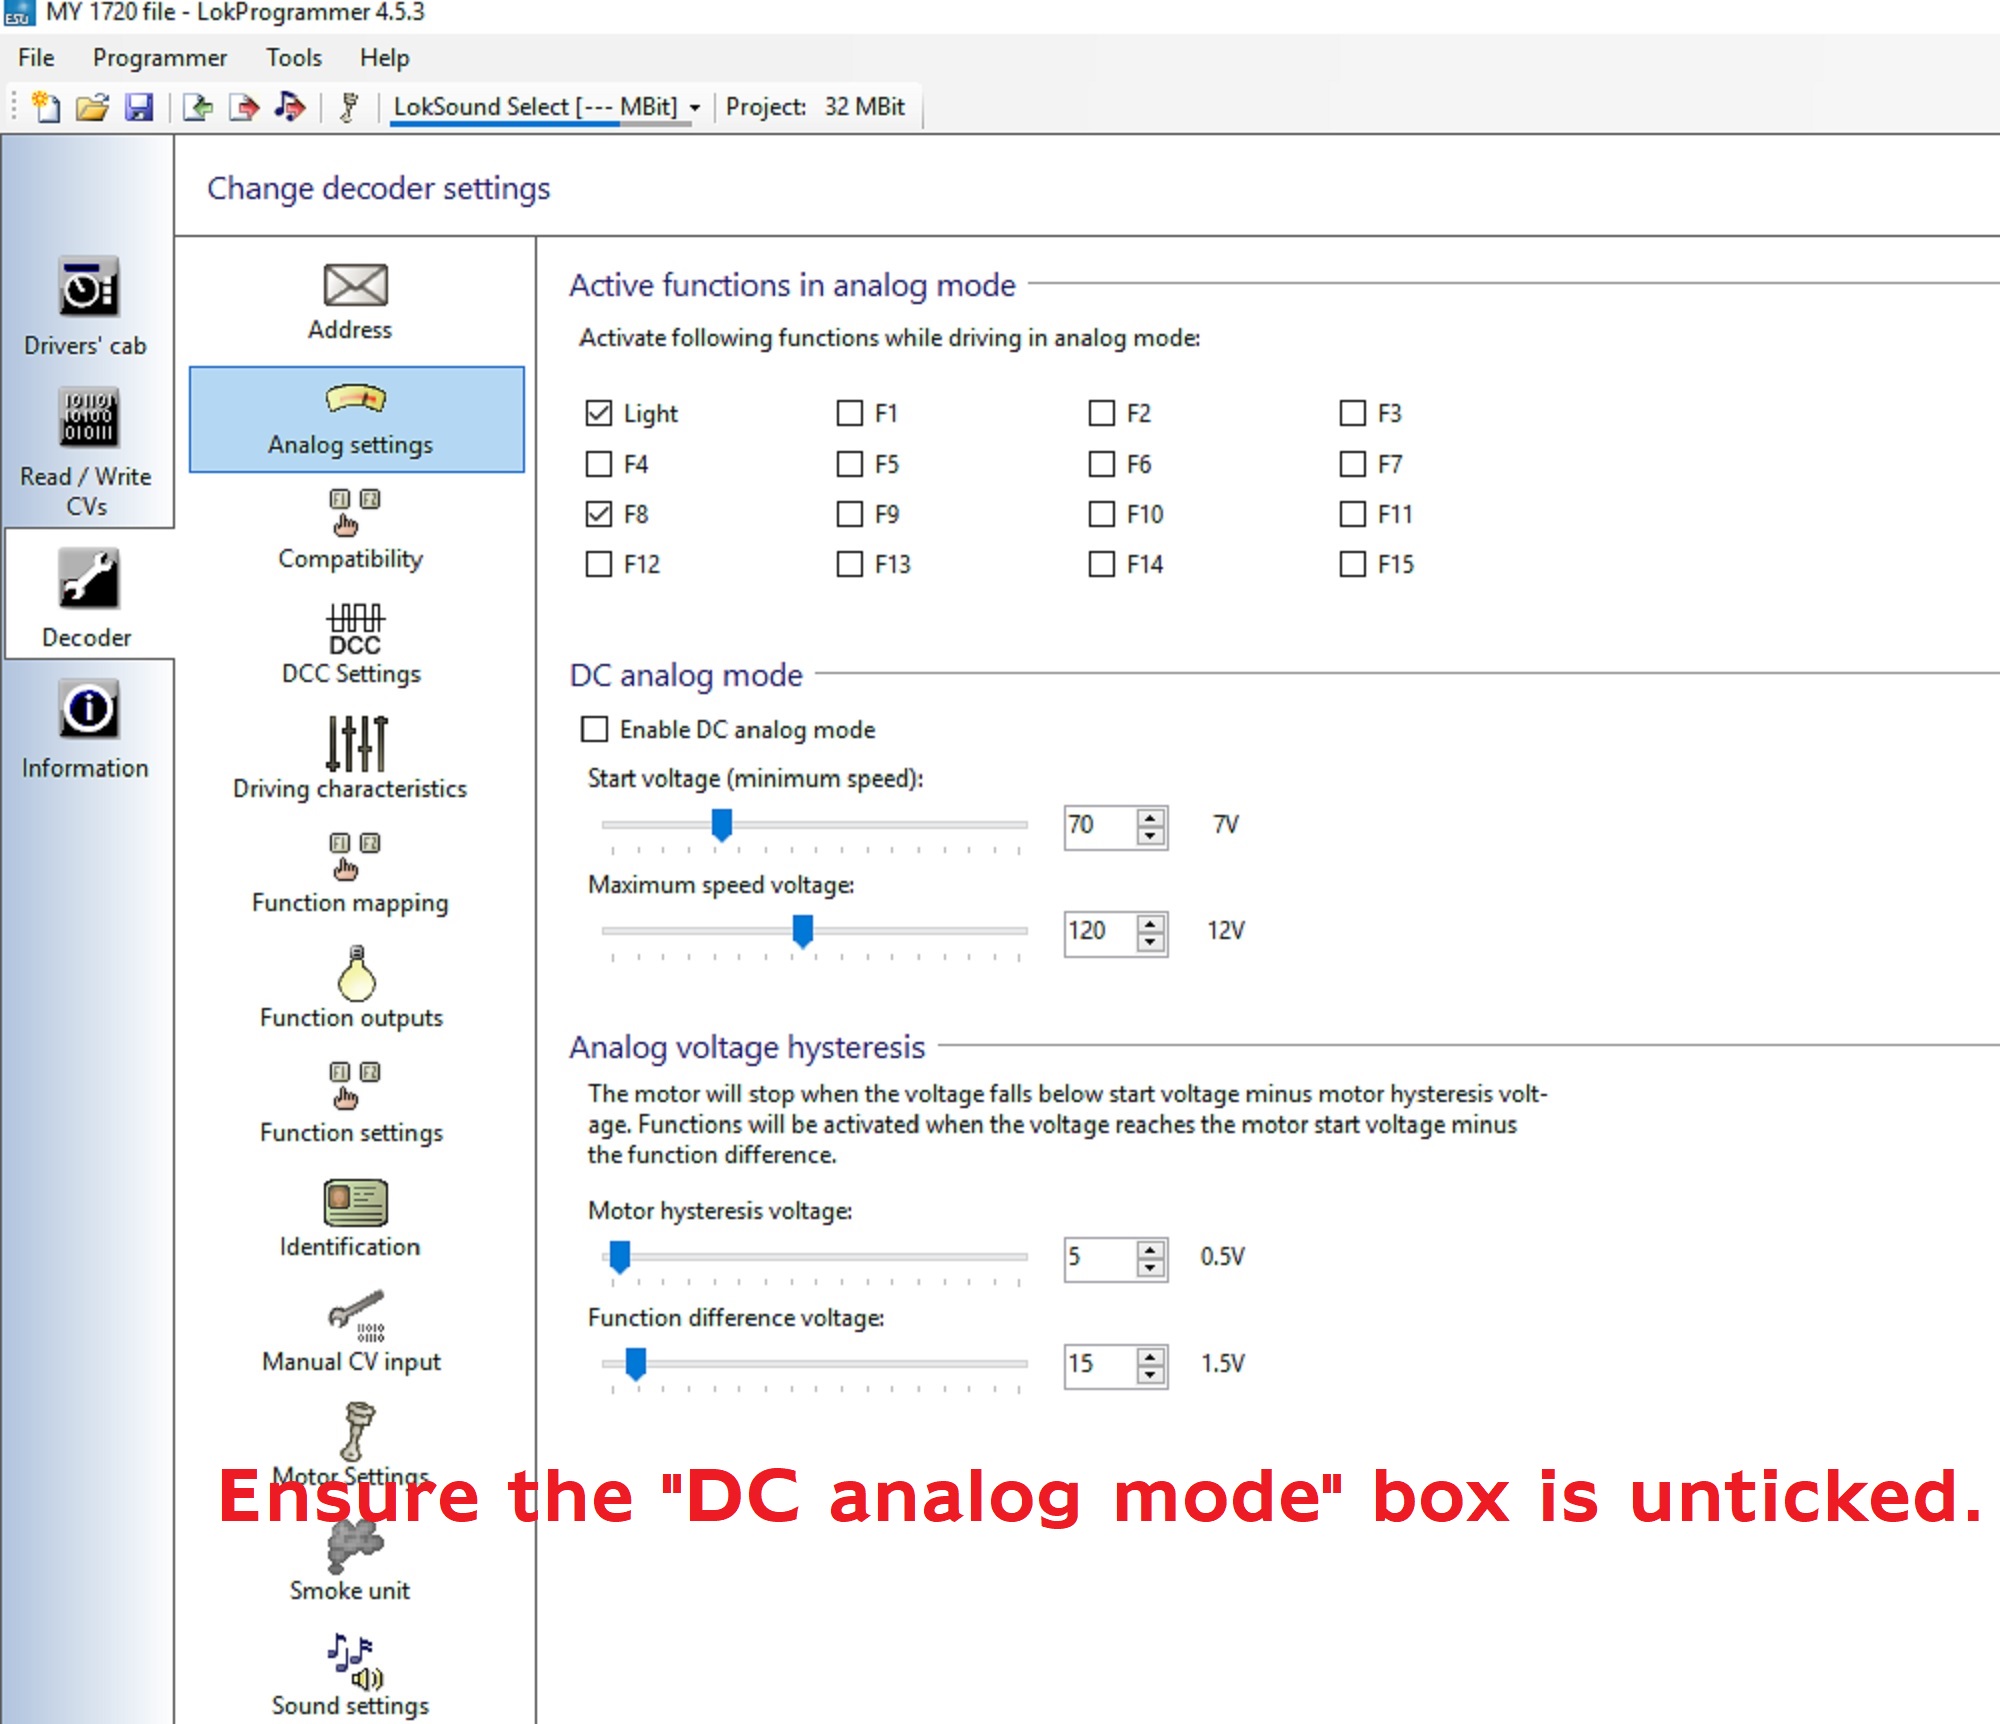
Surprisingly enough, the “surprise” from Stephen was actually a REALLY good surprise. He had brought with him a shiny new DCC control system to show off to us. Being that the new system was in a black box, we knew it must be good!


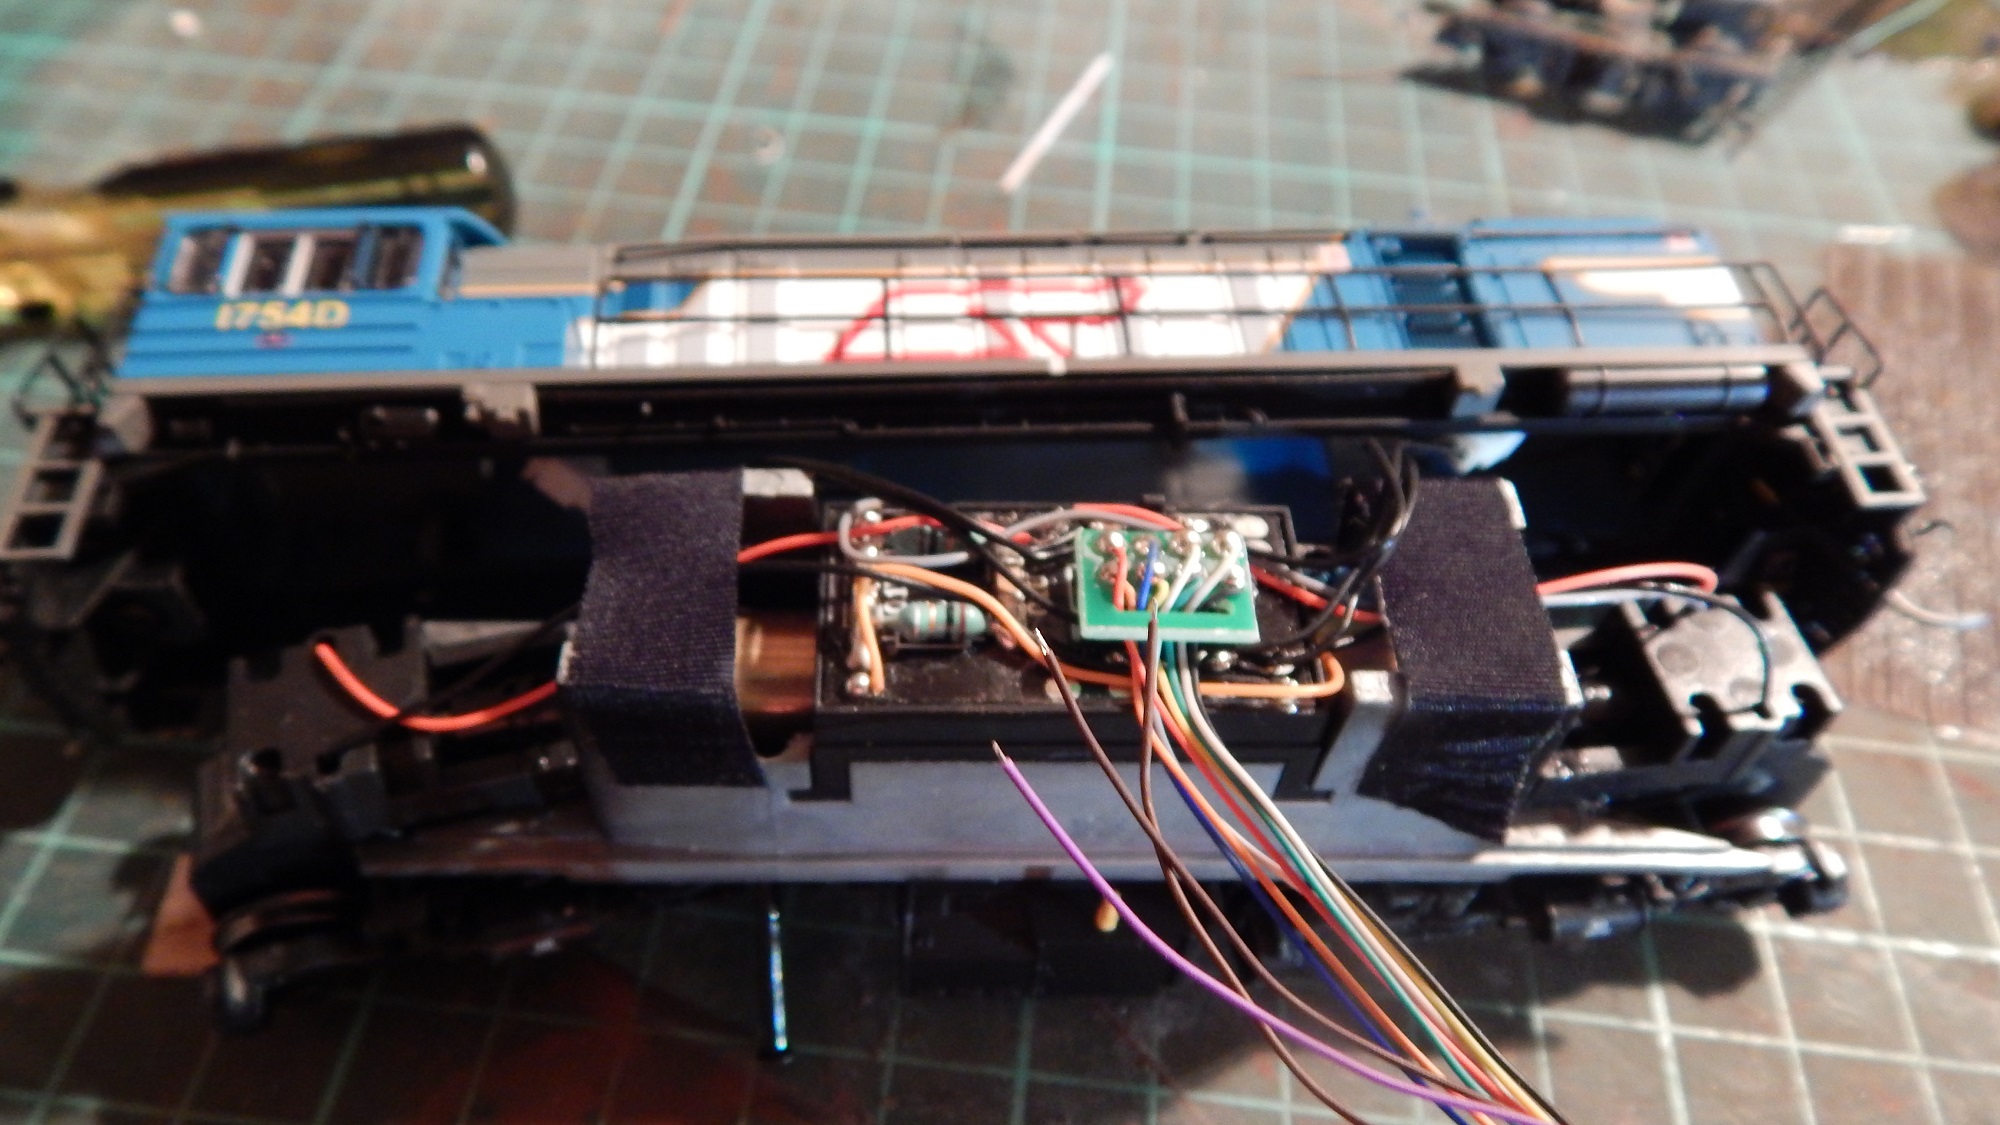
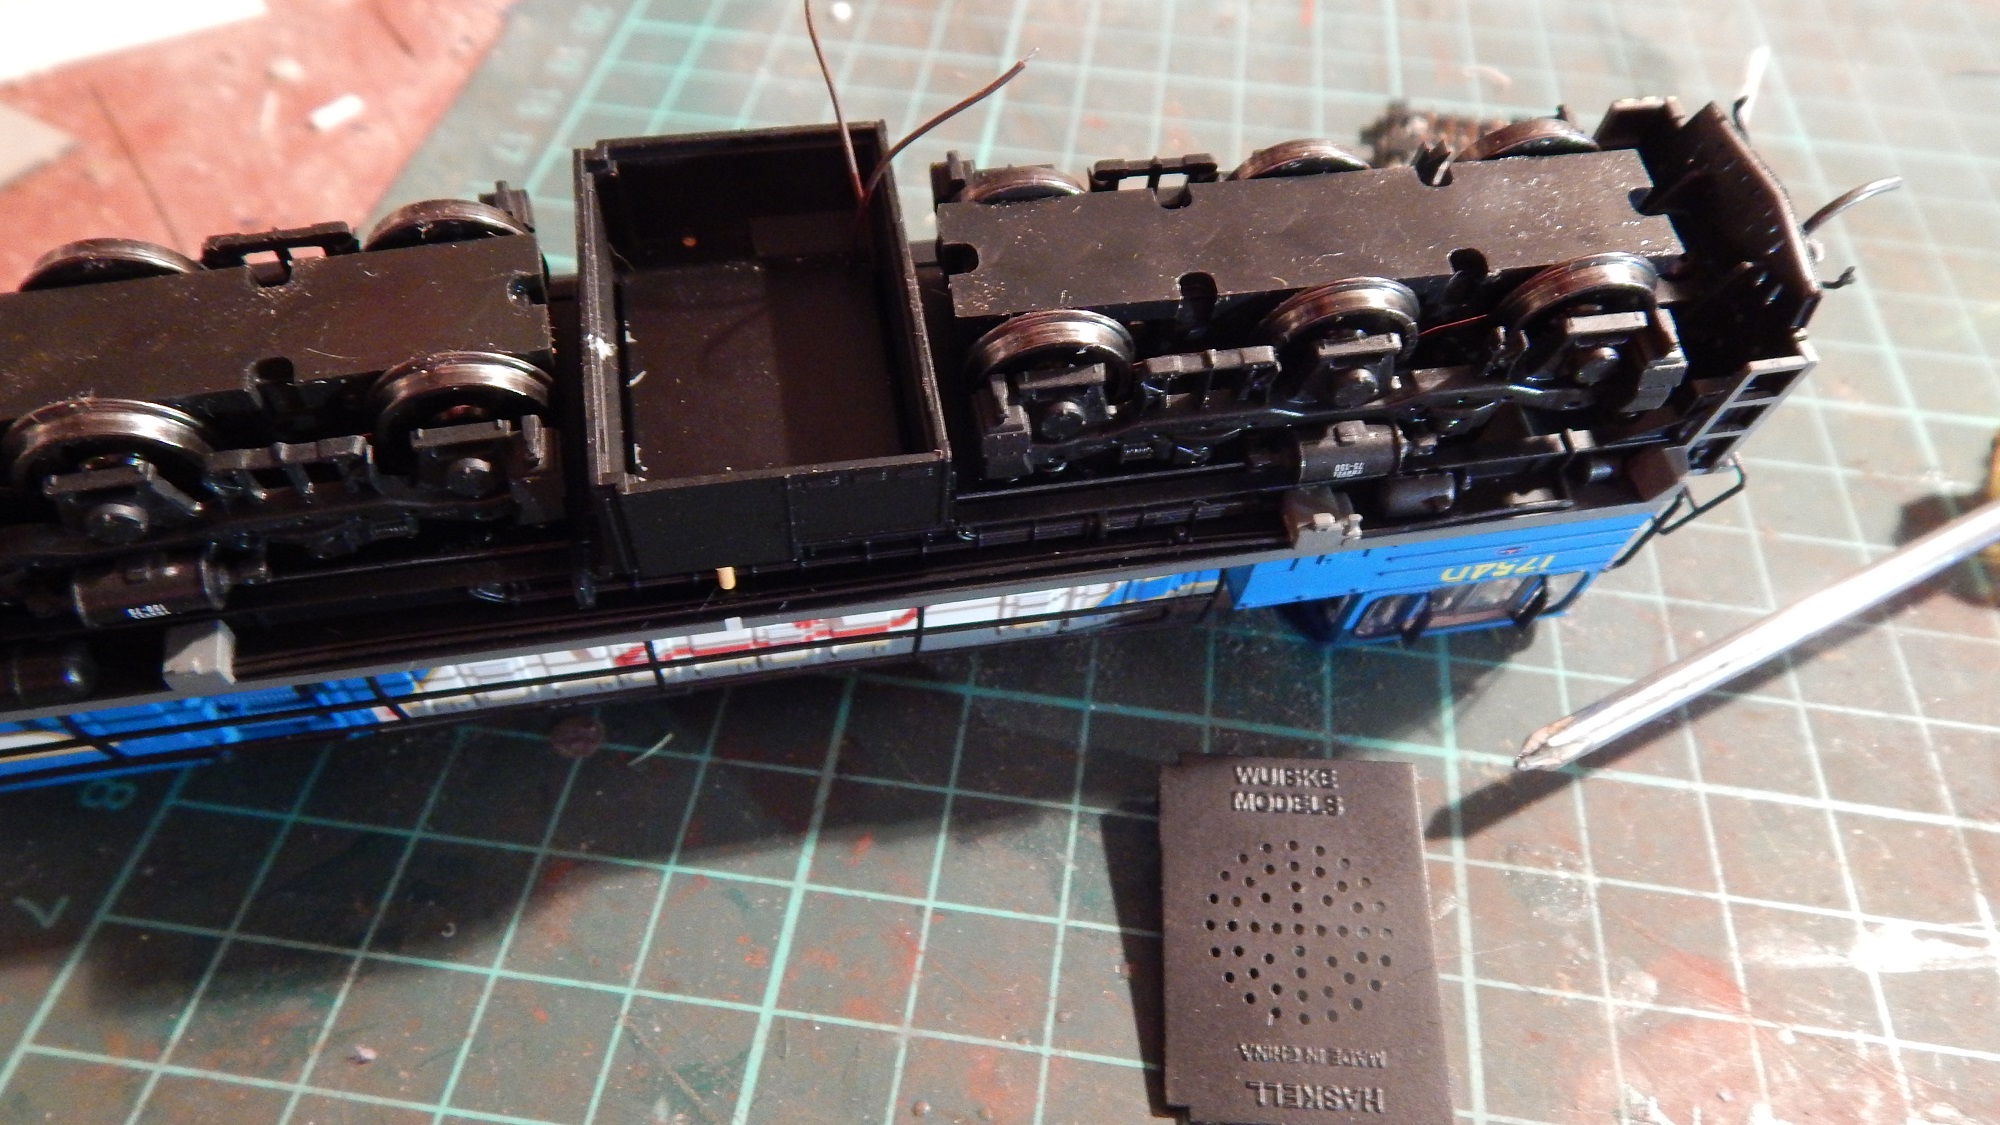
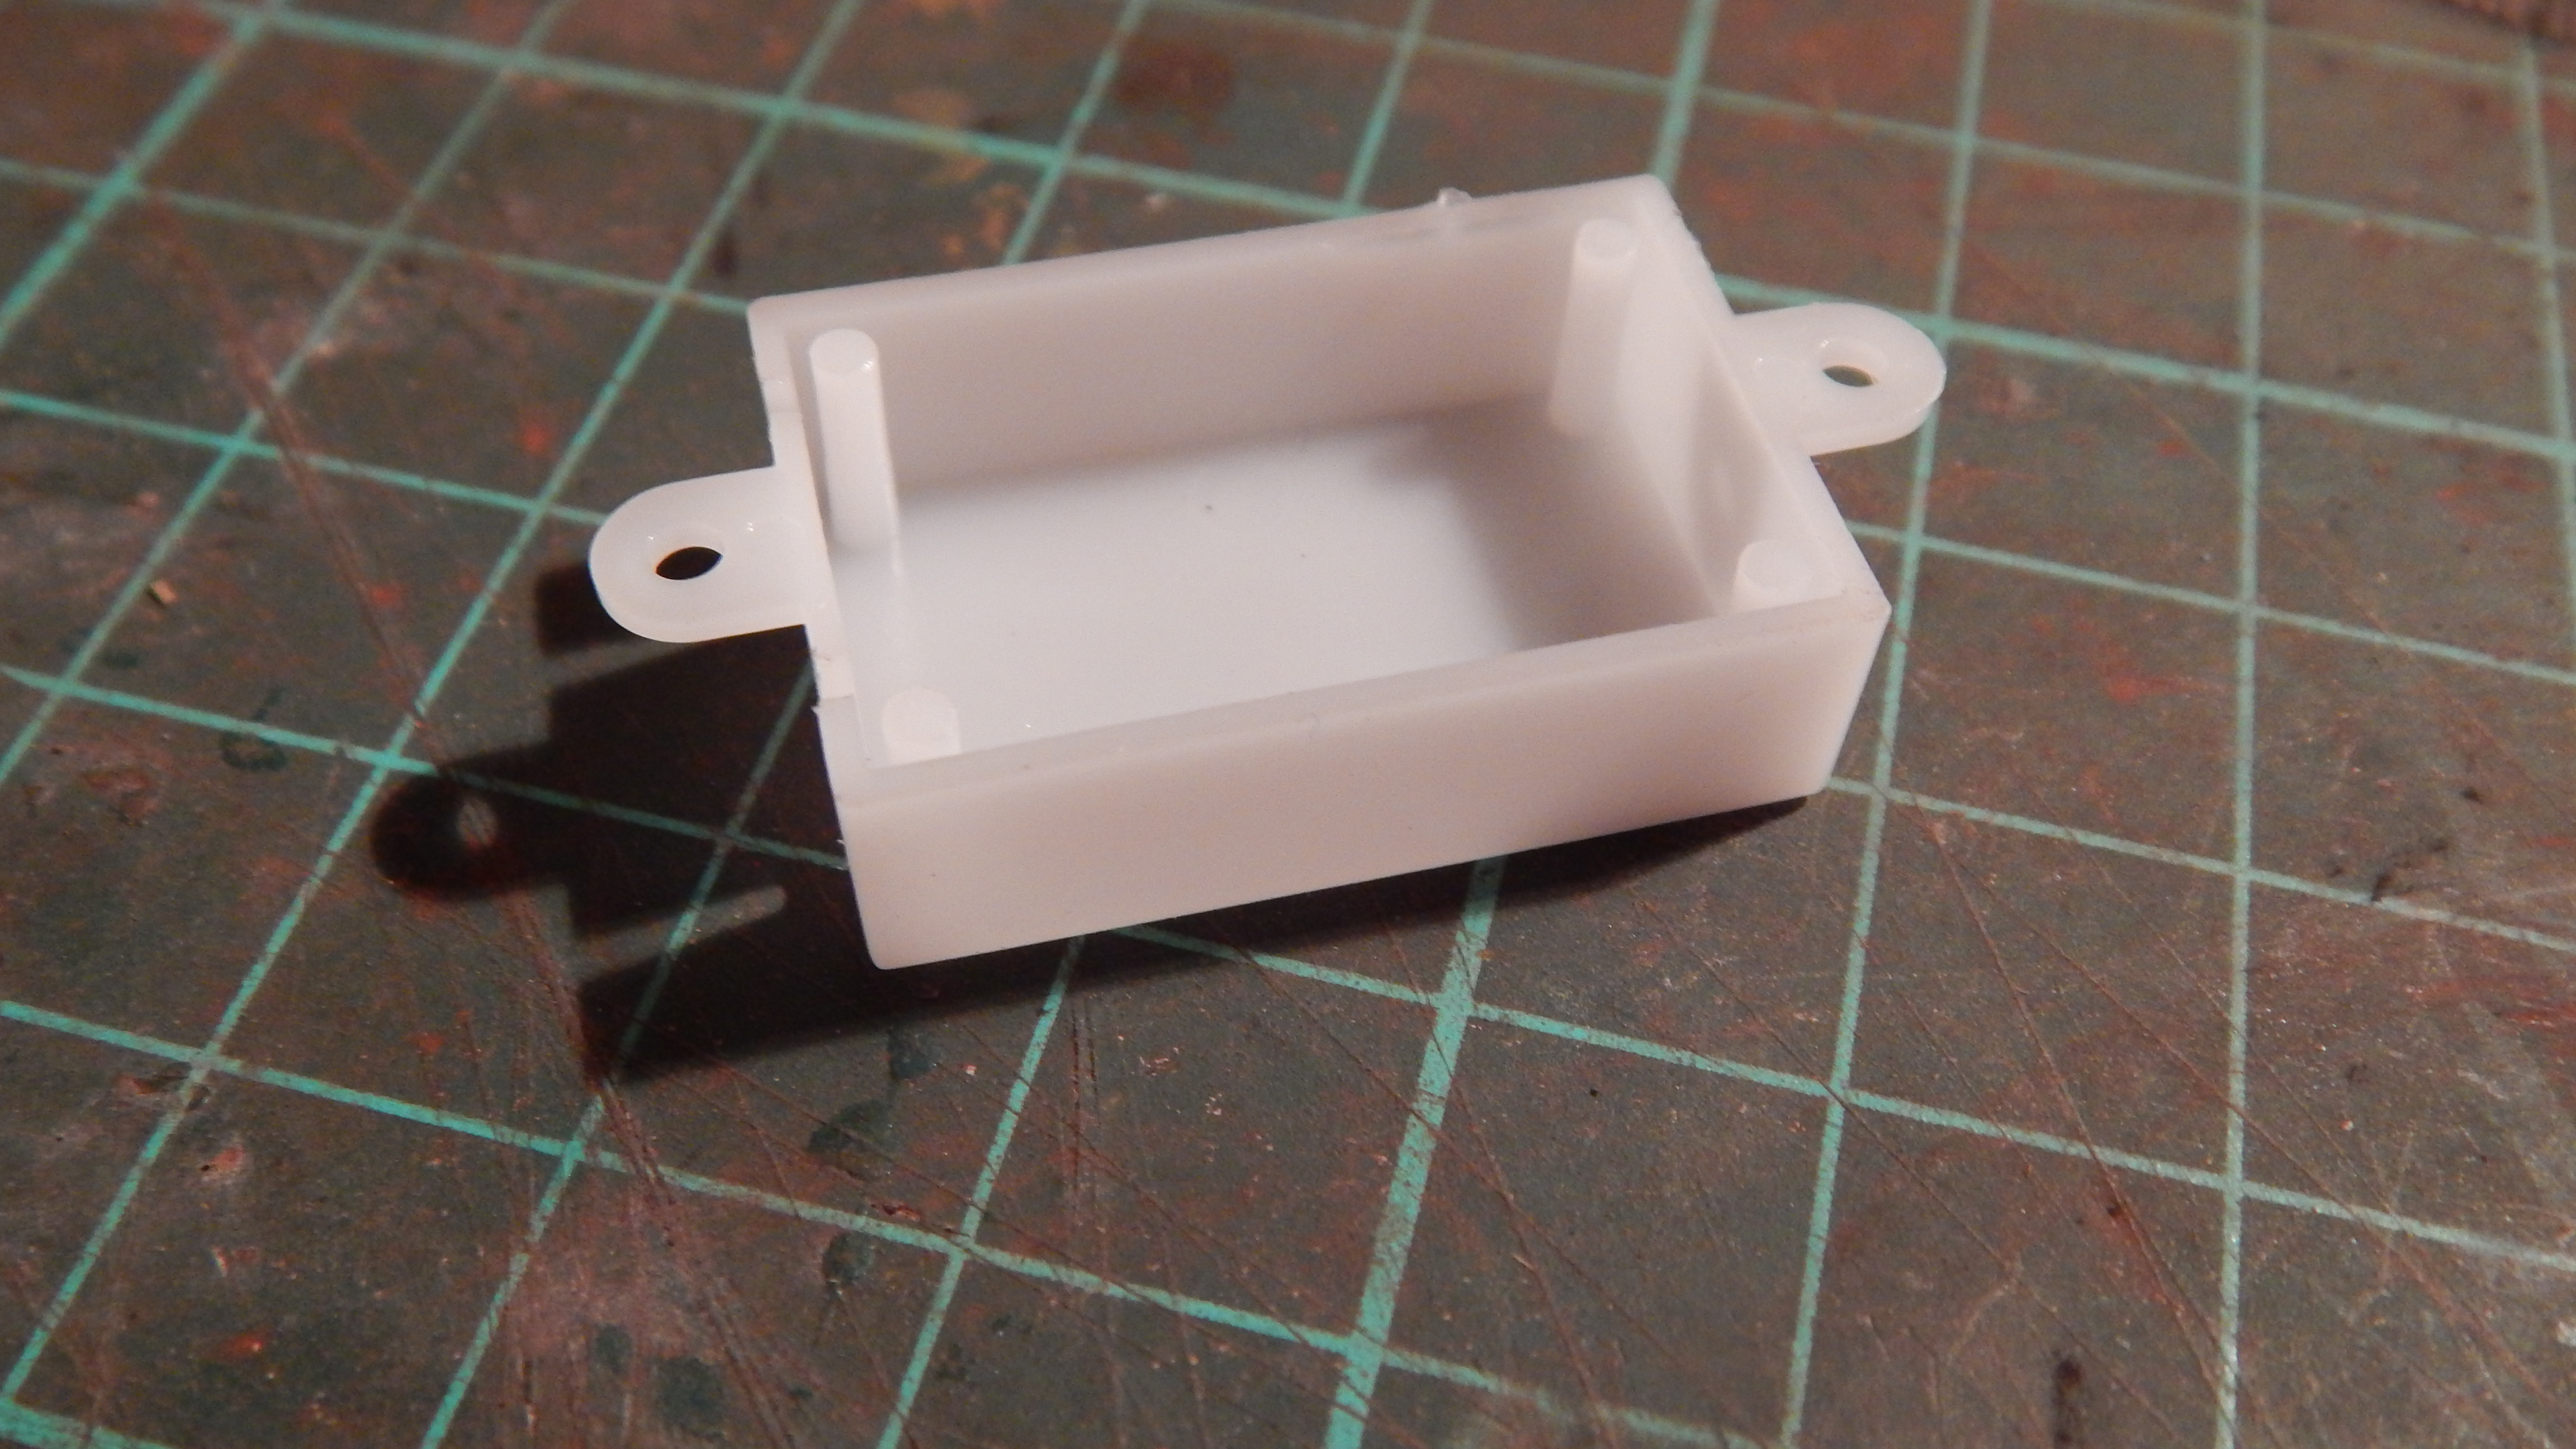
Within a few minutes, Stephen had set up a little demonstration of the Digikeijs DR5000 and we were impressed… So much so that we ended up buying the system from Stephen there and then!


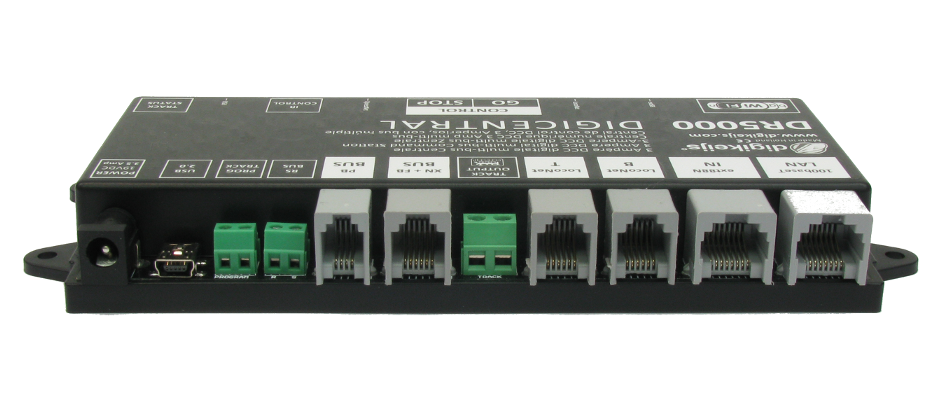
In theory, it seems that the new Digikeijs system will allow us to put occupancy detection, signal control and all the other bells and whistles without me needing to learn to much complex electro-gizmo-thingy-stuff (what? it’s a word alright).


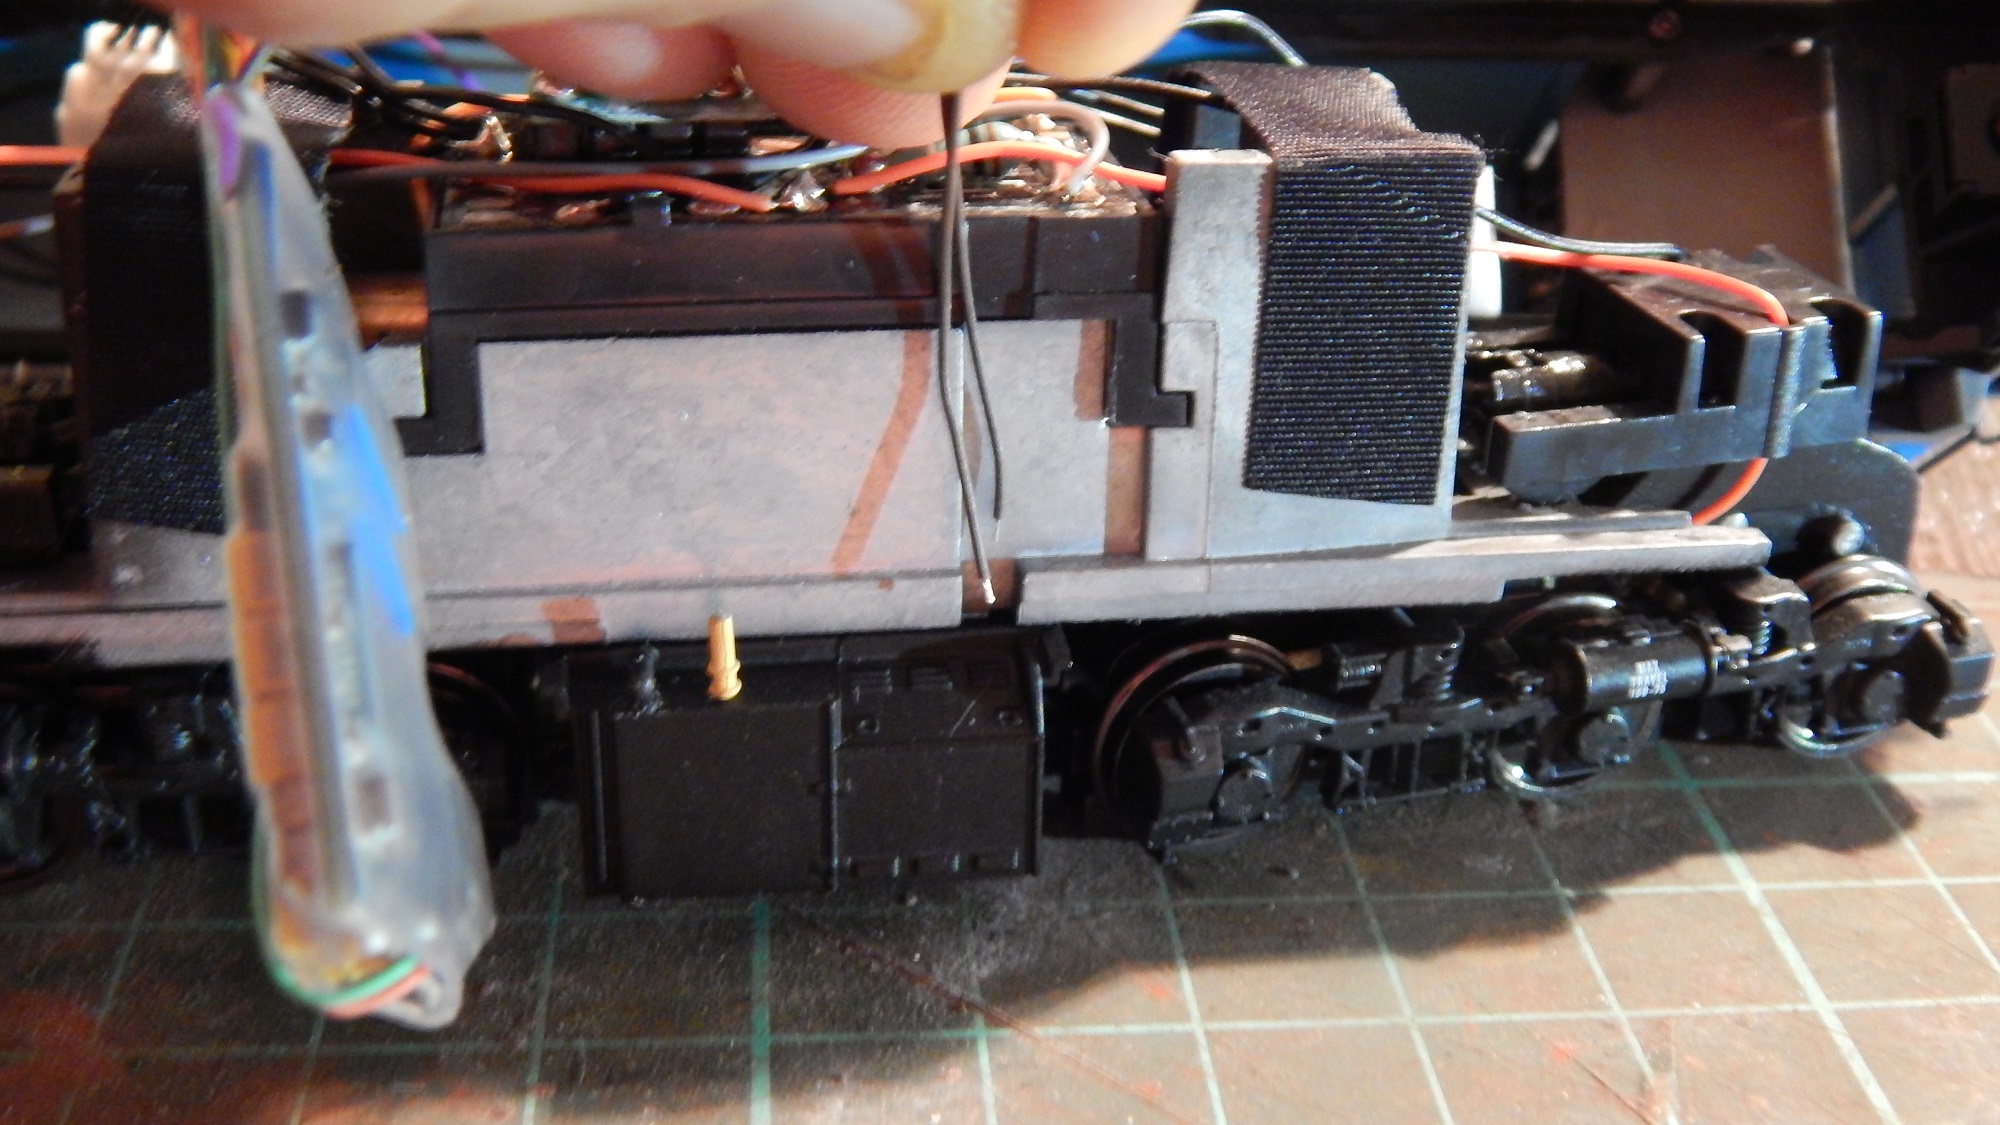
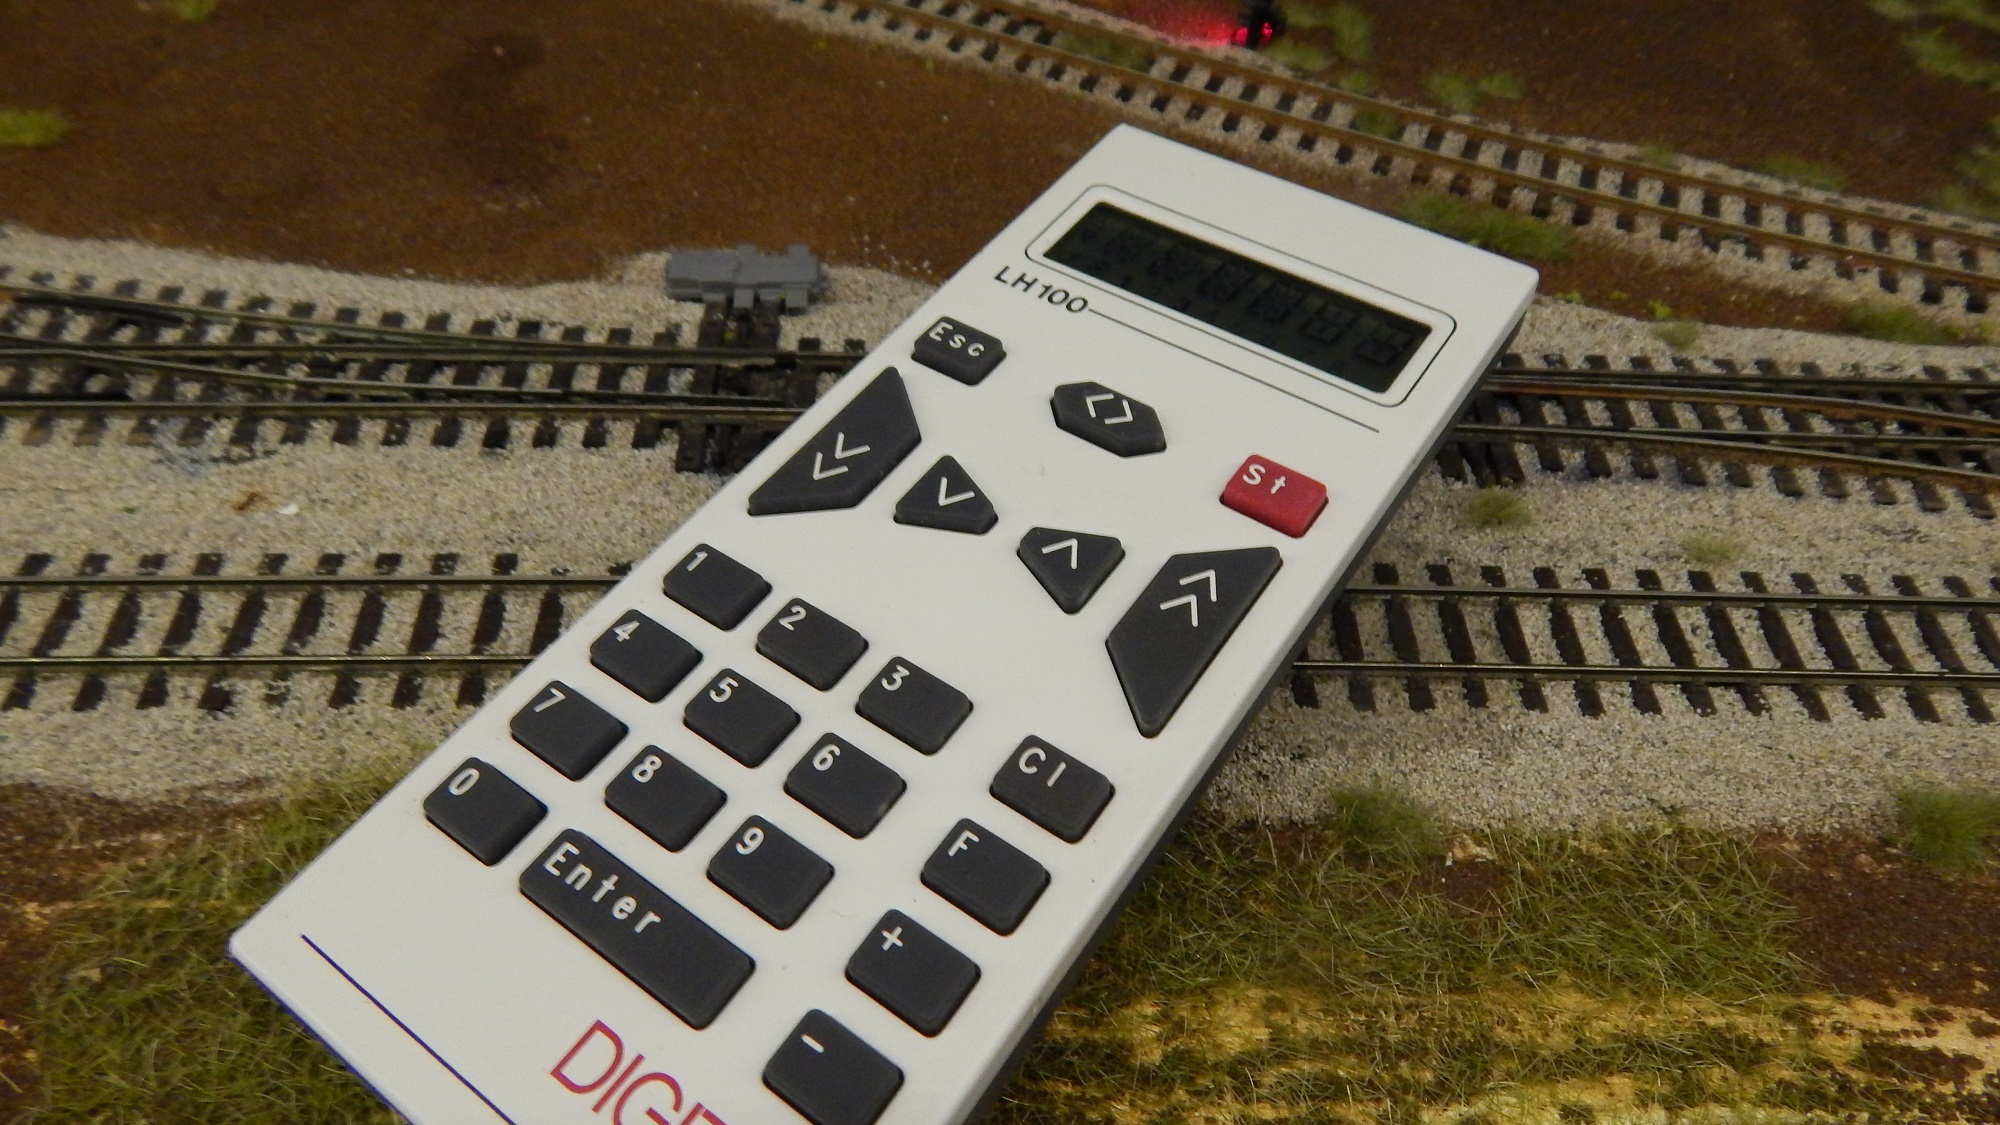
As well as allowing for simple add on  bits and pieces, it seems that the Digikeijs is actually compatible with ALL the major DCC suppliers and even has wifi. 
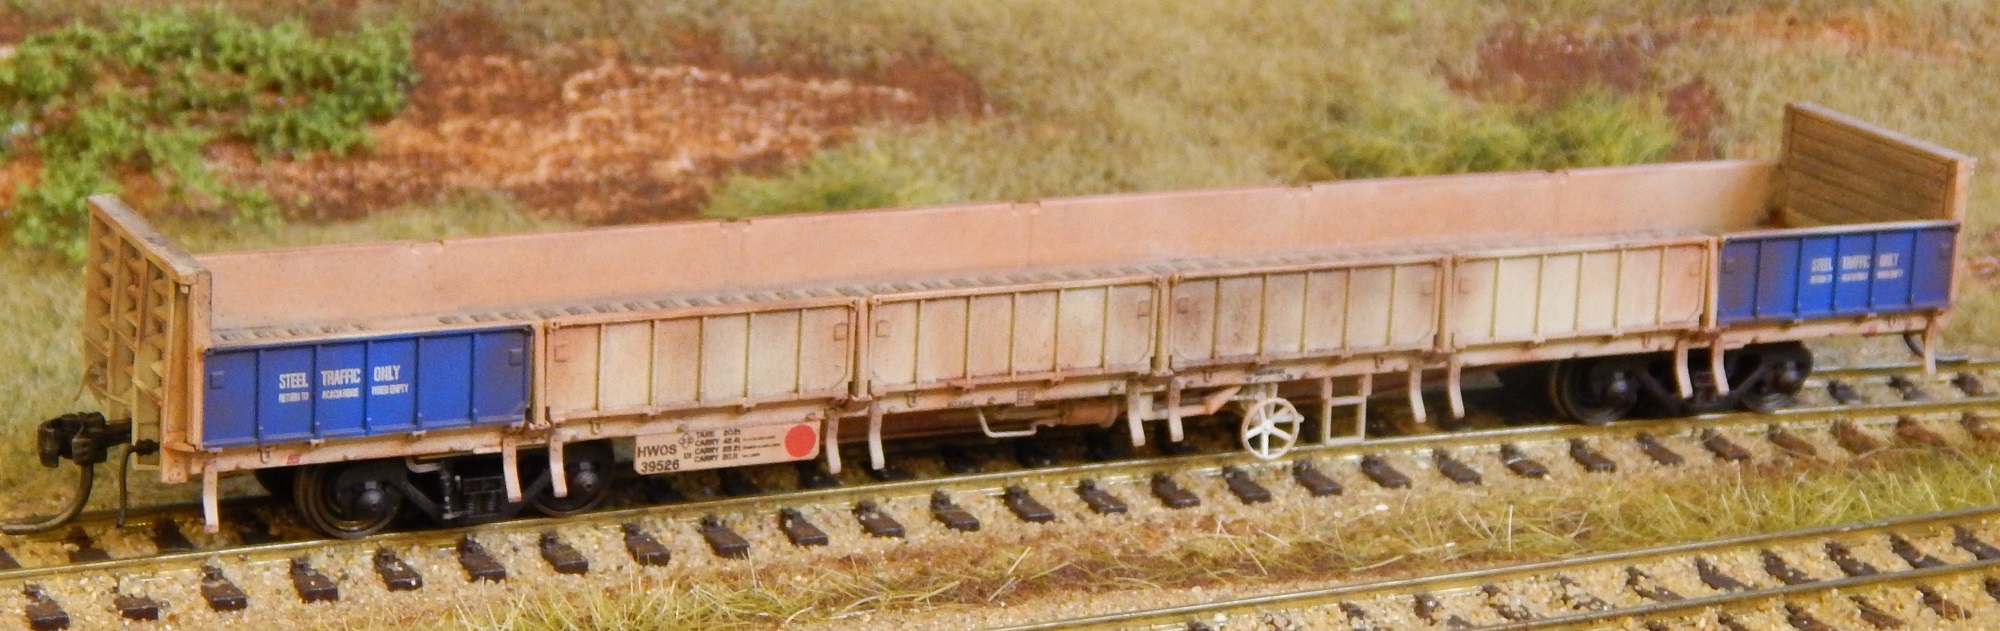
As a result of this, we can continue using our Lenz LH100 controllers as well as the Roco Lokmaus wireless controllers. In fact, the only system it’s not compatible with is NCE, but this is simply because all their items are propitiatory, trademarked, tissue typed and just don’t like to play with anyone else.


All of these points, coupled with the fact that it’s half the price of the others had me sold. So all that remains now is for me to become a youtube junkie (again again) and learn all I can about setting this little piece of techy stuff up.


On the personal front, it would seem that Bridget and I have managed to side step the Australian Gumbyments laws about the proliferation Wuiske’s and we’re proud to announce that she is “with child” (not me this time, but an actual small human).


It looks like the soon to be urchin shall be a boy, which makes us all VERY happy to say the very least. Bridget has been in full swing of using her lumpy condition to her advantage and cries of “for I am with child” have been heard all over Planet Jandowae when hefty tasks (such as lifting a postage stamp) are required.


On behalf of Bridget and myself, we would like to thank you all for your support and congratulatory wishes since we announced this news on faceplant a few weeks ago.


As we’ve reached the end of the year, I would like to take this opportunity to thank you all for your continued support over the last year. 2018 has been, genuinely one of the happiest of my life and we have MANY plans for new things (some of which are VERY big) in the not to distant future.


So from all of us here at the Wuiske Asylum, thank you and we hope you have a VERY merry Christmas and a safe and Happy New Year.


Now, I’ve got work to do on the layout… We shall see how we go.

Posted in New Layout | Comments Off on Chapter 118 – 22/12/2018

Chapter 117 – 15/12/2018

Well, we’ve done another Modelling The Railways Of Queensland Convention and yet again, it was brilliant!


This was Bridget’s first convention and she had a brilliant time. As ever, there was lots of great info and some simply stunning models to get inspired by. One of the great ones for me was Ken Edge William’s (I am pretty sure) overhead bridge that was under construction and completely built from styrene. Pretty sure I need to make one for our layout now don’t I?


Of particular note was Anthony Vaness’ layout “Dagun”. This small layout is based on the tiny town of Dagun in the Mary Valley (near Gympie). This is Anthony’s first QR layout and it is simply stunning.


The entire layout is designed around a 24 inch radius curve and is essentially, a circle. The radius was chosen because the outer radius of a Peco curved point is 24 inch. The layout is extremely lightweight. It was interesting watching Anthony at pack up time as he just picked the layout up in two pieces and took them to his car… How simple is that!


The majority of the structures on the layout are scratch built.
He began by adding cardboard mock ups into the scenes to test how they would look and then built the structures from styrene.


Anthony gave a talk about his layout at the convention and went into great detail about how he constructed it. Even down to using dirt from the actual location!


One of the real stand out things for me was the trees, Anthony told me he managed to walk into his local Riot Art store… That’s one of those hippy places where people whom have seen an ad on TV for British paints that featured a paintbrush have decided they are now an “artist” and as such they need to find an establishment that can furnish them with $2 items for the bargain basement price of $37.50. That aside, they had a small quantity of trees available, so he bought them at a surprisingly good price.


For me, the small details and the scenery are the stand outs and this layout has given me many ideas for our own layout.


Whilst the entire layout is very simple in it’s design, it’s the details that make this layout simply spectacular.


The only thing we can hope for now is that Anthony brings “Dagun” along to many, many shows so the rest of us can be inspired.


As most of you will be aware, we said goodbye to our beautiful dog and long time companion Connie recently. On our return trip from the Convention, we stopped in to the RSPCA office in Toowoomba… JUST to have a look mind you.


It was whilst “just having a look” that we met Scout… Scout managed to lure us in under the guise of appearing to be a dog… A big dog but a dog nonetheless. He regaled us with tales of his excellent training, obedience skills and sitting abilities… In other words he wagged his tail and licked us… A LOT!


So now we had another dog… It wasn’t until we got home that we worked out that in fact Scout was actually only part puppy and mostly a mixture of dragon and wilder beast. He has an interesting loathing of all things shrub related and has a grand plan to rid the world of ALL shrubs. He similarly is in the process of actually eating our balcony, let’s pause and think about this for a minute shall we? HE SNACKS ON HARDWOOD!


Add to this that Scout is actually stupid. I don’t mean a little boof headed, I mean he makes a glass of water look like a computer! Most of his actions seem to resemble something from a cartoon. That being said, we love our new boof headed cartoon dog and he has worked his way into being a proper member of the Wuiske Asylum.


So now we’re simply getting ready for a fast approaching Christmas, we may have an interesting announcement for the Chrtistmas Adam’s Corner. But as always, we shall see how we go.


Posted in New Layout | Comments Off on Chapter 117 – 15/12/2018

Chapter 116 – 04/10/2018

Well things have been a bit hectic here on Planet Jandowae over the last few months. Bridget and I have been head down, bum up working quietly on our next items (usually this translates to Bridget doing things and me saying “are we there yet?”).


As a result, we now have 6 new products available to assist with all of our modelling,


Firstly, we have released some Modern Freight Buffers as well as some Early Freight Buffers. These are something we have been quietly working away on for some time. Not because they are a particularly difficult item to produce but because they are a difficult item to get right by compromising between dimensional accuracy, and an item that will work on everyone’s layout without needing to put a few scale miles between your wagons to make them couple.


The end result is an accurate model of the QR buffers but with the buffer stem slightly compressed (as they ran on the prototype) to ensure you don’t get buffer lock. These modern buffers are ideal for our QLX and QSC RTR wagons as a replacement for the supplied ones which require LARGE curves. As well as the CGL Models HWO open wagons which do not include the buffers. The earlier liveried VAK coal hoppers from SRM can also accept these without issue for those modelling the 1970’s. Aside from that, these buffers will suit ALL QR timber or steel wagons from the 1890’s through until the 1980’s.


The next item is our fine Air Hoses. These we have made as Left and Right handed hoses to ensure ALL freight wagons post 1920 can have these little gems added.


Whilst we’re at it, we have released a Combination Brake Cylinder set (the first of a few actually), These are the standard brake equipment for most 32 foot timber AND steel underframe wagons from 1947 onward. Wagons such as the H, HJ, HH, HS, K, KA, KSA, KB, KKB, HJS, PC, PTM, P–you get the idea, there are many, many more. These sets have been made to incorporate all the fine details that usually send one into a minor psychotic episode to make into one piece to bring our models to life without anyone needing their head plugged into the national grid or having to lay upon a tasteful leather couch and explain to a complete stranger how ALL their modelling woes can be traced back to our mothers not buying us 746 puppies for Christmas when we were 10.


Next, we have released the Drop Door Stops, these tiny, little gems have been produced after many years of screaming at styrene or brass strip that just wouldn’t sit where I wanted it. These door stops were used on ALL QR open wagons with drop down doors (such as the U, UR, H, HJ, HH, HJS, HS, HWA, HSA, F, FG, FGM, T, G (pre 1913), PH, DF, etc, etc… the list goes on and on and on etc. As well as the vast majority of cattle wagons like the IC, J (pre 1913), K, KA, KSA, KWA, KL, KLEX, Y, YK and again, the list continues.


Lastly, we have released the Wagon Weights. These small, metal weights have been made right here in Queensland and are designed to suit pretty much all wagons. They are 16 grams in weight and measure 20mm x 66mm, so you know they will fit in most vehicles.


On a sadder note, it is unfortunate that we have to announce that head of Buried sanity and long time Wuiske Models mascot Connie Dogs has passed away at age 13.


For those that knew Connie Dogs, they will know just how great a dog she truly was. A better mate a bloke could never ask for. Her company will be greatly missed by Bridget, myself and the kids. With her passing, the Wuiske Asylum has become a quieter and emptier place.


Her absence has been noted by her life long mortal enemy Cephor whom in the time I’ve been writing this has been keeping an eye over the spot in which Connie left us. No longer will she need to cast a loving spoonful on enmity at her mild mannered foe by swiping at her as she passed on the stairs, no longer will she be able to curl up on mine or Bridget’s laps to look down upon her obviously inferior house mate and purr with the sense of entitlement that can only come from looking down upon ones canine enemies. No longer shall she puff out her chest after having successfully eaten from Connie’s food bowl without receiving a nip on her ear, similarly, no longer will she have to watch over her shoulder whilst trying to steal Connies food whilst she wasn’t looking.


In her place we shall need to train the kids to start catching snakes an chasing motorcycles. Regrettably, we shall see how we go.


Posted in New Layout | Comments Off on Chapter 116 – 04/10/2018

Chapter 115 – 13/07/2018

Well after a lengthy delay, I have finally managed to get moving on weathering 1754D after we installed a sound unit in it last chapter. The first step was to apply a small amount of white artists acrylics with dry brushing to the body.


This was done to help mute the blue shading in areas where it would have faded the most. The other area was the logo which tended to fade to light outline.


 Once this was done and let to dry (for a month as it turned out), I masked the windows and sprayed the entire model with a very fine mist of white paint. In this case, I used Humbrol Matt White thinned with GP thinners. You can see the difference between this image and the previous one.


As I’ve mentioned previously, this is done to help blend the colours on the locomotive and to leave the white and blue looking far less stark. At the time this was done, I also gave the model a quick, light coat of Tamiya Flat Clear (TS-80).


The Flat Clear gives the surface some tooth for the powders to adhere to later on. Once this had dried, the next step was to start applying the powders. Firstly, I applied a small amount of AIM Dark Rust to the roof.


I did this in small patches along the roof. This helped to simulate how the roof is actually uneven on the prototype and rust develops on the flatter sections between the ribs supporting the roof. After this was done, I applied a small amount of AIM Dark Earth powders to the roof.


This helps to blend it all together and give the roof a worn look. At the same time, I added small amounts of Dark Rust to the exhaust and the center of the panels around this area. This was then muted with a small amount of Dark Earth.


Next I added small spots of Dark Rust to the edges of the top of the body and drew them down using a dry, flat brush. This helped to create little streaks and faint rusting. I also did this on the edges of the cab.


I applied Dark Earth to the bogie sideframes and the cable runs on the underframe. Most of this was blown off and then brushed in. This helped to highlight the detail on these parts.


The buffers received a small amount of Dark Rust which was rubbed in with a small, stiff brush next. Essentially this entire model was done using ONLY the two colours of powders. Another option would have been to apply either a black powder or a wash to the grills, which I still may do.


Once all of this was done, I re-masked the windows and gave the entire model another light coating of Matt White with the airbrush.


Next, I sprayed the entire model with Tamiya Matt Finish again to seal everything in place and to remove any unwanted shine.


This model still needs to have the wheels painted, but that aside it is pretty much finished. Overall, I am happy with this model. It was a pretty quick weathering job that took around about 2 hours to do.


As I’ve mentioned, I still need to paint the wheels on this locomotive to complete the model and possibly apply a light wash to the grills.


And of course, there is still two more units that need weathering also, 1728D and 1733D to complete my collection of blue Driver Only 1720s… for now.


As always though, we shall see how we go.

Posted in New Layout | Comments Off on Chapter 115 – 13/07/2018

Chapter 114 – 05/05/2018

Here we go again with yet another series of delusional rants from Planet Jandowae.
A small voice in my head (well a Bridget shaped voice in my right ear actually) has been telling me for some time that I need to “get my ****** **** ** ****** (censored for your benefit) *** **** ** ***** into gear and show the installation of a sound unit for a 1720”.


So after having come up with the idea to install one of these decoders all by myself, I have decided (without ANY influence at all) to show you step by step how I install the sound units in my 1720s.


The first step is to remove the shell from the locomotive.
This is done VERY quickly by simply undoing the two small Philips Head screws under the locomotive. They’re diagonally opposed from each other on either end of the fuel tank (the same as they are on all our locomotives). You may prefer to (in standard gauge you will have to) remove the sideframes from the bogies.


To remove the sideframes, just place a small flat bladed screwdriver behind the sideframe and gently press it out from the two mounting pins. Just place them to one side until you’ve installed your decoder.


The shell can then be removed from the locomotive. Keep in mind, this is a tight fit and should be removed slowly. DO NOT try to take the shell completely away from the chassis as it is still attached by two sets of three wires. These can be unclipped and this should be done carefully as they are very small clips.


Once this is done, it is simply a case of removing the dummy plug from the printed circuit board. Try to do this with even pressure or pry it up with a small flat head screwdriver.


Once the plug is removed, plug in your decoder. Please remember that ALL decoders use the orange wire as PIN 1. Pin 1 on the PCB can be located by a small white rectangle that is printed around the socket. There is a triangulated corner of this white rectangle… This is pin 1. So ensure the orange wire is plugging into pin 1.


If you’re just fitting a standard DCC decoder, this is all you need to do aside from poking the decoder inside the shell (above the lights wires on the hood end will keep everything in position) and reattach the shell to the chassis. If you’re fitting sound, keep reading.


When fitting the sound unit, you will notice that there is a pair of brown wires coming from the decoder. These are the wires for the speaker. If you look at the chassis, you will note a small indented section leading to the fuel tank on one side. This is where the wires feed through to the speaker enclosure.


The speaker enclosure is located inside the fuel tank. Under the model, you’ll see a flat speaker plate with holes in it (as well as some strange words such as “Wuiske” no one is really sure what these mean). This plate can be removed with a small flat screwdriver blade in one end of the tank.


Once you can see inside the tank, pass the two brown wires through the opening into the fuel tank and you’re ready to attach the speaker. DO NOT use the white (or black) baffle box that is included with the speaker as it is taller than the fuel tank (It’s a 1720, they’re small).


Carefully solder the wires to the speaker terminals. It does not matter which wire is soldered to which terminal. At this point, I usually place some Play-Doh in the bottom of the speaker enclosure before pressing the speaker inside. This will eliminate any negative sound from leaking…


Negative sound is where you have sound vibrations emanating from both sides of the speaker. If they meet, they cancel each other out. This will result in a very quiet sound that has little bass and sounds distorted.


Next I press the speaker into the Play-Doh. Ensuring the speaker is seated nicely inside the fuel tank, I can then refit the speaker plate to the fuel tank. Once this is done, simply reattach the shell and the locomotive is done.


The final step is to program the running number. Prior to this though, I suggest test running the locomotive with the default address of 03. This is done merely as a possible fault finding step later on if problems occur. But I will mention this in a minute.


Programming the running number is done in a number of different ways, depending on which DCC system you’re using on your layout. I have the Lenz system using LH-100 controllers and it is a simple case of placing the locomotive on the programming track and pressing button F (function), 8, then entering the running number and pressing ENTER. That being said, I nearly always program my locomotives using the Loksound Programmer which is mounted to the wall next to my computer.


I mentioned earlier “fault finding”. This is something I have learnt to do every step of the way. As a manufacturer, I get calls from people whom claim to have a “dud” locomotive. Nine times out of ten, it is actually the fitting of the decoder that has been done wrong and could have been avoided. So, here’s what I do for my own locomotive fleet.


First and foremost, I run the locomotives in using just DC. Running in is ESSENTIAL as these are a mechanical device and they have gears and bearings that need to bed in (just like with a car or motorcycle). I usually let mine run for about an hour in each direction at top speed. Then I knock them down to about half speed and allow them to run for a few hours in each direction. You’ll notice that this will remove any wobble and excess noise from the models.


This step also means that I can eliminate the locomotive being the issue if it does not work once I have installed the decoder. The next step is to run it with the decoder installed BEFORE I have programmed it. This means that if it has an issue once I have programmed it, then the fault lies with something I have changed by accident in the programmer.


One thing I do HIGHLY recommend is to turn off the DC function on your decoders. This can easily be done with the programmer but can also be done with the controller on your DCC system. I suggest this as I had a wiring fault on my layout a couple years ago that was burning out decoders. The fault was caused by the AC current coming from the DCC system being blocked and only a low voltage DC current getting through on one section of the layout.


As a result, the locomotive (only two locomotives did this too, the rest were fine) would go quiet and then crawl along as it was trying to switch from AC to DC and back constantly for a while. This killed two decoders on my layout and also took me a few months to find the cause of.


The end result, was I fitted a “Snubber” to the layout in each power district and the problem was solved. I would suggest looking up a DCC filter or Snubber on google and seeing what you come up with as this VERY cheap fix has saved me a lot of headaches and has meant that I swear a little less.


So with 1754D added to my fleet, she is ready for weathering. When I installed the decoder in this locomotive I also installed two others. So my 1720 fleet is now sitting at 6 locomotives. The goal is ten, not for any special reason except that when I was a kid, I said I would love to be able to have ten 1720s on my layout.
As always though, we shall see how we go.

Posted in New Layout | Comments Off on Chapter 114 – 05/05/2018

Chapter 113 – 10/04/2018

Now then, where was I at last time? Oh yes, I was showing off my personal fleet of models.
So here goes, in this chapter, I’ll show you the remaining six locomotives from my current roster.


As most of you know, I don’t add ANY locomotives to my layout until they have been weathered and had sound fitted to them. This simple rule for myself helps to motivate me to pull my finger out and get more work done… Well that’s the theory at least.


First up, 1557D.
This model has had no real weathering as yet. After adding the sound, I painted the wheels and gave it a very light mist of light grey, followed by Dullcoat.


This just blends the colours a bit and dulls the entire model down. I may look at adding more weathering to this model at some point, but for now, 1557D is happy on the layout and working hard… Even if it doesn’t show in it’s weathering.


Next up is 2410.
2410 was a locomotive I had put aside to weather and then Wade McLaren offered me his… So we did a swap.


Wade has removed one of the window panes on the driver’s side and has made this locomotive look as though it was gainfully employed in the coal fields for many years… JUST like the prototype was.


As with the blue liveried locos in my fleet, Wade has used white paint to fade the logo, almost out of existence.


1743D is up next. Like 1557D, this model has had very little done to it.
I removed the bogie sideframes and painted the wheel faces then gave the entire model a very light misting of light grey enamel paint and a quick coat of dullcoat to seal everything in.


I used the 3M Blue Painters Tape to mask the windows as always.
One lesson I have earned is that once the model has been dullcoated, remove the tape from the windows ASAP! Otherwise it will leave a gummy residue on the windows.


1755D is the next loco in the fleet. This model was begun with painting the wheels (as always) then had a light mist of grey and dullcoat added. The dullcoat not only gives you a nice matt finish but also provides some tooth for the weathering powders to adhere to.


I used photos from the Prototype Photos section of the site as a guide for weathering this model. If you ever get any residue from masking tape on windows, just use a bit of rubbing alcohol on a cotton wool bud to carefully remove it.


The sideframes were given a very light dusting with black powders on areas where the bogies would see grease and grime build up. The grills were given a very light application of dark brown powder (black stands out A LOT on the corporate livery).


Small patches of Dark Rust were applied with a small stiff brush to areas such as the corner of the cab and in other areas where rust develops. Again, I used the prototype photos as a reference here.


Next is 2402D. This model is my favourite 90 tonner thus far. As usual the weathering started off with a light mist of grey, painted wheel faces and dullcoat. From there, I applied white artist acrylics using dry brushing in a downward motion to give the logo a faded look.


I applied small patches of white to the roof of the long hood. These next had powders (dark rust) added and gave a nice halo effect to the rusted areas.


The white dry brushing was used on the cab sides and other areas of blue. This gave a very faded and battered look, just like the prototype.


I redid this part a couple times until I got the result I was happy with. A small cotton wool bud dipped in water was used to rub off the unwanted paint.


There were a few things I made mistakes on and ideas that didn’t turn out how I wanted on this model. One of the things I love about weathering is that you can always go back and change things.


The last locomotive in my fleet (so far) is 1741D.
This model was weathered using the same techniques as the others… ie wheels pained, light grey mist etc.


The dry brushing was again done on the blue sections as the prototype has white splashes on the paint there.


The roof was weathered using Dark Earth and Dark rust powders and these were worked into the dullcoated roof and the excess blown off.


There is a pattern to how the roofs weather on these locomotives. Usually the areas where a brace or some other section is welded beneath the roof remains relatively clean.


Getting the powders to leave a small semi straight line clean takes a bit of practice to get right. And then, once you get comfortable with being able to do it, you will make a mistake and have to redo it again… and again… then swear and repeat.


Overall, I am happy with my fleet of locomotives, thus far. But, I do need to add more locomotives to my fleet. Then again, I also need to continue weathering some more wagons. Those new HWO wagons need a bit of weathering too. I should really look at getting more done on my lights also.


Ahhh the list is never ending. Gotta love this hobby. I guess I’d better get a move on and tick some things from my list… Or I could just see how we go.

Posted in New Layout | Leave a comment

Chapter 112 – 03/02/2018


A lot of you have been commenting on the weathering of my personal models after the last few chapters.


After much thought, I decided to have a think, the result of my thinking of having a thought was that, as a thought, maybe, I think, I should put up some photos of my complete (thus far) locomotive fleet that resides on my layout.


Not a bad thought? I think I thought so too.


The first of the 1550 class that I added to my personal collection was 1558D.


I discovered that the 1550s never really got that weathered as Driver Only units due to being repainted not that long after the conversion.


This unit was given a light misting of grey (the light grey we used to paint the old freight wagon kits actually). This just dulled the blue and reduced the starkness of the overall colours and gave it a slightly bleached look.


1558D and 1570D were both weathered using this method and then had powders added.


Overall, these are not my favourite weathering jobs and my later ones are (in my opinion) far better.


I have all three of the corporate liveried 1550 class on the layout and the first one I weathered was 1572H.


1572H ended up being weathered more than I had initially intended.


I wanted to see how much weathering was needed to avoid the light shining through the cab roof, one of the problems with yellow locomotives.


The end result, I am actually pretty happy with.


The next locomotive I tackled was 2401D, the Bicentennial unit.


This one was a model I was genuinely worried I would not be happy with. The prototype never really got that dirty. The bogies and fuel tank got rather grotty but the body was kept fairly clean.


The next locomotive I will show in this chapter is 2414. This model was (again) dulled with a light mist of light grey, then dull coated.


From there, I painted the yellow air conditioner and began to dry brush the body with an eggshell white (really cheap artist paints were used for this).


I added a rust colour over the top of the white sections, to simulate rust. I also started applying powders at this point. Once I was happy with each layer, I dull coated the model to seal everything in.


As the 2400 class stayed in coal traffic longer than the 1550 class, they seemed to get a lot more fading of both the blue and the white sections as well as a darker colouring around the bogies and fuel tank.


1574H is the last locomotive I will show in this chapter. This unit was one I simply had to do as it spent much of it’s life in corporate livery with a blue air conditioner. So just as something different, I painted this and added a driver.


As you can see, the weathering is very mild. Again, it was dulled with the light grey and some VERY light applications of powders were made.


In the next chapter I will show the remaining locomotives in my fleet and may start showing some of the rollingstock I have running around the Wuiske Layout. As always though, we shall see how we go.


Posted in New Layout | Leave a comment

Chapter 111 – 24/01/2018


Wuiske Models, again, in partnership with Haskell Co are proud to announce the release of the 2100 class.


These models have been announced a few weeks back and are now here and available.


With the release of the fourth ever Mass Produced, Ready To Run Queensland locomotive, things are starting to look a lot simpler for QR modellers.


Many of you have been asking if the kits are going to be making a come back and I am pleased to say that they will be returning soon.


With the release of the 2100 and coupled with the fact that some long haired lout from Planet Jandowae was involved, obviously there was going to be a stuff up… And there was!


That’s right, I invented a locomotive! Well, not quite, but close. One of the corporate liveried locomotives has the wrong running number.


That’s right, we released 2109D in a livery it actually never had applied to it. This is an obvious stuff up on my part and it took the combined efforts of BOTH my brain cells to let this one get through.


That aside, some people are now referring to this unit as “The Unicorn” and seem to be accepting it with good grace.


That being said, we made a mistake and wish to let people know that it was my personal stuff up and we won’t do the usual routine of blaming “the factory”, “the economy”,  “China” in general or even “Trump”. No, this is my mistake, plain and simple.


With that out of the way, I am sure the 2100s will make a great addition to our ever expanding line up of Queensland models. I know this has been the class most asked for by you for a few years now…


Well, more second most asked for actually, but that other class is not on the drawing board currently as we don’t wish to have another double up of announcements.


Over the last few weeks, Bridget and I have managed to get a few things taken care of on the layout in between getting the 2100s ready. The junction for the two branches has finally had the point motors installed and ballasting is continuing… Have I mentioned that I hate ballasting?


Harriston yard has been receiving a bit more detail in the form of some weeds and small shrubs around the cold stores.


There is still a long way to go, a lot more ballasting and more point motors to install, but as always…
We shall see how we go.


Posted in New Layout | Leave a comment

Chapter 110 – 07/01/2018

Well, as most of you are aware (due to the lack of activity on this page if no where else) we here at Wuiske Models have been collectively busier than a one legged man in a bum kicking contest, with an itchy nose, holding an asthma inhaler. Having said that, a lot of work has been going on in the background.


Of most interest (to me at least) has been the 1720 class locomotives finding a home on the layout. Thus far, three units have been fitted with sound and two of these have been weathered – 1741D and 1755D.


My eventual aim is to have ten 1720s for my own collection. This is mostly due to the fact that ever since I was a small child, (as opposed to the larger, noisier and all together nicer small child you see today) I always wanted to be able to have ten 1720s on my own layout. I also wanted a layout large enough to sustain ten 1720s.


That’s right, “ending world hunger”, “ending world suffering” and “ending world peace” fell by the wayside in favour of that long haired buffoon from Planet Jandowae having more locomotives on his layout.


The even better news is that the number one, shiny, cute and wonderful Wuiske Models Elf (aka Bridget) seems to be in complete accord with this plan. Many is the time she has sat on the balcony regaling me with tails about how the world will be a better place once the 1720 population of the Wuiske Models layout hits double digits.


Phrases such as “surely, it will decrease taxation, increase fertility and lower cholesterol?” have been heard to have been issued from her lips… Similarly, phrases such as “I swear, you hear what you want to hear” and “are you actually hearing the words I am saying?” are also heard.

Yes, it’s a rich tapestry of conversation here at the Wuiske Asylum.


As most of you are aware, the 2100 class has been produced and is currently in transit. But more news on this soon.


As ever, we shall see how we go.

Posted in New Layout | Leave a comment

Chapter 109 – 27/01/2017

1720-Orig1-1720Well it’s been a while since my last little rant on here… Yet again. I have been spending more time trying to do live videos on our Faceplant page (https://www.facebook.com/wuiskemodels/).


1720-Orig1-1747If we can get this to work then the idea is to have a truly interactive forum where you can all comment on my modelling stuff ups. See how I do things and (with any luck) tell me where I can improve. This is after all how we all learned.


1720-Orig1-1760In this chapter, I will be showing you the artwork files for ALL 18 running numbers of the 1720s. As you can see, we are releasing them with 3 versions “as built”. These have a slightly differnt blue livery and do not include the familiar “worm” logo. These units were from the mid 1960s up to the mid to late 1970s.


1720-Orig2-1726We are releasing 6 running numbers in the original livery with the worm logo. These cover the mid to late 1970s right up until the 1992-1995 period.


1720-Orig2-1738All running numbers have been chosen as the units that survived in their chosen liveries the longest to allow you to cross them over each other.


1720-Orig2-1742Some units we’ve produced were to later be scrapped (such as 1726) which was written off after a level crossing accident whilst in the corporate livery.


1720-Orig2-1757We’ve also done a few special units, such as 1770 “James Cook” in both original and corporate liveries.


1720-Orig2-1761Obviously the models will be available in both standard (16.5mm) gauge as well as the accurate HOn3½ (12mm) gauge.


1720-Orig2-1770-James CookAs with our 1550 and 2400 class locomotives, they will be fitted with directional lighting and independently controlled number boards (for DCC).


1720-DOO-1728DSimilarly, they are equipped with a standard 8 pin DDCC plug.


1720-DOO-1733DThe locomotives are fitted with Genuine Kadee Couplers with scale heads. Unlike our 1550s and 2400s, you asked for us to fit them with #158 couplers instead of #58s so we have.


1720-DOO-1741D-YellowAirconThere are four units being produced in the Driver Only (or DOO) blue livery.


1720-DOO-1754DAs you can see there is one unit (1741D) in the blue livery with a yellow air conditioner. This unit survived like this for a number of years and was one of the very last blue liveried locos left in Queensland.


1720-Corp-1721DThere are also 4 units in the corporate (Broncos) livery. Again, we have selected these based on the longest running units in these liveries.


1720-Corp-1743D-BlueAirconAs with 1741D, there is one corporate unit with a blue air conditioner (1743D). Again, this unit ran around for many years like this.


1720-Corp-1755DAs with all Wuiske/Haskell products these locomotives will have the couplers mounted at the correct coupler height. But can be changed to suit standard gauge coupler height also.


1720-Corp-1770D-James CookSound units are being prepared from ESU Loksound as we did with the 1550 and 2400 classes. These will, again, be available to any retailer so you don’t need to know someone to get them fitted.


1720-BiCent-1723-BicentennialLast but certainly not least, we have the Bicentennial unit 1723. This unit, like our model of 2401D, will be made in limited numbers. But, we are producing more than we did of 2401D to try and avoid people missing out.


So with all going to plan and once we get Chinese New Year out of the way, the production should draw to a close. After that, the models will be shipped. So, we’re still looking at another month or two but they are VERY close now.

As always though, we shall see how we go.

Posted in New Layout | Leave a comment